Property Disclosure Form Dangers

fancy chimney acadia national park

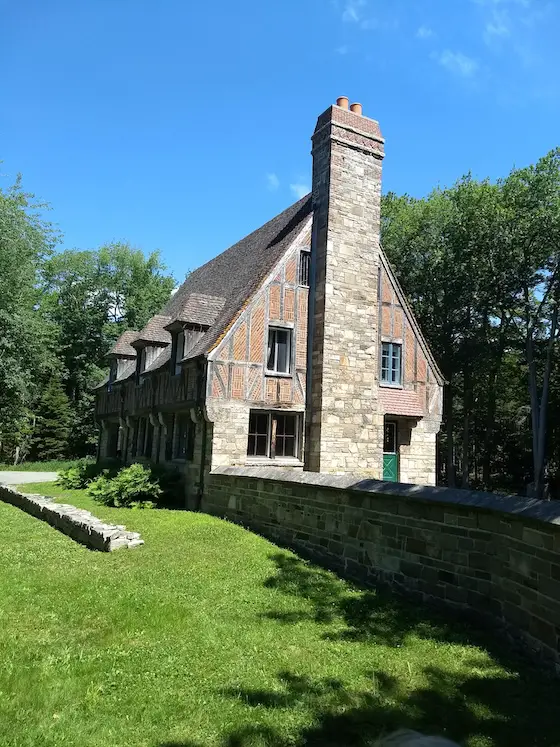
The top of a chimney is too high up for most. You might never have what it takes to go up that high to inspect it. Copyright 2025 Tim Carter

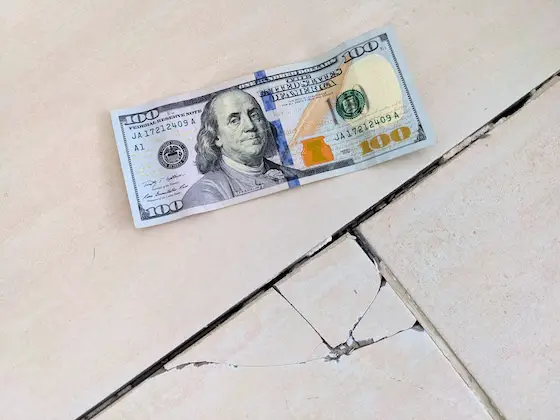
Property Disclosure Form Dangers - You Better Tell the Truth

It all started with a chimney of all things. Last week a woman, who lives in a quaint small New Hampshire town just fifty miles north of me, hired me. She wanted me to review a house inspection report. She had put in an offer on a cozy little home.

CLICK HERE to hire me to help you with a problem.

This column should resonate with you no matter who you are. You may reside in your own home, live in a condominium, or even in an apartment. Many teaching moments presented themselves as this consult unfolded. Technology allows me to do these consults long distance helping folks like you. Many hire me for two reasons: I’m an expert, and I don’t have a dog in the fight.

I was aghast when I viewed the house inspection report. Little did the woman know, but she had the good fortune to hire one of the best inspectors out there. He was ASHI certified. ASHI is an acronym for the American Society of Home Inspectors. In my opinion, it’s the best certification you can have.

The inspection report had more red ink notations in the summary than I’ve ever seen before. There were at least four pages at the top end of the report with red-flag warnings. The most significant one concerned the chimney that projected above the steep roof. It had a large crack in it.

Before hiring me, the woman had obtained a quote from a local mason to repair the chimney. His bid had some decent detail in it, but he didn’t mention two very important items that most masons fail to do when building chimneys.

The Brick Industry Association (BIA) is, in my opinion, the best source of information concerning how chimneys should be built. They have an excellent series of Technical Notes on their website. One is devoted to residential chimneys.

A top flashing and a 3-inch overhang are the two items almost all masons forget to install. Water ruins chimneys. The flashing prevents water from soaking down into the rubble and the overhang causes most water to fall away from the chimney.

The estimate to rebuild the chimney was north of $15,000. Electrical issues discovered by the inspector added an additional $7,000 of work. A slew of miscellaneous other pesky defects added yet another $15,000 to the needed repairs.

It’s important to realize I was a real estate broker in the state of Ohio for over twenty years. I got my license just after getting out of college. I knew it would help me in my fledgling house-flipping business in the 1970s. I also took all sorts of extra night classes in real estate and was one of the first Graduates of the Real Estate Industry getting a coveted GRI lapel pin.

What does all of this have to do with you? If you’re thinking of selling your home, defects in your home can make it less attractive. These same defects can put you in a not-so-good place when it comes to negotiations. Just three years ago we emerged from a seller’s market where buyers ignored defects.

Now, with higher interest rates, we’re in a buyer’s market. Sellers must present their best face and have few or no defects to get the best offers. Mortgage brokers are also starting to pay more attention and look for houses with fewer defects.

Let’s say you’re the seller in this situation. You decide to reject the woman’s counteroffer. You go fishing trying to find another buyer who might not have such a great inspector. This puts you in a very precarious position if you don’t fill out a new property disclosure form (PDF). The ASHI inspector has now made you aware of defects that you know about.

If you fail to fill out a new PDF, and don’t alert future buyers as to the defects, you may be subject to a lawsuit down the road. If you’re the listing realtor, you will be sucked into the suit like a child sucks on a soda straw.

Yes, the overriding principle in real estate is Caveat emptor - “let the buyer beware”, but I can assure you that if a future buyer discovers you were not telling the truth, you’ll have a very hard time in a courtroom.

Your takeaway should be this. Don’t put off repairs to your home. Attend to things as they need work. Don’t try to disguise major issues in your home. Assume an ASHI inspector will show up and discover your deception.

Are you thinking of buying a home? Then you might want to get a copy of an inspection checklist I developed that helps you identify major defects in homes you might miss as you walk through a home for sale. My checklist might allow you to kick a house to the curb before you spend hundreds of dollars on an ASHI inspector.

You can purchase the checklist here.

Column 1620

Multi-Tool – The Magic Tool

dewalt multi tool 12v

This a multi-tool. They operate just like a barber’s clippers employing rapid side-to-side motion allowing you to cut just about anything around your home. Copyright 2025 Tim Carter

Multi-Tool - It's a Versatile Must-Have Tool

I found myself entranced by a video several weeks ago. Shoyan, a master carpenter who lives in Japan, chronicled the construction of a simple residential house that was a mix of Japanese construction methods and Western amenities.

I was in awe of Shoyan’s skills and attention to detail. He employed precision you might see a master cabinetmaker use to build a fine piece of furniture. Shoyan used power tools, but he never hesitated to pull out his razor-sharp wood chisels or a hand plane to get a piece of lumber to do exactly what he wanted. You can watch Shoyan in a video on my www.AsktheBuilder.com website.

I thought about you after the video ended. The average homeowner will never build a home with their own hands as did Shoyan. You, though, often are charged with doing minor repairs and projects around your home. The more of these you accomplish with a great result, the more your confidence soars. My late father-in-law had a saying about this, “Nothing builds success like success.”

I’m often asked about power tools by my newsletter subscribers. Drills, saws of all types, drill/drivers, routers, and portable table saws are at the top of the list. One tool, however, doesn’t seem to garner much interest even though I feel it’s one of my personal go-to tools each week.

The Power Multi-Tool

I’m talking about the power multi-tool. A power multi-tool is used to cut things. The head of the tool vibrates side-to-side just like the clippers a barber uses to cut hair. Any number of blades can be attached in seconds to the tool.

You can cut glass, plastic, wood, drywall, metal, etc. using a multi-tool. Precision cuts like those made by Shoyan are possible. Hand-eye coordination is required as well as a small amount of practice.

You might rush out and buy one of these magic small power tools once you discover how I used mine on a recent project. Fiber optic cable Internet service became available at my home months ago.

The most secure and fastest Internet you can have, in my opinion, is wired cable within your home. WiFi signals can leak outside your home and be sniffed. I once saw a troubling sniffing demonstration at a conference.

It was impossible for me to install ethernet cables in my existing home, so I was forced to use WiFi. I was faced with getting the fiber optic cable from a far corner of the garage to the entrance hall of my home. With some ingenuity and 50+ years of remodeling experience, I was able to create an alcove above the coat closet in the hall.

The first step was to use my multi-tool to make a small surgical cut in the drywall above the closet. This small 4-inch by 4-inch hole allowed me to confirm I could slide a 10-foot-long conduit from that point across a mudroom ceiling and then into the garage ceiling.

I then went into the garage and used the tool with a fine-toothed blade to carefully cut a larger hole in the drywall. I only let the tool penetrate the drywall as I had no idea if wires or pipes were just above the drywall. I put some blue painter’s tape on the blade to show me when to stop plunging the blade into the drywall.

The tool did a superb job of cutting the plastic electrical conduit. There were minimal burrs I had to deal with because I used the very fine-toothed blade.

I decided to build a box to create the alcove. I had some scrap pieces of 3/4-inch A/C fir plywood that would be perfect. The A side was very smooth much like drywall. The multi-tool was then used to cut precise holes in the back wall of the box. One hole was for the electric box for the 120-volt outlet, and the other hole was for a one-gang electric box the conduit that would house the fiber optic cable.

The multi-tool cut through the thick plywood like a warm knife through butter. There was no need to drill a pilot hole with a drill. I didn’t have to use a jigsaw that would create all sorts of nasty splinters. The multi-tool created a hole that looked like it was cut with a sharp razor knife.

You’ll be able to find an affordable power multi-tool with no issues. There are many different brands. Keep in mind the more money you spend, the better the tool will be in almost all cases. The most expensive multi-tools have strong parts and great motors that can last a lifetime with normal care.

Column 1619

Oxygen Bleach Recipe

Oxygen Bleach Recipe

You can make your own ultra-powerful oxygen bleach.

Many oxygen bleach products sold in stores, online, and in TV commercials can contain vast amounts of filler. The filler reduces the amount of active ingredient in the product.

So Powerful it Requires the Oxidizer Label

I developed my own special recipe in 2024. I used information from past conversations with a chemist. This man is, perhaps, the top expert in the USA.

I mix just two safe ingredients to produce my own super-concentrated cleaner. You can get these ingredients from chemical supply companies.

If you were to try to ship my amazing concoction via UPS or FedEx, they'd require you to use that spooky yellow label!

Yet, my oxygen bleach is safe enough to use around my house. I clean and sanitize all of my granddaughter's toys with it!

CLICK HERE to get your copy of my oxygen bleach recipe.

Oxygen Bleach Best All-Purpose Cleaner

dirty slate flooring next to clean slate using oxygen bleach

This side-by-side slate floor comparison should convince you that the tiny pile of powdered oxygen bleach is your best all-purpose cleaner. The three filthy pieces of slate are surrounded by clean slate. Copyright 2025 Tim Carter ALL RIGHTS RESERVED

Oxygen Bleach is the Best All-Purpose Cleaner

Do you struggle and work too hard to get things clean around your home? A plethora of cleaning products assaults you at the grocery store and in TV commercials. I’ve tried many of them, but thirty years ago I was lucky enough to discover the best all-purpose cleaner while doing research for a deck sealer column. I happened to ask this question while meeting with a chemist, “Does it clean anything else?” The it I was asking about was oxygen bleach.

It started two weeks earlier when I was interviewing the president of a small deck sealer company, and asked him, “Do you recommend cleaning the treated wood with chlorine bleach before using your sealer?” At the time, chlorine bleach was promoted by most as the way to clean exterior treated lumber. “Oh, no, chlorine bleach is the worst thing to use! You should always use oxygen bleach.”

What is Oxygen Bleach?

I had never heard of oxygen bleach. The president then said, “It’s best you talk directly with the chemist who works for the biggest supplier of certified organic oxygen bleach. Here’s his contact information.” I proceeded to call the chemist, and a week later we were having dinner at the most famous ribs restaurant in Cincinnati, Ohio.

The chemist proceeded to give a master class on the best way to clean treated lumber. As the waitress served up our chocolate cake desert, I blurted out my anything-else question. The floodgates opened, and in the next forty-five minutes I was bestowed an honorary cleaning PhD. I discovered just about anything inside and outside your home can be restored to like-new condition using magic oxygen bleach.

It's a Magic Powder

Oxygen bleach is a powder you mix with water. The water initiates a chemical reaction that lasts about six hours. Countless oxygen ions are released into the water. These ions attack stain and odor molecules. The cleaning happens before your eyes in many cases without you having to rub and scrub. Tough red wine stains disappear from tablecloths and carpets. Skunk and cat urine odors are removed by this magic cleaner. Tough baked-on caramelized grease in pots and pans softens like butter when soaked in an oxygen bleach solution.

The hospitality and medical industries clamored many decades ago for a chlorine bleach substitute. They were tired of destroying countless sheets, pillowcases, scrubs using harsh chlorine bleach. After repeated washings, the linens were faded and fell apart. Hospitals and hotels needed a new color and fabric-safe bleach that also sanitized. Oxygen bleach fulfilled this need.

The chemist sent me a 100-pound bag of this amazing powder a week after our dinner meeting. He sent a pamphlet describing how to use it, and asked me to share the powder with my friends and neighbors. He said, “If you can clean the item using water, then you can almost always clean it safely with oxygen bleach.” Just about everything inside and outside your home can be cleaned using water.

Within a month, my friends were begging me for more. They were having success cleaning things that they thought they’d have to throw away. Set stains in clothing and carpets disappeared with soaking in almost all cases.

Oxygen Bleach Does the Work For You

The true magic of oxygen bleach is it can do most of the work on its own. Other cleaners often have you rubbing and scrubbing. The oxygen ions do this work for you on a microscopic level. All you have to do is get the surface wet with the oxygen bleach solution and let the oxygen get to work.

The longer you wait, in almost all cases, the less you have to scrub. This weekend, I used my secret oxygen bleach solution to get rid of deep grime and dirt on the painted metal surface of the door between my house and garage.

I mixed up my solution, applied it to the dirt and grime using a paper towel. Vertical surfaces are always more challenging because the solution wants to run down to the floor. I applied the saturated paper towel to the stain like you’d apply wallpaper to a wall. I waited just one minute, and then lightly scrubbed with a sponge. The door looked like new.

Oxygen bleach is an excellent degreaser. I use it in a spray bottle to clean my stove vent hood. I spritz the greasy surfaces and let the solution work for about three minutes. I then just use a soapy sponge and the grease comes off with one wipe. It’s amazing.

My wife uses the same oxygen bleach when doing the laundry. It keeps whites sparkling white. It’s color and fabric-safe. Colors retain their brightness. You get the best results by using the soak cycle in your washing machine. Allow things to soak for an hour or so, then proceed with the washing cycle.

Oxygen bleach can discolor natural wool and silk. It can also discolor aluminum or silver. Those two metals turn black when oxygen in the air reacts with them. It’s no wonder a liquid oxygen bleach solution will do the same.

You can search Google or any Artificial Intelligence LLM and come up with the recipe. It's in the public domain. It's not a proprietary recipe or trade secret of any brand. All you have to do is mix 4 parts sodium percarbonate with 1 part dense soda ash. You can CALL ME to discover where to get the BEST ingredients, how to use oxygen bleach on all sorts of surfaces, and storage tips.

Column 1618

Water Lines for House

copper, pex, and cpvc water lines

Water lines - These are your top choices for pipes that deliver water to the faucets in your home. Which is the best one to use? Copyright 2025 Tim Carter

Water Lines for a House - No Clear Winner

I’ve been a master plumber since age 29. I know, it might seem odd to you that a builder is also a plumber. I was attracted to plumbing for several reasons. Designing a plumbing system is a fun and challenging three-dimensional (3D) puzzle. I still draw these 3D riser diagrams for homeowners and builders. The drawings allow them to obtain plumbing permits, and it keeps my tiny gray cells active.

dwv riser diagram isometric drawing

This is a small version of a typical drain, waste, and vent (DWV) drawing I produce for homeowners and architects. CLICK HERE to order yours.

Water lines are not as complicated as drain, waste, and vent lines. That said, you can have volume and pressure problems if you don’t design water systems correctly. A year ago, I did an extensive long-distance phone consultation with a woman. Her plumber tried to supply a luxury shower with 1/2-inch-diameter PEX hot and cold water lines. Water dribbled from the body sprays when the shower head was turned on. GO HERE to read all about this horrible hot mess.

You may be faced with a decision when building a new home, or remodeling an existing one, about what type of water lines you should use. Three different materials dominate the marketplace: copper, PEX plastic, and CPVC - a different type of plastic.

Each one of these materials has pros and cons. It’s important to realize I can’t do a deep dive into each one because of this column’s space limitations. I’m going to hit the high spots for you.

Copper = Durability King

I cut my teeth as a young plumber installing miles of copper water lines. This tubular copper is available in different wall thicknesses: types M, L, and K. Type M is the thinnest and is used for residential work. Type L is a medium-weight copper tube. You’ll discover it being used in commercial and institutional businesses. Type K is thick. The copper water line that runs from the city water main into your home is almost always K copper.

Copper is just below its historic 2024 historic high price of $5.20 per pound. When I soldered my first copper joint in the mid-1970s, copper was selling for 50 cents per pound. As I write this column, copper is selling for about $4.65 per pound. It’s really not out of line when you think that many things are about ten times more expensive than they were fifty years ago.

Soldering copper water lines is time-consuming. It requires great skill, and you must clean all the flux off the exterior of the tubing once it cools down. Many people fail to do this. You can see the green deposits years later.

Not too long ago, copper fittings with rubber o-rings hit the marketplace. Using a tool that presses the fitting onto the copper tube, you can create a leakproof joint in seconds. The fittings, though, are very expensive. The price of the press tool will take your breath away. Watch my video showing how to use a copper press tool:

Copper can corrode. Talk to people in southern California or other locations who have aggressive water. Pinhole leaks form, creating nightmares for homeowners. Copper is also subject to erosion corrosion. The movement of water within the water lines can erode the copper, much like the Colorado River gobbles the Vishnu granite at the bottom of the Grand Canyon.

PEX - Installs Like Electric Cables

PEX plastic is an interesting alternative. I have this tubing in my home. I also installed it in my daughter’s new home. This flexible tubing can be installed like electrical cables. You only have a joint down at a manifold in the mechanical room and at the shutoff valve under your faucet. This home-run installation method uses lots of material.

You can choose to install PEX in a daisy-chain system. This method uses less material and requires fittings like a copper water system. The fittings install much faster than soldering copper. Be aware that PEX water lines tend to have a slightly smaller inner diameter than copper water lines. It’s wise to install 3/4-inch PEX to shower faucets, hose bibs, and other faucets where you need lots of water.

PEX, however, can be devoured by mice. A mouse chewed through a PEX water line at my home several years ago, causing tens of thousands of dollars of damage.

pex pipe gnawed by a mouse

Look how determined the mouse was. I captured the mouse a few days later, and the chubby fellow turned out to be an Olympic swimmer!

CPVC is a product that installs much like copper tubing. This plastic pipe is rigid. You need to cut it and glue the fittings to the tubes. It’s a very DIY-friendly product. That said, think about the chemicals used to prime and cement the tubing to the fittings. I can’t even pronounce the names of them I see on the can labels. Do you want to drink water that courses through pipes where this chemical no doubt has oozed inside the tubes as you glue up a fitting?

A plumber friend of mine told me about CPVC issues he had in a home he bought. The pipes were installed in a crawl space. He entered the crawlspace to inspect the insulation and bumped into one of the CPVC pipes. It fractured and started to leak. When he went to repair it, the CPVC pipe was very brittle. This created a hardship when making the repair.

At least one CPVC manufacturer is ensnared in a large class action lawsuit because of this brittle characteristic. I reached out to them with questions, but their corporate attorneys prevented them from commenting. That’s never a good sign, in my opinion.

Column 1617

Gutter Guard Cleaning

micro mesh gutter guard clogged with moss, algae, and mildew

These are micro mesh gutter guards. I installed them myself ten years ago. Organic debris, algae, and moss clogged the tiny openings causing them to fail. A pressure washer restored the guard on the left to original condition. Copyright 2025 Tim Carter ALL RIGHTS RESERVED

Gutter Guard Cleaning - You WILL Be Up on Your Roof

Do you attend home and garden shows? These events are almost always held in the spring. They’re a great place to see new products for both the interior and exterior of your home.

I recall thirty years ago, when the gutter guard industry began to gain momentum. This was just after I started writing this syndicated column. New styles and gutter guard designs were popping up as fast as dandelions in my lawn. The manufacturers all said you’d never have to get up on your roof to clean your gutters again. Most of them were not telling the truth.

My home was surrounded by evergreen and deciduous trees. It was a perfect candidate for gutter guards. I had over 240 feet of gutter to protect. The first product I used was an abysmal failure.

Money was tighter than a banjo string around the Carter house at that time. I purchased a flimsy plastic gutter guard that had diamond-shaped holes punched in it. A kernel of corn could easily pass through the knockouts.

The primary reason the gutter guards failed is that the guards lay pretty much flat across the top of my gutters. I had installed my gutters somewhat high on the 1x6 redwood fascia board. I created a shelf for the leaves, twigs, dead flower blossoms, pine needles, and bits of tree bark.

Lately, I’ve seen TV commercials for a similar gutter guard made from metal. The company shows the gutter guards being installed just as I did all those years ago. I can see on my TV screen their guards creating a very flat surface.

Gutter Leaf Guard

This gutter guard has been undergoing testing for ten months. It's not allowing things into the gutter, but the flat shelf it's created is not allowing debris to wash or blow off the roof. PHOTO CREDIT: Tim Carter

Within a year or two, my gutter guards were clogged. The debris couldn’t wash off the flat surface. Wind was useless except to blow off fresh, dried leaves. Pine needles mixed with all the other fine debris rendered the guards useless. I discovered that the top surface of the gutter guard must be in the same plane as the roof, so debris has the best chance of washing off with each hard rainfall.

cross section showing the gutter guard

Here's a quick cross-section showing how the gutter guard - in green - is in the same plane as the roofing material. The drawing is not to scale. I used to make drawings like this sitting at customers' kitchen tables. Copyright 2025 Tim Carter

I decided to test various types of gutter guards. Companies were all too happy to send me a small amount of their product to test. The vast majority of the gutter guards failed. They either clogged up, or the reverse-curve models allowed small debris into the gutter, defeating the purpose of the product!

A reverse-curve gutter guard typically has a solid top with a bullnose curve and slot running along the front edge of the guard. The surface tension of water allows it to roll into the gutter even during heavy downpours. Large debris can’t enter the narrow slot, but small things can.

I demonstrated this phenomenon at the International Builders Show years ago. A company that manufactured a reverse-curve model was exhibiting its latest product. They had a model of a small roof set up in their booth. A recirculating pump and piping delivered water to the top of the small roof. The artificial rain ran down the roof surface and into the gutter guard. The gutter delivered the water back to the pump, sending it back up to the top for another ride down the roof.

While the company representative was speaking with a builder, I went over and stood next to the model. I proceeded to tear up small pieces of paper, about the size of my thumbnail. I felt these would represent tiny leaves or parts of bigger leaves that might litter a roof. I dropped the pieces of paper onto the roof, and the next thing I knew, they were all inside the gutter. Not one of them was deflected to the ground by the magic gutter guard! When the representative saw what I was doing, he told me to leave.

A few years later, I came across a micro-mesh gutter guard. I thought this might indeed be the Holy Grail. I tested two of them. One failed simply because the manufacturer installed it, creating the same shelf I had done with my first guard. The other manufacturer insisted on lowering my gutter so that the front tip of the gutter was in the same plane as the roof. This guard worked perfectly.

That said, I had always felt that even the micro-mesh gutter guard would fail. My gut was right. I installed this same gutter guard on my New Hampshire home ten years ago. Last year, I noticed more water seemed to be coming off the gutter guards. I inspected the guards and found the ultra-fine mesh was clogged in many places by algae, moss, lichens, and a very fine black organic deposit.

I fired up my electric pressure washer. The intense stream of water restored the gutter guards to like-new condition in seconds.

Gutter guard companies and salesmen may be spewing half-truths to you. I’ve been a building and remodeling expert witness for over twenty-five years. We have a saying: A half-truth is a whole lie. You, or someone else, will be doing maintenance on your gutter guards. They will have to be cleaned at some point.

Column 1616

Cleaning a Composite Deck

pressure wash trex transcend composite decking

I’m pressure washing my maintenance-free deck. Beware of mendacious marketing managers! Copyright 2025 Tim Carter ALL RIGHTS RESERVED

Cleaning a Composite Deck - Pressure Washers and Brooms

I gave my electric pressure washer a vigorous workout this weekend. I cleaned 1,100 square feet of Trex Transcend composite decking, 100 feet of guardrails, and a 16-foot-long staircase. The project spanned two days. The decking I cleaned was marketed years ago as being maintenance-free. Bah humbug!

Allow me to provide some context. I remember when I was a young carpenter. I purchased my lumber from Hyde Park Lumber Company in Cincinnati, Ohio. The orange and blue big-box retailers were not yet a glint in the eye of the founders.

Pressure-Treated Lumber Lies

I walked into the lumber company to purchase materials and saw a placard on the counter advertising new maintenance-free pressure-treated lumber. Yes, at one time, residential pressure-treated lumber was a new thing! The manufacturers thought it would be maintenance-free. They based their claim thinking how railroad ties, utility poles, pier piles, and other outdoor lumber are not normally maintained once installed. That’s speculation on my part.

We all discovered the claim was wrong. Pressure-treated lumber requires excessive maintenance. You often need to clean and seal a wood deck every two years. You may be searching for a non-peeling sealer like those still hunting for the Holy Grail. Huge cracks, warping, splinters, etc. are in your future if you don’t maintain your exterior treated lumber.

Trex Generation One Lie

This reality led to the first generation of composite decking. People desired a no-maintenance product. I remember when Trex was introduced. It dominated the marketplace even though it was quite unattractive. It was marketed as maintenance-free too.

You and millions of other homeowners demanded a more realistic composite deck material. Generation two and three composite decking was born decades later. I have some at my own home. The composite decking I have on my own deck is so realistic it garnered a compliment from She Who Must Be Obeyed. My wife is a harsh critic when it comes to products that try to imitate wood.

The maintenance-free claims continue to be spewed out by many retailers, salesmen, builders, remodelers, etc. I knew better as possibly you did too. Decks get dirty. Decks foster algae, moss, and lichen growth. Some deciduous trees bombard decks with an ultra-fine aerosol of sugars. This provides the food for mildew, mold, algae, etc.

moss lichens algae on trex trancend decking

Moss, lichens, and algae can grow with ease on plastic-coated Trex Transcend decking. Photo credit: Tim Carter Copyright 2025 ALL RIGHTS RESERVED

That’s the battle I wage here at my home. My deck is surrounded by both deciduous and evergreen trees. I get abundant rainfall in New Hampshire. My deck, and maybe yours, is nothing more than a giant petri dish.

Cleaning Depends on Pollen/Algae

I clean my composite deck every few years. The determining factor is how bad the pollen season is in any given year. This year, the pollen was so heavy I thought green snow was covering my deck. Hard rainfalls washed much of the green dust down into Lake Winnisquam, but some dug into the embossed wood grain in my decking.

trex transcend decking algae pollen

This is before cleaning. Copyright 2025 Tim Carter ALL RIGHTS RESERVED

clean trex transcend decking

This is what an electric pressure washer can do in about five minutes. Copyright 2025 Tim Carter ALL RIGHTS RESERVED

Cleaning composite decking can add years to its useful life. The grooves between my decking can get clogged with organic debris. This debris holds moisture. My composite decking has the traditional wood-fiber and plastic core, but the top of it is solid plastic. This cap with the embossed grain and variegated coloration creates the real-wood look.

Debris Accelerates Decking Failure

The edges of the decking need to dry out. Wet debris packed into the cracks prevents this. Be sure you clean out the grooves of your composite decking.

You increase safety when you clean your deck. I call algae green ice. I’ll never forget the first time I almost fell on a wet algae-covered surface. I was in college, and one of my geology professors hired me and my partner John to paint his house. A roof over his front porch had a sloped wood-shake roof. Algae covered the wood shakes.

I was cleaning the stucco house before painting it. The roof got wet, and without warning I slipped on the wet algae. I didn’t fall off the roof, but it was a close call. Keeping algae off your deck may prevent a broken hip or wrist.

Push Broom & Soap

Pressure washing takes time. You can do a faster cleaning using soapy water and a softer push broom. A quick cleaning twice a season will remove the sugars that fuel the algae growth before it requires a pressure washer.

The corporate attorneys for some decking manufacturers have reigned in the optimistic marketing managers. You’ll now see clever descriptions such as minimal maintenance. If it’s minimal, I sure as heck don’t want maximum maintenance based on how much time I spent this past weekend!

Column 1615

DIY Plumbing Vent

pvc toilet drain pipe with vent

This is a toilet drain pipe. The smaller pipe that connects on the right side is a vent pipe. It looks like it’s installed correctly until you look what happens on the other side of the wood beam! Copyright 2025 Tim Carter

DIY Plumbing Vent and Other Mistakes - Use My Phone Coaching Service

I did an in-person inspection consultation several days ago. A man purchased a 50-year-old home next to a ski resort. He and his family are avid snow skiers and were tired of renting expensive condominiums. He wanted my opinion about the condition of the house, and how to schedule remodeling work that might span two or three years.

CLICK HERE to set up a DIY Plumbing Vent phone coaching call.

Part of my coaching service is to mark up photos you send me. I will show you exactly how to install the pipes. LOOK AT THIS ONE:

basement slab electric hammer

I’m not sure of how much money he has, and it’s none of my business. That said, I know he’s going to need at least $500,000, or more, to remodel both the inside and outside of the home based on the plans he showed me. This tired home requires a full facelift both inside and outside.

Radiant Heating System on One Zone!

I discovered the radiant heating system and most of the plumbing drains and vents are installed incorrectly. It turns out the previous owner was an avid DIYr. He knew just enough about building and remodeling to be very dangerous.

The first thing I noticed upon entering the house was the 3-inch toilet drain pipe visible between two ceiling joists above my head. This pipe had an oversized 2-inch vent pipe. A 1 1/2-inch vent would have been sufficient and code-compliant.

The DIYr had to flat-vent the drain pipe because it was in a narrow joist space. He did the right thing by rotating his fitting. This prevents toilet water from back flowing into the vent pipe. Unfortunately, he used a tee fitting instead of a wye. A tee fitting allows two pipes to connect at a 90-degree angle. A wye fitting makes the connection at a 45-degree angle. Wyes mimic Mother Nature. Many streams tend to merge into rivers much like you merge into high-speed traffic on highways.

Using the tee fitting wasn’t his most grievous error. He extended his vent pipe about 30 inches and then went down four inches. He was extending the pipe to a place where he could turn it up into a wall. This horizontal length of pipe is no different than the p-trap under your fixtures. My guess is after all these years, that horizontal pipe had filled with water rendering the vent useless.

Vent pipes need to be sloped at all times like drain pipes. This allows the condensation inside the pipes to drain by gravity to the sewer or septic tank.
This DIYr also made a serious mistake on all his soldered copper water lines. I could see the green remnants of the liquid flux that had flowed down over the tubing as he soldered. He didn’t clean the flux off the pipe. This excess flux can lead to corrosion in the future. Old towels cut up into rags do a great job of removing this soft flux once the copper pipe is cool enough to touch.

Water Lines Must Be Big

You might make a serious mistake sizing water lines. I’m discovering more and more that folks who install a luxury shower are disappointed when water dribbles from the body sprays and shower head. Luxury showers can gulp 10 or 11 gallons of water per minute when you transform your shower area into a car wash. One-half-inch-diameter water lines will not suffice. In some cases, 3/4-inch-diameter water lines may not work. Keep in mind that PEX water lines often have a smaller inner diameter than copper!

luxury shower with body sprays

There's water flowing from the large shower head. However, as soon as you turn on the three body sprays water dribbles out of every orifice in this luxury shower. The East Coast plumber was a dunce. Copyright 2025 Tim Carter

The current craze of luxury vinyl plank (LVP) flooring may cause a water leak in your home. It happened to a friend of mine. You, or the flooring installer, may remove a toilet in a bathroom allowing the LVP to be placed under the commode. If the toilet was installed with a time-tested wax ring, you automatically break the seal when you lift it up.

A secondary problem can occur because the top of the toilet flange is now flush or below the new finished surface of the LVP. Toilets are designed such that the toilet flange should sit on top of the finished flooring. You may have to stack two wax rings on top of one another to get a water and gas-tight seal.

Teflon tape can cause you to pull out your hair. I’ve never been a big fan of it. I prefer to use gloppy thread-sealant compound brushed onto the male threads of a pipe. DIYrs often don’t wrap the teflon tape onto the threads tight enough, or they wrap it on the wrong direction. Teflon tape needs to be wrapped in a clockwise fashion as you look at the end of the threaded end of a pipe.

Are you thinking about installing a new garden hose faucet? Most plumbers and almost all DIYrs pipe hose faucets with a 1/2-inch-diameter supply line. You’ll be astonished how much more water you get out of a garden hose by feeding the hose bib with a 3/4-inch pipe.

If this new hose faucet is going to be inside a garage, consider installing a hot/cold hose bib like I have at my own home. These hose faucets work just like your kitchen sink. You can have all hot water, all cold, or mix them for warm water. Washing dogs, cars, or any other item in chilly weather is so much nicer when you have hot or warm water.

Column 1614

DIY Stair Stringer

fast stairs steel stair riser kit with solid oak treads

Building safe stairs is hard unless you use prefabricated steel components that bolt together in minutes. A link to the company that makes them is below in the article. These are made for both interior and exterior applications for pros and DIYrs. Copyright 2025 Tim Carter

DIY Stair Stringer Kit - Build Your Stairs in One Hour

You probably give little thought to the stairs you go up or down to reach different levels of your home, deck, or patio. I’ll wager that if I handed you a measuring tape, a framing square, a pencil, and a level, you’d scratch your head and not even know where to start the layout required to build a safe set of code-compliant stairs.

If you want to TRY to do it, READ MY Building Stairs eBook.

The good news is you can eliminate all that hassle by purchasing a product I just installed a few days ago in my son’s garage. I was astonished at how easy it was to create a safe set of steps leading from the first floor of his home down to his concrete garage floor.

The best part is it brought back fond memories of the erector set toy I had as a child. CLICK HERE to see some wonderful modern metal erector set toys. They make great gifts for grandchildren.

erector set toy

Stairs are Slanted Floors

I feel it’s essential for you to realize how many sets of stairs you might traverse are borderline safe. Let’s assume you live in a multi-story home, or one with a basement, that has a wood-floor system. The first thing to realize is that stairs are no different than the floors you walk across in a room. Your feet walk on the flooring. On a set of stairs we call the flooring treads.

The flooring in your home is supported by wood joists. These need to be strong because they often span distances of 12, or more, feet. The joists in stairs are called stringers. The only difference between stairs and your floor is the stairs are a tilted floor much like a child’s slide.

Do NOT Notch Stringers!

All too many carpenters take a shortcut when building stairs. They start with strong dimensional 2x12s (superior floor joists), and cut out triangular notches that create the risers and the flat surface for the treads. This surgery transforms the strong 2x12s into sub-standard 2x6s. You’d never want floor joists in your home to be bouncy 2x6s, so why would you ever accept them in a set of stairs?

deck stairs tape on stringers

Look how much wood is left after you NOTCH them!!! It's LESS than a 2x6 for goodness sake. It's better to create mortises for the treads. Copyright 2025 Tim Carter

Keep in mind the stringers are the bones of the stairs. They’re what support you and your friend when you’re carrying up or down the 300-pound refrigerator. I never cut notches in my wood stairs. I created 1/2-inch-deep mortises in my 2x12s to preserve the strength of the stringers. These mortises take much more time to create which is why most carpenters don’t do it.

The prefabricated stringer kit product I worked with days ago in my son’s house are made from steel. The stringers are not notched. The manufacturer welds onto the stringers steel angle irons that support the treads. The critical angled cuts required that allow the stringers to rest against the wall, landing, and floor have been made at the factory.

fast stairs stringer with tread support angle iron

These are the angle irons that support the treads. Copyright 2025 Tim Carter

These stringer kits are available in four different models. It just so happened the distance from the landing in my son’s garage to his concrete floor allowed us to use the model A. This one is closest to the safest and most comfortable combination of riser height to stair-tread depth.

I always built my own stairs, when I could control the distance between floor levels, with a 7.5-inch riser and a 10-inch tread. The model A stringers come with a 7 and 7/16ths-inch riser and a 10.25-inch tread. This creates a 36.5-degree angle.

Once you’ve selected the model you need to match up with the height difference between the levels your stairs will serve, you get all the parts you need to create the stairs. You just have to provide the treads and the railing.

All of the heavy-duty bolts and washers are included to assemble the steel parts. All of the components have been pre-drilled and the required holes treaded. You even get a large hex wrench to tighten the bolts.

My son decided to use solid-oak treads. A local lumber mill had affordable pieces of sanded oak that was 1 and 3/4-inch thick. It was select grade with no knots. He also wanted an open-stairs look so there are no solid risers in between the treads. The finished look is amazing.

I decided to create a series of very short videos about the stairs. I show the initial problem we faced and why we had to install new stairs. I then decided to focus on the components and the things you need to realize as you proceed with the assembly.

You can view all of these videos on my www.AsktheBuilder.com website. You can also view them in a playlist on YouTube.

I rarely promote companies in my columns for a host of reasons. Stair safety is one of my pet peeves. I feel it’s incumbent on me to provide you with the name of the website where I procured the stringer kit. Go here to Fast Stairs and wait until you see photographs of all the amazing stairs built using the exact same kit I used.

Column 1613

Why Do Ceramic Tiles Crack?

cracked floor tile missing grout

An inferior flexing wood-floor system caused the grout to crumble. Once the grout was gone, the tile cracked because it had no lateral support. It’s going to require many of those fancy pieces of paper to repair it. Copyright 2025 Tim Carter

Why Do Ceramic Tiles Crack? - 100% Installation Errors

Ceramic floor tile has a rich legacy as a durable flooring material. You’ve undoubtedly walked across it in countless public buildings. Hotel lobbies, commercial buildings, and even my own previous parish church sported this artificial stone product. The tile in my church was over 100 years old, and it looked perfect, just like the day it was installed. Do you recall ever seeing a cracked tile or missing grout in all of the tile you’ve seen in public buildings? There’s a reason why.

Ceramic tile is quite particular when it comes to installation. You’ll discover one thing all crack-free ceramic tile floors have in common should you be inclined to think about what’s underneath the kiln-fired clay tile. The tile is adhered to a solid base that doesn’t flex. The best bases are constructed to also be crack-free.

Soft Clay Becomes Solid Rock

It’s essential for you to realize the strength characteristics of tile. All ceramic tile is made from pliable clay much like that you used to squish through your toes in a mud puddle after a summer rain shower. Once clay is molded and then fired in a kiln, magic happens. The high temperatures in the kiln rearrange the atoms in the soft clay. New bonds are created transforming the soft clay into a very hard material not unlike rock. In fact, the more silica in the clay, the stronger the tile will be.

Tile is Weak When Bent

Natural rock is very strong when you compress it. It can take many thousands of pounds per square inch of pressure to crack it. However, when you try to bend rock, it’s not nearly as strong. Bending is a tension force that stretches the rock. Rock and ceramic tile often have only one-tenth the strength in tension as they do when compressed.

Keeping in mind how thin most ceramic floor tiles are, you never want the base under the tile to move, nor do you want a hollow space, even as thin as a piece of paper, under a ceramic floor tile. Should this happen, the tile will crack when a concentrated weight is placed on it.

Rookie Restaurant Mistake

Many years ago, before I knew this, I was hired to install ceramic tile in a restaurant kitchen. My only experience at that very young age was using the organic mastic adhesive. This material is not much different than cold cake icing. I installed the tile on top of a crack-free reinforced concrete slab.

The tile looked great when I was finished. A week later, the general contractor called me up, telling me my tile had cracked. The cracks were in the tiles under the feet of the heavy kitchen equipment. The legs of the fixtures were not much different than a woman’s spike high-heel shoe.

The organic mastic under the tile was allowing the tile to bend under the concentrated weight. If I had used cement-based thinset instead of mastic, the tile wouldn’t have cracked. Thinset doesn’t compress like the flexible mastic.

Floor Tile Over Wood Floors

My daughter installed large-format ceramic tile in her home six years ago. I didn’t build this house. The contractor she hired resisted taking my advice about many things. He had a fragile ego and thought he knew better.

The floor trusses were designed to the minimum code standard with regard to allowable flex. You might not realize you can specify how stiff floor trusses can be. The same is true for engineered floor joists or regular dimensional 2x floor joists. You can design wood floor systems to almost be as stiff as concrete albeit it will cost you a significant amount of money to achieve wood floors that don’t deflect like a trampoline.

The second mistake my daughter’s builder made was to rely on ring-shanked nails and adhesive to hold the 3/4-inch subfloor to the wood floor trusses. The subflooring was  installed on a cold snowy winter day. I know, as I was there recording it on video. I’m convinced the adhesive in the large tubes was freezing minutes after it was applied to the top of the trusses.

The subflooring should have been screwed to the floor trusses instead of nailed. Several days ago I was walking across her kitchen floor and could hear the subflooring squeak as it moved up and down under each of my footfalls.

It’s no wonder the grout in between my daughter’s floor tiles has crumbled. It’s no wonder at least twenty of her tiles have cracks in them. Her ceramic tile floor is a hot mess.

There is now only way to repair my daughter’s tile floor. You may have the same issue after all. All of the grout must be removed. Cracked tiles have to be replaced. Silicone grout should be used in between each tile. This material remains flexible for its entire life. It doesn’t get hard like traditional cement-based grouts. Cement-based grouts crumble when they flex.

Column 1612