Create Caulk Joints

Creating the Perfect Caulk Joint Every Time

On a recent trip, I observed a caulk joint in an airport bathroom. The person who applied it - I am convinced - used his big toe to smooth the joint. There was caulk 3/4 of an inch on either side of the 3/16 inch wide crack!

Getting the Tools Set Up

All too often people start to caulk with just the caulk tube and the caulk gun. They cut the tip and get going. Big mistake! If you are using a water based caulk, you need to have a bucket of clean water, some rags, a grout sponge and possibly some paper towels. If you are using silicone caulk, you will just need lacquer thinner and some rags.

The water and/or lacquer thinner are important. These are the solvents needed to wash away the smears from either side of the caulk joint once it has been tooled.


Suggested Tool List

  • a tile grout sponge - with rounded edges
  • warm water or lacquer thinner
  • rags or paper towels
  • putty knife
  • razor knife
  • old duster type paint brush
  • packing rod for deep cracks

    Cutting the Tube Tip

    Perhaps the largest cause of caulk joint messes can be traced to improperly sized caulk tube tip cuts. The caulk tube nozzle needs to be trimmed well if you want to prevent a mess. I like to cut the tip at a 30 to 45 degree angle.

    You simply need to match the size of the tip opening to the crack you are caulking. I trim a little at a time and try to get the opening of the nozzle about 1/16th inch smaller than the width of the crack to be caulked. If the nozzle opening is wider than the crack, you will deliver too much caulk to the crack. ALWAYS cut the tip a little bit at a time. Enlarge the hole by shaving off additional layers of the tip. Don't hack away at it.

    Deep Cracks Need Backer Rods

    Professional caulkers use foam backer rods to fill deep cracks. The general rule of thumb is cracks over 1/4 inch deep must be filled first with foam backer rods. If you do not do this the caulk seam will most likely experience excessive shrinkage.

    The backer rods can be tough to locate. The best place to find them is a store that sells masonry supplies and concrete supplies to professional contractors. Look in your Yellow Pages under "Concrete / Masonry Supplies".

    A Good Gun

    Smooth seams don't happen by accident. Spend the money and get a caulking gun that has a good trigger linkage. Don't buy the cheapest model. You need one that will have a good variable pressure trigger. The good guns have a thumb lever that quickly shuts off the caulk when you have finished the joint.

    Just recently I began using a professional gun to apply caulk. For 25 years I had been using the same type you probably have. As soon as I switched to the good gun, my joint quality improved 50 percent! The good guns give you fantastic control as you inject cracks with caulk. Inferior guns push the caulk out too rapidly with each handle squeeze.

    Apply Slowly

    When you start to caulk don't get too much flowing at once. You want just enough caulk to flow out to fill the crack and hump up ever so slightly. Practice on some scrap lumber first.

    Caulk Several Feet and Then Stop!

    Apply caulk to several feet of crack and then stop. Use your finger to gently tool the joint. If lots of excess caulk starts to build in front of your finger, take the excess and deposit it in a paper towel.

    If you are using water based caulks, get the grout sponge slightly wet and lightly wipe down the joint. Rotate the sponge to expose a clean face or edge. Lightly stroke the joint until you are satisfied with the appearance.

    If you use silicone caulks you can't use water. You saturate a rag with lacquer thinner to tool the joint. BE SUPER CAREFUL! Lacquer thinner is highly flammable, explosive, etc. NO open flames, cigarettes, etc. are allowed while caulking. Burn the rags immediately after use.

    If you live in Arizona and are doing exterior caulking with an acrylic caulk, it can skin over (dry) so fast it will make your head spin. I have had it happen to me here in Cincinnati, Ohio, in the summertime. When you think this might happen, just caulk a short stretch of crack and tool it. The caulk you apply next will stick readily to the freshly tooled caulk.

    Strike the Joint Multiple Times

    Do not use too much water or thinner. You can actually dissolve and ruin the caulk. The trick is to make multiple light passes with the sponge or rag. If you practice this technique, you will see how effective it really is. Each pass takes out just a little more caulk and/or removes the smeared part from the adjoining surfaces. Masonry surfaces are too coarse to respond to this type of treatment. When you caulk these joints you must go slowly and tool carefully. You can't rinse these joints!

     

  • Mildew-Proof Caulks

    Disappearing Chemicals

    My research for this column was fascinating. I talked with two caulk scientists. I found out that caulks contain mildewcides and fungicides. These chemicals happen to be water soluble. This means that water can dissolve them.

    I also found out that even though caulk appears smooth to the naked eye, it is actually a somewhat porous surface where mildew spores can readily hide. Couple this with the fact that many body soaps contain ingredients that are food for mildew and you often have lots of water where you have caulk and you end up with perfect growth and survival conditions for mildew.

    Caulks that mildew quickly contain small amounts of the mildewcides. Mildew-proof caulks contain lots of these chemicals. The intention is to add enough mildewcide such that it takes years for it to completely wash away from the caulk. The manufacturers hope that it is time to re-caulk before the caulk actually begins to turn black. I don't have any problems with that thought process!

    Getting Caulk to Stick

    Caulks are basically a first cousin to adhesives. Caulk, adhesive and paint chemistry is very similar. Stop and think. All three things basically 'stick' to something. If you want caulk to be waterproof, you need to make sure that the surfaces to be caulked are clean. They need to be dry.

    It is usually not a problem to get caulk to stick to a crack. If a caulked joint does fail, the trouble can often be traced to dirt or dust that was not removed prior to the application of the caulk. Take time out and always clean the areas to be caulked.

    Caulk Removers

    If you visit a large home center or a major paint or hardware store with a good caulk department, you will often find caulk removers. These products work well if you follow instructions.

    Often the largest hurdle is removing as much of the caulk as possible - with a razor or some other tool. The more caulk you can scrape away before applying the remover the better off you are.

    You can often find caulk removers for each type of caulk. However, the tougher the caulk - like silicones - the harder they are to remove. One of my readers wrote to me just before this bulletin was written - a woman from Michigan. She reported to me that she had great success with a silicone caulk remover made by the 3M Corporation. I have not used it so I can't tell you what I think about it. The Michigan reader told me that she used it to "...get silicone caulk off our fiberglass trailer and it worked GREAT!" She convinced me!

    Preventing Mildew in Baths

    An ounce of prevention is worth a pound of cure it is said. This is true in bathrooms with respect to the war on mildew. You can reduce mildew growth in tubs and showers if you try the following things:

    Keep the tub and shower surfaces clean. This means that you should wash them once or twice a month, not once or twice a year! The soap and body oils that come off of you are mildew food!

    Consider using a squeegee in the tub or shower. Just after you turn off the water and before you jump from the bathing area, use it to remove 90 percent of the water from the tub and shower area. This water will go down the drain instead of evaporating into the air during the rest of the day. High moisture air content within the bathroom helps the mildew to live.

    Leave the shower door or curtain OPEN after you leave the bathroom. Also leave the bath door open so that air flow can readily dry tub and shower surfaces. You want the mildew to die of thirst!

    Related Articles:   Caulk RemovalCreate Caulk JointsMildew-Proof Caulk Manufacturers

    Wood Glue

    The following data should help you quickly identify a winner adhesive. If you are looking for a true waterproof glue check the label to make sure it says "Type I". If you see this on the label it is your assurance that the glue is, in fact, 100 percent waterproof. Many of the urethane glues say they are waterproof but most of them are Type II glues. This means that they are very water resistive. To get a Type II rating, a glued joint needs to survive being immersed in water for 4 hours and then dried out for 19 hours at 120 F. If the joint survives this abuse 3 times in a row, it gets the classification. Epoxies are extremely waterproof. Use these if you really want a waterproof joint. However, epoxies are very material specific. In other words, get the right epoxy for the material you are working with. The labeling will often tell you the limitations of the product.

    Click here to watch Tim's video on Wood Glue. (Editor's Note: Check out Tim's May 4, 2011 Newsletter for a great tip when working with wood glue and you have some left over.


    It is really important to note that the glues themselves are not intended to act as a structural joint. In other words, when you weld metal, the weld itself can have equal or sometimes greater strength than the metal that is welded. Glue doesn't work that way. If you have gaps in the pieces that are being joined and you fill these with glue to make up for your poor workmanship, the glue will not be as strong as the wood, plastic, or whatever. Make sure the pieces fit well before attempting to apply the glue. In fact, if you are gluing something that will require clamping, figure out and test your clamping setup BEFORE you apply the glue. If you fumble around trying to look for clamps, or try to adjust slipping clamps, the glue can set up and your joint will be destined to failure. This message comes to you from the voice of experience.

    Adhesive Comparison Data
    Waterproof Strength Pounds/Sq.Inch Set Time Shelf Life Clamp Time
    White Glue
    No 4,000 Rapid 60-90 sec. Long 1/2 hour
    Yellow Glue
    Not Really 4,000 Rapid 1-3 minutes Long 4-8 hours
    Urethane
    Yes 4,000 30 minutes 4-6 months 6-8 hours
    Construction Adhesive
    Yes 600 1-3 minutes Long if sealed 6-8 hours

    Urethane Glue Manufacturers

    The following is a partial listing of urethane glue manufacturers. It is not complete because there are simply too darn many to list. I have chosen the ones that I feel you will readily be able to find. If you want to rush out and look for them, I would start at old fashioned lumber companies OR shops where cabinet makers buy there supplies. You might find these specialty shops in your Yellow Pages under "Lumber - Retail" or "Lumber - Specialty / Exotic".

    The urethane glues are really pretty cool. If you work in a dry desert climate you may have to dampen the wood very slightly to get it to work. Read the instructions about this or call the technical support line. The urethane glues NEED moisture from the air or the wood to cure. You can experiment on some scrap pieces to see how well this works. Dampen two pieces slightly and wipe them off. Then apply the glue per instructions and clamp. Do the same thing at the same time to two DRY pieces of wood. Check them after one half hour and see if the dry pieces can be pulled apart with your hands.

    Consider purchasing just a little more glue than you think you will use. The urethane glues can go bad in the bottles. Remember as you use the glue, you replace the space in the bottle with humid air. Even when you recap the glue, the humid air in the bottle can react with the remaining glue. Plus, the urethane glues will be more expensive. They cost on average about 70 percent more than regular yellow glue.

    • AmBel
      800-779-3935
      www.excelglue.com
      They make Excel
    • Bordon's
      800-848-9400
      www.elmers.com
      Elmer's Weather-Tite Wood Glue
    • Franklin International
      800-669-4583
      www.titebond.com
      Titebond® Polyurethane Glue
    • Gorilla Group
      888-367-4583
      www.gorillapvc.com
      Gorilla Glue
    • Roo Industries
      877-766-4583
      www.rooglue.com
      RooClear

    Related Articles:  Gorilla Glue, Super Glue

    Gorilla Glue

    I am the undisputed champion of gluing things at the Carter house. Whenever something breaks, out pops the epoxy, or other special purpose adhesive, to do the job. In fact, I actually like gluing things together. I feel it is a challenge to get things back together so that you can barely see the fracture line. I don't know what I would do without my clear epoxy!


    Two Methods of Sticking

    Adhesives are fairly interesting in a way. Have you ever stopped to think how they work? Different glues work in different ways. Some of the simplest glues, like old fashioned white glue, yellow glue and basic protein glues, work by flowing into the tiny open spaces of the object being glued. This is why white glues and such don't stick very well to smooth surfaces.

    The water in the glue dries and the hardened glue is tightly knitted into the wood, paper or other material. If it is a simple water soluble glue, the addition of water (re-hydration) at a later date softens the glue and allows you to unstick the objects. This is why steaming an envelope works. Now, don't think I go around opening people's mail ... I just saw this done on TV during a murder mystery.

    The other method things stick together is an actual chemical reaction or bonding. Orbiting electrons in one compound react and grab onto the molecules of another object. This type of bond can be tenacious. Epoxies are good examples of chemical bonding glues.

    Because of the different types of bonding possibilities, you might be able to see why one singular glue is not a universal product. In other words, an epoxy that can bond two pieces of glass or metal together will probably do a horrible job of bonding two pieces of wood. This is why you really have to match the glue to the job.


    Wood & Paper Adhesives

    Old fashioned white school glue and the basic yellow glues incorporate a water based polyvinyl acetate resin as the glue. This happens to be the same thing that is used in many low end latex paints. Remember, paint is nothing more than colored glue.

    The white and yellow glues are excellent for wood and wood type products like paper and cardboard. These glues can penetrate well into the wood fibers to create a bond. This penetration capability can also be a nightmare if you intend to stain the wood.

    If you try to wipe off white or yellow glue that squeezes from a joint you can have real problems. First, the water from the rag opens the pores of the wood. Then you dilute the glue slightly so it can penetrate even deeper into the wood. Even though you get the glue off the surface, it penetrates into the grain. When it dries, this glue blocks any stain from penetrating into the wood. The result is a light area next to richly stained wood.

    The solution is to let glue sit on the wood. Once it dries, carefully chisel it off or sand the area.


    The New Glues

    Perhaps the most exciting thing in glues - not much happens in this arena when you stop and think about it - is the new urethane glues. These glues can fill voids, they bubble and foam, they can be extremely waterproof, and exceedingly strong.

    The urethane glues are great for wood workers. These glues do not soak deeply into the wood pores like the white and yellow glues.

    These new glues are excellent at bonding different materials. You can use them to bond glass, wood, metal and plastic to one another.


    Construction Adhesives

    These are specialized glues in my opinion. They are coarse in the sense that they dry very thick. They are wonderful if you need to fill a gap. Some are formulated to stick to wet or frozen lumber if you can believe that!

    The downside to these products is their relatively lower strength. They often test out at around 600 pounds per square inch. That is quite strong but only about 15 percent of the other glues.

    When you use construction adhesive together with nails and screws you can create a structure with exceptional strength.

    Another nice thing about construction adhesives is that they are formulated to be somewhat elastic. If the lumber moves that is glued, the bond will not break. Think of these products as extremely sticky caulks. Chemically, that is exactly what they are.

    In closing, to get the best performance from the product you choose, be sure to read the label. Pick a glue that will work for you. Always test it first before you use it.

    Stopping Adhesive Failures

    When I was doing the research for this column, I spoke with some of the top adhesive research chemists in America. I asked them about adhesive / glue failures. I was interested in trying to minimize failures when people like you and I use glues. The answers were almost identical from all of the chemists:

    • Apply the glue to a clean, dust free surface.
    • Apply it evenly to both surfaces.
    • Read the instructions on the bottle / jar BEFORE you have a failure, not after the glue doesn't work.

    None of the above answers surprised me. Remember, glue sticks to whatever it comes into contact with. So, it you apply glue to dust, the dust will stick well. But dust isn't "glued" to the wood or the other surface you are working with. Even application is key as well. Too much glue or not enough will create a weak joint.

    Related Articles:  Wood Glue, Super Glue

    Caulking Tips

    Caulking Techniques & Tips

    Every successful job depends upon having the right material for the job and the right tools to install the material properly. Common sense dictates that if you attempt to install a quality product with inadequate or inferior tools, you will achieve less than excellent results. Caulking is no different.

    Before you start your caulking job, take inventory of your caulking "tools." Here is what you should have: high quality cartridge caulk gun, putty knife, scissors - knife - or razor blade, 5 inch long piece of thin, rigid wire, back up filler strip (for those deep cracks in excess of 1/2 inch deep), clean dry cloth, rounded synthetic sponge and bucket of warm water (if using a water based caulk), or correct solvent (if using a solvent based caulk.)

    Just like anything, there is a right and a wrong way to caulk. The first thing to do is to make sure you have purchased the right caulk for the right job! Determine this by carefully reading the label on the caulk tube. Make sure that it says on the label that the caulk will stick to what you are caulking. If in doubt, ask for some help. Don't "hope" that it will work.

    Once you have the right caulk, read the directions on the label. Yes, I know this sounds boring. I mean, really, who has those extra two minutes it's going to take to do this? Do you think it is worth two minutes to ensure a first-class job? I thought so.

    Water based caulks can often be applied to wet or dry surfaces. Non-water based caulks, especially silicone, will not remotely stick to wet or damp surfaces. The trick to a successful job is taking your time. All too often, people squeeze the heck out of the gun and caulk squirts out all over the place.

    The key, in my opinion, is the right size hole in the tube. Trim the nozzle of the tube a little at a time. Remember, you can always trim the tube a little more. There is no way of reducing the hole if you cut off too much. I always make the hole of the tube about 60 to 70 percent the size (width) of the crack I am trying to fill. Depending upon weather conditions, caulk only two or three feet of the crack and stop. Tool the joint with your finger and wipe the excess caulk onto a paper towel.

    The next step, if you're using a water-based caulk, is to tool it with a damp grout sponge. Get a sponge wet and squeeze out all of the water you can. You wipe the joint you just tooled with your finger to remove EXCESS caulk you smeared on either side of the actual crack you caulked. This is the step MOST PEOPLE SKIP.

    Don't skip it. Don't press too hard with the sponge and make repeated passes along the joint until you just see caulk in the crack. This works well when caulking cracks indoors along smooth objects.

    You can't do this if you're caulking up against a rough surface like stone or brick.

    If you apply the perfect amount of caulk, there will be no excess when you tool the joint. This is very difficult to do. I know of only two or three painters who really have perfected this science. However, once again, the key is taking your time. Simply slow down, and squeeze the gun slooooowly. This is especially critical if you are caulking against a rough surface such as brick. If you get excess caulk on brick, it is almost impossible to remove. Caulk, remember, is like glue! It sticks very rapidly to things. You can make a big mess on brick if you are not careful.

    If you have never caulked before, buy a tube (caulk is really very inexpensive) and experiment! Nail a few different sized scrap boards together and caulk the seam or the corner of the overlap. Simply imagine that you are caulking a new window edge against a piece of trim.

    Silicone caulks are a challenge. Take your time and use lacquer thinner to tool the joint. Ventilate well, if indoors!


    Caulk Manufacturers

    • Bostik
    • DAP Inc.
    • Liquid Nails
    • ITW TACC Miracle Adhesives
    • NPC Colored Sealants
    • OSI Sealants, Inc.
    • Red Devil Inc.
    • Sashco Sealants
    • Degussa Sealants
    • 3M

    Caulks and Caulking Techniques

    Two Basic Types of Caulk

    There are two basic types of caulks in use today: water based and non-water based. Each type has distinct advantages and disadvantages. Within each grouping, as you might imagine, there are various sub-groupings.

    One thing the two basic types do have in common, however, is the fact that chemically speaking, they are closely related to adhesives. This makes sense when you think about it, as the caulks usually are quite sticky when you apply them. Also, when you select the right caulk and apply it properly, it has a tendency to stick to the item you apply it to for quite some time. In fact, some caulks are formulated to be more of an adhesive than a caulk. My guess is that you have seen tubes of "adhesive caulk".

    Water Based Caulks

    The latex caulks that many of us are familiar with use water as a basic ingredient. The presence of water in the caulk is an advantage if you are interested in clean-up and workability. It is a disadvantage if you are looking for extremely long life.

    Often, these caulks have primary ingredients, which add to their flexibility. Commonly, latex (basically synthetic rubber) and acrylics (highly flexible plastics) are found in these caulks. Once again, my guess is that acrylic, latex caulk rings a bell with you. Caulks need flexibility, as they are intended to bridge gaps between things that commonly move.

    Silicone can be added to a water based caulk in small amounts. By doing this, the flexibility of the caulk is increased. These are the caulks you frequently see advertised as siliconized acrylic latex caulks .

    Caulking technology has created specific water based caulks for specific jobs. This is a distinct advantage. The caulks have been formulated to give you maximum performance depending upon the job you are going to undertake. Almost every manufacturer clearly prints on the caulk tube label just what that caulk will caulk best. I highly recommend that you read the labels first before buying them and using them. This will ensure maximum performance and satisfaction on your part. Try to break the habit of reading the label after a problem has developed!

    Non-Water Based Caulks

    There are several widely used non-water based caulks. However, most homeowners are only familiar with one of these, that being silicone. The other two widely used caulks in this group are urethane and elastomeric caulks.

    Silicone caulk has won widespread acceptance by many homeowners. However, it can be difficult to apply. Some silicones can cure quite rapidly, making for messy application jobs. Also, because they stick sowell to many non-porous objects, removing excess silicone can be difficult. Virtually everyone knows that paint will not adhere to pure silicone caulks. Well guess what? In many cases, silicone caulk will not adhere to previously applied silicone! This means that your first application must be your last. You have to get it right the first time!

    Urethane caulks have been used by commercial builders for years. These caulks offer unbelievable flexibility. Some of these caulks can withstand up to 50 percent movement in the caulked joint! These caulks are difficult to work with, however the work is well worth it in many cases. Often you need to use solvents, such as mineral spirits or lacquer thinner to tool the joints. I have used caulks like this to caulk expansion joints in masonry with tremendous success.

    Elastomeric caulks are non-water based caulks which have both interior and exterior applications. They tend to exhibit more adhesive type qualities. For the most part, they are not nearly as flexible as the urethane caulks. Tooling and cleanup require the use of solvents, just the same as the silicones and urethanes.

    Advantages

    Because the non-water based caulks are tougher to work with, they must offer something in return. These caulks offer superior durability, flexibility and adhesive strength unobtainable from the water based caulks. Many of the non-water based caulks cure quite rapidly. This allows them to come into contact with water soon after they are applied. This water rarely, if ever, harms the caulk.

    It shouldn't surprise you that the non-water based caulks are more expensive. The ingredients which give them their positive qualities simply cost more. Water, on the other hand, is very inexpensive.

    When faced with that next caulk job remember to take your time. Think about how much time you are about to spend. The little extra money for a high quality caulk and the extra time spent applying it may pay huge dividends! Don't always opt for the easy way out. Good luck on your next project!


    Silane / Siloxane Water Repellents

    High Performance Silane / Siloxane Water Repellents

    One month ago, I walked into a national chain discount store. Coming out of the exit door was a woman with a 5 gallon can of a highly advertised masonry sealer in her shopping cart. My gut instinct told me that she was probably buying it to spray on her brick walls or concrete driveway. I just didn't get the feeling that she worked at a testing laboratory. Anyway, what a shame. The product she purchased was stearate-based. That means the main component of the product is very likely animal fat. These products and silicone based sealers are actually film forming sealants. They are just about the worst thing you could ever put on your brick or masonry surfaces - especially if you live in a climate that experiences freezing temperatures.

    Film forming sealants do just that - they form a film on the surface of your masonry. It is a clear film that can sometimes turn cloudy. The film can also block water vapor from escaping to the atmosphere. If water vapor works its way to the surface of masonry, collects and then freezes, you can suffer spalling, flaking and other surface deterioration.

    The better way to treat masonry is to apply penetrating water repellents. These products contain special chemicals called silanes and siloxanes and/or a blend of the two chemicals. These nifty chemicals partially block the capillaries in brick, concrete and mortar. The partially blocked spaces then actually repel water instead of allowing it to enter the masonry. Since the passageways are not entirely blocked, they allow water vapor to readily escape to the atmosphere.

    I have listed a few companies that make high performance silane and/or siloxane water repellents. There are undoubtedly twice as many as I have listed ... maybe more. Many if not all of these products are sold exclusively at brickyards or specialty building supply stores that sell to bricklayers or concrete contractors. You can find these stores by looking in your Yellow Pages. Look under "Building Supplies" or "Brick." One of the companies below not only sells to these specialty stores but also sells directly to homeowners. They ship the product directly to your front door via UPS. Call Saver Systems listed below and see real customer service in action! Ask for Masonry Saver.

    Act Quickly

    Many of the brick and masonry sealers have to be applied in favorable weather conditions. Most are temperature sensitive. That means the air and surface temperature must not be below a certain minimum temperature. Read the instructions carefully!


    • Sivento Silanes
    • ProSoCo, Inc.


    Further Reading

    • Measuring Water Penetration
      by Kim Basham & John Meredith
      Masonry Construction November 1995
      (This article is available in PDF format for free downloading from the Masonry Construction web site!)
    • Reducing Water Permeance in Masonry Walls and Chimneys
      John Meredith
      Sweeping April / May 1994

    Brick Walls

    Flashings

    We already know that brick walls are not waterproof. Once the water is behind the brick veneer, we need to capture it and redirect it to the exterior of the wall so it can't cause damage. This is the job of flashing material. Flashings are not easy to install correctly. This is especially true at inside and outside corners. The flashings need to be overlapped and cut in such a way so that water will not enter through the seams.

    What's more, the water resistant membranes such as tar paper or the new, fancy water barriers need to overlap the flashings. This practice requires work above doors and windows. The flashings need to be "laced" behind the water membranes.

    Flashings also need to be placed at door sills, window sills and any other place where the brick has a horizontal break or interruption.

    Quite possibly the best brick flashing I have seen is one made by the Grace Construction Products. It is called Perma-Barrier.

    The Water Pathway

    Mortar droppings can easily clog the narrow space behind brick. The droppings accumulate as the brick wall gets taller and taller. If this space becomes clogged, then the water can't easily escape through the weep holes below. There is only one product I have seen that permits water to easily find its way to the weep holes. This product is called Mortar Net. It is a plastic mesh product that looks like a saw-toothed shingle. This product can be found at companies that sell brick.

    Weep Holes

    These are the simple drain holes at the base of walls or on the first course of brick above a door or window. Without weep holes, there is no easy way for water to escape from behind brick walls. The Brick Industry Association recommends weep holes be placed on 2 foot centers. Most model building codes permit a spacing of 4 feet on center. In my opinion, you can't have too many weep holes.

    I have seen unknowing homeowners caulk these holes closed. Don't do it! They are important and must be left open at all times.

    Masonry Wall Ties

    Non-professional bricklayers often create hazards by not installing a sufficient number of masonry wall ties in brick veneer work. A wall tie is a connector. These simple metal devices attach the brickwork to the wood frame structure. Without wall ties, a brick wall can simply fall down and away from the house. The model building codes are very specific in the spacing of wall ties. They tell you how often they should be spaced vertically and horizontally. Sometimes they will specify a minimum amount of wall ties per square foot of brick work. The building codes also tell you how far each nail should penetrate into the wood sheathing or wood studs. Pay attention to this specification!

    Mortar

    This is going to be your biggest challenge. I would like to see you have your bricklayers make their mortar like the old timers. The premixed mortars used today are simply too strong. That is fine for today's higher strength brick, but it is unnecessary in brick veneer work. A low strength mortar with a high lime content is what you want. The extra lime in the mortar actually will help prevent water from getting between the brick and mortar contact zone. A great low strength mortar that you might try can be mixed using the following proportions: 5 measures of sand, 3 measures of lime and 1 measure of Portland cement. This mortar mixture is an absolute necessity if you decide to use used brick on your house or chimney.

    Sealing Brick

    The Future

    If you want to set up your son or daughter in a future business that is going to do quite well, I suggest you teach them how to remove the bottom eight courses of brick from a house without causing the brick above to collapse. They will also need some carpentry skills as they will be replacing the rim joist or band board that sits on top of the foundation. You see, these wood framing members and quite possibly joist ends and wall studs are going to be rotted. Years of penetrating moisture will have caused this damage. The sad thing is that all of this expensive work could have been avoided. If only the bricklayers and builders had done their homework and taken the necessary steps to collect and divert the incoming water.

    Preventing Brick Leaks

    Bricklaying is a true craft and art form. Like so many things in residential construction today, it is a dying craft. There are just a handful of masons who still strive to do quality work and want to do it right. You will find that the largest majority of these masons actually do commercial and institutional work.

    Many residential masons - hundreds of whom work in southwest Ohio - do not have adequate training. They are young people who start to work for bricklayers who have not had any training themselves, or who do not stay abreast of new products or technology. The same thing may be true in your city or town. You may have bricklayers who are simply doing things wrong because they don't have a clue how to do them right!

    You stop leaks in brick masonry by understanding that water does penetrate brick and mortar. You solve leaks by capturing the water and doing whatever is necessary to redirect it outside the brick wall. These methods are covered in greater detail later in this Bulletin.

    Brick Sealers - What For?

    I am amazed at how people think you have to seal masonry to preserve it. Fifty years ago there were no brick sealers! How have all those old brick buildings lasted? How did they survive before sealers? The point is that many of today's brick are much stronger than those that are 70 to 100 years old. Old brick sometimes didn't get fired as hot or as long as today's brick. There were inconsistencies in materials and quality standards. A good brick made today can easily last hundreds of years without a sealer.

    The mortar many bricklayers use today is also different than that used 100 years ago. Today we use high strength mortars. They have considerably more cement in them than those from 100 years ago. The added cement helps to protect the mortar from weathering. As such, sealers aren't needed to protect the mortar.

    The use of sealers has blossomed, I believe, because of the problems with leaks. The growth of the industry is also fueled by massive amounts of advertising. If a company can convince you that you have a problem and they have a solution, then a sale is a possibility.

    A Finger in the Dike

    So your bricks leak now. What do you do? A sealer - really, you want a water repellent - is maybe going to solve your problem. There is a possibility that the brickwork is so poor and the water entry paths so large that a water repellent just can't stop all of the water migration.

    Remember that wind driven rain is your biggest culprit. The weight of the water driving against brick and mortar actually squeezes water through the brick like toothpaste through a tube. You have probably noticed this fact.

    Some heavily advertised national brand products are film forming sealants. These are also rans as far as the Brick Industry Association is concerned. The best technology available involves special chemicals called silanes and siloxanes. These are cousins of the old standby silicone. Silicone is also a film forming sealant. It is not recommended for any masonry that can be subjected to freezing temperatures.

    Many of the silane and siloxane sealers are environmentally friendly. They are water based and clear. They apply easily with a hand pump sprayer. I recommend that you follow the installation instructions to the letter. Some instructions are detailed and some water repellents may require two coats. Spend the time to read the label!

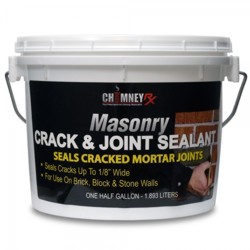
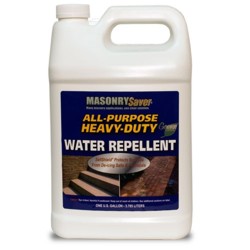
    masonry-water-repellent masonry-crack-sealant

    The above product links are affiliate links. I get a tiny commission if you purchase these from Amazon.

    Brick Tuckpointing Literature

    There is a common thread in all of the following articles about instructions for tuckpointing. Tuckpointing that looks good is not an easy task. Patience, skill and hand-eye coordination are necessary if you want your tuckpointing to match the existing mortar. Some of the articles have older publication dates. Don't let that scare you. Much of the information concerning tuckpointing masonry is timeless. It has been known for quite some time how to do it. The trouble is that craftsmen and others simply forget or fail to pass along the information correctly.


    Avoid mismatching mortar! Find a good contractor and learn the secrets to repairing masonry with my Masonry Repair (Chimneys, Stucco & Brickwork) Checklist. I offer a 100% Money Back Guarantee.


    • Architectural Technology pgs 25-26 Fall 1985
      "Masonry Maintenance" by Valerie Sivinski

    • Brick Industry Association
      Technical Notes on Brick Construction
      Moisture Resistance of Brick Masonry - 7 F

    • Masonry Construction pgs. 447-450 October 1993
      "Restoring Mortar Joints in Historic Buildings" by Kenneth A. Hooker

    • "Repointing Mortar Joints in Historic Masonry Buildings" by Robert C. Mack, FAIA, and John P. Speweik National Park Service
      This publication is awesome. It contains very valuable tips and insights into the entire process of repointing mortar. If you decide to read just one article, make it this one.
    • The Old House Journal pgs. 27-31 Jan/Feb 1987
      "How to Repoint" by Gregory S. Woroch