Time to Work
Let's get to work! Now that the concrete surface is clean and all loose material is gone (you did do that didn't you?), we just need to provide the forms to create crisp lines on the sides of the slab.
You can do this with 3/4 inch thick pieces of 1x4, or 1/2 inch pieces of plywood which have been ripped cleanly and evenly with a table saw. Hold the edging up to the desired thickness of your overlay. A gauge block works great for this! What's that? Well, let's say you are doing a 1/2 inch overlay.

CLICK this image and listen to the first call on the podcast. I talk to Vic about how he can do a concrete overlay and save THOUSANDS of $$$. Copyright 2018 Tim Carter
Cut a 4 inch by 4 inch piece of plywood and set it on the old surface at the edge. Hold your form board flush with this little block, nail the form board to a stake to secure the established height and you are ready to rock and roll.
Pre-existing Cracks
Undoubtedly, your concrete surface may have some original control joints or other cracks. These must be marked on the sides of the forms. Why? Because these cracks WILL telegraph through the new overlay. You need to install your own new control joints with a standard jointing tool to make a nice new line!
You can also take care of this condition by pouring the overlay in sections. Simply do one block at a time. Install a form board the same height or depth of the overlay in between the two side form boards. This will produce a nice crisp line for you as well.
The Materials
Your material requirements are simple and inexpensive. You need Portland cement, fine and coarse sand, and possibly some pea gravel. You will need pea gravel if you intend to do an overlay thicker than one inch.
The cement and fine sand are used as your glue. The cement, coarse sand, and possibly pea gravel are used for the overlay material.
If you are doing a thin overlay, less than one inch, moisture loss from the thin overlay is critical. If water leaves the mixture too quickly, the overlay can be subject to plastic shrinkage cracks and 'curling'. The overlay can actually delaminate from rapid moisture loss.
One of the ways the material looses water is by suction from the old concrete. In other words, the concrete sucks the water from the fresh overlay. To avoid this, the old slab should be wetted and kept wet for 12 hours before you start. You can do this by wetting the slab and covering it with a plastic sheet. Be sure to remove standing puddles before starting to work.
The Mixtures
You don't need fancy admixtures or bonding agents to get great results. Good old cement will do just fine. The mixture for your overlay consists of coarse sand, cement and possibly gravel. You want a minimum of seven bags of cement for each cubic yard of overlay you apply. For purposes of volume measurement, this equates to three parts sand to one part cement. Of course, if you add more cement, say 2.5 parts sand to one part cement, your chances of success will do nothing but increase.
If you are doing an overlay that contains gravel, you would mix two parts gravel, one part sand and one part cement.
The cement paint is easy. It is a one to one mixture of fine sand and cement. Of course you can also go a little heavy on the cement to get a greater bond. You mix these two ingredients dry and then add water to make a slurry just like a rich paint. Only mix what you can use in one hour or less. Remember, it is easy to mix up a quick batch!
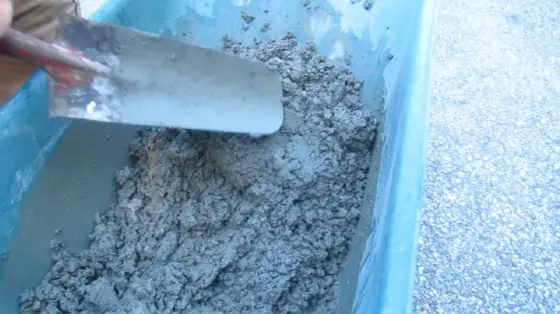
Consistency
Remember earlier when I said that water is the primary cause of concrete failure? Well, don't goof up! I would like to see you mix up your overlay material so that it resembles a somewhat stiff mortar. If you can readily pour it from your wheelbarrow and it flows like a bowl of clam chowder soup, too much water!!
I would like to see the consistency of thick oatmeal. Remember it can't be so stiff that you can't easily spread it.
Ten Feet at a Time
Let's work in sections. Don't try to tackle the entire driveway at one time, especially if you have not finished concrete before. Let's just do 10 feet or so at a time, or work block to block on top of the existing surface. We already talked about recreating lines and how to form at a line.
Remember that as you mix each batch, that batch has a separate setting time than the one before. It is kind of like putting rolls in an oven at different times. They will all brown at different times! You don't want to get caught trying to mix or install a new batch while the other one is ready to finish!
Blending Your Overlay
Earlier we talked about different levels where the bad surface meets a good one. If you have to taper your overlay to meet a surface that is flush, it is not a problem. The overlay material without pea gravel can be applied successfully in a layer as thin as 1/8 inch! Just make sure that it has a good amount of cement in it. If you dilute this thin layer with water, it will surely fail.
If you are doing an overlay that contains pea gravel, you will need to mix a batch of overlay that just contains sand. This overlay will be blended into the gravel batches as you get close to the surface you are working towards. In other words, you may wish to start to taper your overlay four feet away from the flush surface. The last four feet of overlay will then contain lesser and lesser amounts of gravel. The final foot may be just the pure sand mix.
The Paint
OK, the stuff is mixed and we are ready to go. Well, did you have your helper mix up a batch of cement paint? Great! Is the surface damp? Wonderful! The helper should start to paint the old surface just ahead of the individual who is applying the overlay. Don't put paint down that can't be covered with overlay concrete within five minutes!
Screeding & Finishing Tips
Use a straight 2x4 or other board that will stretch beyond each form board by one foot. This is how you level off the overlay material. Start at one end. Using a back and forth motion like sawing a piece of wood, slide the board over the form boards while you advance it like a bulldozer. Fill in any low spots as you go.
Within a matter of minutes, maybe a half hour, the overlay mixture will get fairly stiff. You can imprint it with your thumb say 1/16th inch. It is time to finish. Use a wood or magnesium float or a broom to give the slab your finish. Brooms are easy. You just lightly drag it over the material. Floating requires some technique. Don't press too hard. Use a circular motion and lift the leading edge of the float so it doesn't dig in.
After you are finished, spray the surface with curing compound or cover it with plastic for four to five days. Rapid moisture loss will weaken the overlay! The following day, feel free to lift the plastic and mist the concrete. Keep the top surface damp and you will have an awesome surface!