Sample AsktheBuilder Bulletin

Bulletin 80 Concrete Patching

Copyright 1995 Tim Carter

Concrete Patching - - Manufacturers of Patching Compounds, Additives, Epoxies & Tips

Concrete, what an amazing material! I can't say enough about it. Think of it for a minute. Here is a material that you can make out of four basic ingredients (sand, gravel, cement and water). Once mixed, it can be placed with relative ease (because it is in a semi-liquid state). Then, when dry it can become hard as a rock! There aren't very many other materials I can think of that possess this capability.

Expensive Stuff

Concrete is made from basic, inexpensive raw materials. However, transportation and placement of these materials is costly and labor intensive. Because of its high cost and durability, people expect concrete to last for a long time. This is not an unreasonable expectation, as I have seen concrete 50 plus years old that is in very good shape.

But. . . sometimes things go wrong. Your concrete drive, sidewalk or patio may experience a popout (depression caused by a piece of stone that explodes for numerous reasons). Those living in cold climates may experience spalling, a condition where the top surface of the concrete peels off. A corner of a concrete step may crack and fall off due to a handrail post expanding (rust and/or freezing expansion). In any event, a patch can be employed rather than replacing an entire segment of the concrete.

Challenging Task

I have seen numerous attempts at patching concrete. The majority of them have failed miserably. There are many reasons for patch failure. I'll try to cover some of the most persistent causes.

Concrete, in its original form (when first mixed) sticks together because of the cement. When the cement is mixed with water, a chemical reaction begins that is really pretty neat. Very small crystals begin to grow. These crystals interlock with one another and lock onto the pieces of clean sand and gravel. Also, when concrete is mixed, there is usually lots of extra water around to help keep the crystals growing. And grow they do, as the crystal growth slows down but can continue for years.

However, when patching, these two conditions are not always present. The area to be patched may be dirty and bone dry! If this is the case, there is a great chance that the patch will fail.

Water, water everywhere...

Remember when I spoke above of the growing crystals? The same thing happens, to a large degree, with many concrete patching compounds. They also need water for their crystals to grow.

Many people forget that concrete can and does absorb water. You can demonstrate this easily by getting on your hands and knees. Do this and place a drop of water on a piece of concrete. Observe what happens. The water, in almost all cases, readily soaks into the concrete surface.

When you place water-based patching compounds on dry concrete, the concrete robs the water from the patching compound. No water, no crystals. No crystals, no bond. It is that simple.

Dirt also gets in the way as well. If dirt blocks the crystals from bonding to the concrete to be patched, all that happens is that the crystals bond to the dirt, not the old concrete.

Additives / Bonding Agents

To improve the chances of a patch sticking to old concrete, there are two categories of materials that you should consider. One category is additives and the other is bonding agents. They work towards the same goal, but they do it very differently.

Additives are chemicals or compounds such as rubber, vinyls, acrylics and different polymers that are sometimes added to portland cement mixtures. All they do is simply make the concrete mixture stickier. These compounds can be in a dry form premixed with a patching compound, or a wet milky liquid that you add to your patching compound. In either case, they work quite well when applied to a clean surface.

When using concrete patching compounds that contain additives, be sure to follow the instructions carefully. Some of these compounds must be applied to dry concrete surfaces, while others instruct you to wet the area to be patched. You must pay attention!

Bonding agents are glues that are applied to the old or damaged concrete surface that is going to receive the patch. These are almost always liquid compounds that you simply brush onto the clean, dust free area to be patched.

Once again, you must follow directions to the letter to achieve the best results. It is possible to use both compounds to maximize your chances of success. In other words, you can purchase a patching compound that contains additives - these are usually labeled as containing vinyl or acrylic,etc. - and use it in conjunction with a bonding agent. Always check the labeling to make sure the materials are compatible.

Epoxies

If you really want to go all out on your patching project, consider epoxies. These are no different than regular epoxy. You simply mix equal parts of a resin and a hardener together, often with a sand aggregate. You apply it and BINGO, super patch! The problem with some epoxies however, is coloration. You may not be really excited about the finished color. Some are white, beige, and very light grey. In contrast, regular Portland cement patching compounds dry to a medium grey.

The Old Stand By

Guess what? You can use just plain cement, sand and sometimes pea gravel to patch that hole. If done properly (50 percent cement - 50 percent sand and/or gravel), your patch will perform just fine.

Concrete Repair Tips

Preparation

As you might imagine, the prep work before mixing your patching material is the most important part of the job. This is really true of most building and remodeling jobs.

Most repairs on flat surfaces, such as a driveway, patio or sidewalk, consist of filling a depression or hole. The hole usually has tapered sides. These tapered edges can cause real problems for the long term durability of the patch. The patching compounds thin out at these spots and can easily peel or fail leaving an unsightly second area to patch the following month or year.

I have had the best success patching when I alter the sides of these holes. This can be done with either a chisel and a hammer or a saw equipped with a masonry blade. NOTE: Always wear eye protection and/or ear protection when doing this type of work. Small pieces of concrete, dust, metal or masonry blades can cause severe eye injury. Hearing loss is a real threat as well.

The challenge is to remove the taper from the edges of the hole. If you are successful, the finished edges will be 1/8 inch thick or so instead of tapering to a feather edge.

Mixing the Patching Materials

Always follow directions. Most compounds should achieve the consistency of cake icing or a very thick gravy (don't eat these compounds!) Only mix enough compound that you can apply in 15 to 20 minutes.

Applying the Patch

When using water based repair compounds, wet the surface to be patched, if you are not using a bonding agent. If using a bonding agent follow directions carefully.

For deep repairs, consider installing hardened nails in the depression. For extra deep repairs, drill a 1/2 inch diameter hole and pound a 1/2 inch piece of reinforcing steel into the hole. These items will help hold the patch in place. Be sure that these pieces of steel are at least 1/2 inch below the top of the patch.

Use a finishing tool (magnesium or wood float, steel trowel, etc.) to finish your patched area. Finishing is an art and takes practice. You may have to wait a few minutes until the patching compound begins to stiffen to achieve the desired results. Practice in some out of the way spot, if in doubt.

When you are satisfied with the patch, cover it with a piece of plastic. Weight the edges of the plastic so it will not blow away and so air cannot blow underneath the plastic. This is very important!! Keep the plastic in place for three to four days.

Weather Conditions

Sunny, hot , breezy weather is the worst time to do this type of work! Many people think it is the best time. These conditions cause the patching compound to dry out too fast. Remember the crystals??? Fifty five degree F weather, overcast and damp is a great time to do this work. If you insist on doing it in warm weather, do it in the early morning. Then, shade the repairs so the sun can't hit them.

Don't attempt to repair concrete in freezing weather. The patches will readily freeze and fail. Use common sense.

Manufacturers of Concrete Patching Products

There are numerous companies that manufacture concrete patching compounds. Some of these are regional and some are national brands. I have listed several national brand companies that make great products. Some also have very informative product literature. For example, the Quikrete Company has a book that may interest you. It is called Build and Repair with Concrete. The Portland Cement Association also has a huge amount of excellent literature on concrete. Go to the bookstore on their web site. Many of the publications are available for free download. At the same time, consider ordering a book called The Homeowner's Guide to Building with Concrete, Brick & Stone. This is a great book that covers building new masonry projects as well as maintenance and repair. No homeowner should be without this book!

  • Abatron, Inc.
    Abocrete - concrete repair product
    Aboweld - epoxy repair compound
    Abocoat - concrete coating product
  • Quikrete Companies
    Vinyl patching compounds, bonding adhesives, concrete acrylic fortifiers, concrete cleaners (acid free), quick setting cement & more.
  • Bonsal Sakrete Concrete
    Complete line of concrete patching compounds and repair/ maintenance products.
  • Tamms Industries Company
    Concrete repair admixtures, bonding agents, and sealers.


Concrete Homes Are Not New

Frank Lloyd Wright home

Concrete Homes | You are looking at an authentic Frank Lloyd Wright home in Amberley Village, Ohio. It is just one-half mile from my own home. Each of those windows is cast into the concrete! PHOTO BY: Tim Carter

DEAR TIM: I would really like to build a concrete home using cast-in-place forms. I am not talking one of the new insulated-concrete-form (ICF) systems that use foam blocks. I can't find anyone who has built a home using traditional foundation forms. Realtors and sales people at model homes look at me like I am from outer space. Is it not a good idea to build a simple concrete home? Why aren't more of them built here in the USA? Mark W., Bushkill, PA

DEAR MARK: Building a home with concrete is nothing new. In fact, there are all sorts of variations on the theme. As for the first home built entirely of concrete in the USA, I can't tell you when that happened but it was no doubt a long time ago. But I can tell you there is a 50-year old cast-in-place concrete home you would drool over that is just one-half mile from my own home. It is an authentic one-of-a-kind Frank Lloyd Wright home that is on the National Register of Historic Places. This drop dead gorgeous solid concrete home takes my breath away each time I see it. Even its individual windows are cast into the concrete!

What is the largest obstacle in building a cast-in-place forms concrete house?

First and foremost I think the single largest obstacle to building with concrete in the manner in which you speak - cast-in-place forms - is the overall cost. It can be expensive to build in this manner and the other subcontractors that come after the concrete people leave often have lots of extra work to do.

The cost issues of building a cast-in-place home are significant. It is somewhat labor intensive to attach interior mechanical systems of electric, plumbing and heating and cooling to solid concrete. Drywall can be directly applied to concrete that is very smooth, but not all traditional concrete forms produce smooth finished surfaces.

Are there energy issues with concrete homes?

There are also significant energy issues with respect to solid concrete or masonry structures of any type. Concrete is a conductor of heat, not an insulator. But when you combine concrete with superb insulation, you connect for a home run. This is why the ICF homes are currently gaining popularity; they have all the positives of concrete and all of the super-insulation aspects many of us who live in traditional homes would kill for.

Because of the extra-thick concrete walls, the typical doors and windows you would use almost always require extra wood and labor when they are trimmed out. The stark exterior of the cast-in-place concrete would have to be disguised with stucco or some other wall covering to ensure your home doesn't appear to be a tilt-up concrete warehouse in an industrial park. I don't dislike tilt-up concrete walls, but your neighbors might not be as tolerant as I.

Connecting traditional wood floor joists can be placed in cast-in-place concrete, but it is not as easy as nailing them to the top plate of wood-framed walls. Insulating the exterior walls of your proposed solid-concrete home can be done, but once again it almost always costs more than placing pre-sized fiberglass batts in wood framed wall cavities. The newer blown-in wall insulation products also prefer a wood or steel framing cavity so the thickness of the insulation remains uniform.

concrete homes

Frank Lloyd Wright specified that the hard paved surfaces around the home were to be red - even the driveway! PHOTO BY: Tim Carter

Don't forget that traditional cement-stucco homes are basically concrete homes. Coarse sand mixed with Portland cement makes a layer of concrete that has nearly the same compressive strength as regular concrete. Perhaps you should consider blending the wood-framing building techniques most builders and subcontractors prefer with a concrete outer skin.

It would seem to me this gives you the look you might want on the exterior as well as the superb maintenance-free outside characteristics. You never have to paint the stucco and if you desire it to be a particular color or want different colors, permanent dry pigments can be blended into the wet stucco. The finished look can be stunningly beautiful.

I also urge you to consider other concrete systems. There are all sorts of imaginative ways concrete is being used to build homes. For example, you can have a solid concrete home built using lightweight concrete blocks that contain vast amounts of air. These blocks remind me of ultra-fine volcanic pumice. These same blocks stack together easily and provide a superb surface for stucco and interior drywall.

You may be able to find a regional company that will build precast concrete walls that have integral interior wood framing that will keep the subcontractors happy. These walls are built in a factory and lifted into place with a crane. They bolt together much like you would connect a kitchen cabinet to an adjacent one. Contact one or more of the associations that promote the use of concrete. I'll bet they will help you build the house of your dreams!

Where can you get more information on concrete and residential uses?

The Portland Cement Association and the American Concrete Institute are two great sources of information dealing with concrete and residential uses of the material. When I attend the annual International Builders Show each year, I commonly visit a gorgeous home built with concrete. When you view the exterior and interior of the homes, you would never realize you were in one whose walls are made with solid concrete or a unique concrete hybrid product.

Concrete is an appealing material because it is so durable. When insulated properly, it requires very little energy to heat and cool. The dense exterior walls are, by nature, soundproof. The benefits of a concrete home are many, you just have to find a builder skilled in working with the material and choose a system that makes sound financial sense.

Column 537

Flagstone Patio Set on Sand

flagstone patio

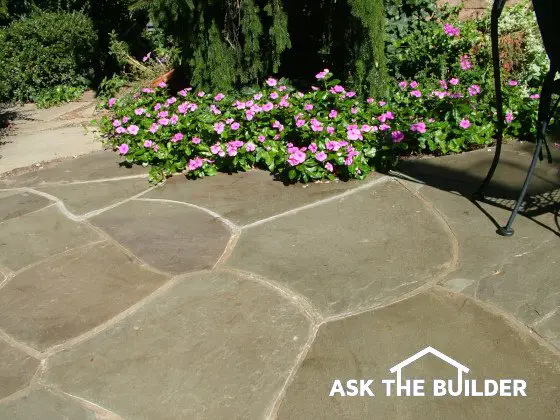
These flagstones are set on a concrete base. The stones have not budged in 13 years and I suspect they will still look swell 50 years from now.

DEAR TIM: Last fall a contractor installed a flagstone patio for me. He carefully laid the flat stones on a bed of sand and then grouted the spaces between the stones with mortar. Well, the flagstone are separating, the mortar is cracking and the patio is a mess. The contractor wants to put a layer of cement over the sand and start over. Will this work? If I had hired you, how would you have installed my flagstone patio? April W., Denver, CO

DEAR APRIL: Years ago the same thing happened to me. I installed thin paving brick on a sand bed that looked like a piece of glass it was so smooth. But ants, moles and freezing weather turned my brick sidewalk into a humpy-bumpy sand-covered disaster. Like me way back then, you are going to have to start over.

First remove and salvage the flagstone. Carefully chip off any mortar that is on the edges. Remove the sand and discard it unless you can be sure it is free of stones and dirt. If you can salvage it, much of it can be used to reinstall the flagstone but the sand will be mixed with Portland cement.

At this point you have two alternatives to solve your problem, although I am inclined to think that one of the methods is far better than the second. This first method, in my opinion, will produce a flagstone patio that can last 50 years or more without any cracks. Once you have determined the finish height of the patio, you need to excavate soil so that you can install a 4-inch thick concrete slab, 3/4 inch thick setting bed of cement mortar and the actual flagstones. Many flagstones are commonly 3/4 inch thick so I would excavate to a depth of 5.5 to 6 inches. Compact the soil at the bottom of the excavated area.

Pour a concrete slab in the excavated area that contains one-half inch steel reinforcing bars placed on two foot centers in both directions. This grid of steel needs to be suspended so that the steel ends up in the lower third of the concrete slab, but be sure that at least one and one-half inches of concrete is under the steel at all points. This steel has tremendous tensile strength and will prevent the slab from developing large cracks that cause the concrete to separate and tilt into separate planes.

To further strengthen the slab, you can dig vertical piers that are 6 inches in diameter and extend below the frost line in your area. These piers act like the legs on a table and help give the patio added support. To prevent the patio and the piers from heaving if frost starts to penetrate into the soil, make the bottom of the piers flare to 8 inches in diameter.

flagstonse patio flowers

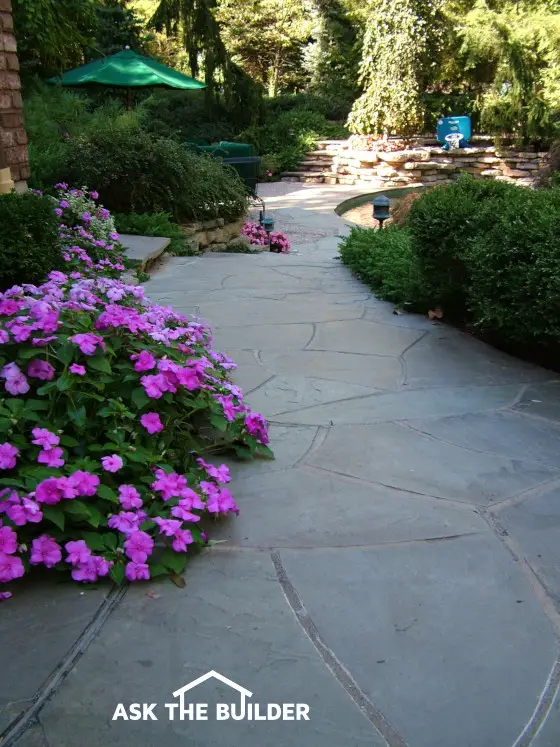
Curving the walkways and edges of the patio and then adding plants that flow over the stones makes for a luscious look.

When you pour the slab, it does not have to be finished smooth. The surface needs to be in the same plane, but it can be left very rough with holes and stones exposed. This rough texture will help hold the flagstones in place when they are set in wet cement mortar.

Within 24 hours of pouring the concrete slab, start to install the flagstones. Use a mixture of Portland cement and sand to permanently attach the flagstones to the concrete. Mix one part of cement to three parts sand. Coarse sand is better for this purpose as it contains pieces of rounded rock about 1/8 inch in diameter. This coarse sand makes a very strong mortar.

The mortar should be the consistency of regular bricklayer's mortar. Do not make it so dry that you have to pound the stones into place with a rubber mallet. If the mortar is just right, a small amount of pressure from your hands floats the flagstones into position. Once the flagstones have set for two days, you can fill the gaps between them with a similar mixture of medium sand and Portland cement.

A second alternative method of installing the patio is to remove the current sand and allow it to dry or become just slightly damp. Blend one part Portland cement with three parts of this sand and reinstall the sand base. Before you install the sand back into the excavated area, generously water the soil so it is very wet. Be sure you install the sand at least 3 inches thick. Level the sand and place the flagstones onto the sand and tamp them into place. Use a garden hose and a nozzle to finely mist the flagstones so that some water flows between the stones into the sand. Do this for perhaps 10 minutes.

Wait at least one week before walking onto the patio to fill the gaps between the stones with the Portland cement and sand mortar mix. This wait period will ensure the sand and cement base has time to harden. The sand base will be immune to attack from ants and moles, but it will not be sufficiently strong to withstand serious frost heaving and/or other soil movement.

The second method of mixing Portland cement with sand works, but it is not as good as the poured concrete base. Thirty years ago, I built my mother-in-law's patio using the sand and cement base method. The patio is in good shape today, but many of the brick are somewhat humpy and bumpy. She likes the look as it reminds her of weathered brick walks she has seen in Williamsburg, VA.

But her patio is different. There is no mortar between the brick. The brick are very uniform and stack closely against one another. There is a strong possibility that the cement mortar joints between individual flagstone that are laid on top of a sand / cement base may start to fall apart if the base starts to crack and shift.

There is very little extra work to install the concrete base. The only extra step is mixing the cement mortar that adheres the flagstone to the concrete slab. This is not as hard as it seems and can be done one wheelbarrow at a time.

Column 536

Installing Ceramic Tile

inlay tile flooring

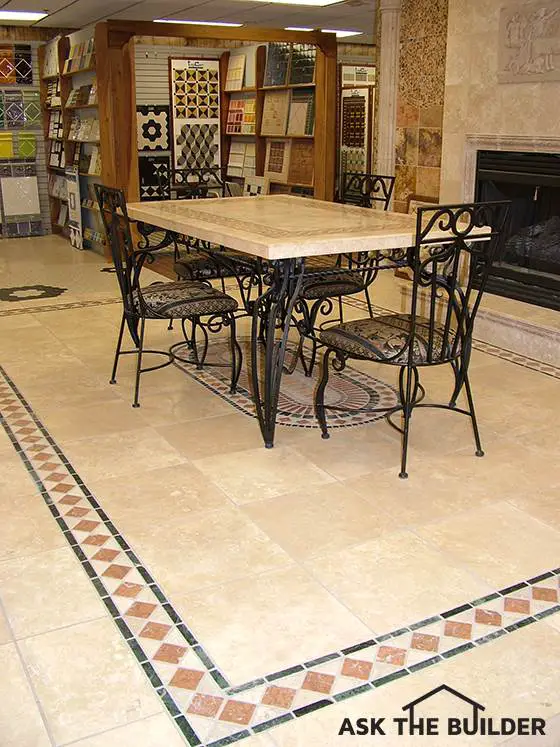
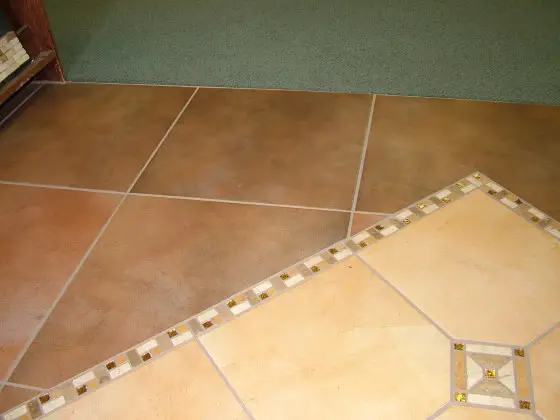
The large tiles on this floor were set on smooth concrete. The smaller inlay tile make for a splendid contrast. ©2017 Tim Carter

Ceramic Tile Installation

DEAR TIM: I have successfully installed ceramic tile in different homes I have owned, but always have worked with tiles that are 12 inches square or smaller. In the first level of my new home I want to install 900 square feet of 18 or even 20 inch square tiles on the concrete slab.

Everyone tells me this is a task for professionals. Is it that hard to work with these giant floor tiles? What can I do to prevent cracks in my tiles? Shelley H., Colorado Springs, CO

DEAR SHELLEY: I think the best analogy I can offer to compare 8 or 12 inch ceramic tiles to the jumbo ones that measure 18 or 20 inches square would be to compare running a race with athletic shoes and then doing the same race fitted with snow shoes.

With snow shoes on you will finish the race, but not without a tremendous amount of difficulty and it will take you much longer to cross the finish line.

The bane of ceramic tile installations in general is rooted in a characteristic all ceramic and natural stone flooring materials share. All of these products exhibit great strength when you squeeze them, but have low strength when you bend or stretch them.

Simply put, if a given tile has a solid base under it that will not flex and you place a heavy object such as a pool table on the tile floor, the tiles will not crack. But if that same tile has a hollow space between it and the subfloor or the subfloor flexes, the tile can easily bend and crack.

CLICK HERE to get FREE & FAST BIDS from local ceramic tile contractors.

The issue of tiles cracking grows exponentially as the size of the tile gets bigger. Small ceramic tiles that are one inch square can be very forgiving but large 18 or 20 inch square tiles demand perfect installation conditions if you want your new floor to be crack-free for the service life of the floor.

Perhaps the most important step is to ensure the surface you are installing the tiles on is in the same plane. Some tile installation guides refer to this as the flatness of the floor. The floor doesn't need to be level as it needs to be perfectly smooth.

Small humps or depressions in the floor can create sinister hollow voids under tiles as you lay them. It is imperative you take the extra effort to eliminate the humps by filling in all depressions with a floor leveling compound.

The best tool to use to discover and eliminate high spots and depressions in floors is a precision aluminum or magnesium straight edge. These tools can be rented and when placed on a concrete or wood floor they immediately expose any imperfections in the floor.

If you employ a flashlight and lay it on the floor and position the light beam so it shines parallel to the floor and aim it towards the straightedge, you will quickly discover even the slightest low spots in the floor.

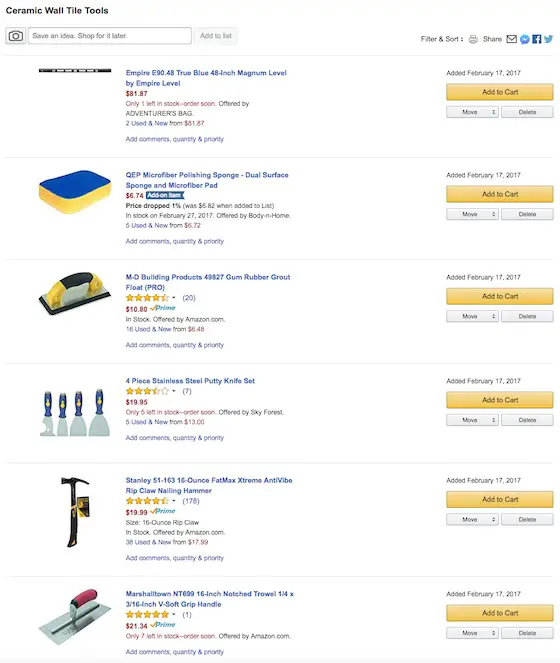
Full Tile Tool List

Here's a list of tools that I've used for years to successfully install thousands of square feet of ceramic tile.

  • tape measure
  • pencil
  • tile cutter
  • nippers
  • a 1/4 by 1/4 inch v-notched trowel
  • a hammer
  • some 6d finish nails
  • 8 lineal feet of straight 1/4 inch wood lattice strip
  • putty knife
  • 3-inch wide-bladed scraper
  • grout sponge
  • rubber grout float
  • several buckets
  • accurate 4 foot level

Click the image below to BUY all, or some, of the tools in the above list.

ceramic tile tools list

CLICK THIS IMAGE NOW TO ORDER ALL THE TOOLS YOU NEED TO DO CERAMIC TILE.

Once you have filled in all of the low spots with a cement-based floor leveling compound and the floor is smooth as a silk scarf, it is time to install the floor tile. It is extremely important you use the correct notched trowel to spread the cement-based thinset adhesive.

I suggest you use a one-half inch V-notched trowel. This trowel applies a generous amount of thinset for these large tiles.


If you're getting ready to install ceramic tile or have someone install it for you, my Ceramic Tile Installation Checklist is a must. Avoid making costly mistakes with the help of this document. I offer a 100% Money Back Guarantee.


colored tile inlay ceramic tile

Look what you can do with different colored tile as well as different sized tile. Think outside of the box. You do not have to use the same color and sized tile in one area. Mix it up!

The secret trick is to also skim the bottom of each tile with the thinset adhesive before you lay it on the floor. Use the flat side of the trowel to apply the thinset to the tiles and then to scrape off the excess.

This extra step fills in any hollow areas under the tile with thinset. It also assures you that each tile has nearly 100 percent contact with the floor beneath it.

I feel another surprise in store for you is cutting the large tiles. Many standard wet diamond saws may allow you to cut the tiles, but you may not be able to use the saw's sliding table aspect to help you maintain a straight cut.

All cuts may have to be free hand. If you do not have access to a wet diamond saw, you may have to use a traditional glass cutter unless you can find a large tile cutting tool made for the jumbo tile. The store where you purchase the tile may rent one to you.

Getting a floor perfectly flat or in the same plane also provides other visual benefits. Many ceramic tiles have a satin or even high-gloss glazed surface.

These shiny surfaces readily reflect light. If different tiles are tilted one way or another, your eye readily sees this as light hits the floor at a low angle. This often happens when sunlight streams into a room either early or late in the day.

But if the floor is flat and the thinset is applied evenly, all of the tile surfaces will reflect light the same direction. The glossy surface will telegraph the flatness of the floor beneath it.

It is vitally important to install reinforcing steel in any concrete slab that will be covered with ceramic tile. The steel helps prevent cracks in the concrete and holds the slab together in the event a small hairline crack does develop. Special crack isolation fabrics installed between the concrete slabs and the tile also help prevent future cracks in the tile.

CLICK HERE to get FREE & FAST BIDS from local ceramic tile contractors.

Column 535

Fiberglass Doors

fiberglass door

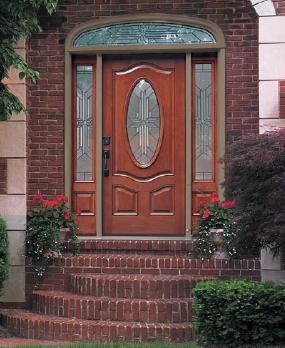
This is a fancy fiberglass door. There are thousands of possible combinations of wood grain, color, glass options, etc. I guarantee you will find one that will look perfect for your home.

DEAR TIM: I need to replace the outside doors of my home because they are in poor condition. I am very confused as to the type of wood I should use. I love the insulating qualities of solid wood. Different contractors have suggested oak, mahogany, teak and walnut. What type of door would you install if you were bidding the job? Why would you make that particular recommendation? Mary M., Knoxville, TN

DEAR MARY: This is an interesting proposition. Would you consider my proposal if I sold you a door that was a better insulator than solid wood? Would you consider my offer if I could give you exterior doors that would not rot, warp, crack, split or twist as a solid wood door might over time? Would you be interested if these particular doors looked more like wood than wood itself, ones that have realistic grain that matches real wood? Would you be interested if I told you that there was an infinite amount of stain colors and a virtually unlimited amount of door styles and stained and beveled glass options? I thought so.

Are fiberglass exterior doors a good alternative to a wood door?

Before you make up your mind to use solid wood, you should give a serious look at the highest-quality fiberglass exterior doors. These products, in my opinion, are in the top 25 best all-time home building products. They deserve an honored place in the Hall of Fame of truly innovative and superb home building products.

I do not offer this praise lightly. Many products strive to constantly imitate wood. I have seen cheap interior doors that have a bogus wood-grained pattern stamped into them. Who hasn't seen metal doors that have had wood grain embossed in them? Vinyl, aluminum and other sidings for years have had fake wood grain patterns to try to fool consumers. The latest are composite decking materials that are trying their best to imitate real wood. But all have fallen woefully short in my opinion. They are wood impostors.

Can a fiberglass door imitate real wood?

But the highest quality fiberglass doors successfully imitate real wood. I recently saw an new exterior fiberglass door that was so realistic, it even copied the ultra-fine mitered joint line where two pieces of wood trim cut at 45 degree angles met to make a 90 degree angle. You could actually feel the micro cuts of the wood grain in the fiberglass. It reminded me of some of the new movies where computer simulated scenes are almost impossible to tell apart from a real one.

Add to this the deep, rich custom-formulated stains and clear coat finishing kits and you have a recipe for some of the most beautiful exterior doors I have ever seen. My biggest regret is that these doors were not available when I was building. My customers would have killed to have doors such as these.

The good news is you and they can. Fiberglass exterior doors are not only perfect for new homes, but they are excellent choices for remodeling jobs such as yours. A contractor can easily find a high-quality fiberglass door that will enhance the look of your home much more than you could ever imagine.

CLICK or TAP HERE to get FREE quotes from local companies that can install your new fiberglass door.

What architectural styles are available for fiberglass doors?

These doors are available in a multitude of styles to match any architectural style. I don't care if you have a Queen Anne Victorian home like mine or a southwest adobe mission style home. There is a perfect fiberglass door with or without gorgeous stained or beveled glass.

I can assure you that the next home I build will have fiberglass doors. I love the look and I love the fact they are so low maintenance. If you come to visit me in the future you will undoubtedly touch the door's surface and wonder: Is it real or fiberglass?

Do all fiberglass doors have the same quality?

Beware, not all fiberglass doors are the same! Only the high-quality fiberglass doors get my praise. There are some low-quality fiberglass doors that just do not offer all of the things I like about the better ones.

Wood doors are superb and all of my current exterior doors are wood. But I have had problems with my wood doors developing cracks and bowing. And this happened even though I followed all of the steps to seal the tops and bottoms of the doors when they were installed. The door leading out of our kitchen must be securely dead bolted in the winter to stop drafts because it is badly bowed and does not meet up against the weatherstripping.

Fiberglass doors are stable. They will not warp, bow or twist. They are foam filled and are excellent insulators. You can apply fancy hardware to them just as you would a wood door. Fiberglass doors can be painted if you so choose. I prefer the rich custom formulated strains myself. I urge you to go look at some high-quality fiberglass doors now. But be careful, they can be intoxicating.

Column 533

Glass Block Greenhouse – It’s Easy With ProVantage

Glass Block Greenhouse

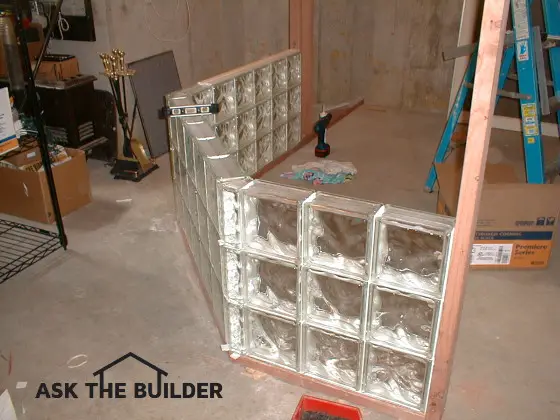
Glass Block Greenhouse | The Pittsburgh Corning glass block stack easily if the first course is plumb and level. Use their ProVantage plastic spacers.

Glass Block Greenhouse - So Easy With Caulk

DEAR TIM: I love the look of glass block and have several projects I am thinking about. One of them is somewhat bizarre - a playhouse for my children. But the process of building with the glass block intimidates me as I have never laid brick or block before. Are there some tricks you can share that will enable me to use this wonderful product that is sturdy but allows abundant light to get into spaces? Andrea G., Lexington, KY

DEAR ANDREA: Wow, did you hit the nail on the head, not once but twice! You have no idea how hard it used to be to work with actual glass block. It was installed in the same manner as brick and block using mortar and thin reinforcing steel.

Is It Hard to Install Glass Block with Mortar?

Yes, it's incredibly hard to install glass block using traditional brick or block mortar.

If you think laying brick and block requires skill, you have no idea how much extra talent you must possess to lay glass block in mortar. Brick and block have an invisible characteristic that actually helps masons install the brick and block. It is called suction.

CLICK or TAP HERE to get FREE BIDS from local GLASS BLOCK contractors who can install this glass block.

What Does Suction Do?

The porous nature of brick and block is such that when the masonry unit comes into contact with the wet mortar, some of the water is instantly absorbed by the brick and block. It is similar to the way paper towels absorb spills. This suction allows the mortar to stiffen rapidly so that you can continue to lay course after course without disturbing the work in place.

Do Glass Block Have Suction?

Glass blocks have no suction whatsoever. The mortar mix must be the perfect consistency - neither too wet nor too dry. You can usually only lay a few courses and then must stop so that the accumulated weight does not squeeze out mortar in the first courses you laid.

Is There an Alternative?

Yes, there's an alternative way to install glass block using caulk and plastic spacers.

Instead of taking years to acquire the skills of a master mason, you can master installing glass block in minutes.

The better method is to put the glass block together the way I did when I recently built a glass block greenhouse for my wife's orchids. The glass block is the exact same one that has been used for years, but the manufacturer developed precision plastic spacers that create perfect horizontal and vertical spacing for the block.

What is the Most Important Step?

The most important step in the entire process is getting the first course of glass block both level and plumb. The manufacturer recommends, no insists, that you build a curb off the ground to install the first course. I did this by using a 2x6 piece of redwood that I got perfectly level using cedar shims. This level base made the installation proceed with absolutely no problems.

What is the Best Caulk to Use?

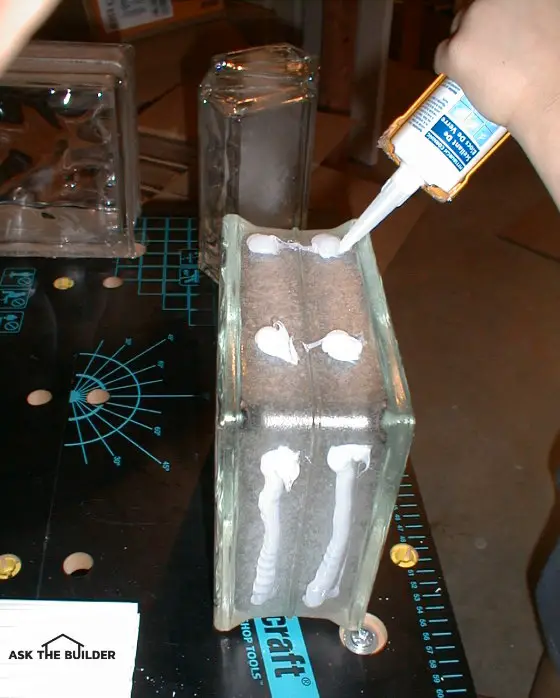
Silicone caulk is the best to use to install glass block. Instead of using traditional mortar to connect the block to each other, you simply use clear silicone caulk. I was amazed at how easy it was to assemble the block. In fact, it was so easy my 12-year-old daughter helped with the entire job. Not only did she apply all of the silicone to the blocks, but she also placed blocks on the walls. This amazing technology is both simple, effective and the end result will take your breath away.

applying caulk to glass block

My 12-year old daughter loved squirting the silicone caulk onto the block. Reference: June 22, 2014 Newsletter.

Do you Grout the Joints Between the Glass Block?

Once all of the glass block are in place and the silicone has cured for a short time, you grout the spaces between the block with a mortar-like material. It is nearly identical to sanded grout you might use for ceramic tile floors. Because of the super-smooth surface of the glass block, is very easy to wipe the excess grout film from the surface of the glass block.

Once the grout hardens, you can come back with a damp sponge and remove any light grout film. It is also advisable to take an old cotton towel and buff the surface of the block to make them crystal clear.

Watch this video to see how to grout the glass block:

Can Glass Block Create Other Projects?

Do you want to know how easy and fun it really is to use this new system? When my daughter and I installed the last block we both looked at each other and said, "What can we do next!" We started thinking of cool projects and yours was one that was discussed. The glass block system has special 90 degree outside corners that would allow you to easily build a square or rectangle playhouse for your children. I used special 45 degree angle block corners to create a cool clipped corner inside my greenhouse.

Glass Block Doghouse

Another project I brought up that everyone thought was off the wall was using the glass block to create two or three walls of a dog house. As crazy as this sounds, it just may have some merit. The glass block, silicone and grout are 100 percent waterproof. In colder climates when the sun is low in the sky, the glass would allow sunshine to warm the interior of the shelter.

An insulated concrete slab could capture and retain the heat. A large roof with generous overhangs would stop the summer sun from making the dog house into an oven. I'm sure you will uncover lots of cool projects to use this new glass block system if you stop and think about it.

glass block greenhouse

This picture doesn't do the room justice. I need a wider angle lens. The blue sky and cloud ceiling panels rock!

Is This System Revolutionary?

This new glass block installation system is perhaps one of the coolest things I have seen in a long time. I saw it at a recent convention and was immediately attracted to it since I knew how hard it was to install glass block using traditional mortar. The plastic spacers are so well-engineered that the spacing between individual glass block is maintained perfectly as long as you apply the correct amount of silicone caulk.

Companion Articles:  Glass & Acrylic Blocks Do Many Things, Glass Block Installation, Glass Block, Glass Block Manufacturers

Column 532

Build Arch Doorway Using Plywood and String

arched opening

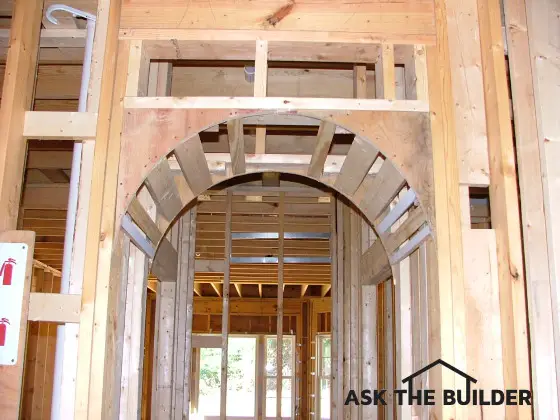
Build Arch Doorway | This arch doorway is more circular than elliptical, but the method to create any curved opening is fairly standard. Note the flat 2x blocking between the pieces of cut plywood.

DEAR TIM: I have quite a few square openings between rooms in my home. These openings do not have any doors but do have finished wood jambs and wood trim as if there was once a door in each opening. I would like to transform these openings so they have gentle curves and are smooth-finished drywall or plaster. How can this be done? - Maria G., Tuscon, AZ.

DEAR MARIA: It's easy to build an arch doorway, especially if it's new construction. I outline the steps below.

This task is so simple you'll be astonished once you are halfway through it. The best part is that it does not require any fancy tools to speak of. If I were invited to help, I would only bring my wide pry bar, a standard circular saw, a small jig saw, a hammer, some string, a pencil and my drywall finishing tools. Many homeowners already own most of these tools. If you don't, I'll bet a friend or neighbor has the tools you need.

How Do You Salvage Wood Trim?

The first step in the process is to remove the existing trim and wood jambs. Try to salvage these if possible, as the trim may come in handy down the road if you damage another piece of door casing somewhere else in the house. Carefully tap the flat blade of the pry bar under the edge of the casing trim and try to pry it away from the wall.

Once you've pried the trim off the wall, do not hammer the nails backwards through it. Doing this often causes large chunks of wood to pop off the face of the trim. Instead, use a linesman's pliers to pull the nails through the wood trim from the back side. This is not as difficult as you might think, unless the trim is made of a hardwood.

Watch this video to see how to best remove finish nails:

Why is Wall Width Important?

With the wood jambs out of the way, you should now be able to tell how thick the wall is all around the opening, and to see how the wall was built. Check the wall width at several points around the opening and find the narrowest dimension. If your home is less than 30 years old, the wall might be 4-1/2 inches or 4-5/8 inches thick. If it's an older home with real plaster, the wall could easily exceed five inches in width.

How Do You Create the Outline of the Arch?

The frame for the archway is going to be prefabricated on the ground or a workbench. It will consist of two pieces of plywood, cut in the shape of your arch, spaced apart by framing lumber. If you are going to cover this arch frame with half-inch drywall on each side, the arch frame needs to be one inch narrower than the narrowest point of the current wall opening. If your current wall thickness measures 4-1/2 inches, you are in luck. You will be able to use two-by-three framing lumber and half-inch plywood to construct the arch frame.

Use Plywood or OSB

The first step is to cut blanks - rectangular pieces of plywood - which will be re-cut to create the sides of the arch. If the wall opening is six feet wide, and if your planned arch has a curve one foot deep (i.e., the lower tips of your arch come down one foot from each corner of the existing opening), then you need two pieces of plywood one foot by six feet.

How Tall Should the Arch Be?

The hardest part is next. You need to create the arch shape you desire on one of the pieces of plywood. It's critical that the apex of your curve come no closer than 1-1/2 inches to the top edge of the plywood blank. This spacing allows you to place a continuous two-by-three along the top of the arch frame between the two pieces of curved plywood. You can substitute thinner wood spacing material if you desire, but it will still need to be the same width as the two-by-three.

How Do You Create the Arch Template?

You can create an arch template by bending a thin, flexible piece of wood into the desired shape and then tracing along its edge onto the blank. Or you can use a trick you may recall from high school geometry for drawing an ellipse. Drive two nails into a separate piece of lumber or the remainder of the plywood sheet. Make sure the nails match the width of the arch frame. With a piece of mason's string, tie a loop that is big enough to place around the two nails with a bit of slack.

If you put a pencil inside the loop and push it away from the nails until the string is taut, then move the pencil in a clockwise motion, allowing the taut loop to guide the pencil, you will trace the shape of an ellipse. For your arch, you will trace only a segment of an ellipse, but the principle is the same.

 CLICK or TAP HERE to get FREE quotes from local carpenters who can build an arch doorway.

Orient one of the plywood blanks so its edges are touching the nails. Depending upon how much slack is in the loop, you can create oval shapes with different radiuses. Place a pencil inside the loop and push the string away from the nails, keeping the string taut. Trace a graceful arch.

What Saw Should I Use?

Once you have created the arch shape, use the jigsaw to cut the pattern. Then nail small pieces of two-by-three between the two pieces of plywood on the three straight sides and at six-inch intervals along the bottom of the curve of the arch. When complete, the sturdy arch frame is rigid and one inch narrower than the current finished opening. A helper holds the arch frame in place as you toenail it to the existing rough walls studs. Cover the arch with drywall and finish it to a texture to match the existing walls.

Circle or Oval - Which is Better?

True circular arches are rare. Almost all arches are oval shaped, and these are not hard to do with the string jig method. The key is determining the amount of slack in the string to create the apex of the oval from the bottom spring line. The spring line is the invisible or imaginary straight line that connects the bottom tips of the arch.

To ensure the arch is centered and consistent in shape, you can also create a grid on the plywood of equally spaced lines. When the shape is perfect, each half of the arch is a mirror image of the other. You can see the curved line pass through the same part of each square or rectangle created by the grid lines.

Aerobics Before Building Prevents Injuries

I notice as I get older it is a struggle to stay in shape. Just recently I constructed a gorgeous glass-block greenhouse for Kathy and those darn boxes of glass block were heavy. Add to that all of the bending and kneeling I had to do for the initial layout and you have a recipe for temporary muscle tears that create painful and nagging injuries.

Down the street from my house, you can find the Fisk home. Steve and Diane have lived there for every bit of 15 years. Diane has always been an aerobic instructor and you can tell by looking at her! I am so envious as she looks so fit and she always has a bounce in her step. I think it is the endorphins that are released after a workout.

Anyway, she has always tried to get me to come to her classes, but I always seem to have an excuse. To be honest, I rarely see any men at them and I have to be honest, I would feel a little embarrassed. But I think it is time to leave my pride at home and give aerobics a chance.

I don't know about you, but I hate it when I pull a muscle. I am miserable and often the job gets delayed or doesn't get finished for weeks. So I decided to do some research on the topic and stumbled across a pretty cool website called AboutAerobics.com. If you are a beginner like me, this may be a great place for you to start learning more about this fascinating way to help keep your body in shape.

I guarantee you would start doing aerobics if you saw how happy and cheerful Diane Fisk is. I swear it has to be aerobics because our houses are both connected to the same water main, so it surely isn't the water she drinks!

Stain Solver

Author's Note: Stain Solver was a brand of oxygen bleach. The owners of the company announced they were going out of business in January, 2025. As of June, 2025 it was impossible to purchase Stain Solver.

You can make your own oxygen bleach using this recipe. CLICK HERE to get the recipe.

Oxygen Bleach

Organic * Color-Safe * Oxygen Bleach

Your Everyday, Everything Cleaner

You're here because you want to know more about Oxygen Bleach. That's a good thing!

There are many oxygen bleach products you may see in grocery stores, big box stores or on TV commercials. The problem you have is figuring out which one is best.

Oxygen bleaches are powders that have been around for decades. They're used each day by hospitals, hotels, and giant uniform companies to clean garments, sheets, pillows, and any other fabric. If you used chlorine bleach on these things, they'd be ruined within a few months.

Oxygen bleach is color-safe and fabric-safe. It's non-toxic. It's safe around plants. It's simply an amazing product all homeowners should use. 

High-quality oxygen bleach safely and powerfully blasts away dirt, stains, and odors from anything water-washable. Mixing the pure-as-snow powder with water creates a fizzing, cleaning solution that’s tough on stains and odors yet gentle on your stuff.

The all-natural and organic solution dissolves stain and odor molecules, leaving your possession restored. Whether a 10-year-old deck, wine-stained carpet, heirloom linens or filthy grout, Stain Solver can save it.

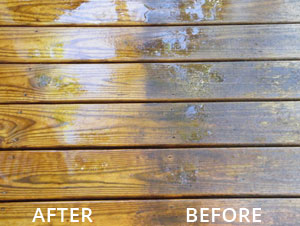
b4After235x209
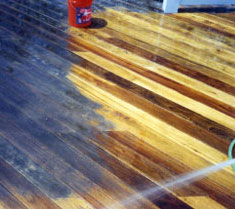
"We used your Oxygen Bleach on the deck of our summer home in New Jersey with amazing results. The photo clearly shows the striking difference between the mildew-covered decking and the clean wood. We loved your advice about using a garden hose instead of a pressure washer." - Gail M. from PA


See all BEFORE & AFTERS »

Click on any of the images below to view the before and after stories provided by people who have used my oxygen bleach recipe.

Clean with Stain Solver Stain Solver
Stain Solver Tile Stain Solver Deck cleaning
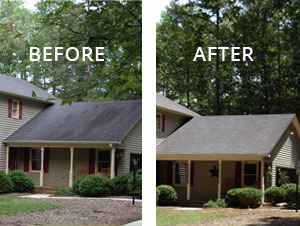
Stain Solver Roof cleaning before & after

Oxygen bleach solves many problems. It cleans and renews safely most anything from decks to grout, to whitewalls and old, yellowed, but favorite sweaters, to laundry and pet disasters .. and more!