Cracks in a New Chimney

crack in brick chimney

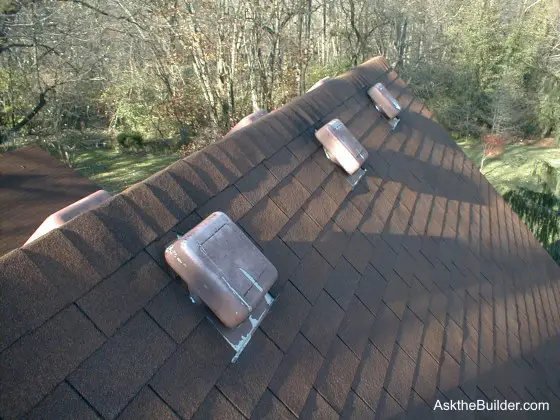
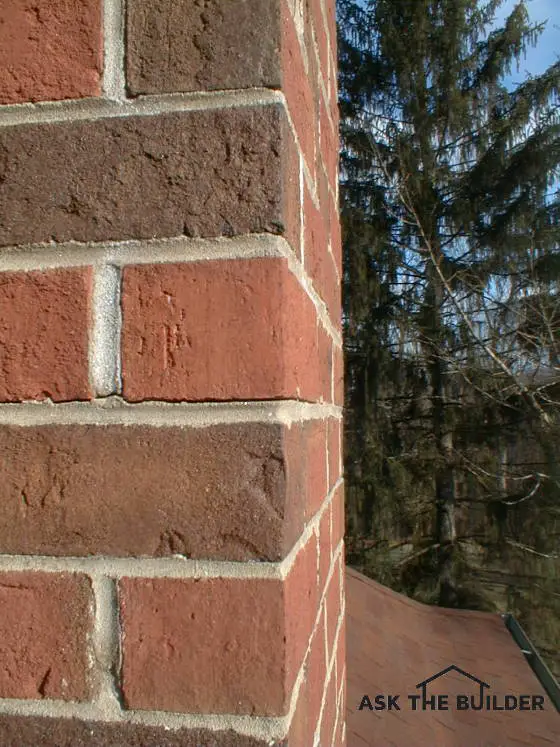
Cracks in a New Chimney | The crack in this chimney could be a problem.

DEAR TIM: My six-month-old block and brick chimney has developed some cracks. These 30 - 36 inch long cracks run vertical through both the brick, block and mortar joints. Should I be concerned? Are the cracks normal settling? Is the bricklayer to blame? Some joints weep moisture after a rain. Is that normal? Nick R., Middlebury, VT

DEAR NICK: Cracks that pass through either brick or block concern me. A hairline crack that appears every now and then in either a vertical head or horizontal bed mortar joint may be a simple shrinkage crack. But a long, continuous crack such as the one you describe most certainly is something to investigate.

CLICK or TAP HERE to get FREE BIDS from local masons to repair your chimney.

How Strong is Brick?

Brick, concrete block and even stone are very strong materials when you attempt to squeeze or compress them. Some can have compressive strengths that easily exceed 5,000 or even 7,000 pounds per square inch(psi). Some granites have an incredible compressive strength of 28,000 psi. But subject these same materials to a different force - tension, and they can readily crack. Tension is a bending or stretching force.

What are some causes of chimney cracks?

Settlement could be the cause of failure. The soil upon which the chimney rests might not be strong enough to support the enormous concentrated load that is being placed upon it. The combined weight of all of the brick, block, mortar can be in the tens of thousands of pounds for an average chimney, especially one that has been built correctly where the masonry is solid around the flue liner.

How Big Should a Chimney Footing Be?

The concrete footing for the chimney may also be inadequate. Most chimney footers should be a minimum of twelve inches thick and extend one foot or even 16 inches on all sides of the actual footprint of the chimney. Steel bars, 5/8 inch in diameter, should be placed three inches up from the bottom of the footer. These bars should be placed every 16 inches on center in both directions. Be sure these bars do not droop or fall to the bottom of the concrete during the pouring process.

Can Brick Be Defective?

The actual brick or block may have been defective. But the likelihood of placing several defective masonry units on top of each other where the defects are in perfect alignment is a one-in-a-million possibility in my humble opinion. There is a possibility the mortar below the defective area is of poor quality and the weight of the masonry above it caused the cracks to appear. This is also a low-probability cause.

CLICK or TAP HERE to get FREE quotes from local companies to repair your chimney.

Did the Wind Crack My Chimney?

Believe it or not, the cracks can be wind-related. The mortar that is used to cement the bricks and blocks to one another does not have instant initial strength as the chimney is built. It takes weeks and even months for the mortar to develop its full strength. Strong winds on a new chimney can exert a considerable tension force within the masonry. Block and bricklayers know this and the smart ones often insert steel rods within the chimney as it is being built to help resist the force of the wind. These same steel rods are vitally important for those that build chimneys in seismic zones.

Are Weeping Brick Joints Normal?

The weeping joints are somewhat normal. Rainwater, especially that rain blown against the chimney, soaks into brick veneer and brick and block chimneys. This liquid water sometimes dissipates into the masonry, but large amounts of water can work its way down the chimney and find a pathway back to the exterior through a mortar joint.

Horizontal Crack in a New Chimney

The crack travels the entire length of the horizontal bed joint.

Can water leak into the chimney crown?

But liquid water trapped in a Northeast chimney in the winter months is a very bad thing. If large amounts of trapped water freeze, the expanding water can blast the chimney apart. You must make sure the top of the chimney - the crown - is watertight. If there are cracks, you can buy wonderful synthetic polymer compounds that have a color and texture that matches the chimney crown.

These trowel on over the existing cracked crown and provide years of leak-free performance. The actual face of the chimney can be sealed with new clear sealers and compounds that will bridge cracks up to 1/8 inch in width.

Are Cracked Chimneys Dangerous?

A chimney that has been weakened by a building defect or even natural deterioration is a dangerous thing. They can collapse with very little notice and cause serious bodily harm or death and do enormous structural damage to the average house.

What is the Best Repair Mortar?

The best repair mortar for brick chimneys is one made with hydrated lime and sand. This is what the brick masons of old used. When the hydrated lime hardens, it's simply limestone and you know how hard and durable limestone is. CLICK or TAP HERE to have hydrated lime delivered to your home.

hydrated lime

This is an excellent hydrated lime. It's a fine white powder and it's going to look great on your home. CLICK HERE or THE IMAGE TO ORDER SOME RIGHT NOW.

It is always a good idea to have a suspect chimney inspected by a residential structural engineer, a seasoned chimney sweep or bricklayer who has 20 years or more experience building chimneys. Rebuild the chimney in fair weather when outdoor temperatures are in the 60 - 75 F range.

Column 495

AsktheBuilder – NewsGator Daily Tips

I get many emails each day. Some are desperate, others are funny, many are cordial. I try to answer all of them and often the answers reflect my mood. But more importantly my answers pull on my 30-plus years of hands-on experience and all of the technical information I have uncovered in my years as a home-improvement journalist.

Each day, I select a unique email from a real person and post it to a special Premium RSS feed that is generated and hosted by NewsGator Online Services. These daily tips come to you automatically and just one of them might save you hours of searching or better yet, hundreds or thousands of dollars!

Here are a few examples of the emails I get and my answers:

Dear Tim,

Merry Christmas! My husband and I are in the process of building a home in North Carolina. We will have about a 400 ft driveway to contend with and are very interested in the "tar and chip" driveway concepts. It may resolve both the aesthetics and cost efficiency we long for. How does the cost compare to that of an asphalt or concrete driveway? Is it considered a hard surface driveway or is it like loose gravel.....we would appreciate any feedback you can provide. Thank you, Nancy

Nancy,

You are going to love tar and chip. I have installed this surface for years for customers and have one myself. There are thousands of miles of main roads, secondary routes, and private drives in the USA that are tar and chip. It is a magnificent surface that requires no maintenance.

You can have the loose gravel look or that of smoother blacktop with no loose chips. The choice is yours. If you want the full story on tar and chip, read thefirst column I did on the topic years ago. I then did a follow-up column as I kept getting requests from people to re-visit the topic.

As for cost, tar and chip is far less expensive than regular blacktop. It costs only 15 - 20% of what concrete might cost. The savings are a function of the size of the job. Just 5 months ago I redid my own driveway with expensive brown Merimac chert from Missouri. Even with that gravel, my cost was less than one dollar per square foot! Since your driveway is so long, you should get a price less than $1 per square foot.

Tim Carter


Here is an amusing one. I am quite sure the answer was comforting to the travel bugs!

Hey Tim,

We traveled to Orlando, Florida this past week and noticed termites in our hotel room. Yesterday, we left the hotel and boarded a plane back to Toronto, Canada. We are worried that if these termites found their way into our clothes, shoes or belongings, including our suitcases, we may have brought them to our home in Toronto. Now they may be spreading and reproducing inside our home. Being that the plane traveled at 37,000 feet, could it be that the termites may have survived the trip and are now in our home and breeding?

Your reply would be greatly appreciated. Thank you.

Dorota & Corrado

Dear Dorota and Corrado,

You can sit back and relax! The termites you saw were probably the worker termites and these eunuchs are not capable of starting a new colony. Furthermore, most termites do not like light and they need moisture on a very regular basis. The stowaway adventure would very likely have killed them for any number of reasons.

Keep in mind that your local variety of termites can infest your home at will. So if you get an infestation at some future time, it may have nothing to do with the ones you saw in Orlando. What's more, I doubt the species you saw in Florida would tolerate your winter climate in Toronto!

Tim Carter


I am sure you get the point by now. The daily tips will be varied and are easy to read and understand. I often include links back to more detailed information.

You should seriously consider joining the Premium Newsgator RSS Feed service. I can assure you my daily tips will save you money and frequently bring a smile to your face!

Tim Carter

Slate Flooring Installation

Slate Flooring Installation

Slate Flooring Installation | Slate is a great flooring material and is not too hard to install. You must first layout the pieces to see how the pattern repeats. Grouting slate is VERY HARD.

DEAR TIM: I have decided to install a slate floor in my kitchen. What must I do to make sure the slate will stay adhered to the floor? What tools will I need? Can I apply the slate to a wood subfloor? Will grouting the floor be difficult? Harold W., McCall, ID

DEAR HAROLD: Congratulations! The slate floor you are about to install will garner you endless compliments. Slate has so much character and is nearly indestructible. Once sealed, its micro-crystalline composition makes it very stain resistant. If you want an eye-popping color, consider using burgundy red slate with a deep gray grout. This rich color goes well with many kitchen cabinets.

What tools are needed to install slate flooring?

Let's talk about tools first. You will need a chalk line, a tape measure, a framing square, a special square-notched trowel, a large sponge, knee pads, buckets, a three-inch wide stiff blade scraper, a grout float and most importantly a diamond-blade wet saw. You can substitute an abrasive blade on an old circular saw or a hacksaw with a carbide rod blade in lieu of the diamond wet saw.

The slate is going to be permanently adhered to your subfloor with cement-based thinset. This powder contains Portland cement, ultra-fine grains of silica sand and frequently special powdered acrylic resins. Once thinset is mixed with water, it makes a sticky mortar that tenaciously grabs onto anything it touches. Perhaps the best attribute of thinset is that once dry, it does not flex. You can install heavy objects on a slate floor with no fear of cracking so long as you use thinset.

What subfloor is needed for slate?

Slate can be installed on a wood subfloor if the wood flooring is a minimum of one and one quarter inches thick. You can do this by applying half-inch thick plywood over a traditional three-quarter inch thick subfloor material. Screw the half-inch thick plywood to the existing subfloor spacing the screws every eight inches on center. Apply a thin coat of water-based urethane to the final layer of plywood. This urethane prevents swelling by stopping water from soaking into unprotected plywood. Installing one-half inch thick cement board on top of the regular three quarter inch subfloor is a better choice if that option still remains.

Do you need isolation fabric under the slate?

You may also decide to use a crack isolation fabric between the slate and the wood flooring. These fabrics work well to offset any differential movement between the wood subfloor and the slate. Wood can expand and contract with seasonal changes in humidity. Slate will not react to these same seasonal changes. The fabric absorbs the differential movement between the materials.

Is there a pattern for slate flooring?

The layout of slate is very important. Although most slate floors appear to be a hodgepodge of random pieces, they are actually different-sized pieces that carefully interlock in a very regular repeating pattern. The pattern is almost always printed on the carton or included in a piece of paper within the carton. You need to remove the slate from just one of the cartons and lay it on the floor carefully spacing to create the pattern the manufacturer has in mind.

What should the spacing be between the pieces of tile?

The spacing between individual pieces of slate will often be 5/16ths or perhaps as large as 3/8 inch. As you dry lay the pieces of slate you will see that the spacing between pieces happens somewhat automatically. Do not begin to mix any thinset until you are sure you have the spacing correct and you know how the slate will interlock from carton to carton.

How long do you have to wait before walking on a newly laid tile floor?

After the slate is installed, let the thinset cure for 48 hours before you gingerly walk on the slate. It is now time to apply a grout-release liquid or better yet, a special wet-look sealer to the slate. These products will make grouting much easier as grout can get trapped in the cleavage texture of the slate. It may take 24 hours for these liquids to fully cure before you can begin to grout.

CLICK or TAP HERE to get FREE quotes from local companies to install your slate flooring.

How Do You Grout Slate?

The grouting process is important. Watch these four videos to understand the entire process. You must not make a mistake when grouting!

CLICK or TAP HERE to watch the four-part video series on another tab.

The grout must be the consistency of cake batter. Wipe off all excess grout from the slate. Squeeze as much water from the sponges as possible when you use them to remove excess grout from the slate. Excess water that seeps into the damp grout will severely weaken it causing it to crack, powder and disintegrate over time. You must get all traces of grout from the slate before the grout dries. There will be a slight haze of grout powder on the slate, but that will come off the slate with a dry towel after the grout has completely dried.

Static pressure is very important. The layout of the slate is extremely critical. The pattern printed on the box produces a shape that is rectangular in nature. Once the spacing between the pieces of slate is uniform, there will be a consistent width and height to the rectangle when you measure to the outside edges of specific pieces of slate that create the shape.

Using these width and height measurements you can make sure the slate installation is square throughout the entire room. Use these measurements to create a grid layout on the floor. The edges of the slate pieces will touch up against the grid lines if you continue to install the pieces correctly.

Column 494

Vaulted Wood Ceilings

vaulted wood ceiling

Install T&G wood on a vaulted ceiling requires special talent, tools and techniques. You will probably discover that some colored wood putty will also come in handy.

Vaulted Wood Ceilings

DEAR TIM: While paging through a home decorating magazine I saw a vaulted ceiling that was covered with wood. The look was stunning. I have a corner room of my home that has two drywall vaulted ceilings that rise from each wall producing a diagonal seam in the ceiling. How difficult is it to install wood on this surface? What tools do I need and what can be done to make the job go as smooth as silk? Barb F. San Diego, CA

DEAR BARB: Stunning you say? My wife and other customers have also been heard to exclaim: sensational, awe-inspiring and dazzling. Based upon your description, it sounds as if your ceiling is nearly identical to one in my own bird room. We call our sun room the bird room because that is where our singing male canary lives. The Douglas Fir bead board ceiling in my bird room gets compliments from every person who walks into the room. For some reason our guests' attention seems to be drawn to the wood ceiling. Perhaps the two skylights that drown the room with light are partially responsible.

Is installing wood on a vaulted ceiling hard to do?

Unfortunately, you have selected perhaps the toughest ceiling to tackle. I would have much preferred it if you had told me the ceiling was flat or a standard one-plane vaulted ceiling. The intersecting ceiling planes of a hip roof add a significant degree of difficulty to the project. Installing wood around skylights adds yet another level of complexity. Be thankful you don't have those to contend with.

Here is a list of tools you will need to complete this job:

  • a miter box saw
  • a chalk line
  • hammer and nail sets or a nail gun(preferred)
  • a circular saw or table saw(preferred)
  • ladders and/or scaffolding(preferred)
  • sandpaper and brushes

How do you find the center-line of the ceiling joists / roof rafters?

The first task you need to complete is locating the center line of the ceiling joists/roof rafters. You can do this the old-fashioned way using a nail and hammer or with a modern stud-finding tool that peers through the drywall and locates the solid wood for you. Use the chalk line to snap a line down the center of the rafters from the intersecting hip to where the rafter passes over the exterior wall. Be sure to check for solid wood along both sides of the giant diagonal seam that extends from the outside corner to the peak of the roof. You need solid wood on either side of this seam to secure the ends of the wood pieces that fall between rafters.

What is the best method to use for installation?

Don't even think of installing one piece of wood until you have pre-stained and urethaned every piece of wood you will need for the job. Trying to apply these liquids upside down after unfinished wood is installed is a nightmare. Wood ceilings look best when you use tongue and groove lumber that interlocks. This method allows for blind nailing so you do not see any nails after the ceiling is installed.

It is extremely important to make sure the actual tongue is covered with stain and urethane. Seasonal movements in the wood can partially expose the tongue. If you fail to stain it, you may have unwanted racing stripes on your gorgeous wood ceiling at some future date.

The nails are installed through the tongues. Drive them at a 45 degree angle in the corner where the base of the tongue meets the actual body of the board. The nails must be long enough to penetrate one to one and one quarter inches into the solid wood rafters that are currently hidden by the existing drywall ceiling.

CLICK or TAP HERE to get FREE quotes from local companies that will install wood on your ceiling.

You will need a circular or table saw to make an angle cut on the groove side of your first starter piece. The angle will reflect the actual pitch of the vaulted ceiling. Failure to make this cut produces an unsightly gap where the wood strip meets the wall. You will also have to face nail this first starter piece so the bottom does not fall away from the ceiling. All other pieces of wood will be blind nailed through the tongues.

How Do You Get the Pieces of T&G Lumber Tight?

Tongue and groove lumber does not always interlock with ease. Never tap or hammer the tongue end to try to drive the board into place. You can flatten and damage the tongue making it impossible to interlock the next piece of lumber. A better method is to use a small one-foot long piece of scrap wood. The groove of this smaller piece should easily fit on the troublesome board. You can then hit the scrap piece of wood which in turn pushes the larger piece into place.

How do you hide the imperfections or small nicks?

Colored wood putty that matches the finished wood is great for filling imperfections, nicks, or small knots. Keep the stain on hand as well to touch up scrapes that will happen as you handle the finished wood. Use a small brush or a cotton swab to apply the stain and/or urethane.

Column 493

Ductwork Design

heating design - Tim's second floor - 5 outside walls

Ductwork Design - This second-floor room has five outside walls! It required two large supply ducts to satisfy its heat loss.

DEAR TIM: We moved into our new home 3 months ago and now that it is cold we have discovered our daughter's bedroom is freezing! The house has vinyl siding, her room has a large double window, faces north and is farthest from the furnace. The builder tells us that is the problem. I have shut down the vents in the basement, laundry room and two other little-used rooms. But my daughter's room is still cold. What is wrong? Surely the builder can't be right. Anne K., Mason, OH

DEAR ANNE: Yes, and there was a full solar eclipse last week as well. Jeeesh! The phoney answers and excuses some builders offer up to cover mistakes seem to be as plentiful as grains of sand on a beach. The following wager may surprise you: Do you think I could keep that bedroom at a nearly constant 72 F even if your daughter's room had floor to ceiling single pane glass with no insulation in the ceiling? Don't bet against me, because you will lose. I can heat or cool an non-insulated house and you will be a snug as a bug in a rug. You'll be a poor bug, but a comfortable one!

Is the builder responsible for the HVAC components?

Your builder is ultimately responsible for this mistake since he entered into a contract with you to supply a livable home. Undoubtedly he will redirect the blame to the heating and cooling contractor who installed the ductwork and the heating and cooling system components. But never forget that it was the builder's job to make sure all heating and cooling components were correctly sized and installed.

Why is a room so cold?

The cold temperatures in your daughter's room can be caused by any number of things. More than one thing can be wrong. The problem could be as simple as a damper control that is blocking air flow within the branch duct(s) leading to the room or the duct(s) could be blocked with construction debris.

What do damper controls do in the ductwork?

Well-designed forced air systems almost always have a simple damper control in each branch line as they leave the main trunk lines. These damper controls allow the installer to fine tune the air flow to each room of the house. The control levers you have at the actual grill in each room are not intended for the purpose of balancing air flow.

The more likely scenario is that the duct system is poorly designed and static pressure within the ducts is not equal throughout the system. Ductwork systems in houses need to mimic our bodies vascular system. Blood vessels get smaller and smaller the farther away they get from our hearts. Doing this allows the blood pressure in our finger tips to be just about the same as the blood pressure in your neck. If you can see the actual main trunk line as it leaves the furnace, it should get smaller in cross section the farther it gets from the furnace.

As the forced air from the furnace starts to head down the smaller branch lines, it takes energy with it. The remaining air in the trunk line still needs to travel to the rooms downstream. If the main trunk line stays the same size, the remaining energy in the moving air simply can't push all of the extra air down the main trunk line.

return duct supply

Look at the duct next to the gray i-beam. Note how it's large next to the steel column but towards the upper left of the photo, the duct gets SMALLER. This is how you maintain static pressure in the main trunk line.

Does each room in the house require different size ducts?

Another possibility is the main ducts are sized properly but the installer failed to put the right size branch line into the room. Each room of a house has its own heat gain or heat loss. As such, the furnace needs to supply a different amount of heated or cooled air to each room so that all rooms are the same temperature.

It is also possible that there are not enough return air ducts in each room. The supply ducts should be located under windows on outside walls. On the opposite side of the room, a return air intake duct should be up seven feet high on the wall. As the furnace operates it pushes air out of the supply ducts and pulls air across the room into the return air ducts. This is where the air begins its journey back to the furnace where it once again gets reheated.

CLICK or TAP HERE to get FREE quotes from local companies HVAC companies in your area.

If you determine that the fix is not easy, don't let the builder tell you to just solve the problem with a space heater. These devices do work and work well. The supplementary heater will not do you any good this summer when it is 98 F outdoors. I guess when you call to complain that it is too hot in that room, the builder will tell you to hang a window air conditioner out of one of those large windows.

What is static pressure?

Static pressure is very important. Professional heating, ventilating and air-conditioning (HVAC) contractors know how to supply enough air to each room so that every room in the house is within a degree or two of what your thermostat reads.

The method used to determine duct sizing is not magic. A professional HVAC contractor performs a heat gain and heat loss calculation using the blueprints. These calculations are done for each room and the final calculations show exactly how many cubic feet per minute (CPM) of air must be supplied to each room. A second calculation converts this CPM quantity to a specific branch duct size. The calculations are so precise they tell the contractor the exact size duct for every part of the system!

Column 491

Whole House Fans

house roof vents

Whole House Fans | These simple pot vents are great exhaust ports for a whole house fan. You may need quite a few to satisfy the power of the fan.

DEAR TIM: While doing a walk through inspection in our new home our builder indicated that he could not put in the whole house fan we wanted. The reason he gave was that both roof vents and eave vents had been accidentally installed. I believe he called them continuous ridge and soffit vents. The builder said the whole house fan would burn up and offered a credit to us. Is this correct? We really want the whole house fan. Kristi B., Manteca, CA

Dear KRISTI: Ooooops! What does the builder mean "accidentally"? The location of your home in the central valley of California needs as much ventilation as possible. If I was building your home, the continuous ridge and soffit ventilation would have been just one part of the roof ventilation package. The great news for you is that you can have the whole house fan installed and it will not burn up so long as your builder and roofer team up and install some extra roof ventilation products.

Do whole house fans work well in all climates?

Whole house exhaust fans come in different types and sizes. Their sole purpose is to move vast quantities of air. They work very well in climates that have moderate to low humidity. As the sun goes down and the outside air temperature begins to drop, a whole house fan can create pleasant breezes through any and all rooms of a house. Ask anyone who has one and they will tell you that even during peak summer months, they sometimes have to sleep under a blanket!

How much exhaust area is needed for a whole house fan?

These fans pull hundreds and even thousands of cubic feet of air per minute into your home. For them to work at peak efficiency they have to push an equal amount of air out of the attic. If there are no places to exhaust air or the exhaust areas are small, the fan blade spins but it doesn't really push much air. Low air flow past the fan motor can cause it to overheat. Spinning car tires on snow and ice are a fairly accurate analogy. A car engine can rapidly overheat in this situation as the car's radiator is not moving through the outdoor air.

When you purchase a whole house fan the written instructions clearly state how much free net area of exhaust the fan needs. The net free area is often called out in square feet or square inches. But don't be fooled. If you cut a one square foot hole in your roof and cover it with some sort of cap, you do not have one square foot of exhaust opening. The insect screening or slits in the metal vent can cut off as much as 50 percent of the hole you created.

I always prefer to exceed this amount by 25 to 50 percent. One way to achieve this required ventilation area quickly is to install simple and affordable spinning roof turbines.

Will spinning roof turbines help exhaust air?

These wonderful roof ventilation products may not look as sleek as the hidden continuous ridge and soffit ventilation you already have, but they also allow massive amounts of air to readily escape from your hot attic space. What's more, they work anytime a slight breeze blows across your roof. I would install these on the back side of your roof so they are not visible from the street.

If you don't like roof turbines you can have your builder install simple static roof pot vents. These are very common roof ventilation products and they work well. I have them on my own home. But depending upon the fan you have purchased, you may discover you need 10 or even 15 of these pot vents to satisfy the whole house fan. Once again, place these vents on a part of the roof that is least visible from the ground.

Don't let your builder pull the wool over your eyes with an expensive change order for this work. The actual materials you need to provide the necessary ventilation for the fan will probably cost you less than $150.00. The time to install the products might be less than 4 hours. In my opinion, the builder should not charge you for the time since he already told you he was going to install the whole house fan in the first place. Necessary roof vents are a part of this package.

The spinning roof turbine vents are an excellent match for whole house fans. The beauty of them is that they do not restrict the amount of opening in the roof. In fact, when they spin either by wind power or air being pushed by the whole house fan, they exhaust far more air than they would if the hole in the roof was simply open to the atmosphere.

The truth be told, you can't have too much roof ventilation. Ask any farmer that raises chickens and they will show you how they ventilate the chicken houses since chickens can't sweat and need to be cool or they die.

Where Are the Fans?

In the June 20, 2021 AsktheBuilder Newsletter, Lewis emailed asking, "Why do you rarely, if ever, see whole-house fans in new houses?" CLICK HERE to read the answer.

Column 491

AsktheBuilder Newsletter

AsktheBuilder logo

AsktheBuilder Newsletter

I can send my column to you via email. I also include interesting questions I get, product news and all sorts of other announcements. In fact, when I travel, I announce where I will be in case you live nearby and want to get together to drink a brewsky or sip a vanilla Pepsi.

See the Newsletter link in the yellow stripe above left? Just go there and fill in your email address and name and you are all set.

PRIVACY POLICY: I do NOT share your personal information with anyone. It is that simple.

RSS Feeds – No SPAM for You!

RSS Feeds

I have the good fortune of belonging to a unique group of entrepreneurs who make their living on the Internet. We participate in a daily email discussion forum where ideas are shared. If you see an email and want to add a comment, the entire group reads your response. It is an incredible hotbed of ideas that are so far out on the curve you can't believe it.

Late April and early May of 2003 had many of this group meeting face-to-face for the first time in fabulous Las Vegas. One of the most progressive members of the group, Chris Pirillo, held court and told all of us about RSS technology. It is a fantastic new aspect of technology that allows you to get the information you want from certain websites without any SPAM or fear of your email address being abused, sold, etc. Why? Because RSS doesn't rely on email to deliver information! It is perhaps the supreme *push* technology.

To see the news aggregator software I use, go to Newsgator. This website has some very good information all about RSS technology and how it can make you very productive.

Glenn Fleishman, a Seattle-based freelance writer for the Seattle Times, wrote a column that appeared on November 8, 2003 in the Seattle Times. Here is a link to the actual column. You will have to register to get access to the column. As of November 19, 2003, the Seattle Times was not charging anything to get into their archives.

Building Stairs

DEAR TIM: I need to rebuild a simple interior staircase. What is the simplest and easiest way to tackle this project? When you cut those deep notches in the side stringers does that weaken the staircase? Are there any products or techniques that can simplify stair construction? Tony G., Reedsburg, WI

DEAR TONY: I sure hope you paid attention in math class and have some basic carpentry and sketching skills. You are going to need all of these to successfully complete the project. Stair construction can be very challenging and confusing. It is important that you follow all safety recommendations and building code requirements. If you pay attention to detail you will be able to complete the staircase in one day. If not, you better have a ladder nearby.

building steps sketch

Take a notepad and make a simple cross section drawing of the existing staircase. Note the vertical distances between each step, and the vertical distance between the first and last step and each floor level. Measure the depth of each tread at the same time and record these measurements. Double check your measurements and drawing for accuracy. Note any gaps between each side stringer, and where these components touch the bottom floor and the sub-floor header.

If you are lucky, the vertical measurements between each stair tread and the depth of the treads will be consistent. Using a piece of rectangular (10 inches high by 14 inches long) cardboard you can make a stair angle guide that will allow you to recreate the top and bottom stringer cuts and the position of the treads before you remove the old staircase.


Author's Note: If you need step-by-step color photos of the stair-building process, you should consider my Stair Building eBook. This helpful guide is the answer to all of your frustration over the stair building process. Click the link and you will be amazed at what you will discover.


Place the cardboard rectangle against one side stringer with the 14 inch edge resting on one of the middle stair treads. Slide it back, so the 10 inch edge just touches the stair tread nosing above. Place a yard stick or other long straightedge on the stair tread nosings. Slide it up against the piece of cardboard. Use a pencil and trace a line on the underside of the straightedge. The result should be a triangle whose sloping leg connects one stair tread nosing with the one below. The bottom leg of the triangle will be your tread length and the vertical leg will be the riser height.

As you demolish the old staircase, make every attempt possible to salvage the side stair beams or stringers. The top and bottom angle cuts on these side stringers are the most challenging part of the project. If there were no gaps where the old ones met the floor and sub-floor header, you can use the old stringers as a template. This will save you hours of agonizing work and wasted lumber.

Trace the pattern of the old stringer onto your new side stringer. I like to use 2 x 10 or 2 x 12 lumber for strong staircases. I never cut notches in my stringers as this weakens the staircase. Cut along the traced lines and place the stringer in position. It should fit perfectly. Temporarily tack the stringer into position, so it will not fall. Starting at the top of the stringer, use your triangle template to mark the location of the top of each tread and the face of each stair tread nosing. Make adjustments, as necessary, to match your original drawing. Remember, the sloping line of the template must be parallel or in line with the edge of the stringer at all times.

There are some wonderful wood and steel products that simplify stair construction. You can purchase adjustable triangular wood blocks that screw or nail to a 2 x 6 or 2 x 8. Once applied to the stringers, you end up with the notched look but not the traditional weak staircase! These triangular wood assemblies allow you to create an infinite amount of riser and tread combinations to fit any situation.

You can also purchase simple L shaped brackets that are nailed or screwed to the side stringers. The stair treads rest on these strong metal brackets. These handy devices eliminate any need to notch the stringers or plow grooves to accept the treads. They can be found at most lumber stores that sell metal deck framing components.

Column 215

Construction Bids and Quotes

Construction Bids

Construction Bids | Window replacement is not always as easy as it looks. Taking an old window out and installing a new one is just one part of the overall job.

DEAR TIM: My wife got an estimate from a small contractor to replace seven windows at our home. The new windows are a major name-brand with wood interior and aluminum cladding on the exterior. He was also going to install new interior trim and restore the exterior trim. The price of the quote was $5,725.00. It seems outrageous to me, but my wife loves the quote and thinks this man is the greatest. I tried to get other quotes but my wife says I scare contractors as they never return my calls. What should I do? What is a fair price? Gary K., Trenton, NJ

DEAR GARY: I'll bet this exchange between husband and wife happens tens of thousands of times each day in the USA. I am constantly flooded with phone calls and emails from people who have all sorts of trouble analyzing quotes from contractors. In many cases, some people would be ecstatic even getting a bid. Believe it or not many people each day wait for the elusive contractor to show up, and even when they do show up to look at the job, some never call back with a quote. Consider yourself lucky that you even got a bid.

Why does a contractor's price seem high?

There are many reasons why some people think a contractor's price might be high. One of these reasons, I believe, is the proliferation of do-it-yourself information that is flooding consumers on television, on the radio, in magazines, on the Internet and even other newspaper columns such as this. All too often difficult jobs are depicted as being no problem or easy. I know what happens before, during and after each installed window replacement job.

First of all let's think about this small contractor's business. He needs to have all sorts of tools, a truck and a place to house his business. Saw blades, tools and his truck need maintenance and parts and they eventually wear out. These costs must be apportioned to each of the jobs he completes. If he is a contractor that offers free estimates, the time spent doing this work activity must be applied to those jobs he eventually gets under contract. After all, you don't go to your job and work for free, do you?

What costs are included in a contractor's quote?

There are many other soft business costs he must pass on to the final consumer. For example, he has insurance premiums (Worker's Compensation, Liability, Disability, Health, etc.), permit fees, association dues, assorted taxes to pay, and all of these are invisible to you the paying customer.


How would you like me to build your new home? It's probably impossible for me to fit your job into my schedule, but I will gladly share hundreds of my tricks and building secrets with you and your builder. Check out my New House Specifications.


Finally, he has to buy the replacement windows. You may be shocked to discover the actual cost of high-quality aluminum clad wood windows. If you want quality, and it sounds like you are getting it, it comes with a price tag. You can get a feel for the cost as nothing is stopping you from going to the window distributor to get a price as if you are going to buy the windows yourself. Granted, the contractor may get a small professional discount while you pay full retail price, but you will get a good idea of what the windows cost.

CLICK or TAP HERE to get FREE quotes from local companies to bid on your next home improvement project.

My guess is that you want this small contractor to be around in six months if you have a problem. That is a very reasonable expectation. For this to happen his business needs to be profitable. Yes, it is not sinful to make a profit. The marketplace usually culls out contractors who charge excessive profits.

Should you get quotes from different contractors?

To find out what the average price is for your job, you do indeed need to get quotes from different contractors who are going to install the same exact windows. You must compare apples with apples. The local distributor for this brand of window may have a list of other small contractors who buy and install these same windows on a regular basis. I would ask the distributor for a list of qualified contractors that you can call.

Bids are complicated. To get tight bids that you can really compare, you must have clear directions and a goal so each contractor is bidding on the same thing. To get contractors to show up, offer to pay them $50 or even $100 if they produce a good written estimate. Show them that you value their time!

If you really want to find the pro, Click here for information on Checklists!

Column 490