Wet Bars Require Some Thought

wet bar

The short wall facing you at the end of the bar is very important. It keeps the bar from tipping over.

DEAR TIM: I want to build a traditional refreshment bar with a wet bar behind it. What are some good dimensions for a bar/wet bar? How do you make the bar stable so it does not tip over when people lean against it? What is a preferred bar height? Can you recommend some high performance surfaces for the face of the bar and the actual bar top? Randy C., Boulder, CO

DEAR RANDY: Timing is everything. It just so happens I just completed an identical project in my own home. My bar has been a labor of love and my family and I are very pleased with the final results. It is not hard to design and build a durable and functional wet bar. I believe the hardest part will be selecting the finish materials. There are simply many wonderful products from which to choose.

The dimensions of a typical bar are fairly standard. A finished bar height surface that works well for the average height person is 42 inches. The bar top should be at least 18 inches deep. 20 to 24 inches is better if you have the room. My bar ended up being 28 inches deep so that it would completely cover a rear shelf that is used to store bottles of soda, beer, glasses and supplies. Without the protection offered by the enlarged bar top, spilled drinks and food could easily contaminate these supplies.

The front overhang of the bar is very important. If you intend to use bar stools, the overhang should be 12 inches. This depth will allow people to sit comfortably and not have their knees scrape against the face of the bar. If you must have a smaller overhang, do not make it less than 10 inches.

Bar stability is very important. A simple straight bar wall is strong where it connects to an adjacent wall but becomes very unstable as you approach the end of the bar. Several inebriated friends leaning against a flimsy wet bar can indeed cause it to collapse. I have found that several things can be done to make a bar very stable.

If the bar is built on a concrete floor, a small 14 inch long return wall can be built at a 90 degree angle at the end of the long bar wall. Face the outside of this wood wall with 3/4 inch thick plywood. The plywood adds enormous lateral strength to the small wall. Use six inch long by one half inch diameter sleeve anchor bolts to attach the bottom wall plate to the concrete floor. This tiny wall prevents the end of the wall from moving.

If the bar is built on top of a wood floor joist system, the wall can be stiffened in a different manner. A 4x4 post can be bolted to the end of the wall. This post projects down through the floor into the floor joist cavity. If you are lucky the post will rest alongside a joist. Use long lag or through bolts to securely fasten the post to the joist. If the post falls between two joists, install solid blocking between the joists and fasten the post to the blocking.

You can use handsome paint grade or wood finish wainscoting to finish the front of the bar. I happened to use cherry wainscoting. Regular paneling, acrylic plastic block, stone, brick, salvaged barn siding, etc. or a mixture of these materials are all viable candidates. These materials can be attached to a standard 2x4 wall that forms the bar wall. The inside of the bar wall can be finished with regular drywall.

wet bar sink & backsplash

The granite backsplash is the only way to go. It adds a tremendous amount of character.

Granite was my choice for both the bar top, the wet bar top and the back splash behind the wet bar. This material is durable, gorgeous and has gotten many compliments. Other choices are solid surface materials, plastic laminate, tile, marble, etc. Keep in mind that the bar top must be securely fastened to the bar wall so that the top does not flip when people lean against it. I used a large piece of flat steel that I bolted to the wood bar walls. The granite was then epoxied to the steel. You can use plywood in lieu of steel depending upon which finish material you choose to use.

If you can add a wet bar behind the regular bar, be sure to incorporate as many base and wall cabinets as possible. The storage space they provide will come in handy if you happen to do lots of entertaining.

Column 410

Miracle Liquid Siding Products

The following comments are from homeowners who emailed me. They both speak volumes about some of these coating products:

"I was just wondering if you know of anything a consumer can do if they fall prey to having this siding put on their house? We had a beautiful cedar home that we wanted to have 'maintenance free' and save on our fuel costs, so we had it installed. As your May, 2002 article shows, it did absolutely NOTHING. We have been going around and around with them for a year and a half. I even got the Better Business Bureau involved, but there is only so much they can do. The company that we actually used to apply the siding is now NO longer selling it. So, it's apparent to me that it isn't working, they are aware of it, and I want my money back. I would appreciate it if you have any insight. Thanks," Kim M., Concord, NC, October 24, 2002


"Thank you for the article about liquid stucco. I almost fell into this trap and paid $9600 for nothing. It sounded way to good to be true and the guy even showed me the space shuttle picture and the same photo is on his brochure. I wonder if he can get in trouble for that? They also claim to have painted all the big light houses of the North and the Lincoln tunnel. Do you think that is true? I'm sure glad I didn't give him the deposit. He said if I give a deposit today that he will lower the price $1000. That made me think! Thanks again," Jimmy, June 14, 2004


Please read additional emails at the bottom of this page. They are from other consumers and people who own liquid-spray-on coating franchises.


DEAR TIM: Several companies are advertising liquid siding and liquid stucco coating that can be sprayed on my home. The companies claim enormous energy savings and that the product will never peel, blister or chip. Are these claims realistic? This product seems too good to be true. Darryl McC., Louisville, Ky.

DEAR DARRYL: Over the past few months, you and many other readers have sent me letters and e-mails concerning these exterior coating products. Fortunately, you and the others are smart enough to hesitate and ask. I am fearful that many other consumers have possibly trusted the ads or sales pitches and have become victims.

Numerous companies, I have discovered, are advertising and selling these products. All the products seem to involve a two-or three-coat system applied by spray equipment, and many are offered in hundreds of colors. The ads and sales brochures say that the materials can be applied over wood, brick, stucco, aluminum siding, concrete block, vinyl, etc.

Miracle Liquid Siding ads

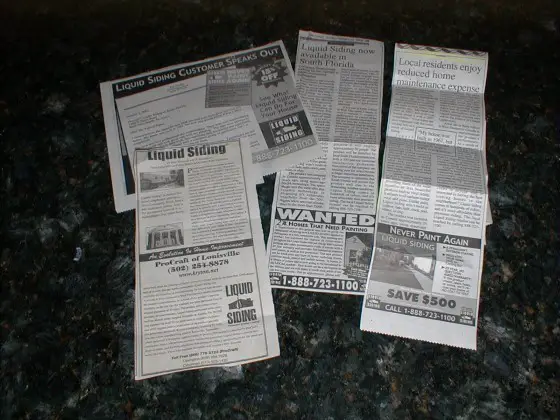
Miracle Liquid Siding Ads

The ads sure make these products sound great, but the buyer better beware. Let's start with many of the ads' claims that these exterior coating products can save you money on heating-- a claim that in the case of one liquid siding company has received a stern rebuke from the Federal Trade Commission.

I, like the FTC, am deeply troubled by the super-insulating claims. Some companies even say their thin coatings contain ceramic microspheres that provide insulating properties similar to the heat shield tiles on the Space Shuttle. Whatever the intergalactic claims, though, it is highly doubtful you will see a noticeable savings in your energy bill should you coat your home with these products.

Heat loss and heat gain through the painted surfaces of a home account for a minority of energy consumption. Air infiltration and energy loss through windows and doors, attic spaces, slabs, basement walls and floors account for the lion's share of your energy bills. These products do nothing to stop the flow of energy at these locations.

On April 3, the FTC issued a report dealing with Kryton Coatings International Inc., which claimed that its "Multi-Gard" liquid coating could save consumers up to 40 percent on their energy bills.

The FTC's report noted, "Dealers of 'Multi-Gard' liquid siding have agreed to settle Federal Trade Commission charges that ads claiming their product provided consumers with an insulation value of R-20 were unsubstantiated and violated federal law." (The R-value of 20 refers to resistance to heat loss.) The report went to say that "the FTC alleged that the companies did not have a reasonable basis for making the claims."

If the insulation claims are invalid, you may wonder what else contained in the advertisements are either not true or lacking key information. Personally, I have other specific problems with these liquid coating products.

For instance, in addition to all of the other advertising statements, these companies claim that their products have superior bonding properties. These properties, the companies say, allow the exterior coating to stay attached to a surface for a very long time with very little fear of peeling, blistering or chipping.

That claim, however, is sound only if the liquid spray product is applied to a fresh, clean surface that has no previous coating. But many existing homes have been painted with traditional paints. Each layer of paint in addition to this new coating forms an adhesive chain. When the weakest link in this chain fails, all of the coatings applied to this weak link- including the miracle-liquid-siding/ceramic coating - can peel and fall away from your home.

A big, hidden danger with these products is their ability to trap and hold liquid water. Water can get behind wood siding, brick, stucco, etc. that is covered with a plastic or plastic-like coating. If it is not allowed to escape quickly, this liquid water can spell serious trouble for any house that has wood framing, wood by-product sheathing, wood or wood by-product siding, etc. Once the water contacts these materials, it can fuel the growth of fungi that can rot the wood framing members, and mold that may possibly cause health problems.

Many of the products claim "perm ratings" slightly greater than ordinary house paint. The perm rating is a scientific measurement of a product's ability to allow water vapor to pass through it. The higher the perm rating value, the better your house breathes. These products tend to have perm ratings of 20 or so. Many standard air and water infiltration barriers that are beneath siding, brick and stucco have a perm rating of 80 or more. The exterior finish of a home should have a perm rating of 100 or more so that water vapor can escape readily to the atmosphere.

What's the future of these exterior coating products? It's hard to say, but you can bet that they're paying attention to the FTC statement concerning Kryton. Don't be surprised if they start to tone down their ads with respect to energy savings or promote other aspects of the product that may get your attention.

Be very careful of these products, especially when the sales pitches talk about long life and extended warranties. These claims mean nothing if you intend to change the color of your home in the future or the company goes out of business.

Having a maintenance-free home is desirable, no doubt, but be very careful of products that can't do what they say or may actually create hidden damage to your home.


Author's Notes:

Here are additional emails from consumers and people who actually own businesses that apply the products:

"I just read your article on Miracle Liquid Coatings to replace house paints. Thanks SO MUCH! I just had a sales rep from one of these companies come out (Liquid Siding of Florida) to give me an estimate. Our session was cut short (as I will soon explain), but I thought I would pass on several statements that he made.

First, he said that traditional house paint has had lead and mercury removed, seriously limiting the lifespan of paint. In fact, he said that in Florida, latex house paint will only last 3 years! Second, he claimed that his product would last 25+ years. The only reason that they can't claim longer longevity is because they've only been using this type of product for 25 years. Third, and this is what caused our session to be terminated, he said that it was company policy to create a bid and make the presentation only if BOTH homeowner's (i.e. my spouse and I) were present! I've encountered this tactic before and I refuse to do business with such organizations." Steve Hall


"I am a Liquid Siding dealer in North Carolina and I was researching the internet for information regarding the product I sell and apply. After reading your article, I am a little concerned about some of the information that you are providing your readers.

I am not going to deny the fact that Kryton did have an issue with the FTC as that is true. The issue on that controversy though was not whether or not Liquid Siding did act as a thermal barrier or not. The issue at hand was controversy over the actual technology that was involved. Kryton advertised an R-factor which as you know is a resistance factor. The FTC determined that Kryton could not advertise an R-factor because the thermal coat in the 4- part system does not work on a resistance factor but on a reflective factor.

Also, the thought about applying the coating on previously painted surfaces is unfortunately incorrect. Kryton manufactures a product called Spray and Shine and is used in the first step in the application process. We put Spray and Shine on the substrate first and let it set for 20 minutes. This allows the pores of the substrate to open up and at the same time loosens the dirt and kills any mildew or mold and its spores within the substrate. We then pressure clean the surface and set the house to dry for a few days until the moisture content is below 15% before we apply the surface conditioner.

If you would like independent lab reports from some of the top researchers in the nation please let me know and I will have them mailed to you promptly. I am not trying to attack you maliciously in anyway, I am just trying correct information regarding our product.

When Kryton first started selling dealerships they unfortunately sold a few territories to people that had difficulties sustaining their business. Liquid Siding dealers however, are the only dealers in the permanent coating industry that has seen sustained growth for 5 straight years. We are currently number 7 out of 500 in Qualified Remodeler magazine doing over 22 million dollars worth of business last year. This year we are poised to surpass that number again."

Best Regards,
Joseph LaRochelle


Here is another email received from Pam Carter, TN.

"Dear Tim,

We had liquid ceramic siding applied to our cedar siding in 2003. It has been peeling for several years and the company that did the work is no longer in business (surprise). We would like to REMOVE the liquid ceramic paint from the cedar but are afraid of completely ruining it by scraping or using chemicals not meant for this type of product. Also,our home was built in 1984 and the cedar used was not of very good quality.

We used all of our savings to have this done and have not been able to replace the money yet, so we cannnot afford regular siding. Is there anything you can suggest for us to do as our home is becoming a real eye-sore in our neighborhood? We would appreciate any input you can give us.

Thank you for being there for us.

Sincerely," - Pam Carter


Create a Utility Screened Porch

DEAR TIM: I have a wood deck that receives intense sunshine during the middle and late part of the afternoon. Mosquitoes and flies that call my backyard home also pester us constantly when we are on the deck. I would love to solve both problems at once but still maintain the open feeling of the deck. What would you do if you were suffering as I am? Helplessly hoping I remain, Paul S., St. Louis, MO

DEAR PAUL: Several years ago, I solved a similar problem for a woman who had the most splendid patio surrounded by a garden. She was sensitive to the sun and hated to be bothered by bugs. But, she wanted lots of light and an unobstructed view of the garden in the spring and fall when the sun and bugs were not a problem. The solution, that I devised, was a screened-in porch structure that had easily removable screens. My customer was able to transform the screened-in porch to an open air pavilion within a matter of minutes.

screened-in porch - curved screen panels

This is a very neat screened-in porch that is built on a deck. The curved screen panels add a very nice touch.

The first thing you need to do, before you embark on a project such as this, is to make sure it is okay with your local zoning and building officials. Many zoning codes permit you to install patios close to property lines but not necessarily an open structure that has a roof. Once you have obtained the necessary zoning approvals, you can proceed with your final design.

Perhaps the best way to envision this structure, without the screens in place, is a simple pole barn or a picnic shelter commonly found in many city or state parks. These structures typically have 9 or 10 foot high columns or posts that are firmly attached to the ground. This height helps produce the open feeling you desire. Simple beams span from post to post. The roof rafters rest on these beams. If you really want to brighten the inside of the structure, consider adding two or three affordable skylights that face away from direct sunlight.

This structure does not have to connect in any way to your house. In fact, a free standing structure is easier to build. You will need a screen door or two that allows you to get in and out of the structure when the screens are in place. Even these doors can be hinged, so that they are removable in a matter of minutes.

Recently, I found a product that makes the screen removal and installation process a breeze. The screens are attached to the structure with Velcro™ strips that allow you to either roll the screens up and out of the way or totally remove them for long term storage. This system was not available when I built the porch for my customer. I had custom wood screened panels built that fit in between the support columns. I attached the wood panels to the posts with stainless steel screws. The screws allowed my customer to quickly remove or install the panels as needed. The Velcro™ system has an added benefit. You can also order clear plastic panels that allow you to extend your outdoor relaxation periods. These panels are effective crystal-clear wind screens that allow you to see into and beyond your yard while you warm yourself with an outdoor freestanding fireplace or heater. These clear panels also are applied with the same Velcro™ fastening system.

vaulted ceiling screened in porch

Here is the same porch seen from the ground. Note the vaulted ceiling and the triangular screen panels that allow heat to readily escape from the underside of the roof.

The underside of the roof structure does not need to be finished. In fact, the open rafter look is very interesting. It looks much better if you paint the underside of the roof a light gray. The biggest challenge might be running electricity to the structure. I highly recommend one or two paddle fans, a few convenience outlets and possibly some soft indirect lighting that bounces light up off the underside of the roof for casual and cozy evening enjoyment. Be sure the electric is inspected by local code officials.

Be aware that this structure must be wind resistant. Use readily available metal clips that connect the roof rafters to the beams. You should also use common metal framing connectors that allow you to firmly attach the beams to the posts. Finally, use post connectors to lock the posts to the wood deck or possibly a concrete patio. Wind is a hazard with open structures. It can actually rush into the structure, push up against the underside of the roof and collapse a part of and/or the entire structure. The metal connectors will prevent wind damage.

Asphalt Driveways

asphalt driveway

How to Install an Asphalt Driveway | That's fresh asphalt or blacktop on the right. Ford F-250 truck key and fob for scale.

How to Install an Asphalt Driveway - The Gravel Base is Most Important

DEAR TIM: We're building a new home and we are installing a blacktop driveway. There is conflicting information in the bids. One contractor wants to install a three-inch-thick blacktop surface on the hill leading up to the house. Another contractor says a two-inch surface is sufficient. My husband and I want a strong driveway that will last for many years. Which bid is better? Anna H., Danville, PA

DEAR ANNA: If you want a long-lasting blacktop driveway, don't concentrate too much on the thickness of the actual blacktop. The blacktop in and of itself is not the source of strength. The rich-looking smooth black surface that you walk and drive on is merely a top dressing that hides the muscle just below the surface. You should talk to both contractors and ask them questions about the type and thickness of the gravel base that will be installed under the blacktop.

What is Blacktop?

Blacktop is simply a form of concrete. It's typically a mixture of sand, stones of different size, and liquid asphalt. The sticky asphalt binds the sand and stone together and acts as a superior waterproofing material. This is why asphalt drives and roadways can withstand years of abuse from Mother Nature and still perform. But the asphalt binder has one slight drawback. Although it seems to be a solid material, it actually can flow or move when pressure is applied to it.

What's the best blacktop crack filler? Easy - epoxy. CLICK or TAP HERE to see the one I use.

Is Blacktop a Flexible Pavement?

This flexibility is often an advantage as blacktop can conform to subtle changes in the subsoil beneath the pavement that might otherwise cause cracks in a traditional concrete or brick driveway. But even blacktop can crack. Strong blacktop driveways are typically built using crushed angular gravel as a base.

How Thick Should the Gravel Base Be?

This gravel needs to be a minimum of six inches thick for light vehicle traffic such as cars and pickup trucks. If you expect larger commercial trucks to roll up and down your driveway, I would install a gravel base that is a minimum of eight inches thick.

What is the Best Gravel?

The best gravel for blacktop driveways is crushed stone. This is a mixture of irregular angular pieces of rock that may range in size from about 1.5 inches down to sand-sized particles. You want a blend of stones across this range. Roadways that will have heavy vehicles on them often have a 1-foot-thick layer of larger angular stones the size of softballs that lies beneath the crushed stone described above.

Never use rounded gravel as a base under blacktop or asphalt driveways. The rounded stone will move when pressure is applied to it much like marbles that would move about in your pockets.

Get FREE BIDS from local blacktop contractors in your city or town here.

 How Strong Should the Soil Be?

The soil beneath the gravel must also be of good quality. Once the driveway is excavated, the soil should be compacted before the gravel base is installed. If the driveway is located in an area of wet or marshy soil, you should consider installing a special Geotextile fabric over the soil before the gravel is installed. This fabric stops soil and silt particles from fouling the gravel. If silt and soil get into the gravel, it acts as a lubricant. The gravel loses considerable strength when this occurs.

How Should the Gravel Base Be Installed?

Install the crushed gravel in layers. The first layer should be three to four inches thick. It should be graded fairly smooth and then compacted with a heavy rolling machine. Once completed, install the second lift of gravel. The width of the gravel base is very important. It should extend six inches beyond the blacktop wherever possible. This extended gravel base prevents the edges of blacktop drives from cracking off when a car or truck tire kisses up against the edge of the pavement.

What Size Should the Stones Be in the Blacktop?

The size of the stones in the actual blacktop is important. Larger stones, up to 3/4-inch in the longest dimension, will make for a very strong surface. Once again, the blacktop or asphalt paving should have a blend of stones that range from large to sand-size. My own blacktop drive that's 20-year-old has these larger stones. Look:

blacktop drive electrical outlet

This blacktop is twenty years old and in very good condition. It’s got larger pieces of stone about the size of large grapes. That’s one reason it’s doing so well. (C) Copyright 2021 Tim Carter

Will Thicker Blacktop Last Longer?

Adding extra blacktop thickness will not significantly extend the life of the surface. The two-inch-thick layer of blacktop should be fine as long as the gravel base is installed correctly. Keep in mind that blacktop is available in many different blends and mixtures. Each mixture has its own recipe of the sand, gravel, and liquid asphalt components. Talk with each contractor and ask which blend is best for your area. If you get conflicting answers, then you better get a third opinion.

Should I Install Conduits Under the Blacktop?

Install several plastic conduits under the driveway in key locations. If any utility trenches cross the driveway, be sure they're filled with gravel or structural fill material. A soil-filled trench that has not been compacted can lead to a catastrophic driveway failure in future years.

Plan ahead for invisible dog fences and light posts. Be sure to put in any number of 1.5-inch or 2-inch blank PVC conduits under the driveway. These empty pipes will come in handy down the road when you find the need to install a cable or wire under the driveway. Finally, do not seal your new blacktop driveway for at least one year. The driveway needs to cure for months before it begins to develop a hard skin or surface.

Cost Overruns

bathroom sink

This seemingly innocent pedestal sink faucet could easily create a $900 cost-overrun headache.

DEAR TIM: I have had several new homes built for me. I was determined to stay within budget on my most recent project. I had a solid contract, an extensive cost breakdown provided by the builder, a decent set of blueprints and specifications and I still was surprised with a bill for nearly $57,000.00 worth of cost overruns. Please look at my documents and tell me what went wrong. Jim D., Cincinnati, OH

DEAR JIM: The autopsy report is in. There were multiple causes for the cost overruns. The blame can be traced to mistakes on your part and some on the part of the builder. Unfortunately, I have also discovered some evidence that may lead to an indictment on the part of the builder. It appears that there are several items that are being presented to you as overruns that are simply bidding shortfalls made by the builder. These mistakes should be paid for by the builder or deducted from his final payment.

Your contract appears to be very good. It is a fixed sum contract that locks in the total cost of the home. The wording of the contract clearly states that the builder will construct the home using the plans and specifications. The contract references the itemized cost breakdown sheet showing each phase of construction. Indeed there is a line item cost for many aspects of the job. The contract further states that the builder will receive a profit and overhead sum of 17 percent in addition to these specific costs. I have no trouble with this method of compensation.

The first problem that I see is that the plans and specifications are missing a considerable amount of detail. For example, I can see exterior trim boards and other woodwork, but the plans do not indicate the type of material nor its size. I see countertops drawn but no material type is mentioned. I see bathrooms but wonder if you are going to get shower doors or curtains, towel bars, toilet paper holders, etc. The plans show that you will have a brick exterior but there is no mention of the level of quality of the actual brick material.


How would you like me to build your new home? It's probably impossible for me to fit your job into my schedule, but I will gladly share hundreds of my tricks and building secrets with you and your builder. Check out my New House Specifications.


I see a line item in the cost breakdown for brick, but it is a big number. There is no separate breakdown for brick labor, sand, mortar, structural steel lintels, flashings, etc. This lack of detail allows a dishonest builder to play the classic shell game. When asked, the builder lowers the actual budgeted cost of an item by artificially puffing the costs of one of the other items within the group.

To avoid this problem area, the cost breakdown for a new home must have a line item for labor and many of the different materials for each phase of the project. This method allows you to see if material costs have been exceeded and if so, whose fault it is. For example, there were several areas where you blew the budget because you selected more expensive fixtures. Your lighting fixtures, plumbing faucets and kitchen cabinets all exceeded the allowance as specified by the builder.

This particular nightmare can be avoided by simply eliminating allowances. Clever builders can insert low allowances to make their overall bid number low. Once you sign the contract and start construction, this flaw becomes painfully apparent. In other words, preselect ALL fixtures and items and list them in the written specifications before the job is bid by the different contractors. If your bids come in too high, you can lower costs by choosing a less expensive fixture. The builder is trying to take advantage of you in several areas. He is trying to charge you $15,000.00 more for a retaining wall that is clearly shown on the site plan. You have not requested any changes to the wall and it appears to be a straightforward task. Based upon the line item for the wall in the cost breakdown, I feel the builder simply made a mistake and underbid this aspect of the job. He did the same thing with all of the exterior concrete work. I did a quick calculation and determined that you can barely buy all of the concrete for the amount he has provided for in the cost breakdown.

Finally, I see that you requested several changes during construction but that there are no signed change orders. That was a major mistake on your part. Never allow a change to be made unless you are presented with a written change order that both you and the builder sign. The change order should clearly show any additional charge or credit depending upon the nature of the change.

Special Gray Primer

paint primer

DEAR TIM: I have had all sorts of problems in the past with finished wall paint colors not being what they look like on the color chip. The end result is that I might have to paint the wall surfaces two and possibly three times even though the paint manufacturer claims one coat coverage. What am I doing wrong? Is there a way to get true one coat coverage and a perfect color match at the same time? Carol K., Pepper Pike, OH

DEAR CAROL: You are by no means alone. Your wall painting troubles are experienced by many homeowners and rookie painters alike. The causes of the poor coverage and color rendition problems can be traced to many things, not the least of which might be simple operator error. In other words, it is possible that you are putting too little paint on the wall. But residential paint technology has recently undergone a huge change. Color rendition and coverage problems are being overcome in a most unusual fashion.

Although it may not seem so to the average person, paint is a very complex product. But if I had to define paint in two words, I would simply say that it is colored glue. It can be formulated in many different ways so as to coat many different things. The pigments that produce color in paint are also very complex. The characteristics of both the paint and the pigments need to be finely tuned to produce different qualities such as hiding power, washability, fade resistance, etc. To further complicate the issue the paint needs to be easy to apply, meet Federal EPA guidelines, have exceptional durability, clean up quickly, etc.

Painting tools and application techniques further complicate the issue. You may have a superior paint product but it may not look good once applied if you use poor quality brushes, roller covers and spray equipment. Add to this the human factor. I have seen people paint walls in the most unusual ways. Typically they apply the paint too thin. Keep in mind that the volume of paint that you apply to the wall is not the finished volume once dry. The water or petroleum based solvents that give paint its liquid characteristic when wet evaporate into the atmosphere as paint dries leaving a much thinner coating than what you look at while applying it.

Up until recently paint manufacturers and store clerks have advocated using a white primer/sealer paint to cover new drywall, wood and plaster in homes. It was not uncommon for a store clerk to recommend tinting the primer a similar color as the finished wall paint. But even still paint coverage problems persisted. The use of a primer/sealer on both new and existing wall and ceiling surfaces is a very good thing. These often overlooked paints solve porosity problems where light and dark grains in wood or differences in drywall paper and joint compound soak up paint at different rates. The heavy pigment content of the primer/sealers also help to create a uniform finished texture. But even after using these products people still had trouble getting one coat coverage that yielded perfect color rendition as seen on the paint color chips.

Some very clever paint researchers discovered that tinting the white primer/sealers to various shades of gray solved the one coat color issue. A few colors worked fine over the white primers but a majority of the color palette that you see in the huge displays and color chip fans require a gray tinted primer to reproduce the exact color you see on a particular color chip. The paint manufacturers and retailers in certain stores know exactly what shade of gray to tint the primer/sealers so that the colored finish coat paint covers in one coat.

This technology of using a gray primer instead of a colored one is based in black and white photography. Have you ever watched an old movie? The actors and scenery were absolutely in vibrant color, but they only had black and white film. So what you and I see are different shades of gray except when a true black or white image was captured on camera. Each color, no matter if it's a shade of blue, yellow, green, red, brown, purple, etc. has a corresponding shade of gray! You can prove this by taking a photo with your digital camera in the black and white mode. Use the correct shade of gray that corresponds with your color, and magic happens.

There is a huge advantage in painting with this new system. Without the gray primer/sealer you may get the good coverage and true color rendition. But by not using a primer/sealer you very likely will see shadows on a wall or texture differences that detract from the beauty of the painted surface. Using a tinted paint with the appropriate gray primer will insure that the two coats will result in a perfect paint job. Visit your local paint store or a retail store that sells paint. If the store manager or head clerk is clueless about the special complimentary gray primer/sealers, you better walk out the door and find the right paint retailer!

Hanging Hammocks

hammock

Yes, that is me filling my backyard with lots of ZZZzzzzzz's. The sun somehow makes my blonde hair look gray in this photo.

DEAR TIM: I just received a splendid hammock as a gift and now I need to hang it. What is the best way to hang the hammock? What is the minimum and maximum distance trees can be apart from one another to make a hammock work? If my trees won't work, what are my alternatives? Allen W., Cheyboygan, MI

DEAR ALLEN: Just thinking about hammocks makes me sleepy. When the soft cotton ropes of my hammock gently cradle me on a summer afternoon, my troubles fade away as fast as a shooting star steaks across the night sky. I can't think of a more comfortable way to relax than in a hammock that is suspended properly and securely.

I still have the first hammock my wife and I purchased over 15 years ago at a small shop in Pawleys Island, South Carolina. While at the shop, I knew I had a great location to hang it, but I was unsure if it would work. Hammocks come in several sizes and the size you have controls, to a large degree, how it is hung. Since my hammock was a deluxe or two person size, I needed 15-feet of space between the two trees where I wanted to hang it. Believe it or not, when I arrived back home, the spacing was 14 feet 11 inches.

If you have a smaller one-person hammock, you probably can get away with a distance of 12-feet between trees. The way to check is to simply lay the hammock on a clean flat surface. Unfold the hammock on the ground as it will be suspended in the air. Measure the distance end to end from the circular suspension rings where the cotton cords are strung. The spacing between the trees should be about one foot more than the total length of the hammock. Once hung, the hammock develops a slight sag. This works to your advantage as you need some space for the hardware that is used to connect the hammock to the trees, wood posts or metal frame.

I prefer to use one half inch diameter eye bolts as the primary connector. Do not confuse these with eye screws. An eye bolt has a circular closed end loop at its end and fine machine threads that accept a standard bolt and washer. You drill a hole completely through the tree five to six feet above the ground. The threaded shaft of the eye bolt should be two inches longer than the diameter of the tree where you drilled the hole. Insert the eye bolt through the tree so that you can attach a washer and a nut to secure the bolt to the tree. If you have trees that are spaced farther apart than 15 feet or so, the eye bolts need to placed higher off the ground to account for the inevitable sag that will result when you suspend and lay in the hammock.

I feel it is very dangerous to use an eye screw. This hardware item has coarse threads and no nut or washer. An eye screw fastens into the tree as you would turn any screw into a piece of wood. Eye screws can strip and can pull out of the tree with little or no notice. If your hammock suddenly crashes to the ground with you or someone else in it, serious permanent back and neck injuries are a distinct possibility.

The hammock is attached to the eye bolt with a connecting-link chain connector. This connector allows you to safely connect the rounded loop of the hammock to the eye bolt. If the trees are too far apart or you want the hammock closer to the ground, you simply purchase some 3/16 or 1/4 inch sized chain and use it in between the eye bolt and the hammock loop. If you use chain, you will need two chain link connectors at each end of the hammock. Wooden six inch by six inch posts can substitute for trees if your trees are too far apart or too close together. These posts need to be placed in the ground and surrounded by at least eight inches of concrete. The post should extend a minimum of 24 inches into the ground. Be sure that the bottom of the hole is wider than the top diameter. This bell-shaped design prevents frost heaving from pushing your pole out of the ground over time if you live in a colder climate.

If you want to avoid the hassle of trees, hardware, posts and concrete simply purchase a hammock stand. These are made from tubular steel and fit most common hammocks. They assemble in less than one hour and are very sturdy. You can set them up anywhere and move them about in your yard as the sun creates new areas of shade during the day.

Column 418

Deck Support Columns

deck support column

Deck Support Column - This is how NOT to support a deck. There's no metal post-to-beam connector. Copyright 2018 Tim Carter

"Tall decks typically need larger diameter support columns than decks that are closer to the ground."

Deck Support Column Checklist

  • Wood is good but steel is supreme
  • 6x6 wood posts are best
  • 4x4 steel columns last forever
  • Local welders can make steel columns fast

Related Links

Wood Deck Post? Always Notch and Go Big - Secret Notching Info Here - Do NOT SHARE

Pro Deck Railing Connection Tips

Deck Support Column - Don't Kick Steel to the Curb

DEAR TIM: It's time for me to build a fairly tall deck. I've seen wood support posts twist and crack. I don't want that problem. What are my alternatives? I am looking for something that's sleek, simple and easy to install. Mark O., Scottsdale, AZ

What Causes Wood Posts to Twist and Crack?

DEAR MARK: The hot and dry climate you live in can quickly cause wood to shrink. This shrinkage creates all sorts of internal stresses within the wood that lead to twisting and cracking. Some wood species are much more resistant to these defects, but I doubt a lumber retailer would ever give you a bulletproof guarantee. I think you should consider another building material - steel.

treated lumber post

This is a treated lumber post that's been well cared for. Note the rot and the cracks. I know the homeowner. It's been regularly sealed yet it still rotted out! Copyright 2017 Tim Carter

Does a Steel Deck Support Column Make Sense?

steel column for a deck

This 4 x 4 steel column is about 9 feet long. Welded to the top of it is a U-shaped saddle that is just the right width to handle two 2 x 12s. The steel fabricator punched the 5/8 inch diameter holes in the saddle so it was easy to drill the beams and insert the through bolts to secure the wood beam to the steel.

There are several reasons steel makes sense in your situation. Tall decks typically need larger diameter support columns than decks that are closer to the ground. If you were to build with wood, a structural engineer might specify six inch by six inch or larger wood support columns instead of traditional four by four columns.

Switch to steel and I am quite confident a four by four steel column will perform as well or better than a six by six wood column of the same length. A structural engineer can quickly confirm this for you.

Free & Fast Bids

CLICK HERE to get FREE & FAST BIDS from local welders who can make the steel posts.

Do Steel Columns Look Sleek?

The smooth and uniform appearance of painted steel also makes it a good choice for you since you desire that sleek look. Steel keeps its shape and requires very little maintenance if you paint it correctly from the start.

EB015 Cleaning & Sealing Deck eBoo Cover

Have You Installed a Steel Deck Support Column?

I've installed steel support columns on more than one deck. The material is easy to work with and connecting the steel to the underside of the deck is a simple matter.

Making the connections to the concrete piers buried in the ground is also an easy task. Perhaps the hardest thing is taking accurate measurements to determine the height of the steel columns. A local welder can build the columns for you and should be able to help you confirm the accuracy of your dimensions.

How Do the Columns Connect to the Beam?

The steel columns almost always connect to a beam under the deck. You need to determine the thickness and height of this beam.

These dimensions dictate the width and height of the metal channel that will be welded to the top of the steel post. This U shaped channel cradles the beam. The welder will punch or drill 9/16 or 5/8 inch diameter holes in the U-shaped cradle. Once the beam is in place in the cradle, you drill through these holes and insert one half inch bolt and nut to permanently attach the wood beam to the steel column.

two level deck

Believe it or not, this is one 21-foot-long steel column! It passes through the first deck on its way to support the second triangular deck off the master bedroom. It was very cool to assemble this deck I must tell you.

The steel column is connected to the concrete piers with one half inch diameter stud anchor bolt. The welder should install a 12-inch square 1/4 inch thick steel plate to the bottom of the steel column.

A similar 9/16 inch diameter hole should be punched near each corner of this plate. Once the steel column is perfectly plumb and resting on the center of the concrete pier, you drill through the holes in the steel plate into the concrete below. Hammer in the stud anchors and tighten the nuts. Be sure the nuts and washers are installed on the stud anchors before you strike them with a hammer. The hammer blows can damage the uppermost threads of the anchor preventing you from installing the nuts.

CLICK HERE to get FREE & FAST BIDS from local welders who can make the steel posts.

Should the Steel Column Be Pre-Painted?

The steel column assembly should be completely primed and painted before it is installed. Painting it this way minimizes any future rust problems. I prefer to use special rust inhibitive primers that are formulated to bond well to bare steel. There is a very good chance your welder will have some high-quality primer for this purpose. Many welding shops deliver primed fabricated steel to job sites. It may make sense for you to have the welder prime the steel and you apply the finish coat.

Should a Drain Hole Be in the Base Plate?

Be sure the welder produces good solid welds at the top and bottom of the column. Ask if he can punch a drain hole in the middle of the bottom steel plate. This hole allows any water that may one day find its way into the column a place to drain from the column. Water that gets trapped inside the column can cause the column to prematurely rust from the inside out.

CLICK HERE to get FREE & FAST BIDS from local welders who can make the steel posts.

Adhesive Remover

flooring adhesive

The adhesive under this cork flooring is thin and impossible to scrape up without some type of liquid adhesive remover.

DEAR TIM: I recently removed some old plastic wall tile and floor tiles. There is a rock hard layer of adhesive that needs to come off before I can install new flooring and wall coverings. What is the best way to chip off this hard material? I struggled to remove the floor tile. Is there a trick to removing vinyl floor tiles? Veronica M., Atlanta, GA

DEAR VERONICA: Wow! Now here are two jobs I would make excuses for all day long. The thought of doing both projects back to back is true mental anguish. There are some tricks I have discovered that will make the jobs progress somewhat faster. The good news is that the hard adhesive residue can almost always be softened and disposed of.

Adhesive removal can be a chore. The primary reason is that there are so many different types of adhesives. Reversing the chemistry to make the rock hard deposits soft again can only be accomplished by using the correct adhesive remover. Fortunately, there are many superior products that are readily available. What's more, many are job specific. The product label frequently describes exactly what they will do.

Adhesive removers are very closely related to paint strippers. The reason is very simple: paint is simply a colored glue. Many of the companies that produce paint strippers manufacture adhesive removers. The products soak into the adhesive transforming it back to the paste or liquid state. Once it is softened, you can usually remove it with a hand scraper.

The most user-friendly adhesive removers are made with citric acid technology. Look for the word "citrus" in the label and be assured the product will be fairly easy to use. These products often are water washable and are low-odor. Some are liquid and others are a paste. You simply apply them to the hard adhesive, stand back and let them work. The paste products work best on vertical surfaces.

Another user friendly product is a soy-based adhesive remover. This product softens a wide range of old adhesives. It also rinses off with water. Keep in mind that these products often have a dwell time of several hours. This means that you apply them and wait for them to soften the glue. The product labeling usually gives you a good idea of the minimum dwell time. If you get impatient and try to remove the adhesive before the remover has had sufficient time to work, you will just add to your workload. Let the remover soften the hard adhesive completely, before you start to scrape.

Pay attention to recommendations regarding sunlight and wind. Direct sunlight and wind can evaporate the products. If you apply certain adhesive removers and neglect to follow instructions, the adhesive may get soft and then re-harden before you have a chance to remove it. It is a wise idea to try a small test section to get a feel for how quickly the adhesive remover works.

Tough adhesives sometimes require a solvent based adhesive remover. These products are more toxic than the water based adhesive removers. Pay very close attention to all label warnings. These products are often highly flammable and the fumes can be very dangerous to inhale for a period of time. Work in a well ventilated space.

The adhesive removers can be found in many hardware stores and large paint stores. The Internet is also a good place to shop for specialized adhesive removers for unique projects. Keep in mind that most of the paint stripper manufacturers also have a companion adhesive remover line. A particular store may be able to order the product if it is not a stock item.

Several years ago, I read about a technique to remove vinyl floor tile one piece at a time without breaking the tiles. All you need is a block of dry ice. Slide the dry ice over a tile and within a few seconds it will contract just enough to release itself from the adhesive bond. Frequently, you will hear the tile "pop" loose. You move the ice block to the next tile and pick up the full tile that is now floating free above the adhesive layer.

If you decide to try this method, be aware of certain dangers. The dry ice is simply solid carbon dioxide. You must ventilate the space you are working in very well to dissipate the gas. Failure to do this can cause serious injury or death. The carbon dioxide can also kill any animals that might be nearby. As long as you can open some windows and bring in outdoor air, you should be fine. Wear thick gloves as well. The dry ice can cause instantaneous frostbite if it touches exposed skin.

Column 421

Handicap Showers

Handicap Shower
DEAR TIM: I am building a bathroom and want the ceramic tile shower to work with a wheelchair. Since a curb of any type will hinder access into and out of the shower, the floor of the shower needs to be flush with the floor of the bathroom. Can this be done in a typical home? If so, what do I need to know to make the shower and bath floor leakproof? Earl B., Sacramento, CA

DEAR EARL: You bet you can do this. It is far easier to do it in a new home rather than a remodel, but even in an existing home, a top quality remodeling contractor working with an expert tile setter can accomplish this task. Perhaps your biggest obstacle will be creating a large enough space for the shower area. Rotating a wheelchair in a confined space requires a floor space that measures 54 inches square. A 60 by 60 inch space would be ideal.

Many people are familiar with gang showers in high school where all sorts of shenanigans happened after each physical education class. Some modern day gym and workout businesses also have showers where the floor is flush with the changing room. Accessible showers are nothing new, not by a long shot. But as the population is aging, there is indeed a growing need for them in average residential housing.

A typical ceramic tile shower has a cement mortar base that is just beneath the tile. The thickness of this mortar system can be as little as 1 to 1.5 inches. If you have ever used one of these showers, you know the slope does not have to be significant for water to find its way to the drain. The shower floor area simply needs to slope 1/8 inch per foot to achieve excellent drainage. The rest of the bathroom floor should have a very slight tilt back towards the shower stall so that water spray from the shower into the bathroom could work its way back into the shower area.

The subfloor system needs to be designed so that the shower area is 1.5 inches lower than the subfloor in the main area of the bathroom. If the subfloor is a wood based system using traditional joists, you create a small, dropped flooring area using joist hangers and smaller sized floor joists. If your house is built on a concrete slab, the concrete in the shower area needs to be lowered the same amount. In both instances, the tile setter will add a sufficient amount of cement mortar to raise the floor within the shower to the same level as the remainder of the bathroom.

A special liner is placed on the subfloor of the bathroom and the shower area before the cement mortar is installed. This waterproof membrane is permanently connected to the shower drain and it laps up the side walls of both the shower and the bathroom walls. Any water that seeps through the tile and mortar is collected by the membrane and directed to weep holes within the body of the shower drain. I prefer to use a membrane that is made with chlorinated polyethylene. This material comes in rolls and has a special solvent that allows you to weld seams together so that you can protect the entire floor area. This membrane is commonly sold at ceramic tile specialty stores and full service plumbing supply houses.

There are several other issues that you need to be aware of when building this shower area. Soap dishes and shelves for shampoo need to be at a comfortable height for those using the shower. The actual shower valve control needs to be positioned so the challenged individual can easily turn the water on and off. A hand held shower device attached to the main shower head is also a must.

The shower valve is very important. Many shower valves are anti-scald. In fact, the modern building codes mandate it. Most anti-scald valves are designed to sense pressure differences. That is fine in most instances. But if you desire the best valve to protect against scalding, consider installing one that is both temperature and pressure sensitive. These valves allow you to preset temperatures so that people using the shower have little risk of getting burned.

Finally, be sure to install one, or possibly two, shower curtains to prevent water spray from getting into the main bathroom area. These shower curtains need to extend down to the floor and have weighted corners. One curtain should be well within the shower area so that water spray can't find its way onto the main bathroom floor.

Column 422