Wood Wall Covered in Artificial Stone

wood fence artificial stone

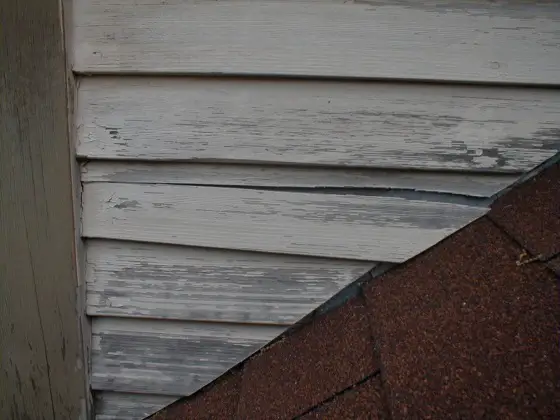
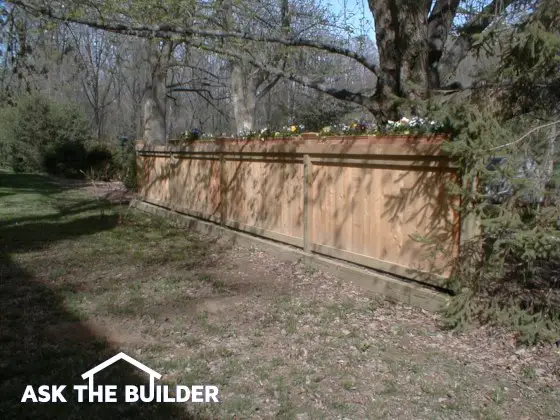
Artificial Stone on a Wood Fence | This is my neighbor's wood fence. It has a smooth face to which you could attach artificial stone. The challenge is to make sure the fence sections are securely attached to the posts as the weight of the stone can be significant. Faux stone on wood walls is possible.

DEAR TIM: I want to build an exterior wall around my pool area. My dream wall would be made from stone. But my skills are heavily weighted to carpentry. Therefore, I think a masonry wall might be out of the question. I am not looking forward to wood because I realize it will need periodic maintenance. Is there an easy no-maintenance material I can use? What do you suggest? Gerry M., Malone, NY

DEAR GERRY: This is indeed an ambitious project and one that will look good once completed. A stone wall would be very attractive and I think you should not abandon this idea. You need to think outside the box. What if I told you that you could build a wood wall and cover it with artificial stone that is so realistic it would fool even a geologist?

Should I Check My Zoning Laws?

Before you proceed to the lumber yard and stone center, you need to stop by your local government zoning office. Many cities, towns and villages have strict zoning laws that control yard walls and fences. These laws even control walls and fences surrounding pools. You need to pay particular attention to the minimum and maximum heights of the wall and the appearance. Some zoning laws regulate the materials you must use and the appearance of the surface that faces your neighbors.

CLICK or TAP HERE to get FREE BIDS from local stone masons who can install faux stone.

Is Artificial Stone Affordable?

You can purchase affordable artificial stone that can be applied directly to a wood wall substrate. This stone is made using colorful iron oxide pigments, cement and special small lightweight aggregates that are poured into highly specialized molds. The molds are vibrated so that the face of the concrete stones picks up every detail of the molds. The resulting texture and color of the artificial stones is incredible. They come in all different colors, textures and sizes. The color is solid throughout and they weather just like traditional stone.

Is it Easy to Install Artificial Stone?

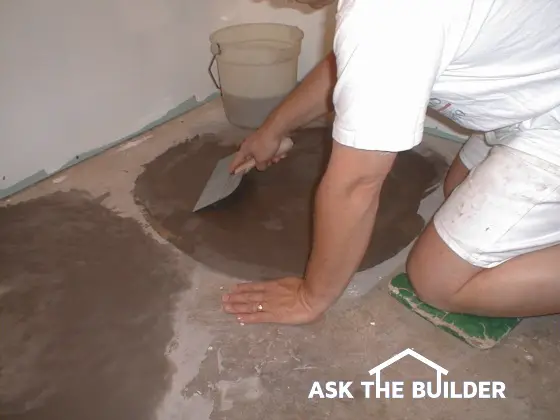
It is easy to install the stones. They are simply pushed into a bed of mortar that has been troweled over a layer of galvanized wire lath. The stones are generally easy to fit and you are supplied with special corner stones that allow you to finish off any outside corners.

What are the Important Installation Steps?

There are several important steps you need to consider if you want a wall that will not deteriorate or crack. The combined weight of the lumber and the artificial stone and setting mortar will be considerable. If you build the wood wall like a traditional fence, all of the weight will be concentrated upon the vertical posts. These posts must be placed on eight inch thick by 30 inch diameter footers that extend below the frost line in your area.

What is the Best Lumber to Use?

I would consider using treated lumber for all of the posts, beams, and plywood for the sub-wall that acts as the hidden support system for the artificial stone. The beams need to be securely fastened to the posts with either a mortised recessed joint in each post or by using structural framing connectors that are readily available at most lumber yards or hardware stores. Simply nailing the horizontal beams into the posts is a recipe for disaster. All fasteners must be galvanized.

CLICK or TAP HERE to get FREE BIDS from local stone masons who can install faux stone.

How Long Should the Wood Weather?

After the wood wall is constructed, it should weather for a period of 30 to 60 days. This will allow it to shrink. Treated lumber often contains lots of moisture. If you construct the wood wall and immediately cover it with the artificial stone, you may get random cracks in the joints between stones as the wood member shrink and contract.

Should I Use Tar Paper over the Wood?

It is also a great idea to place tar paper over the entire wood structure just before you nail on the galvanized wire lath. Because water can soak through the mortar that holds the stones onto the wall, this tar paper will keep the wood dry. If the wood were to get wet at a later time, then it might swell. This swelling could also create random cracks.

The shop that sells the artificial stone will very likely give you numerous building tips. This product is used all over the USA for garden walls and privacy walls. You will by no means be the first person to use this artificial stone to create a paradise around a pool!

Column 358

Fixing Toilet Drainage Problems

toilet ring and flange

Fixing Toilet Drainage Problems

DEAR TIM: My toilet leaks at the floor level. I am convinced it has something to do with the fact that it rocks side to side each time it is used. Upon removing the toilet I noticed the metal ring is rusted and the toilet bolts have nothing to grab onto. I would prefer not to cut into the drain lines if possible. What is the best way to fix this? Steve W., Lawton, OK

DEAR STEVE: Toilets are not supposed to act like rocking horses, that's for sure! It is vital that toilets are securely attached to the drainage system and that there is a seal in place between the toilet and the drain system. The seal prevents sewer gas from invading your home and it insures that all toilet waste goes down the drain and not into your home. Toilet seal problems are significant health hazards and require immediate attention.

Plumbing drainage systems have special fittings that make the transition from the pipes to fixtures. Beneath sinks plumbers use a fitting called a "desanko". This fitting has a nut and a washer on it that allows you to connect the P trap pipe to the drainage system. As you tighten the nut, the washer compresses around the P trap pipe and creates a waterproof and airtight seal. Unfortunately, we can't do the same thing with toilets.

Toilets are connected to the drainage system using a toilet flange. The flange fitting should be set so that the top of the flange is about one quarter inch above the finished floor surface. The flange contains several holes that allow you to securely fasten it to the wood or concrete floor beneath the flange. It is very important that the rim of the flange is supported by the floor. The weight of the toilet and anyone using it should never be transferred to the drainage pipes.

This flange fitting has special slots in it that toilet bolts fit into. The toilet bolts extend vertically through the flange and pass through the holes in the base of your toilet bowl. Using nuts and special washers you then tighten the bowl to this flange.

You can purchase a flange extender ring that simply fits over your rusted metal flange. These extenders usually come with a special paste gasket seal. You must use this sealant or silicone caulk between the new flange extender and the old rusted ring. This joint absolutely must be water and gas proof. Visit a traditional plumbing supply house to obtain this flange extender.

Once your new flange is in place, you must make the connection between the toilet and the flange water and gas proof. This is accomplished by installing a wax ring on top of the flange. Wax rings come with or without a horn. A horn is a plastic diverter that directs water into the drain pipe. I prefer wax rings that have this horn. The wax is very sticky and works very well as long as the toilet does not move once the bowl is in place. This is where many rookie plumbers and homeowners make a critical mistake. They move the toilet to some degree after it is in position.

toilet flange thumbnail for videoClick here to watch a toilet flange installation tip video.


Toilet bowls should be installed so that they are level side to side and front to back. The trouble is most bathroom floors are not level. Once your flange extender is in place I want you to set the toilet on top of the flange without the wax ring in place. Use wood shims and a two foot long level to get the toilet so that it is indeed level. Gently lift the toilet off the flange without disturbing the wood shims.

Place the wax ring onto the flange with the horn pointing down into the drain pipe. Be sure the toilet bolts are sticking up through the special slots in the flange. The wax ring often will hold these bolts in place. Slowly and carefully position the toilet onto the wax ring. A helper is handy at this stage and will make sure the bolts make it through the holes in the base of the bowl. Lower the toilet slowly until it contacts the wood shims. Tighten the toilet bolts and grout the space between the floor and the base of the toilet. When the grout sets carefully remove the wood shims and fill these holes with the same grout. You will enjoy years of leak free performance!

Column 359

Watch this video to see how Tim SOLVED a problem in minutes!

CLICK here to learn more on how Tim can help solve your problems.

Creating Brick Patios

brick patio

I feel one of the most important aspects of creating a brick patio is to make sure the patio is sized properly. You can download amazing how-to instructions to build this patio. Go here to get the instructions.

Building a Brick Patio - Use Clay Paving Brick

DEAR TIM: I have a perfect spot in the back of my house for a patio. The look of real brick is very appealing to me. Is it possible for an average person to install a brick patio? What is the easiest method and what is the most permanent method? What do you think the materials would cost? Pamela S., Overland Park, KS

DEAR PAMELA: Patios can be created using all sorts of materials including, but not limited to, concrete, Patterned Concrete®, stone, ceramic tile, traditional clay brick and concrete brick. I have worked with all of these materials but I must admit that the traditional red clay paving brick has always received the most glowing compliments from customers and people who walk on my own brick patios.

Not all brick are created equal. People who live in cold climates need brick that can withstand years of freezing weather. You live in an area that does indeed get cold so be sure that the brick you purchase is graded and rated for severe weather. This brick is made with high quality clay and is fired in the kiln for an extended period. These conditions create a hard brick that is very durable.

The Size of the Patio Must Be Correct

I feel one of the most important aspects of the job is to make sure the patio is sized properly. All too often people make patios and decks too small. I would purchase the patio furniture you intend to use. Place it exactly where it will be used. Use spray paint or string to outline the edges of the patio allowing sufficient room for grills, side tables, flower pots, etc. Using this outline you will be able to estimate the total square footage of the patio.

DIY-Friendly Job

An average person can install a brick patio. If you work alone, it will take many days of work. All too often people think they can do jobs like this on a weekend. I find that rarely to be the case. Be conservative in your time estimate so that you do not rush and cut corners. An average-sized patio that measures 15 by 20 feet may consume 100 to 150 man-hours of labor.

The Two Brick Patio Methods

Clay paving brick can be set in a sand base that is supported by a crushed gravel base. They can also be permanently attached to a poured concrete base. I have tried both methods and I can tell you that the brick over sand method is by no means permanent. Moles can push up bricks, ants love to bring sand to the surface between the joints and this sand is often tracked back into the house. Weed control is a constant problem as well. Installing the brick with cement mortar over concrete eliminates all of these problems.

PC1450 PDF cover page

Download my step-by-step instructions to build a patio using brick. These instructions come with videos, illustrations, links to top tools, and SECRET formulas for both mortar and cement paint. You can get the step-by-step instructions here. It includes a rare secret recipe for the mortar!

How Much Work Does it Require?

The amount of work to do both methods is quite different. In both instances, you will need to excavate and remove soil to create the area for the gravel or concrete base. Transporting the gravel or concrete via wheelbarrow to the patio site is the same amount of work. Installing the base materials is also very similar. Moving brick to the patio and placing each one is the same. The biggest difference is the time spent carefully placing bricks in a cement mortar and then grouting the joints the next day. Comparing the time for both methods I would estimate that you will spend an additional 40-60 hours to get a permanent installation. This is a bargain for a surface that will give you years of beauty and trouble-free service.

How Much Does A Brick Patio Cost?

The cost to install a traditional brick patio is affordable. I prefer to use the one and one half-inch thick solid paving brick. These measure four inches wide by eight inches long and currently cost forty cents each in my city. Each square foot of patio surface requires approximately 3.7 bricks. The concrete required for this job will cost about eighty cents a square foot. Miscellaneous materials like sand, cement, and saw blades needed to cut the brick may add another fifty cents per square foot to your cost. The total cost of materials for your patio should be in the neighborhood of $2.80 per square foot or $840.00 if you do go with a 15 by 20-foot patio (The year 2000 costs!).

Column 360

Wood Flooring

wood flooring

DEAR TIM: I really would like to have a solid hardwood floor but my existing house has a concrete slab. Is it possible to install a hardwood floor on top of concrete? How in the world do you attach the strips of hardwood to the concrete? What needs to be done to insure that the floor looks as good as one installed on a wood sub-floor? Stacey C., Boulder, CO

DEAR STACEY: If your slab surface is level with the outside earth or is an elevated concrete slab you can install traditional hardwood flooring over it. Concrete slabs that are below ground level are not candidates for solid hardwood flooring. If you have such a slab, I would consider installing an engineered hardwood flooring. This material is made by taking different plys or layers of wood and gluing them together to make a wood product that is more stable when subjected to elevated levels of humidity often found in basements or below grade slabs.

Wood is a hygroscopic material. In other words, wood changes its shape in response to changes in relative humidity or the presence of liquid water. As the humidity goes up or if wood gets wet, it swells. As the wood dries it shrinks or contracts. This type of movement can cause all sorts of problems with finished wood floors or even wood furniture. For this reason, it is important that the hardwood stays dry and at or near constant humidity levels before, during and after installation.

To successfully install your hardwood floor over the concrete, you need to make sure the concrete is dry. If the slab is new, it usually takes a minimum of 60 days for it to release sufficient moisture before you can proceed with the hardwood installation. If you are building a new home, be sure the contractor installs a high performance cross laminated vapor barrier under the concrete. These vapor barriers are often used in high end commercial jobs and are very nearly impervious to any vapor transmission. They are also very puncture resistant.

To test any slab for excess moisture, simply vacuum a small area first. Then tape a 15 inch square piece of clear polyethylene film to the slab using two strips of duct tape along each of the four edges. If no condensation or fog develops under the plastic after 48 hours, the slab is sufficiently dry. If the slab is wet, then heat the space and open windows or use a dehumidifier to draw moisture from the slab. Retest the floor for moisture content once you think it has dried.

The hardwood flooring is fastened to plywood or 2x4 strips that are securely attached to the concrete. Keep in mind that the height of your finished floor will end up at least one and one half to two and one quarter inches above the slab height depending upon which wood subfloor you decide to use. This raised floor can be a problem at doorways if you or the builder do not plan for this.


Installing a new hardwood floor? Use my Hardwood Flooring Installation / Refinishing Checklist to avoid costly mistakes. I offer a 100% Money Back Guarantee.


Before the plywood or 2x4 sleeper strips are attached to the floor, an additional vapor barrier must be installed on top of the dry concrete. Use the same high performance plastic that should have been used below the slab. The concrete floor needs to be level or in the same plane. Use a 6 foot long straightedge to check for high and low spots. Standard asphalt shingles make excellent shims to fill in low spots. The vapor barrier can be installed over the shingles and then the wood on top of that.

Fastening the plywood or 2x4 strips to the concrete can be done one of several ways. You can buy special hardened concrete screws that can bite into the sides of a pre-drilled hole in the concrete slab. Driving these screws requires a powerful screw gun to accomplish the task. A simple yet effective method is to drill a 1/4 inch hole through the wood and then directly into the concrete. The depth of the hole should be 3.5 inches. Take two 16 penny sinker nails and drive them side by side at the same time into the hole. Use a 20 ounce or larger hammer to drive the nails and strike them squarely. Believe it or not, the nails will bite into the concrete and hold the wood securely to the slab.

Before you actually install the hardwood flooring, make sure the room has been heated to room temperature for at least five days before the flooring is delivered. Once the wood is delivered, remove any packaging so it can acclimate. The wood needs to be exposed to the room temperature and humidity for at least an additional five days before you actually begin to install it.

Column 361

Leaky Outdoor Faucets

outdoor faucet leak

DEAR TIM: My outdoor frost proof hose faucet is stuck in the off position. It is dripping and I want to repair it. This same valve has always been a source of trouble and I would like to have one that is easy to operate and allows for full water flow. How can this be accomplished? My children have requested an easy way to fill water balloons as well. Any suggestions? John D., Derry, NH

DEAR JOHN: You are not alone my friend. I have had all sorts of problems in the past with outdoor hose faucets. Some of them are knuckle busters that cause scrapes on my fingers when I operate them and others just leak after a few years. Just about every traditional residential outdoor hose faucet uses old technology washers and repairing them can be a hassle. I permanently solved the problem at my own home recently. It was inexpensive and took me less than one hour.

Maximizing water flow can be achieved by using a standard ball valve. These valves are easy to find and commonly used by plumbers as shut off valves when they wish to isolate a water supply line branch. Copper tubing is soldered into each end of the valve to make a leak proof connection. These valves do not have a traditional round handle that you rotate several times to open and close the valve. A ball valve has a simple lever handle that only turns 90 degrees. (See above photo.) The handle is easy to operate, especially for older people who have arthritis.

Inside the rust proof solid brass valve is a stainless steel ball. The ball has a one half inch hole drilled through it. These valves will provide a lifetime of leak free performance. When the valve is open completely there are no obstructions nor any convoluted pathways within the valve. Water flows freely to your garden hose. On the contrary, the inside of a traditional valve often resembles a maze that the water has to twist and turn through before it exits the valve. A simple ball valve often costs less than $5.00.

You will need two valves - one for outdoors and the other one will be used indoors to make the new outdoor valve frost proof next winter. The indoor valve will need to be turned off before cold weather and the outdoor valve should be opened and left open all winter to prevent a burst pipe.

You will not be able to directly connect your garden hose to the ball valve. A special adapter is needed. To save you time and trouble finding this adapter, consider visiting a real plumbing supply house or a traditional hardware store that has a full line of plumbing fittings. This brass adapter has male three quarter inch garden hose threads on one end and male three quarter inch and female one half inch threads on the other end. This multipurpose fitting will work for either one half or three quarter inch water supply lines and costs less than $1.50.

The adapter is soldered to the ball valve with a standard copper tubing fitting that matches your ball valve pipe size. I happened to use a one half inch male adapter. Instead of using Teflon tape or pipe dope to make the connection between the two adapters I soldered them together for a permanent leak-proof connection.

The valve and these parts need to be securely fastened to your home. I happen to prefer copper stand off pipe clamps for this purpose. Match the size of this clamp to the size of your water supply line. Be sure to use stainless steel or solid brass screws to attach these clamps to your home. I use two clamps, one on either side of the valve. The two clamps also hold the valve far enough away from the house so that scraped knuckles will be a thing of the past.

I solved the water balloon filling problem at my house with a special hose nozzle. I found mine at a hardware store that had a great assortment of brass hose nozzles. This simple nozzle looks like a midget old fashioned fire hose nozzle. There is no on/off mechanism and the end of the valve reduces down to the size of a standard pencil. The balloons easily fit onto the end of this midget nozzle and the ball valve allows for rapid filling in the event you are overrun by the enemy.

Column 362

Cracks in Wood Siding

cracks in wood siding

The splits in the siding material concern me. My guess is that the siding was not installed correctly when the houses were built.

DEAR TIM: I live in a landominium development where we all have separate houses. Each house is covered with beveled cedar wood lap siding that splits for no reason. Our maintenance committee insists that all split boards be replaced before the outside of a unit is painted. This seems extreme to me. I thought cedar would be a long lasting material. Do the boards really need to be replaced or can the splits boards be caulked? Jim G., Riverside, CA

DEAR JIM: The maintenance committee is doing the right thing. The boards with splits should be replaced. These splits allow rainwater to penetrate deeply into the wood and in some instances behind the wood. Water is an enemy to painted finishes and wood that has not been treated to prevent rot. A new paint job can blister and peel within six months if enough water gets behind the wood siding. You are correct about the longevity of cedar siding. It is a wonderful renewable forest product that contains natural preservatives. But water that saturates the wood sheathing or framing lumber behind the siding may start to rot in a short amount of time.

The splits in the siding material concern me. My guess is that the siding was not installed correctly when the houses were built. Inexperienced carpenters often nail lap siding so that each piece of siding is unable to move. Lap siding is installed so that each piece overlaps the one below it. This overlap creates an excellent weather barrier so that rain water is shed from the siding. Rookie carpenters often nail along the bottom edge of the siding and this same nail pierces the top portion of the piece of siding just below.

This method of nailing pins each piece of siding and makes it nearly impossible for the siding to expand and contract with changes in the weather. Experienced carpenters know that the nails from one piece of siding must not pass through the siding below. If the overlap of the two pieces of siding is one and one quarter inches, then the nail for a piece of siding should be one and three eighths above the bottom edge. This nail spacing allows each piece of siding to float and move easily. Be sure that the painters nail the siding properly as they replace each split board.

When the split board is being replaced look to see if a water barrier membrane is in place. Years ago tar paper was used by carpenters beneath beveled lap siding. It is still a very effective material to use if you do not want water to contact the framing lumber and wall sheathing. Modern fabric water and air infiltration barriers can also be used. These products come in large rolls and are easy to recognize. If you do not see any water barrier behind the siding, then it is vitally important that new siding be installed. In this case, the siding is the only weather barrier. Felt paper and the modern fabric barriers offer an important second line of defense.

If you want to maximize the life of the houses and the paint jobs be sure that the siding is nailed with hot dipped galvanized nails or better yet, stainless steel nails. These nails have the highest corrosion resistance and are worth the extra cost. Be sure the nails are long enough so that the nail shaft penetrates at least one and one half inch into solid wood once it passes through the siding.

The paint job on the replacement piece of siding will last a very long time if the painter can paint both the back and cut edges of the wood before it is installed. When wood siding is completely covered with paint, water has a difficult time getting into the fibers. If you keep wood completely dry using this method, it becomes dimensionally stable. High quality paint will adhere to this wood for many years.

Column 363

Install Ceramic Tile

installing ceramic tile

Install Ceramic Tile


DEAR TIM: I would like to install 12 inch by 12 inch ceramic tile over my existing sheet vinyl floor. The cushioned vinyl would provide a wonderful flexible membrane that would absorb impact. What kind of glue should I use? What else should I do to make sure my tile floor will look like it was installed by a professional? David R., London, KY

DEAR DAVID: Stop! Installing rigid ceramic tile over something that might move is a huge mistake. The resilient vinyl flooring you now have must be removed before you install your ceramic tile. If you don't I guarantee you that numerous floor tiles will crack over time.

I discovered this the hard way years ago. One of my jobs required ceramic tile floors to be installed in a restaurant kitchen. The tile was installed over a concrete slab. But instead of using cement based thinset that dries hard, I used the trowel-on organic mastic that resembles cake icing. Organic mastic retains a slight amount of flexibility once it dries. When the kitchen equipment was placed on the floor, the tiles beneath the equipment legs cracked in short order.

Ceramic tile is very strong if you try to compress it. But if you bend it, it is very weak and will readily crack. The sheet vinyl floor will allow the tile to bend ever so slightly just as the organic mastic gave way beneath the heavy kitchen equipment. Do whatever it takes to remove the sheet vinyl and any glue that is holding it down. Adhesive removers can commonly be purchased at paint stores. These chemicals work just like traditional paint strippers to soften old glue.


If you're putting ceramic tile in your home, check out my Ceramic Tile Installation Checklist to learn exactly what you should know about the process. Avoid making costly mistakes with the help of this document. I offer a 100% Money Back Guarantee.


The large tiles you are working with are very susceptible to cracking. They are highly sensitive to imperfections in the subfloor beneath the tile. Installation instructions often tell you to make sure the floor is level. What this really means is make sure that the floor is in the same plane - as if the floor was perfectly smooth like a new piece of plate glass. Humps or dips in the floor can create small void spaces under each tile. Walking across these spots or concentrating loads at these points will cause future cracks in the tile.

You can eliminate the humps and dips by using a straightedge and floor leveling compounds. I prefer to use the cement based products that mix with water. Most of them will readily adhere to concrete floors or wood subfloors. If you intend to apply your tile on a cement board product that will be nailed to the wood subfloor, you should remove the humps and dips before you nail the cement board in place.

I use three different straightedges and my drywall finishing tools to apply the floor leveling compound. My six foot and four foot long aluminum levels make a wonderful straight edge. I also use my aluminum framing square. Place the tools at various spots on the floor to determine where the humps and dips are. These same tools can be used as large spreading tools that act like bulldozers to evenly apply the leveling compound.

Mix approximately one half gallon of the floor leveling compound with cold water. Many of them are rapid set and you must spread and tool the material within three to five minutes of mixing it. If it starts to get hard in the bucket do not add more water to try to liquify it. This will make the final product weak. Be sure the floor is dust free and slightly damp to achieve the best bonding.


If your getting ready to install tile in a shower, especially the floor of the shower, you must read my Shower Pan eBook. Failure to do so will result in possible water leaks and mold growth at your home. Who wants that?


Using regular drywall tools and a little bit of water you can achieve a smooth glass like surface as the compound hardens. Gently float the wide drywall tools over the hardening compound and it will get smoother and smoother with each stroke. Sprinkle a few drops of water on the compound to make this task easier. Practice on a small spot first until you feel like a pro. Use the straightedges to check for humps and dips in the flooring as you proceed.


Author's Note: We've received other questions with similar problems or questions. Here's one from Krystina G. of San Sebastian, PR, dealing with floor levelness.

"My husband and I have a home made completely out of cement and we want to put ceramic tiles throughout our home. The floor is not level and we wanted to know the best way to go on with leveling floors."

Column 365

Programmable Thermostats

Programmable Thermostat

My programmable thermostat works very well. It is dependable and has four different time periods that will cycle on and off each day.

Programmable Thermostats

DEAR TIM: Electricity and heating fuel prices are soaring. I need to conserve energy. Will a programmable thermostat really help me save money? How can you maximize energy savings when using one? Robin T., Auburn, NY

DEAR ROBIN: You bet a programmable thermostat can save you energy dollars. The amount of savings depends upon many factors. Some people save more than others because they fine tune the thermostat for maximum performance. But keep in mind that these wonderful thermostats can't make a silk purse out of a sow's ear. In other words, if your furnace and air conditioning system is poorly designed and not sized properly to match the heating and cooling needs of your home, the thermostat may struggle to deliver the savings and comfort you desire.

Programmable thermostats are not new. They have been around for years in one form or another. But advancements in electronics and small computer chips have allowed these instruments to become more reliable and affordable. These devices allow you to adjust the temperature in your home up to four times a day. The thermostats have a memory and will raise and lower the temperature at different times so that when you wake up or come home the house is at the desired temperature. When programmed correctly they will also adjust the temperature in the home when you have left for the day or are sleeping.

The typical programmable thermostat has four setting periods: Wake, Leave, Return, Sleep. You simply enter these times into the thermostat and then set the desired temperatures for both the heating season and cooling season if you use air conditioning. To optimize energy savings, set the thermostat back eight to ten degrees when you are away and sleeping. These work best in the heating season. You probably will find that these setbacks are too much if you are using air conditioning. For the most part, air conditioners do not recover as quickly as furnaces.

It often requires a few days to properly adjust these thermostats. You need to learn how quickly your furnace or air conditioner can recover from the set back temperature. In my own home, I have found that it takes just 30 minutes for my furnace to make up the eight degree difference. But it takes 90 minutes for it to drop the temperature just four degrees when cooling. Once you learn how long it takes to go up and down, you can program the furnace or air conditioner to turn on at the right time so that when you wake up and/or come home, the house is at the perfect temperature.

You also need to learn how long it takes to go the other direction. There is no reason why the furnace or air conditioner should be still running just before you leave the house or go to bed. The thermostat should set the temperature back some time before so that you are out the door or under the covers just before it gets uncomfortable.

Not all programmable thermostats are created equal. I suggest you buy a high quality one. Some poor quality thermostats contain electrical components that create false heat. This can cause up to an eight degree temperature difference between the actual air temperature and what the thermostat reads. The best thermostats carry an Energy Star label and cost more money because they contain high quality components.

If you have an existing programmable thermostat, look to see if it contains batteries. If so, change these batteries annually. Be sure the thermostat has indeed been programmed. Often a programmable thermostat is operating as a normal one and the interior temperature never changes. Check the thermostat periodically to see if indeed it is raising and lowering the temperature. Come home early one day to see what is going on ... or off!

Related Column: Programmable Thermostat Sources

Column 367

Brighten up Rooms with Mirrored Doors

Mirrored Closet Doors

DEAR TIM: I need to brighten up the bedrooms in my house but am really concerned about energy costs. Is there a way to add more light or create the illusion of light without giving more money to the utility company? I am on a fairly tight budget and can't afford to hire someone to make the improvements. What do you have in your bag of tricks for me? Ron F. Amelia, OH

DEAR RON: Magicians often employ smoke and mirrors to create a spectacular illusion. Forget about the smoke and consider using mirrored closet doors in the bedrooms. Not only will these doors make the rooms brighter, they will also make the rooms feel bigger. The best news of all is that these products can be very affordable and they are quite do-it-yourself friendly. You don't have to limit the use of these in bedrooms. They are excellent choices for entry hall closet doors.

Mirrored interior doors are really nothing new. For many years builders and homeowners simply purchased a large plate glass mirror and use different clips and channels to mount the mirror on the back of a door. The trouble is when the closet door was closed, the mirror was hidden from view. Placing the mirror on the room side of the door is a modern application that looks smart and distinctive. The glass is available with beveled edges and special decorative V grooves as well.

You can often add a mirror to an existing door but I feel switching out your doors and installing new mirrored door kits may be a better long term solution. The mirrored door kits tend to look much better and the glass is far safer than traditional large mirrors.

The new mirrored door kits are available in either hinged bi-fold doors or sliding by-pass doors. They are available with either full coverage frameless mirrors, doors that have a narrow metal frame, doors that have an attractive wood molding frame or doors that have a rich wood surround that are very traditional in appearance. The wood framed doors are available in cherry, whitewash oak and white ash. They will take your breath away.

Mirrored door kits come in various sizes to fit most standard openings. Standard kits reach up to eight feet tall. If you need a custom size door, some of the manufacturers will make it. This is a great option in case your current door opening is an odd size. You can get doors that fit openings as wide as twelve feet and as high as eight feet. The extra cost to make a custom door above and beyond the door kit cost is usually just $75.00.

The installation of these doors is not difficult. The doors have excellent hardware that is often pre-assembled at the factory. Typically you just have to install a top and bottom track. The by-pass or sliding doors are easier to install than the bi-fold doors. Bi-fold doors simply require tighter tolerances with respect to the opening being square and plumb. If you try to install a bi-fold door in an opening that is out of square the gap at the outer edges of the door adjacent to the wood or drywall jambs will not be consistent. The door will operate fine, but the gaps may look a little unsightly.

The mirrored door kits are not budget breakers. A simple door kit can often be purchased for less than $70.00. The top of the line wood door kits that fit the largest openings can cost over $500.00. But if you are building a new home, the eight foot tall floor to ceiling mirrored doors can actually save you and your builder money. By eliminating the drywall and framing above the doors a builder can often save up to $170.00 per closet. That is a significant savings.

Be sure to look for mirrored doors that offer jump proof rollers for the tracks. Not all mirrored door kits offer this hardware. This hardware will keep the doors on the tracks for many years to come. Poorly designed tracks and roller systems allow mirrored doors to jump the tracks regularly. There is no need for this to happen if you simply purchase the best door kits.

Companion Articles:   Mirrored Door Sizes, Specifications & Tips, Mirrored Doors & Manufacturers

A Patio of Concrete – the Right Way

A Patio of Concrete

Concrete Patio

DEAR TIM: I am building a new concrete patio. It is important to me that the patio is sized correctly and built to last a lifetime. Do you have some important design tips for patios? Does the end of the slab away from the house have to be thicker than the rest of the slab? How can I prevent the slab from tilting towards the house over time as the backfill along the house settles? Steve C., Riverside, CA

DEAR STEVE: I can't tell you how many enjoyable evenings I have spent on my patio with my wife and family. My wife and I spent a great deal of time planning the patio and it paid off. There is a special area for our table and chair set, a planting bed in one part that has a wonderful paper bark maple shade tree in it, a secondary sitting area with a glide rocker and two chairs, a barbecue grill area and still plenty of extra room to spare. You can achieve the same or similar results if you just take your time and sit and think.

Patios and decks are nothing more than outdoor rooms. The trouble is many people stake out an area 12 feet by 20 feet and think that this is a huge expanse. It does indeed look big without furniture on it. But once you place furniture on a patio this size, it starts to shrink rapidly. The truth is a 12 foot by 20 foot patio is not that big at all.

Start your planning by determining just what you want on the patio. A standard round table with chairs requires an area 12 feet by 12 feet. This will give you enough room to walk around the table as people are sitting in the chairs. Keep in mind that the patio will have paths within it that allow you to cross the patio to get to the house or to the yard. Do not place furniture in these critical areas. Use graph paper and scale cutouts of the furniture to help you plan. Pay attention to your existing dining and living rooms. Note how much space there is between chairs, end tables and your couch.

Your local building department may have special recommendations with respect to code requirements and the actual concrete slab. If there are no code requirements then I would do several things. Because you live in a very mild climate you don't have to worry about frost heaving. It was a concern of mine so I placed three inches of small rounded gravel beneath my slab to prevent water buildup under my patio. I installed a hidden pipe in the gravel at one end of my patio. This pipe extends about ten feet and eventually comes to the surface. This pipe helps keep soil moisture to a minimum and this helps to minimize, if any, frost heave.

You should pour the slab at least five inches thick. I would use nothing less than a 7 bag mix or specify 4,500 pounds per square inch strength. The more cement you have the stronger the concrete will be. Remember cement is the ingredient that holds the sand and gravel together!

In addition, I would use both steel reinforcing and fibermesh secondary reinforcing in the slab. One half inch thick steel reinforcing rods placed at two foot centers in both directions will help make your patio enormously strong. The fibermesh consists of virgin polypropylene fibers that are added at the concrete ready mix plant. These fibers help prevent plastic shrinkage and settlement cracks. Specify about two pounds per cubic yard. Place the steel rods in the center of the concrete. The steel rods will help keep the patio in one piece in the event of a crack or settlement. You can drill into the house foundation and place steel dowels that extend into the slab as well. These will help prevent settlement if the backfill does drop alongside your home.

Be sure the soil beneath the patio is compacted. Consider treating the soil for termites if you are permitted to do so. If you have a well, you need to have a professional exterminator do this chemical treatment. Avoid pouring the concrete on hot, sunny and breezy days. The best concrete pouring conditions, in my opinion, are damp overcast days with the temperature hovering around 57F. The slab must have a clear curing compound applied to it immediately after you have given it its final finish.

Column 371