Garage Width for 2 Cars

2 car garage in winter

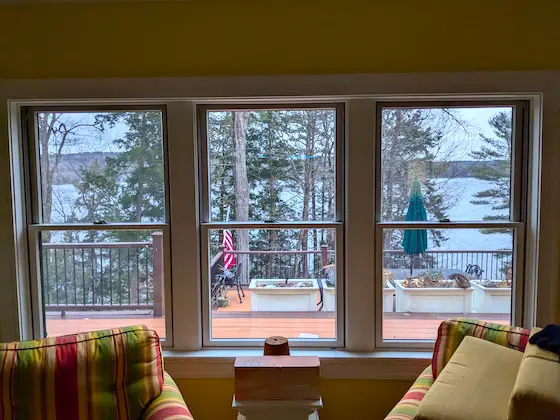
This appears to be a spacious two-car garage. It is so long as you never store anything against the walls or in between the cars. Copyright 2025 Tim Carter

Garage Width for 2 Cars - 26 Feet Minimum 28 is Better

Do you park your car or light truck in a garage? I do both here at my home. I didn’t build the house I live in but hope to build my final dream home with my dream garage in the next few years.

I grumble each time I back my Ford F250 Super Duty 4x4 into my bay. The architect who designed my home made the same mistakes that have been made by thousands of other architects over the past 100 years. Allow me to explain.

Eight months ago I stopped by a new home construction site. The foundation of the house and garage had just been backfilled. The carpenters had yet to arrive. I could see the 16-foot-wide notch for the two-car garage that faced the street. The architect who drew the plans must have been related the the one that designed my flawed garage.

Viral Video

I decided to record a short 50-second video showing the flaw. Much to my surprise this video has gone viral on YouTube. It’s been watched 207,000 times as I type this sentence.

The attached garage at this new house is only 20 feet wide and about 22 feet deep. My guess is you’ve never taken the time to measure the average outdoor parking lot space. Most are 9 feet wide and 20 feet deep. You know from experience that if a car is in the next space and centered, you’ll bang your door against the other car if you try to open it all the way.

A 16-foot garage door cheats each slot out of one foot. Each car in this situation gets only 8 feet of width. It’s a very tight squeeze to get in and out of a car or light truck when both are parked next to one another in a garage like this.

I was stunned by the thousands of comments my video received. Most say the garage is perfect and that I’m a whiner. They didn’t seem to pay much attention to the point I touched on about having garbage cans, recycling bins, bicycles, lawnmowers, plastic storage bins, etc. stacked along the walls.

I decided to survey the 20,000 homeowners like you who subscribe to my free newsletter. I asked the subscribers to watch the same video. The results of the survey were the exact opposite of those commenting on the video. CLICK HERE to see the survey.

Seventy-eight percent of the respondents said they wish their existing garage was wider and deeper. They wanted to have more room to get in and out of their cars and light trucks.

pie chart of garage size results

The question was: Do you wish your garage was wider and deeper so you could store things in it and have plenty of room to get in and out of your vehicle?

Architects of Old Made the Same Mistake

About the same time I recorded the video, I had shared in my newsletter a house plan catalog that is nearly 100 years old. It was published by the Home Builders Catalog Company of Chicago in 1928. The last section of this catalog has many detached garage plans. Each one of them had the exact same design flaw. You can access this amazing catalog at www.archive.org.

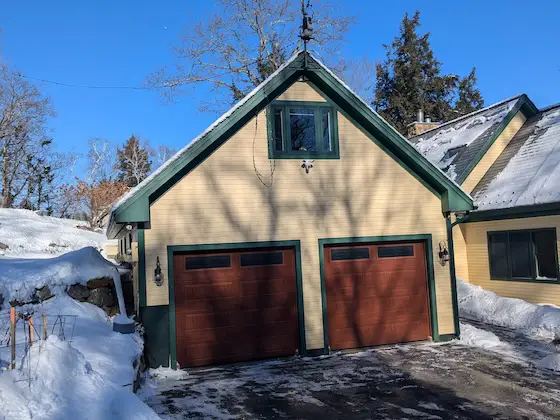
The flaw, in my opinion, is the walls on either side of the garage door opening. These walls almost always measure two feet long from the notch for the door to the outer corner of the garage foundation. All of the old garage plans show the same flaw.

When my wife pulls into our garage, the passenger side of the car is only 34 inches away from the inside face of the exterior wall. Thirty-nine inches of space is required to open a door all the way. Anything wider than one foot stored along the wall makes it impossible to exit the car inside the garage. I have to let my wife out of the car in the rain and snow and have her walk into the garage when we both come home from church. It’s a pesky problem.

Off-Site Storage or Sheds?

The current prices for off-site or on-site storage is higher than thin cirrus clouds. The current rate for a tiny 5x5-foot off-site unconditioned storage space near me is $50 per month. I can rent an on-site storage cube that’s 8x8 feet for $99 per month. Large sheds you can buy to put in your back yard can approach $10,000.

Building a larger garage that has ample space for your car, light truck, and lots of other possessions might only cost you $45 more per month on a mortgage payment. I share this with you in the event you’re planning to build a new home or build a dream detached garage.

There are many other design considerations you should think about when it comes to planning a spacious garage. If you’re an architect, or an architecture student, I recommend you read all of my past columns on my AsktheBuilder.com website about dream garages. Let’s stop cloning that same mistake I see in all those old and new garage plans!

Column 1597

Automist Fire Protection

Automist Fire Protection - Your Personal Robot Firefighter

Traditional fire sprinklers in residential houses require LOTS of water. They're expensive to install.

The Automist fire protection system is a game changer for sure. Imagine having six firefighters living inside the walls of your home ready to spring into action!

I know a thing or two about firefighting. After watching the Automist videos below, GO HERE.

and this one:

Match Brick Mortar Color

brick mortar doesn't match

The person who tuck pointed this brick at the old sardine factory in Bass Harbor, Maine ruined it. He was supposed to match the white hydrated lime and use the correct sand. Copyright 2025 Tim Carter

Match Brick Mortar Color - It Starts With the Sand

You may not know this, but I received a bachelor of science degree in geology many moons ago. I was fascinated by the topic, and it helped me build houses and buildings that would not fail. Hydrogeology, the study of groundwater, and continental glaciation were two subjects that have allowed me to solve wet basement problems for thousands of homeowners like you.

One of the things I discovered in my college years is that normal sand you find anywhere is nothing more than very tiny pieces of rock. Some sand is quite pure like that you might find on Siesta Key in western Florida. Many call it sugar sand.

Most sand is comprised of different small pieces of rock. These miniature boulders are often different colors. Each grain of sand is no doubt a very small piece of a specific mineral. Black particles might be biotite. White sand might be quartz. Orange particles might have originated from a sandstone with a high iron content.

I live in central New Hampshire. The sand that’s used to combat ice on roads sparkles in the sun. The glitter is caused by very tiny flecks of mica. It gorgeous to look at on a sunny day.

I share this background with you for a reason. You may not have ever given much thought to how bricklayer’s mortar is made. Standard mortar is a combination of three ingredients:

  • sand
  • powdered Portland cement, lime, and some other ingredients
  • water

Sand is the most abundant ingredient in the mix. The powdered cement and lime are the glue that holds the sand together and allows the mortar to bond to each brick, concrete block, or rock. Common sense tells you if you just got sand wet and laid brick with it, the brick would not bond to one another.

Masonry buildings older than 150 years didn’t have Portland cement in the mortar. The expert masons of old just mixed hydrated lime with the sand. They added just enough water to make the mortar mix the consistency of apple sauce.

When you mix the three ingredients above to make fresh mortar, the cement and lime coat each grain of sand much like adding beans to a meat chili. The color of each sand particle is hidden by the gray cement/lime coating.

This is why when you look at a brand-new brick or concrete block wall the color of the mortar is uniform. It’s almost always some shade of solid gray.

Mother Nature removes this thin coating of cement/lime paste over time exposing the sand color to your eyes. Look closely at old mortar and you’ll see individual grains of sand at the surface. The mortar color on old walls is created by the combination of all these tiny different pinpricks of color plus the cement/lime paste that you can see in between the particles of sand.

Your job, or that of the workman you hire to tuck point your brick, is to take time and find sand that matches the sand in your existing mortar. You need to match both the color and grain size.

Start your search at the closest gravel or sand pit near your home. Think of how hard it was to get sand to your house all those years ago when it was built. The bricklayer didn’t want to pay to have sand transported great distances if he didn’t have to.

One exception might be if you live in Cincinnati, Ohio. The best bricklayers used a very special silky sand available at the now-closed Rack Sand and Gravel pit.

location of rack sand and gravel pit cincinnati oh

This body of water is the abandoned Rack Sand and Gravel Pit in Cincinnati. The top surface of the water in the pit represents the level of water in the continental glaciation deposits that underlie the entire Mill Creek Valley. Unfortunately, it's probably very polluted by all the industry that's close to the gravel pit. Image Credit: Google Maps

This rare sand was fine-grained and had a tiny amount of loam in it. It made a delightful mortar that was easy to work with and produced stunning mortar joints.

Once you have the correct sand, you now need to concentrate on matching the correct color of the powdered cement and lime. Should you have an old building like the old sardine factory in Bass Harbor, Maine, you know you’ll just have to use pure hydrated lime. It’s a magnificent mortar ingredient that’s been used for thousands of years. Lime produces an off-white mortar.

The patient person mixes and tests the mortar before committing to using it. You mix some up, lay a few bricks, and let them sit for a month. At the end of the wait period you do a light acid wash on the mortar to replicate what takes Mother Nature thirty years to accomplish. The acid wash removes the thin mortar paste from the sand at the surface.

You can then see if one of your batches matches the existing mortar you’re trying so hard to match. Yes, I know this is lots of work, but who wants their house to look like it has a large facial scar running across the brick walls or the chimney?

I know I don’t!

Column 1596

Unique Bathroom Sinks

marble shell corner sink

Unique Bathroom Sinks - This unusual corner shell sink with the minimalist wall faucet might be just what you’re looking for in your home.. Copyright 2025 Tim Carter

Unique Bathroom Sinks and Faucets Speak Volumes

It’s that magical time of year. The International Builders and Kitchen and Bath shows are just weeks away. This year this huge event is in Las Vegas. There are only a few convention centers in the USA large enough to house all of the exhibitors.

I’m blessed to be a member of the working press. As you might imagine, we’re treated like royalty at both shows. Just under two thousand companies want us to come to their booths to see all their new wares. I’ve been doing this for over three decades. You have to carefully pick and choose how you will spend your precious time.

Several manufacturers spend vast sums of money on their presence at the show. One is Kohler. Their booth is an oasis of eye candy if you’re entranced by anything to do with plumbing fixtures. I’ve been a master plumber for over forty years and have installed hundreds of Kohler fixtures. I always enjoy viewing the magnificent and elegant designs they debut at the show.

This is not to take away anything from the efforts of some other major brands like Moen, Delta, and American Standard. I happen to use a stunning Moen kitchen faucet each day here at my home to wash dishes.

This column is not a soft advertisement for manufacturers. It’s about how you can use some of their most unique products to set your home apart from your friends, family, and neighbors. Allow me to share a few stories that might inspire you.

Several years ago one company introduced a bathroom vanity faucet that looked like it was made in a rainforest. The spout appeared to be created from a stalk of bamboo. The handles were shaped like small bamboo stalks. My wife fell in love with it. I ordered one and installed it in our basement half bathroom. This faucet is still made today.

wallpaper installation

This is the bamboo faucet and copper basin. Copyright 2025 Tim Carter

The theme of the bathroom was tropical. We found two different wallpapers and a matching border that made it look like you were inside a grass hut with no glass. The openings gave you a view of the beach just beyond the palm tree line. The bamboo faucet sent water into a repurposed used copper basin. I drilled a drain hole into it creating a vessel sink that recessed into a stunning piece of brown variegated marble. You can use different faucets to create countless themes in your home.

My daughter did a similar thing in the half bath of her new home. The interior of her home was very contemporary. It had no woodwork surrounding the doors or windows. The wall board went straight down to the tile floors.

To extend this minimalist feel into her half bath, she found an antique wall-hung corner sink carved from a thick piece of marble. The artist created a scalloped curved front making the sink appear to be a giant sea shell.

I installed hidden L-brackets that were bolted to the sides of the wall studs. These extended out of the wall and the sink rested on them. The sink appeared to float in midair. The crowning touch was a single-handle wall faucet with a long gooseneck spout. Everyone that sees this sink marvels at it.

Do you think you could enlist the lowly ho-hum toilet to help create an illusion in a bathroom? My son is doing it now. He and I were forced to use a wall-hung toilet in a basement bathroom at his home.

Get the image out of your mind of the stark commercial wall-hung toilets you see in airports, office buildings, or schools. His toilet is a futuristic china fixture with smooth sides. As crazy as this sounds, it’s the most beautiful toilet I’ve ever seen. The water tank is hidden behind the tile wall. There’s a simple touch pad to activate the flushing action.

Are you planning to create a deluxe luxury shower in your home? Perhaps you’re doing a major remodel job or building a new home. Did you know you can install multiple shower heads to create a true rain downpour if that’s what you’re after? You can even include speakers that surround you with the sound of a rainstorm. The shower heads can be both in the walls or in the shower ceiling.

luxury shower with body sprays

There's water flowing from the large shower head. However, as soon as you turn on the three body sprays water dribbles out of every orifice in this luxury shower. The East Coast plumber was a dunce. Copyright 2024 Tim Carter

Should you wish to do this, be sure you or your plumber does the math so you have plenty of water supplying your virtual reality shower experience. You may need to have 1-inch diameter cold and hot water lines feeding your bathroom. If you fail to do this, water may dribble from all the shower heads and body sprays.

You don’t have to have press credentials like I have to see all of these wonderful new products. At the end of February, YouTube will be flooded with thousands of videos shot at the show by members of the press. Search for IBS or KBIS 2025 videos.

You’ll be able to salivate over all the new kitchen and bath faucets from the comfort of your own home. You won’t have to be bumping into people in the crowded aisles like has happened to me too many times in the past.

Column 1595

Best Picture Windows

picture windows bass harbor condominium

Best Picture Windows - This view out to Bass Harbor, Maine was ruined by the window design. It’s such a sad mistake. Copyright 2024 Tim Carter

Best Picture Windows Bring the Outside Inside

I’m quite sure there’s a great chance you’ve been inside a house that is surrounded by spectacular scenery. You may have stayed at a resort like the one in Furnace Creek in Death Valley National Park. Perhaps you’ve stayed in the Mt. Washington Hotel in Bretton Woods, NH.

I can guarantee you the architects who designed the buildings and specified the windows in these locations did everything possible to maximize the view you’d experience when gazing outside. Not all architects are blessed with the talents to achieve this in everyday plans for houses.

I didn’t build the house I currently live in. The architect who drew up the plans squandered the view I have out to Lake Winnisquam here in central New Hampshire. My living room wall that faces the lake has three identical up-down sash windows. The view out to the lake is interrupted by ten inches of wood in between each of the windows.

picture windows lake winnisquam

The architect or homeowner squandered this magnificent view to Lake Winnisquam. Fortunately, a larger window can be installed by a seasoned remodeler in just one day. Photo credit: Tim Carter Copyright 2025

To add insult to injury, the opening could have been nine inches taller and two feet wider. I would have specified a huge picture window that would have been six feet wide by five feet high. A two-foot-wide casement window with no grills would have been on either side of the giant picture window.

I had the pleasure of staying in a condominium on Mt. Desert Island in Downeast Maine just after Christmas. This building used to be a sardine canning factory. The foundation of the building was installed in the tidal zone of Bass Harbor. You couldn’t ask for a more scenic view to the south and west.

As hard as this is to comprehend, the architect specified windows that contained grilles. These obnoxious horizontal and vertical lines ruined the view out to the harbor. Picture windows should have been used. An awning window underneath the picture window would have provided plenty of air should you want the salt-water aroma to fill the inside of the space.

My daughter didn’t make this mistake when she designed her new home six years ago. This quaint two-story home built on Mt. Desert Island, in Maine was nestled in the woods. She wanted to bring the woodlands inside.

This was accomplished by installing huge two-foot-wide by six-foot-high clear casement windows in the living room and dining room. Two of these windows were joined together to create each opening. The result was nothing short of spectacular. I was very proud of her. I assume she must have heard me many years prior talking about architect mistakes as we gathered around the dinner table.

You can create massive openings to bring the outdoors inside your existing home. I’ve done it many times. The last job I did for a customer before transitioning to Ask the Builder I installed a massive 8-foot-wide picture window with two casement flankers on each side. The customer was speechless when he stood in front of it the first time gazing back into the woods behind his home.

A decent carpenter or remodeling contractor can cut openings in solid walls. You can enlarge existing windows making them wider and taller. The carpenter will install a beam over the top of the opening. This beam can be as long as sixteen feet if need be! CLICK HERE to see how easy it is to install a new window in a solid wall.

I’ve created large openings in masonry buildings to install big windows. You can support brick with large angle irons. Structural engineers may have to size all the beams and angle irons, but this is the work they love! Don’t hesitate to ask them how big can you go.

Creating these large openings in new construction is child’s play. A Colorado couple hired me two months ago to act as their virtual general contractor. Their house has a giant wall of windows that is 16 feet wide by 25 feet tall. Realize windows can be custom made to fit openings. We had to do this on this job to maximize the view out to the mountains.

Several years ago I created an in-depth video series showing you how to create an opening in a solid wall. I wanted to install two windows at each end of my garage attic. These windows were smaller picture windows with narrow casement windows on each side. The videos show you how to install the required beam or header above the window. This beam transfers the weight of the wall above the window around the sides of the window.

You don’t ever want to put weight on top of a window. The window glass may crack or an operating window will not function with ease.

Column 1594

Efflorescence or White Mold

efflorescence crystals on a concrete slab

Efflorescence - You may see this in your garage or basement and think it’s dangerous mold. In almost all cases, it’s just harmless salt crystals.. Copyright 2024 Tim Carter

Efflorescence or White Mold? 99% Of The Time It's Silly Salt

The seasonal tumblers are all clicking into place here at my home. The same thing might be happening where you live. My central New Hampshire town, much to my dismay, uses rock salt to fight ice and snow on the roads. Yes, it works, but it also corrodes cars and trucks. The salt also creates anxiety for many a homeowner in the spring. They think their garages have a horrible toxic mold bloom.

I know this to be true based on the hundreds of comments you can read on one of my YouTube videos. A few years ago I had a marvelous efflorescence bloom in my garage. Here is that video:

I decided to record it and share how to make the pesky white growth disappear. The comments on this video have astounded me over the years. The vast majority are a mixture of relief when the viewer discovers they don’t have an expensive and toxic mold outbreak. I’m grateful each time I see one of these comments knowing I’ve saved that person lots of money.

Efflorescence Happens Everywhere

Efflorescence can happen in any climate. You can see it in Phoenix, Tallahassee, Seattle, or Kennebunkport. The root cause of efflorescence is salt. Salts of all types can be found in soils, concrete block, brick, sand, etc. Almost all of these dissolve with ease in water. I’m sure you’ve seen this happen if you add table salt to hot water before you add pasta. The salt disappears in seconds. It’s still in the water, but you can’t see it.

In my case, the salt is brought into my garage on my car and truck. It’s become one with the snow in the wheel wells. The salty snow melts and the water seeps into the web of tiny cracks in my concrete floor. The salt begins to build up week after week down in the concrete matrix. The cold garage inhibits evaporation. After several months, the concrete has transformed into a hard sponge filled with saltwater.

My First Time - The Red Brick Wall

I remember my first experience with efflorescence as a young builder. I built a 50-foot-long brick retaining wall at my second home. I worked on it after getting home from work as well as on weekends. Kathy, my wife, was delighted with it. However, a month later, the red bricks started to get a white deposit on them. I was perplexed.

I was able to wash it away with a garden hose and the wall looked great for a day or two. Just as the sun rises each day in the sky, the white deposits would return. I tried scrubbing them with water and got the same result. You might have done the same thing sharing my frustration.

There was no Internet at the time. You had to trudge to the library and spend hours doing research to get answers. I didn’t have that sort of time back then as I was trying to build my business and feed a family.

Don't Use Water

Your efflorescence issue could be on a new patio, a concrete wall, a block wall, or any other masonry surface. Each time the masonry gets wet, the water dissolves some of the salt. As soon as the sun comes out or the wind starts to blow, this salty solution is brought to the surface. The water jumps into the air, but it leaves the salt behind.

Should you make the mistake I did all those years ago trying to wash it away, you just repeat the cycle. The salt dissolves and a certain amount of it soaks right back into the brick, block, or concrete. It then reappears a few days later.

Use a Broom or Stiff Scrub Brush

I discovered the best way to deal with efflorescence is to just brush the dry salt crystals away. The ones in my garage are delicate gorgeous crystals if you peer at them from a short distance. They brush away with a simple push broom. Once out my garage door, they’re carried down to Lake Winnisquam. The salt crystals then begin their journey back to the Atlantic Ocean where they belong.

Efflorescence, in some cases, can be very difficult to remove. I’ve seen deposits on the underside of the magnificent granite bridges built by John Rockefeller, Jr. in Acadia National Park. These deposits are thick and resemble stalactites and stalagmites you’d see in a cave.

efflorescence on granite acadia national park

This is just one example of white efflorescence staining on one of Rockefeller's carriage trail bridges in Acadia National Park. Photo credit: Tim Carter Copyright 2024 ALL RIGHTS RESERVED

Thick deposits like this might be a mixture of calcium carbonate and salt. If so, you may have to deploy weak concentrations of muriatic acid to remove them. This is nasty work and it’s best to not let the deposits build up to this extent.

Stopping or preventing efflorescence is not easy. Cutting off the supply of water to the salt hidden just below the surface is one way. You can accomplish this with ease if you live in the Atacama Desert. Everywhere else, it’s an issue because of rainfall.

Your second choice is to exhaust the supply of salt. This happens in my garage by August of each year. You may not be so lucky as there could be an endless supply in the soil behind a retaining wall or under your new paver patio. The back side of new retaining walls can be coated with a waterproofing material to prevent the saltwater from entering. Cross-laminated plastic can be put on top of soil before you lay that paver patio. This will block the salts from reaching the pavers.

In the meantime, just brush away the salt crystals and never use water to do the job. I wish you the best of luck in your battle against efflorescence!

Column 1593