Painting Walls or Trim First
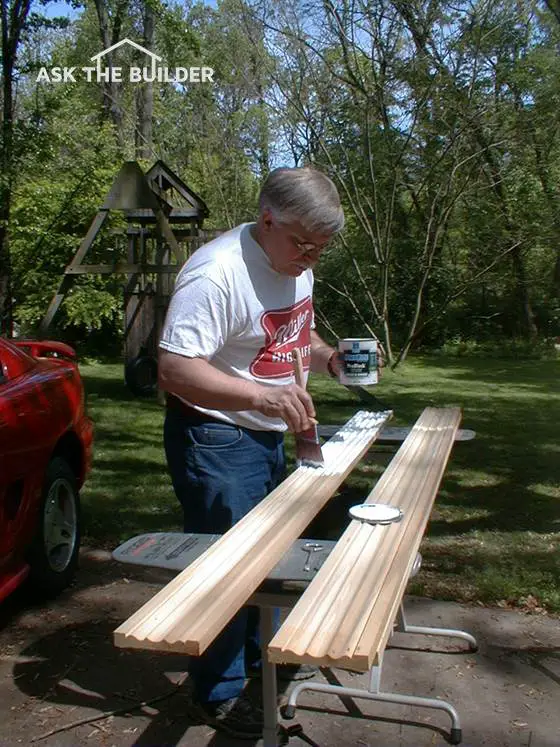
When woodwork is flat and waist high, you can make hay while the sun shines!
Painting Walls or Trim First TIPS
- Ceilings are first
- Walls and Trim back and forth
- WATCH videos below
- Caulk and spackle important
- CLICK HERE to Get Tim's FREE & FUNNY Newsletter!
DEAR TIM: My husband and I are building a new home. We're going to install all of the door and window trim ourselves and paint the entire interior as well.
Should we paint all of the trim before it's installed and spray paint the walls and ceilings? Is it better to install the trim and paint it in place?
We want to spray as much as possible but don't quite know the order in which things should happen. Johnette P., Ft. Dodge, IA
DEAR JOHNETTE: I don't know if there are correct answers to your questions. My guess is if we had ten painters and ten finish carpenters in a room and presented your case, we'd get back twenty different scenarios as to the precise steps they would take to minimize work and maximize the quality of the overall job.
Pre-Finished Surfaces
Perhaps the biggest challenge you face is working with finished materials. It sounds to me as if you're trying to install pre-painted trim on top of walls that have been finish-painted.
While this sounds good in theory, it doesn't translate well in practice because you will damage the pre-finished surfaces as you finish the job.
CLICK HERE to get FREE & FAST BIDS from local painters who can paint FAST.
Spray Painting
I have no problems with spray painting walls and ceilings. It's been done on several of my jobs with outstanding results. The finished look is as good or better than if the walls had been painted with the best rollers.
The speed with which an experienced person can spray paint a room is astonishing. If you have minimal spray painting experience, I suggest you practice in a garage or closets before moving out into rooms you will see each day.
Airless Sprayers
The technology of DIY paint sprayers has advanced rapidly. There are some very good airless paint sprayers that are easy to operate and clean. When you have the paint thinned correctly, they deliver professional results.
Paint Sprayer Videos
Watch these two DIY paint sprayer videos. I really liked the one sprayer.
Installing Woodwork Dirty
Installing woodwork on walls around windows and doors is not as easy as you might think. I's not uncommon for a wall to get scuffed by a hammer as the finish carpenter taps the edges of trim to adjust it.
A carpenter's hands get dirty while working and she/he may smear a wall by accident. Walls can get nicked and scratched as long lengths of trim are moved around the house. The time spent being careful may be counter productive.
Touch up painting of the spray-painted walls with a brush can also yield less than satisfactory results.
CLICK HERE to get FREE & FAST BIDS from local finish carpenters who can install your woodwork.
Prime Woodwork
It's a great idea to prime woodwork on both sides and applying one coat of finish paint on its exposed face before it's installed. The finish trim will need one final coat of paint after it is installed.
The woodwork can get nicked, scratched and abused as it is installed. What's more, the spackling compound used to fill the countersunk nail holes will have to be sanded, primed and sealed before the final coat of paint is applied if you use the wrong one.
There are spackling compounds that have a built-in primer/sealer. CLICK HERE to buy it.

Here's a pretty cool spackling compound. It's got paint primer built into it. This saves you time and money. CLICK THE IMAGE NOW TO ORDER THIS SPACKLING.
Flat Dots
If you fail to prime and seal these small filled holes, they often stand out after the finish paint is applied. You see a bunch of dots that have a different sheen than the gloss of the paint on the wood.
The porosity of the adjacent painted wood is much different from that of the sanded porous filler. Primer/sealers even out the porosity between the spackling compound and painted wood.
Caulk Gaps
Woodwork rarely fits perfectly against the walls. There can be long large and small cracks between the woodwork and walls that should be filled with caulk.
If the walls and trim are already painted, the resulting caulk job will look like pinstriping as it is doubtful the caulk color will perfectly match the color of the finish paint. The caulk will look best if it's covered with a coat, or two, of paint.
Partial Paint
If I were in your shoes, I'd spray paint the walls with a primer/sealer paint and then follow with one coat of finish paint. The ceilings can be finish painted at this time if no woodwork touches up against them.
I'd then install all of the woodwork including the baseboard. All cracks would be then caulked and all nail holes would be spackled. I prefer to use the lightweight spackling that can be wet sanded with a damp sponge.
Wet sanding eliminates dust problems. I would then spot prime and seal all spackling, unless I had used the newer spackling compound with the primer / sealer in it.
CLICK HERE to get FREE & FAST BIDS from local painters who can paint FAST.
Paint Walls Next
If I were you I would apply one final coat of paint to the walls. It's a smart thing to brush a very small amount of paint up onto the edges of all the woodwork as you are covering the caulk with the wall paint.
After the wall paint is dry, I'd then apply the final coat of paint to the woodwork using an expensive two-inch tapered brush. The final coat of woodwork paint extends to the edge of the woodwork where it touches up against the walls.
If you have excellent hand-eye coordination, you should have no problem maintaining a crisp paint line at this intersection. Don't believe what you see on the home improvement TV shows about using masking tape. It's a joke and takes too much time.
Caulk Is The Secret
If you desire truly professional results, you'll caulk each and every crack you see. This is the most obvious mistake I see in DIY paint jobs - missing caulk.
The trick to applying caulk is to have a bucket of warm water and a grout sponge with you as you caulk. Cut the tip of the caulk tube so it is slightly smaller than the average sized crack and use a top-quality caulk gun to carefully control the amount of caulk being discharged into the crack.
Caulking Videos
Watch this video to see how I apply and finish caulk. You need to wipe the caulk with a sponge!
Two Feet
Apply caulk to no more than two lineal feet of crack at a time and then use your finger to smooth the caulk. The excess caulk on your finger should be minimal if you applied just enough caulk.
Immediately stroke the caulk twice with the damp, not dripping, sponge to remove any excess caulk that smeared onto the wall or woodwork. The only caulk visible should be that in the crack.
CLICK HERE to get FREE & FAST BIDS from local painters who can paint FAST.
Column 516
Tim built custom homes and did ultra-custom remodeling for 20+ years before launching his Ask the Builder media presence. He was selected as one of the Big 50 by Remodeling magazine in 1993. This award gave birth to Ask the Builder in October 1993. Tim also operates https://DrawPlumbingPlans.com. His @askthebuilder YouTube channel was the first home improvement channel on YouTube.