Podcast 11
Ask the Builder Podcast 11 Highlights:
- Bruce's new blacktop drive needs support at one edge
- Jack's brick home leaks in driving rains
- Diane has crumbling concrete steps
- Tim shares a story about new ceramic tile bubbling up off a floor! NOTE: Transcript of this story below.
CLICK to LISTEN to Tim's AsktheBuilder Podcast 11.
Podcast Sponsor: Stain Solver - Certified Organic Oxygen Bleach
Stain Solver is MADE in the USA with USA ingredients that are food-grade quality. CLICK THE IMAGE to order some NOW.
CALL 1 Bruce's Blacktop Drive Support:
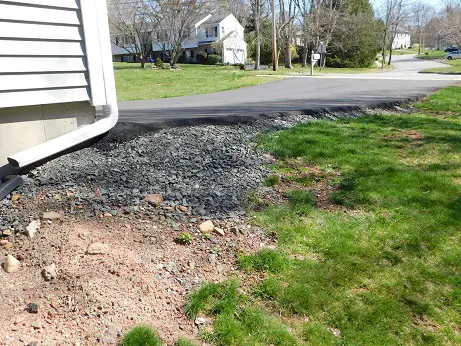
This new blacktop will crack and slump SOON if a small retaining wall is not built. Copyright 2018 Tim Carter
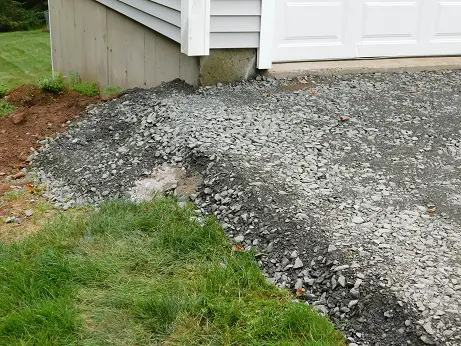
This is Bruce's new blacktop from the other direction. This is the base gravel before the blacktop was installed. The contractor was a loser to leave it like this. Copyright 2018 Tim Carter
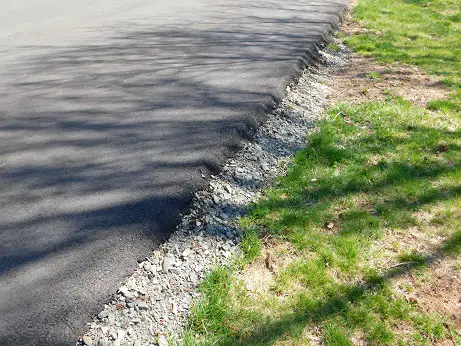
This is a mistake to have a drop off this close to the blacktop. The blacktop will CRACK and SLUMP if a car or truck gets close to the edge. Copyright 2018 Tim Carter
Related Links:
A Strong Blacktop Drive - It's All About the Base
Call 2 - Jack's Brick Wall Leak
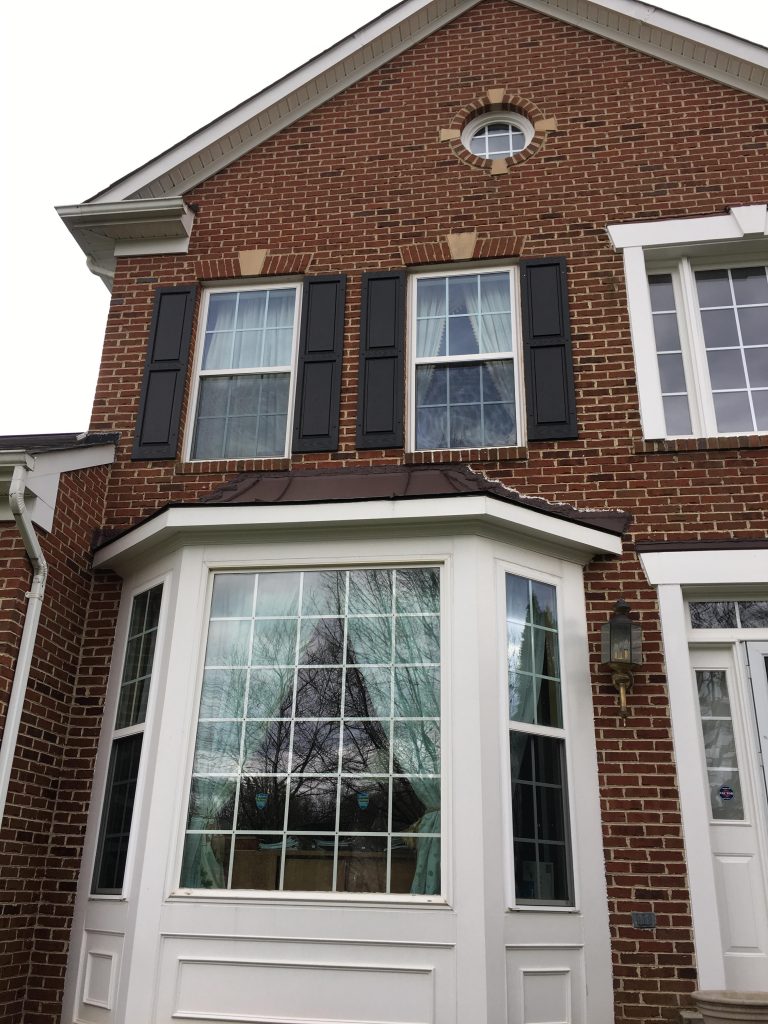
The rain pelts this part of Jack's home. Brick is NOT waterproof.
Related Links:
Brick Wall Leaks - Poor Construction Techniques Are the Root Problem
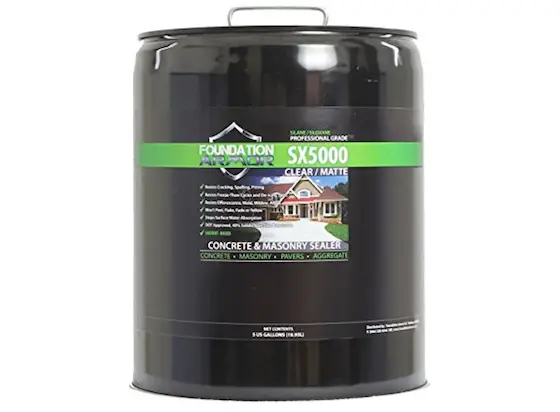
This is a magnificent silane - siloxane water repellent that soaks into brick walls to STOP LEAKS - use a backpack leaf blower to blast it into walls as it's sprayed on. CLICK THIS IMAGE NOW TO ORDER IT.
Call 3: Diane's Crumbling Concrete Steps
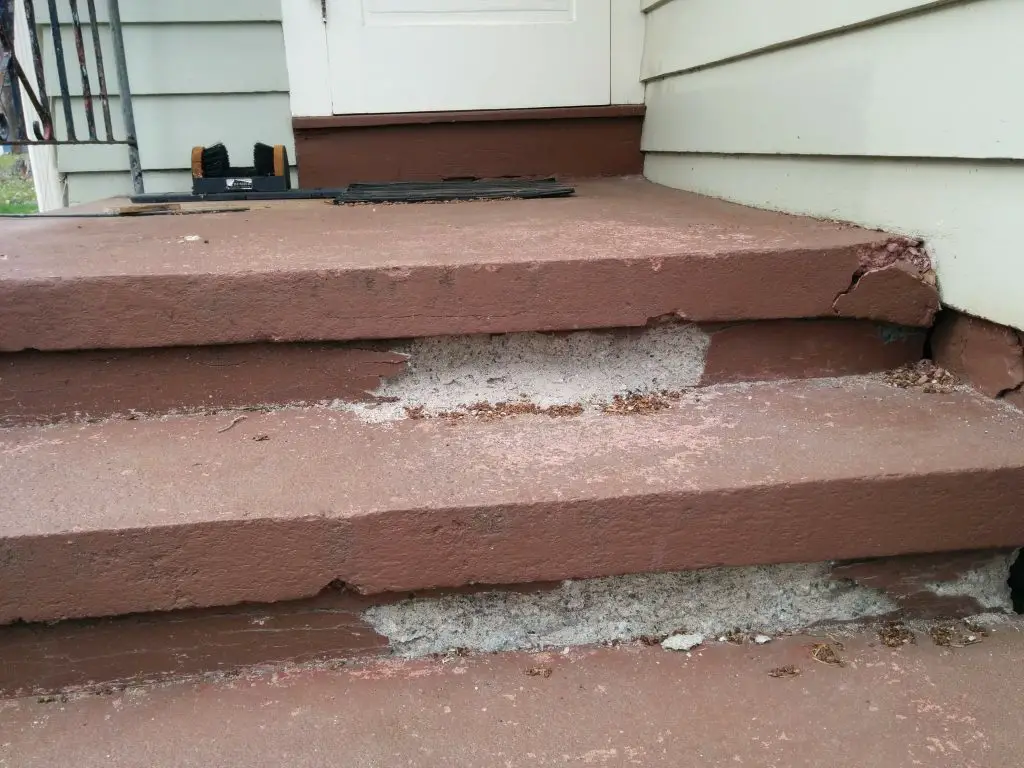
These are Diane's crumbling steps. Listen to my advice in the podcast how to repair them. Copyright 2018 Tim Carter
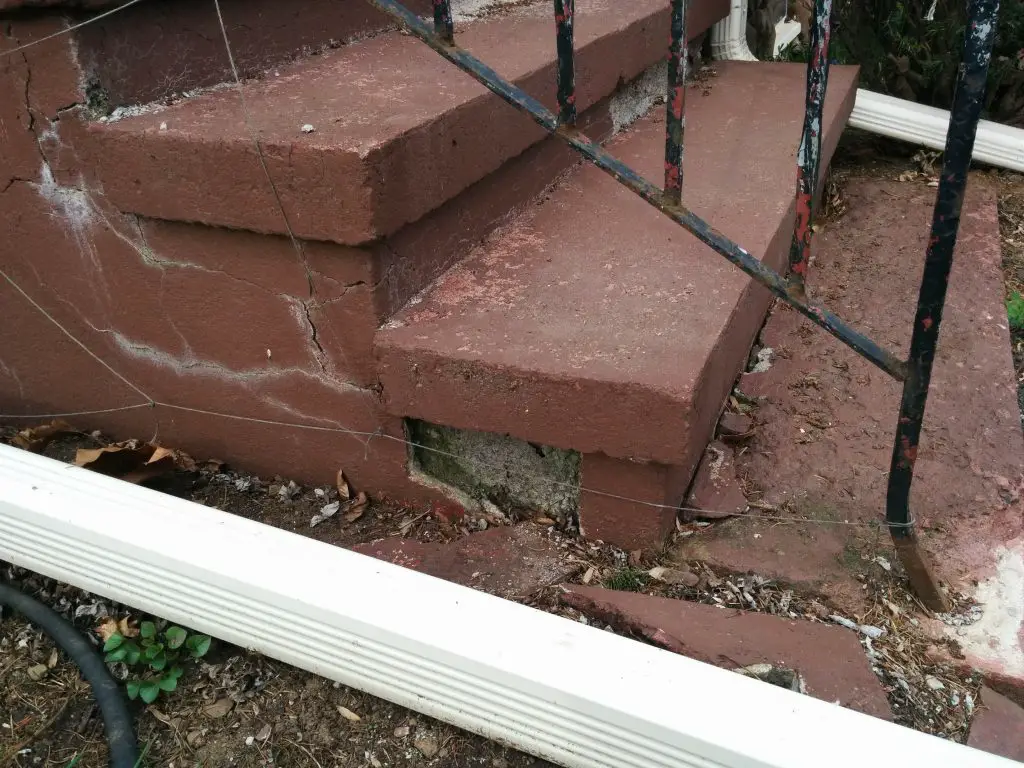
Here's a side view of the steps. It can all be repaired. Copyright 2018 Tim Carter
New Ceramic Tile Bubble Story
Let’s go back in time to 1985. It was winter and I was in the finishing stages of building my first custom home.
Mark was the owner and he was a great man. We became good friends and often ate noodles for lunch. That’s what he called a Skyline Chili 5-way.
Mark’s house was a sleek contemporary and it had a long kitchen and breakfast area as one room. The eating area had giant Pella windows and overhead sunroof windows. It looked out onto a nice wooded backyard.
This room called for 8x8 ceramic tile. It’s important to realize I had put down quite a bit of ceramic tile and I always followed the recommendations of the Tile Council of America. They’ve got a new name now, but that’s what it was called all those years ago.
Their specifications said you could apply ceramic floor tile directly on a wood subfloor if the floor was 1 and 1/4-inches thick and the floor had joists a certain size and spacing. A key point is you don’t want a wood floor to flex like a drum or trampoline as it will cause the tile to crack and the grout to crumble.
The wood floor system exceeded the specifications so I felt good about putting the tile on it. I had to screw down the second layer of exterior grade plywood to get to the minimum thickness of the subfloor. That wasn’t hard.
To get a great bond, I used cement-based thinset. Thinset is just a blend of fine silica sand and Portland cement. Some thinsets may have dried water-based glues added to them, but I can remember if this one did.
You mix the powdered thinset with water until it’s the consistency of pancake batter. The thinset is spread on the floor with a square-notched trowel that matches the size of the tile. I think it was a 1/4 by 1/4-inch notched trowel if I had to bet money on it.
I was able to get the entire floor down in one day. It looked gorgeous. Typically you’d wait two days for the thinset to cure before you’d grout the gaps between the tile.
I went home exhausted and slept well.
The next day I went to the job to start doing some tile work upstairs and was shocked to find some of the tiles on the floor had raised up. I had never seen this happen before. It was alarming, to say the least as I knew Mark would be upset. He hated mistakes.
I walked out onto the tile to one of the lifted tiles. It was no effort to lift it off the floor. Lo and behold there was a giant bubble under the tile.
It’s as if someone had blown air under the plywood!
All of a sudden I realized what happened. The water in the thinset soaked into the plywood and caused it to expand. I had butted the pieces of plywood tight to one another as I installed them thinking that was the way to do it.
I was wrong. I should have left a 3/16-inch gap around each piece and made sure no thinset got into that groove as I troweled on the adhesive. That gap would allow the plywood to expand without creating bubbles.
The other mistake I made is I never thought to put on two coats of clear water-based urethane on that plywood. The dried urethane would have prevented the water in the thinset from soaking into the plywood. It would have taken me just a few minutes to roll on that urethane!
When I think back on some of the mistakes, er learning experiences, I made as a young builder, it’s a wonder I survived! Truth be told the mistakes, should you think about why they happened, make you a much smarter craftsman or craftswoman!
Never forget - Do It Right, Not Over!
Subscribe to the AsktheBuilder Podcast