Some Simple Shelving For Your House
The best shelving system I have found requires minimal skills, materials and tools, but yields shelves so strong that I can climb them like a ladder.
DEAR TIM: I need your help. My husband and I seem to accumulate too much stuff. We need a simple storage shelving system for our basement and garage. Surely you know a way to build a strong set of shelves using standard lumber and a few simple tools. I would love to surprise my husband. Is this a project I can do by myself? Ellen R. Waukesha, WI
DEAR ELLEN: It sounds like you have the same disease as I - packratitis. I have found that early treatment of the symptoms relieves a tremendous amount of pain. All too often people deposit items on the floor. This practice creates clutter, is dangerous, and opens the opportunity for items to be damaged by water or footfalls. Simple stacked vertical shelving creates lots of horizontal storage space while using a minimum amount of floor space.
The best shelving system I have found requires minimal skills, materials and tools, but yields shelves so strong that I can climb them like a ladder. I am confident that you can assemble my system by yourself in less than two hours.
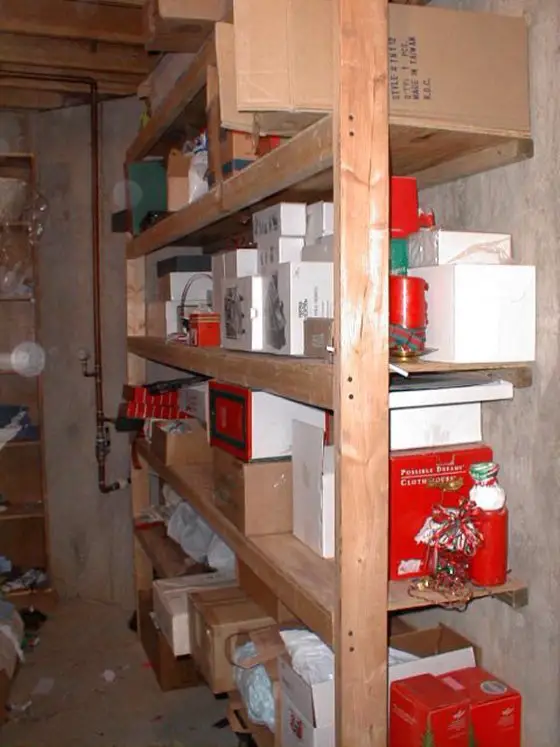
My shelving system incorporates 2x2 lumber for the back wall support cleats, one half inch thick standard CDX plywood shelves, 2x3 lumber for front shelf support beams and vertical 2x4s that support the front shelf beams.
Gather a four and a two foot level, a circular saw, a screw gun or drill with a Phillips head bit, a hammer, and possibly a hammer drill with a quarter inch diameter bit. To construct 5 shelves that are 16 inches deep by 8 feet long and 7 foot 8 inches tall you will need the following supplies: two pieces of 4x8 by one half inch thick CDX plywood, two 2x4's 8 feet long, five 2x3's 8 feet long, five 2x2's 8 feet long, twenty 3 inch long coarse thread drywall screws, sixty 1 and 5/8 inch long coarse thread drywall screws and 3 lbs of 16d sinker nails.
Using the circular saw, rip the plywood lengthwise in pieces that are 15 and 7/8 inches wide by 8 feet long. If you cut them exactly 16 inches wide, the final leftover piece will be about 3/8 inch too narrow. The 2x2's and the 2x3's do not need to be cut. The 2x4's are cut after assembly begins.
You begin assembly by attaching the 2x2 back wall cleats first. If you have regular wood walls, simply nail them to the wall studs. I like the top of the first cleat to be 24 inches off the floor. Each successive cleat is 16 inches higher than the one below. All cleats must be level and the edges of each cleat must be perfectly plumb. If you need to attach the back wall cleats to a masonry wall, drill a one quarter inch diameter hole through the 2x2 and then continue 2 inches deep into the masonry surface using the hammer drill. Take two 16d sinker nails and drive them at the same time into the hole of the 2x2. If you use a 20 ounce hammer and solid hammer blows, the nails will bite aggressively into the concrete or concrete block wall.
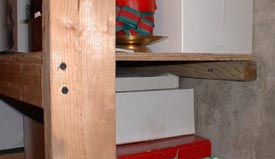
Take a 2x3 and place its 1.5 inch wide edge on the floor. Place a cut piece of plywood on top of the 2x3 so the plywood edge is flush with the vertical face of the 2x3. Attach the plywood to the 2x3 using 5 of the short screws. The 2x3 acts as a miniature I-beam at the front of the shelf. Follow these same steps with all of the other shelves.
Take a partially assembled shelf and place the back edge of the plywood on top of a 2x2 back wall cleat. Use 5 additional short screws to attach the plywood to the cleat in the same manner as you did with the 2x3. The shelf will flop slightly until the 2x3's are attached to the vertical corner 2x4's.
Cut the two 2x4's to match the height of the highest back wall cleat. If the floor is not level, make sure you add or subtract the difference. Keep in mind that the vertical 2x4's will be 16 inches away from the back wall when you check for level. The vertical 2x4's are placed on the side of the front corners of the shelf system. Using the two 3 inch long screws at each connection point, you screw through the vertical 2x4's into the horizontal 2x3's. Use the two foot level to help you level each shelf as you attach the 2x3 beam to the 2x4 corner posts.
Tim built custom homes and did ultra-custom remodeling for 20+ years before launching his Ask the Builder media presence. He was selected as one of the Big 50 by Remodeling magazine in 1993. This award gave birth to Ask the Builder in October 1993. Tim also operates https://DrawPlumbingPlans.com. His @askthebuilder YouTube channel was the first home improvement channel on YouTube.
I've made these in three different houses and starting on my fourth. As you can tell, I am happy with the simplicity, strength, and efficiency of this design. I'm 180 pounds and climb the shelves like a ladder! I make two of them side-by-side by moving the 2x4 support beams to the front of the design. Thanks for sharing!