Trimming and Cutting Wallpaper
Trimming & Cutting Wallpaper TIPS
- Patience and some skill needed
- Simple tools, but special razor knife
- Use special primer on walls - See below!
- Start plumb out of each corner
- CLICK HERE to Get Tim's FREE & FUNNY Newsletter!
DEAR TIM: I've decided to install some wallpaper. It's a small room, so it shouldn't be too hard.
Since I've never installed wallpaper, I'm filled with anxiety about how to cut and trim the wallpaper where the paper stops at the ceiling.
Can you de-mystify the process? What other tips can you share with the beginner who desires success and not a rerun of I Love Lucy trying to wallpaper? Sharon P., Dayton, OH
DEAR SHARON: Your instincts are right on target.
Patience & Skill Required
Wallpapering is a true craft and no matter what anyone tells you, even the cable TV hosts, it's not as easy as it looks. Professional paper hangers will tell you that it can take hundreds of hours of practice until you become fairly proficient.
CLICK HERE to get FREE & FAST BIDS from local wallpaper hangers in case you're getting cold feet.
Start Small
But all that said, even the professionals had to paper their first room! I admire people like you that accept a challenge, attempt to do their due diligence, and then jump in realizing a mistake or two is possible.
What's probably going to happen in your case is you'll make some mistakes, but any friends or relatives that see the completed job will not be able to find them.
Big Topic - Small Space
I don't have near enough space to give you all the information you need. Books have been written on the topic of hanging wallpaper. There's at least one professional association, Wallpaper Installers Association, that publishes in-depth articles in their newsletter about the art and magic of wallcoverings.
Just A Few Tools
Let's get started with the tools. Fortunately, you don't need many tools to wallpaper.
Here's a list that will get you going on this job:
- retractable razor knife with snap-off blades
- 4.5 or 6-inch drywall taping knife
- smoothing brush or plastic smoother
- 4-foot level
- grout sponge
- measuring tape
- paint roller & pan
- paint brush
Click the Image Below to get all, or some, of the tools now:
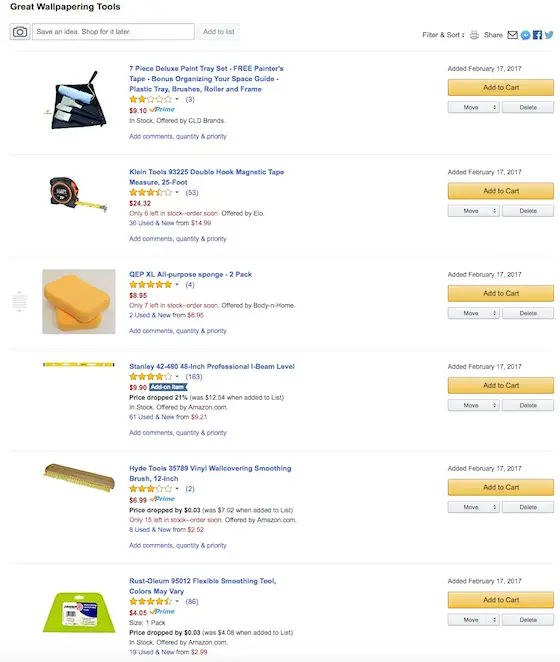
CLICK HERE to get all the tools I recommend in one place. It's easy and fast.
Special Razor Knife
You'll need a retractable razor knife outfitted with the blades that snap off exposing a fresh point. These knifes come in different sizes and you want one that's medium or small size to fit into tight places. The long blades that come with these tools are about three-eighths inch wide and 4 inches long.
Trimming Guide
I prefer to use a 4.5 or 6-inch-wide flexible drywall taping knife as a trimming straightedge.
IMPORTANT TIP: Be sure you take a metal file and slightly round off the tips of the knife. Failure to do this will cause you to tear the paper as you slide the taping knife along the paper as you trim up near a ceiling or along vertical pieces of woodwork.
Smoothing Tool
Get a special short-bristle wallpaper smoothing brush. Some hangers prefer to use a plastic smoothing tool, but I feel rookie hangers can push out too much adhesive by pressing too hard with these tools. Go with the brush to start.
Misc Tools & Aids
You'll also need an accurate 4-foot level, a tape measure, step ladders, a folding table, a bucket or two, a new grouting sponge, paint roller and pan and a paint brush. You might already have many of these common tools.
Trim On Wall
You really can't trim wallpaper until it's up on the wall and in contact with what your going to cut against. To ensure the wallpaper stays on the wall and looks good, let's discuss some basics.
No Pimples or Holes
The walls need to be as smooth as glass. Any small bumps, or pimples, on the wall will telegraph through the wallpaper after it dries. The same is true for holes or cracks. Do all repairs and get the walls as smooth as possible.
CLICK HERE to get FREE & FAST BIDS from local wallpaper hangers in case you're getting cold feet.
Special Primer - IMPORTANT!
You should apply a special paint that's made as a wallpaper primer. Don't use regular paint.
These new wallpaper primers take the place of old sizing. The special primers block the water from leaving the adhesive allowing you lots of time to position each piece of paper as you hang it. This is very important.

This is the new high-tech wallpaper primer / sealer. It's an amazing product. I've used it and like it very much. You can tint it. CLICK THE IMAGE NOW TO BUY SOME.
Pre-Pasted Paper
For this first project, purchase pre-pasted paper and use a clear gel paste activator to make the paper sticky. The paste activators can be applied with paint rollers or a brush.
Allow Paper To Relax - IMPORTANT!
Once you apply the activator you must allow the paper to relax. The paper starts to swell once wet with the activator.
You simply fold the paper back onto itself so the back of the paper is completely in contact with itself. Don't worry, you'll be able to peel it off itself.
Wait Ten Minutes
I'd wait at least ten minutes for the paper to expand and relax. Failure to do this will create bubbles and blisters in the paper! If you apply the paper on the wall before it has fully relaxed, it continues to swell and it can only go one way - OUT!
Wallpaper Videos
Watch these videos to get an idea of what you're up against. You can do this job since it's a small room and there's not much to cut around.
Plumb Line Each Wall
Wallpaper needs to be hung plumb. You can create a very accurate plumb line using your 4-foot level.
Make a very faint pencil line one-eighth inch away from where you want the first piece of paper to start. Don't hang the first piece of paper on the pencil line, especially if the paper background is white. You'll end up seeing the pencil line in the seam when the paper dries.
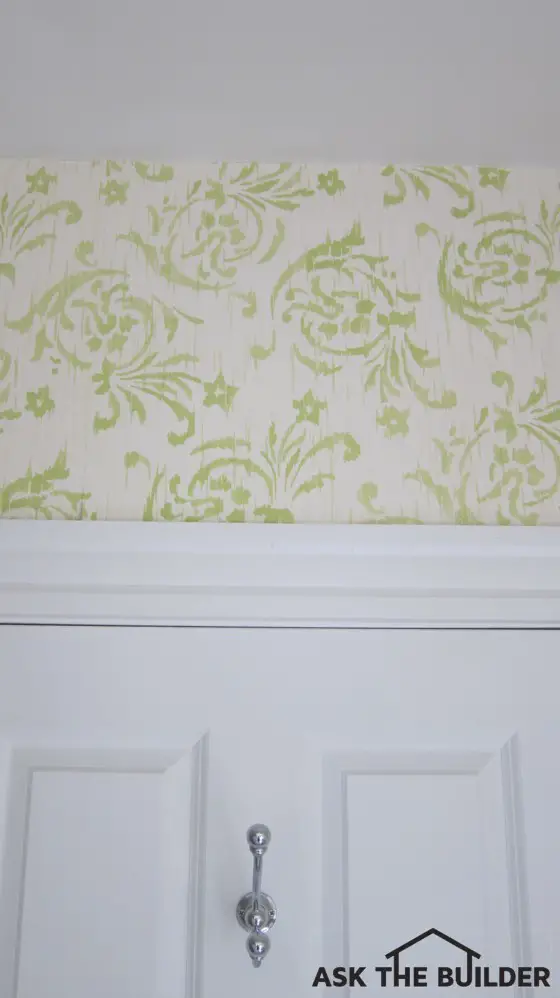
Trimming
Trimming and cutting paper is an art. The easiest cuts to make are at the ceiling and along long vertical cuts where door and window woodwork touch up against a wall.
To make it easy to cut, only allow the wallpaper to lap up onto the ceiling about one or two inches.
Smooth Then Cut
The trimming process begins by using the short-bristle brush and carefully pressing the paper as tight as you can into the corner where the top of the wall meets the ceiling. Then use your fingers to press the paper into the corner.
Place the drywall knife tightly up into the corner at a 45-degree angle. Use the razor knife to slowly cut the paper with the blade running across the edge of the drywall knife. Slide the drywall knife along the paper and continue to trim.
CLICK HERE to get FREE & FAST BIDS from local wallpaper hangers in case you're getting cold feet.
Column 1051B
Tim built custom homes and did ultra-custom remodeling for 20+ years before launching his Ask the Builder media presence. He was selected as one of the Big 50 by Remodeling magazine in 1993. This award gave birth to Ask the Builder in October 1993. Tim also operates https://DrawPlumbingPlans.com. His @askthebuilder YouTube channel was the first home improvement channel on YouTube.