Window Flashing Tape

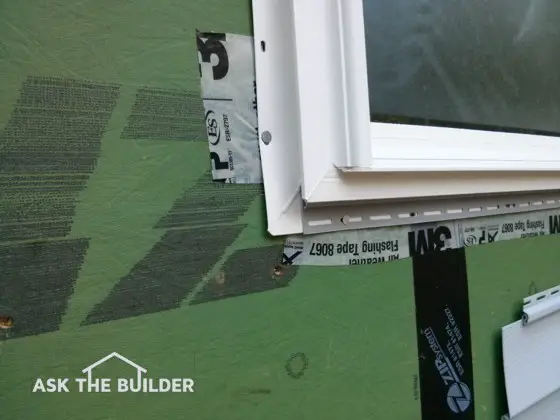
See the white tape that says Flashing Tape? It’s installed incorrectly. Copyright 2017 Tim Carter
Window Flashing Tape Installation
DEAR TIM: I've been a subscriber of your free newsletter for years and am finally building a new home. I decided to follow your advice and stop by the job site as often as possible and take photos.
The contractor just installed my windows and has started to install the vinyl siding. It appears to me that any water or air that might get behind the siding will flow inside my home because of gaps between the window nailing flange and the wall sheathing.
What's the proper way to install windows and doors so that water will not rot my house? Loreli S., Hanover, PA
DEAR LORELI: Congratulations on your new home adventure.
Dreams Do Come True
It's so exciting to build a new home and watch your dreams become reality. Unfortunately, some new home projects become nightmares because of poor plans, workmanship and/or a combination of both. Let's hope you're following much of my advice and you're on the right track.
Free & Fast Bids
Take Thousands Of Photos
Capturing the entire building process with hundreds and thousands of photos is one of the best things you can do. Better yet, try to shoot some video with you talking in the background explaining what you're taping.
Modern digital cameras and smart phones take stunning photos and video footage. Storing the images has never been cheaper as hard drives, flash drives, and other memory chips continue to fall in price. You can store all the images in the cloud on distant servers as well.
You may not realize what's in the photo because you're not a building expert. That's okay. If there's a problem at a later date, an expert can look through your photos and often discover what's causing the problem. I've been able to do successful long-distance autopsies on severe problems with houses because folks like you took the time to take great photos and videos.
Nailing Fin Gap
That was a good catch of you to notice the gap between the nailing flange of the window and the wall sheathing. I see that sort of mistake on many jobs. There should be no gap and there are any number of ways to insure that air and water never leak behind or around a window or a door.
Time Tests New Products - Some Fail
As time marches on there are always new products and methods that attempt to improve quality and efficiency in building. Go back over one hundred years and builders used tar paper to cover the exterior wood walls of homes to help prevent wood rot from water that might get behind siding or stucco.
They didn't have magic tape so some became quite creative in how they overlapped the tar paper over the windows and doors to create an effective waterproof barrier.
Gravity and Overlap
You need to treat the side walls of a house much like you do a roof. Stop and think how simple roofing materials work. Standard shingles create a waterproof barrier because each row of shingles overlaps the row below it. Mother Nature perfected this methodology on animals and birds long ago. Study the overlapping nature of the fur on dogs, cats and any other mammal as well as feathers on a bird and you'll see why they can be out in the rain and stay fairly dry.
Waterproof Sheathing
First and foremost, your exterior wall sheathing must be waterproofed. Some newer products come from the factory with a plastic coating that repels liquid water but allows water vapor to pass through it. If you use the special tape made for this sheathing to waterproof the seams, you've accomplished step one.
If you use traditional oriented strand board (OSB) with no coating, then you'll have to install some other air and water barrier over the OSB.
Nailing Fin Design
Almost all modern new windows and doors come with a nailing fin that's built into the window or door. These fins are part of a channel that collects and redirects water around the window or door. If you seal this fin correctly to the waterproof exterior surface covering the OSB, you can force any water or air that gets behind your siding down to the ground or stop it from infiltrating into your home.
Flashing Tape
The first step is to use a high-quality flashing tape. Read the instructions that come with the product. It's mission critical that these are applied to clean, dry and oil-free surfaces because you're counting on the bond of the tape to provide the long-term protection.
Since water is pulled down by gravity, you start installing the flashing tape on the bottom of the window or door. The first piece of flashing tape is applied across the bottom nailing fin and extends about 4 inches either side of the fins on the side of the window.

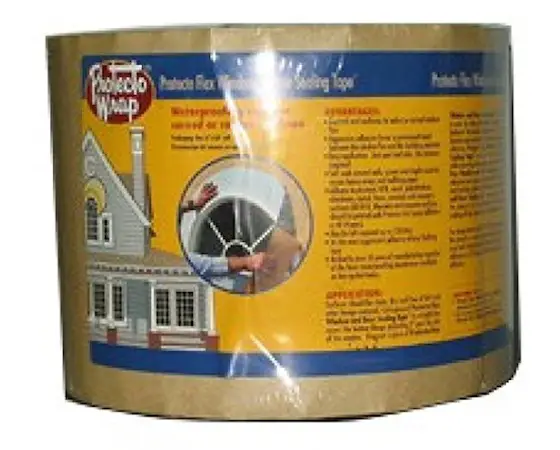
This is a bad photo, but it's a great tape. Why? Because the adhesive is butyl rubber. That's the BEST adhesive to have inside a wall. CLICK THE IMAGE NOW TO HAVE THIS DELIVERED TO YOUR HOME.
The next pieces of tape start at the bottom of the first piece of tape, go up the sides and extend past the top nailing fin four inches. The last piece of tape goes across the top nailing fin extending over the side pieces. I'm sure you can see how this tape mimics roofing shingles in the way it overlaps.
Each building system has a weak link. In the case of the flashing tapes, it's the adhesive. I've remodeled old houses that had felt paper behind the siding and although it was brittle it still repelled water. The system was still in perfect working order after decades.
Will the flashing tapes, hidden behind the house siding, still be adhering well in the next century? As Kenny Chesney said in his hit song, "Only time will tell, but it ain't talkin'."
Column 1109