Bridges – Building in Your Backyard
DEAR TIM: There is a small 20 inch deep gully in my yard. This little valley prevents me from easily getting my riding mower to the other side of my lawn. Do you have any ideas on how to build a little bridge to span this ditch? What can I do to make sure it is not too bouncy? What is the best lumber to use? Doug R., Milwaukee, WI
DEAR DOUG: Building a miniature bridge is a really cool project. You don't have to be a structural engineer to design one since there is a very good chance you have existing bridges in your home. Anyone who has a basement, crawl space or a second story home walks across a bridge each time they pass through a room. I suggest that you study the underside of your existing floors before you build your outdoor bridge.
When you look at your existing floors you will see floor joists that span from one wall to another. In some instances they may rest upon a beam. The joists will probably be 16 inches on center. If you want a really stiff bridge, consider spacing the joists 12 inches on center. The depth or height of the joist is directly related to the length of the span. The greater the span (distance between supporting walls), the deeper a floor joist needs to be. You will incorporate these same principals in your simple bridge.
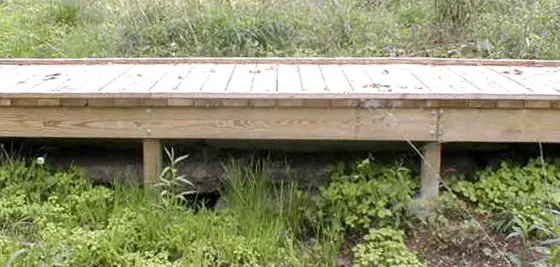
If the span of your bridge is exceptionally long, you can reduce bounce by installing vertical 4x4 posts under each bridge joist at the center of the span. These posts need to rest on 6 inch diameter concrete piers that extend to the frost line.
Because the bridge will be exposed to the weather, I recommend that you use treated lumber for the bridge joists. The decking for your bridge can be treated lumber or you can choose to use construction heart redwood or cedar decking for a more finished look.
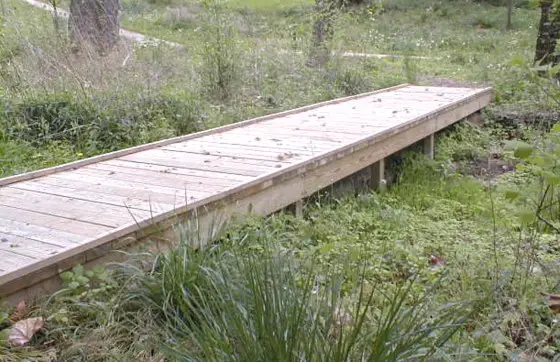
The width of your bridge is important. Measure the width of your riding lawn mower with the most cumbersome accessories attached to it. You want to be sure the bridge is wide enough to accommodate your machinery without clearance concerns. A bridge 60 inches wide should work fine in most instances. A 4x4 curb should be incorporated at each edge of the bridge. Keep this in mind as it will reduce the overall operating width of the bridge by approximately 7 inches.
I would build the bridge just like a traditional wood subfloor. This means that a rim joist or band board is nailed to the ends of the bridge joists. This framing member keeps the joists from falling over like a house of cards when you walk or ride over it. It also allows you to build the frame for the bridge in the yard and drop it into position with the help of several friends.
The ends of the bridge joist should rest upon steel reinforced poured concrete grade beams. These grade beams need to be 6 inches wide, 8 inches thick, and as long as the bridge is wide. I like to dig two post holes under each beam that extend down to the frost line. The concrete flows into the holes at the same time as you pour the beams. These monolithic bridge foundation supports will prevent your bridge from shifting or twisting as you drive across it.
Before you pour your grade beam, be sure that you keep in mind the total height of your bridge joists and the decking. To permit a smooth transition from the grass to the bridge deck, the bridge joists ends and the grade beam must be below grade at each end of the bridge. Double check your measurements before you pour the concrete grade beam!
The decking for the bridge can be applied two ways. The simple way is to apply it perpendicular to the run of the bridge joists. If you do build the bridge 60 inches wide, you will be able to get 3 pieces of decking from each 16 foot length that you order. For a more decorative look, consider running the decking at a 45 degree angle to the bridge joists. This method will create more waste, but the diagonal look is stunning.
Companion Articles: Bridge Building Tips, Bridge Joist Sizing, Bridge Planning
Column 270
2 Responses to Bridges – Building in Your Backyard