Replacing Single Pieces of Warped Hardwood Floor
Replace Warped Hardwood Floor TIPS
- Hardwood floor board can be replaced
- Extremely hard job - no room for mistakes
- Professional is best equipped to do this job
- Furniture repairman can fix other defects without removal of wood
- CLICK HERE to Get Tim's FREE & FUNNY Newsletter!
Tom P. who lives down south, who has the patience of Job, emailed me just before Christmas, 2013:
"I have something I need to fix. We bought our house 2 1/2 yrs ago and it was built in 2005. Our entry way and dining area have hardwood floors, suspended of course because we live in North Mississippi and the houses are built on slabs.
I have one board, in the middle of the floor by the front door that is, well, warping and raising. All of the boards all the way around it are fine. My first thought was moisture, but all the boards around it look fine and there are some surface areas where II can poke my finger into some small holes. I think it is just a bad board and needs to be changed."
CLICK HERE to get FREE & FAST BIDS from local hardwood floor repair companies.
Here's a photo of the problem:
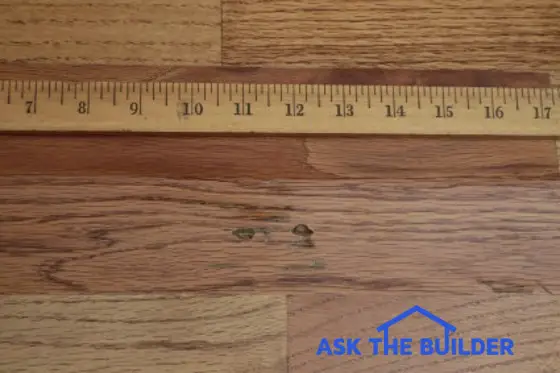
It's tough to see the warping, so we need to believe it's there. Photo credit: Tom P.

CLICK this image and listen to the first call on the podcast. I talked to Jill about how to repair wood kitchen flooring, and possibly installing an inlay border as an option. Copyright 2018 Tim Carter
Here's my answer to Tom:
Tom, it's absolutely possible to take out an interlocked piece of tongue and groove hardwood flooring. With respect to making such a repair completely invisible once done, I'd say this job's degree of difficulty is about 9.8 on a scale of 1 to 10.
Professional Required
In other words, you're deep in professional territory, and not just any professional, a true hardwood floor craftsman who has years and years of experience doing such repair work.
Cut Out Center Carefully
Cutting out the bad piece of flooring requires you to cut away the center core of the damaged piece of flooring without harming any of the adjacent pieces of flooring. This is very tough to do and requires great lighting, sharp tools and deft hand-eye coordination.
With the center of the wood out of the way, you can then start to get out the long pieces, one of which will be nailed to the subfloor. In your case I imagine they have wood sleepers on top of your concrete slab.
CLICK HERE to get FREE & FAST BIDS from local hardwood floor repair companies.
Exact Fit - No Room For Error
Once the bad piece is out, then you have to install a new piece that's the exact size of the old one in width, length and height. Remember, your existing floor was sanded and the new piece you install must be the same height. Good luck with that. You can't sand it in place or you'll ruin the adjacent pieces.
Cut Off Bottom Groove
To install the new piece, you need to cut off the bottom of the groove along the two grooved edges. You also need to cut off the small tongue on the narrow edge.
Once installed, you need to secure the piece of wood. You can glue it to the subfloor or glue and face nail it with small finish nails.
Are you discouraged yet?
Stain & Finish Challenges
If you successfully have it installed, now you have to match the stain color and clear finish.
This will really test your skills.
DIY Floor Refinish Kit - No Sanding
Use this kit to refinish the floor around the repair area. No doubt you probably screwed it up. No sanding required!!

This is the wonderful DIY floor refinishing system. It's not hard to do. Just be sure the floor is CLEAN first. Use Stain Solver to clean the floor. CLICK THE IMAGE TO BUY this refinish system.
Bottom Line: The warped piece will probably look ten times better than any repair you initiate yourself. My guess is you're the only one who knows the defect is there. Any visitors would probably think the wood appearance is normal.
I'd leave it alone if it were me.
CLICK HERE to get FREE & FAST BIDS from local hardwood floor repair companies.