Crumbling Concrete Foundation DIY Fix
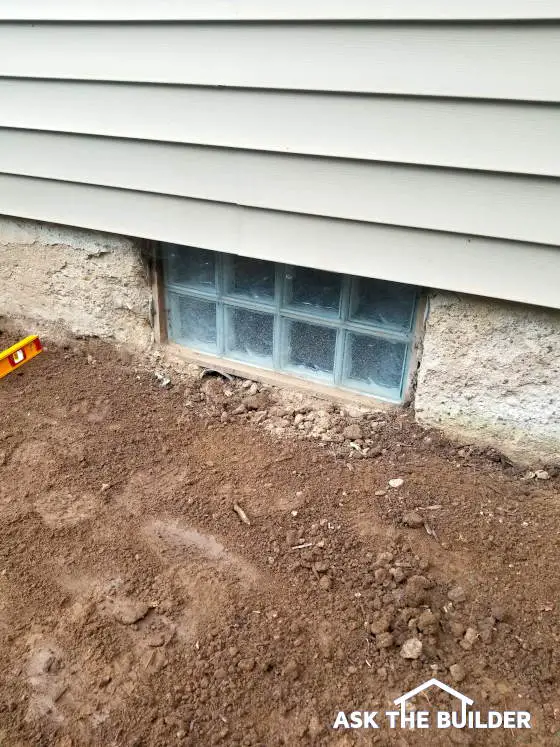
Crumbling Concrete Foundation | This poured concrete foundation is looking shabby. Believe it or not, you can make it look gorgeous again with minimal effort and tools. Copyright 2020 Tim Carter
Crumbling Concrete Foundation - Easy DIY Repair
QUESTION: Hey Tim. I watched your three-part video series on patching a concrete foundation on your website. It’s exactly what I needed to help me repair the cosmetic crumbling of my concrete. I’ve got questions. Will that method work to also patch defects in steps and flat concrete sidewalks and driveways? I have a 4-inch-diameter hole in the foundation that needs to be filled. What’s the best way to do this, just pack in some of that cement stucco you show how to mix up? Do you have any other secret tips to share? Casey S., Antigo, WI
Wouldn’t you love to have a nickel for every person that needs to patch concrete? Oh my, that would be so many nickels! There’s a better-than-average chance that you might have some concrete at your home that needs some attention. Great news! I’m about to share how you can achieve pro results with very little work and cost.
How do You Repair a Crumbling Foundation?
I recorded the three videos that Casey mentioned about six years ago. It was pouring rain but we had to shoot that day. Fortunately, I was under a covered porch and could demonstrate exactly what to do. The first video in the series is below. Links to the other videos are shown.
Here are links to all of the videos in this series:
How to Repair a Crumbling Foundation Part 1 of 3
How to Repair a Crumbling Foundation Part 2 of 3
How to Repair a Crumbling Foundation Part 3 of 3
What Tools are needed?
The first step in a concrete repair is to remove any loose concrete and get rid of all dust. You can use a chisel and a hammer or if you have lots to do, consider renting a rotary-hammer tool that has a chisel tip. These power tools can do a remarkable amount of work in a short time. I like to use a garden hose and scrub brush to clean away all dust and loose particles of sand.
Why do Concrete Patches fail?
The next step I would have never known about had it not been for a generous old concrete craftsman that shared a few of his trade secrets with me forty-five years ago. This mason saw me trying to do a small repair job and stopped to talk to me. He could tell I was about to make a mistake, one that perhaps you’ve made and a great many others.
He explained why most concrete patches fail. There are so many reasons, but the biggest one is a lack of bonding between the old concrete and the new material. This gentleman shared tales about him being a young apprentice. It was fascinating.
He was born and raised in Cincinnati, Ohio as was I. Back when he was in his 20s, just about every new house that was built had concrete steps with a stunning sandy texture. The steps were actually stuccoed. You rarely see this technique today because it’s an extra step in the process.
This expert craftsman said they’d never pour a set of steps on a Friday because they wanted to apply the stucco no later than18 hours after pouring the steps. In hot weather, they’d often pour the steps in the morning and apply the stucco in the afternoon for optimal results.
What is the Proper Stucco Mix?
The stucco mix was just a blend of hydrated lime, Portland cement, and medium sand. He said they used 1.5 parts of Portland cement, 0.5 parts of hydrated lime, and 4 parts sand. Blend all this together dry and then add enough clean water to make a mix that resembles applesauce.
But the true secret to getting the stucco, or in your case the patching material, to bond to the old concrete is to apply cement paint just before you apply the patching material. Cement paint is just a mixture of Portland cement and clean water. You blend enough cement with the water to make it the consistency of latex paint.
Just before brushing on the cement paint to the old concrete, this master craftsman said to get the old concrete damp. You can use a sponge, a brush, or an old spray bottle. Remember, you want it damp, not soaking wet.
You then brush on the cement paint and immediately cover it with your stucco mix. Never allow the cement paint to dry. It must be covered immediately. You’ll discover you’ll not have to rush if you work in the shade or on an overcast day. Working in the direct sun on a hot day is too hard on the materials and you.
How do You Patch Larger Holes?
Patching larger holes is easy. You use the same process but find some rubble or small pieces of stone, brick or concrete to help pack the hole. Don’t try to fill large holes with just the stucco mixture. You want the rubble to be covered with the stucco mix so use rubber gloves if you want to do this by hand. Do what’s necessary so the hole has no voids in it. It needs to be completely filled with the rubble and the stucco patching material.
The old mason left me with one other very important tip. He said the patching material or stucco must be covered with burlap and kept wet for 48 hours. Back in his day, that’s all they had to slow down evaporation. You can use 4 or 6-mil plastic sheets, but be sure you weigh it down so it doesn’t blow away and so the wind can’t get under the plastic.
The plastic allows the patching material to get much harder and create a bond with the old concrete that will last for many decades. I’ve driven by concrete I patched in the mid-1970s using this method in the past year and it still looks perfect.
Column 1366
Tim built custom homes and did ultra-custom remodeling for 20+ years before launching his Ask the Builder media presence. He was selected as one of the Big 50 by Remodeling magazine in 1993. This award gave birth to Ask the Builder in October 1993. Tim also operates https://DrawPlumbingPlans.com. His @askthebuilder YouTube channel was the first home improvement channel on YouTube.
I have a concrete foundation with brick and block construction over the foundation. at the connection at the top of the foundation the concrete is flaking off crumbling from the top down about 8 inches or so. what is the best way to rebuild or pair this if possible? this is happening from the inside of the basement inside the house.