How to Pour a Concrete Footing or Footer

How To Pour A Concrete Footing TIPS

This spring you may have ambitious plans to build that long-awaited DIY room addition, shed or detached garage.

Good for you!

Many a homeowner just like you has successfully completed one of these smaller projects.

All structures need a great foundation so they can stand the test of time.

Foundation walls almost always are supported by a footing, or footer.

Footing Is First

The footing is almost always the first thing one does when building anything.

The bottom of the footing is what touches Mother Earth. It's no different than your foot, hence the name.

CLICK HERE to get FREE & FAST BIDS from local foundation contractors who can put in your footing.

Spreads Weight

The purpose of a footing is to spread out the weight of the structure onto the soil. The foundation wall rests on this footer. Most common footings for houses, room additions, detached garages, etc. are 24 inches wide and no less than 8 inches thick.

You can access a handy quick start guide for concrete footers with more tips and a full tool list here: Concrete Footer Quick Start Guide

Degree of Difficulty: hammer-4-5

Concrete Footing Step-By-Step Videos

Watch these videos to see the entire process of forming and pouring footers. You may be doing a trench footer where trench walls become the forms. These require you to stand down in the concrete if you have a frost depth that exceeds 24 inches. 

After watching the videos, then continue to read for extra detail that may have been skipped in the videos.


Permits & Frost Depth

Check with your local building department concerning building permits, and the frost depth in your area. The bottom of the footer needs to be below the frost depth. It’s always a great idea to go just a little deeper than recommended.

Call 811

Be sure you locate and identify any underground utilities before you dig. Call 811 and have all utilities marked so you don’t get hurt or cause neighbors to have problems if you slice into a buried electric, water or gas line.

Must Be Square

Be sure you double check the footer is square before you dig. Layout the foundation on the ground before digging.

When the diagonal measurements are the same in a square or rectangular foundation, it’s square! Watch this video about squaring up a footing or a wall.


Watch this video to see a neat trick using some long 2x4s. You can build a box that represents the actual outer shape of your finished foundation. Make sure the lumber is straight, square it up and then spray paint a line about 8 inches on the outside of the box to represent where you need to dig your trench.

If you footing is going to be 24 inches wide, most are, and your foundation is 8 inches thick, that means the footing extends 8 inches beyond the outer line of your foundation wall.

Digging Is Work

You can dig by hand, I’ve done it for many a footer, but tool rental businesses now rent very small excavators that can fit in a small yard. You don’t need a full-size backhoe to dig a shallow footer.

Great Soil

If the soil smells like rotten eggs, is squishy or you sink in it even when you get down to the desired depth, STOP and get a professional opinion. You may have to dig deeper to get to STRONG soil or you may have to install piers. Smelly soil often means there's lots of organic material rotting in the soil. This will cause a foundation failure in the future.

Steel Is A Must

Footers need long pieces of reinforcing steel. One-half-inch diameter, #4, is almost always sufficient. This steel needs to be continuous through the entire footer and be held up at least 3 inches from the soil. Overlap splices at least 16 inches.

CLICK HERE to get FREE & FAST BIDS from local foundation contractors who can put in your footing.

8 Inches Thick

The footer should be at least 8 inches thick. Most architects call for a footer to be 20 inches wide, but I always poured mine 24 inches wide. Wider is better because it spreads out the weight of the building onto the soil

Must Be Level

You can just pour the concrete in a 24-inch wide trench if you like. It’s key the concrete is very level.

Drive vertical pieces of reinforcing steel into the soil every 4 feet in the center of the footer as leveling reference points. Use a laser level or builder’s transit to get the tops of these pins at the same height.

Helpers A Must

Have plenty of help on hand when the concrete truck arrives. Be sure to have spare wheelbarrows in case one breaks.

Don’t overfill wheelbarrows as concrete is very heavy. Consider renting a small machine with a bucket that you can use to make trips from the concrete truck to the footer.
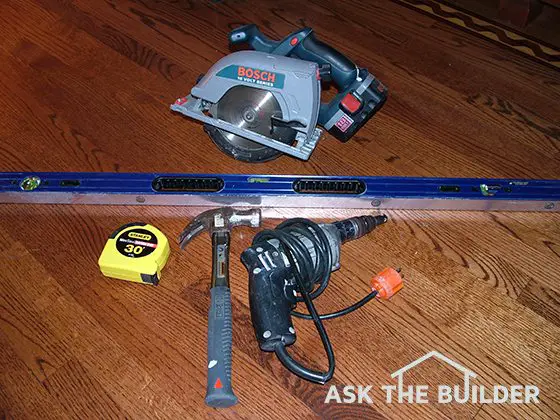
Boots & Tools

Wear rubber boots if you’re working in the trench to level the concrete. Concrete will cause burns to skin, so wash off any as soon as possible. Use a simple wood float or magnesium float to smooth the concrete.

Hard Work

No one task, other than digging the hole and wheelbarrowing the concrete, is really hard in this job. It’s all a matter of common sense and thinking the job through.

Column HT007

Staining a Fiberglass Door

Finishing Fiberglass Doors TIPS

Must Be Clean

The fiberglass door must be perfectly clean to achieve the best results.

You can't assume the door is clean.

Most oils are clear and you'd have no idea they're on the surface.

The stain or paint will not bond well if the surface is dirty.

You can do it with a standard soap and water solution such as Top Job, Dawn Dish Soap or any other liquid type soap. Rinse the door with clear water and dry it. The door must be dry before you stain it.

CLICK HERE to get FREE & FAST BIDS from local painters that specialize staining fiberglass doors.

Deep Cleaning

Oxygen Bleach

Stain Solver is MADE in the USA with USA ingredients that are food-grade quality. CLICK THE IMAGE to order some NOW.

If you want to deep clean the door removing all mildew, algae, oils, etc. then use Stain Solver.

Stain Solver is made in the USA with USA ingredients. It's a pure powder you mix with warm water.

Once dissolved, you can brush it onto the door. Work in the shade keeping the door wet with the solution for about 15 minutes.

Follow up cleaning with liquid dish soap solution, rinse well and allow to dry.

Most fiberglass doors allow you to use mineral spirits to clean the door, but never use turpentine! Follow the finishing instructions that come with your door if you have them.

Stain Colors

If you have a new door, look at the stain kit. Most have some sample pieces of fiberglass.

fiberglass-door-stain-kit

The stain in this kit was specially formulated for fiberglass doors. It's not NORMAL oil stain for wood. CLICK HERE NOW TO GET THIS AMAZING STAIN KIT.

You use one of these to test the stain color. If you don't have a scrap, well, you may be out of luck. If the hinge edge is fiberglass (most are), then you can try to sample the color near the bottom of the door on this edge.

Depth Of Color = Time

Stain color can be adjusted by the amount of time you allow the stain to sit on the door / sample before brushing and how much pressure you apply when brushing. If you want a lighter color, let the stain sit for a short while and remove lots of it with the brush.

Do the opposite for a darker look.

Rub in Circles

The stain is applied to the door with a cloth rubbing it in a circular motion. Work from the center of the door to the outer members. Don't try to do the entire door at once. Work in small areas and feather out stain in overlap portions.

Don't forget to stain the fiberglass sample. You'll need this finished as well as the door. You'll use the sample to test the door for gloss loss due to sun exposure.

CLICK HERE to get FREE & FAST BIDS from local painters that specialize staining fiberglass doors.

Stain Must Be Dry

Most fiberglass stains need 48 hours to dry. You can test for dryness by applying a piece of acrylic painters masking tape to the door or better yet, to the fiberglass sample.

painters-tape

Use this kind of tape to do the *dry-stain* test. CLICK THE IMAGE NOW TO ORDER THIS MAGIC TAPE.

Rub the tape with a piece of wood or knife handle. If the stain is dry the tape will be clean when you pull it off the stained object. If the stain is dry, you are now ready to go to the final steps.

Applying the Top Coat

Here is where many people goof up. The temptation is to apply thick coats of finish to protect the door.

Most fiberglass door manufacturers want you to apply two thin coats.

IMPORTANT TIP: Thick coats will not dry properly. Try to coat the door in a dust-free environment if at all possible.

Milky But Clear

The top coats often look like thin milk.

Don't panic! If you apply them sparingly they'll dry crystal clear. Avoid dipping the entire brush in the clear coat. Try to just get the tip of the brush wet.

VERY IMPORTANT TIP: Work quickly and don't over brush. Apply some in an area and move on.

If you brush back and forth over the same area too much, you can dissolve the stain! Always brush in the direction of the grain! Work from the center of the door out towards the edges.

Don't forget to apply a clear coat at this time to the fiberglass sample if you have one.

The Second Coat

Follow the instructions on the top coat container. Many will indicate a short drying time of less than 4 hours.

Don't sand the door after the first coat.

Apply the final coat as you did the first coat. The surfaces normally look wet when you apply a thin coat - not milky.

A milky appearance may be a clue that you are applying too much finish.

Painting a Fiberglass Door

Several readers wrote to me asking if they can paint a fiberglass door. Absolutely!

You paint one as you would any exterior surface. Clean the door with soap and water and allow it to dry.

Use a latex primer matched to a 100 percent acrylic top coat paint.

fiberglass-door-paint

This is a special paint formulated to BOND to fiberglass. It can be tinted. CLICK THE IMAGE TO ORDER IT NOW.

Remove Weatherstripping

I always like to remove the weather-stripping if at all possible. This allows you to work more quickly and keeps the door from sticking to the weather-stripping.

Keep the weather-stripping out of the door if at all possible for a week to 10 days. This drying time will allow the paint to fully cure and harden. If the paint is tacky it can stick to weather-stripping.

CLICK HERE to get FREE & FAST BIDS from local painters that specialize staining fiberglass doors.

Column B264

Grouting Tile

how to grout floor tiles

The consistency of the grout is extremely important. If it is too wet when mixed, there is a good chance the grout job might fail over time. ©2017 Tim Carter

"Never ever add more water to grout that's become stiff in the bucket. This added water will..."

Grouting Tile Checklist

DEAR TIM: I need to know how to mix grout. I'm about to tackle a floor tile grout job before my relatives come over for a holiday party. I don't know mixing grout and how to grout tile, but feel it's easy.

What type of tile grout should I use for my ceramic floor tile?

Is mixing grout difficult? How much grout should be mixed at one time?

Can you share your top grouting tips? Amy H. Oakdale, MN

DEAR AMY: There's not a doubt in my mind that you will succeed grouting your ceramic floor tile.

Is it Easy to Grout Tile?

It's easy to grout tile, but only if you can follow instructions.

You've asked many of the right questions concerning grouting tile. Although the process of grouting tile is not like laying heavy concrete blocks, I can think of easier jobs to do. If you protect your knees, back and skin on your hands, you should survive the job with very few aches and pains.

CLICK HERE to get FREE & FAST BIDS from local tile contractors if you want to bail out of this DIY project.

What is Wall Tile Grout?

Wall tile grout is just pure Portland cement, often with colored pigments. Wall grout does not contain any sand because it needs to fit into small spaces between the tile.

Grout that's used for ceramic tile is available in many different forms, but the two most common are wall grout and sanded floor grout. Wall grout is usually colored Portland cement.

It's a fine powder that sometimes has dried acrylic modifiers that help it to stick to ceramic tile. Wall grout should be used on ceramic tile joints that are one-eighth inch or less in width.

What is Sanded Grout?

Sanded grout is a mixture of pure Portland cement and fine grains of silica sand. It's a miniature version of concrete and is used to fill grout lines 1/8-inch or wider.

Ceramic floor tile is often installed with grout joints much larger than one-eighth inch. It's not uncommon to see grout joints as wide as three-eighths inch.

Wall grout will shrink when used to fill joints this wide, so sanded grout is used. Sanded grout is a blend of wall grout and fine particles of silica sand.

The silica sand makes the grout very durable to wear and tear and takes up room within the grout so as to prevent unsightly shrinkage cracks as the grout dries and cures.

Where are Mixing Grout Videos?

I suggest you watch the following videos, then read the rest of the column. Much of it will make sense. Links to the tools you'll need will be below.


Is Mixing Grout Easy?

Yes, I find it fairly easy to mix either wall or sanded grouts. The trick is to only mix about as much as you can fit into a half-gallon milk container, maybe less.

I've used for years a simple stiff 3-inch putty knife to mix grout in a 2 or 5-gallon bucket.

putty knife

This is an all-around great tool to have. It's wonderful to mix sanded or wall grout. Keep it clean to last for decades! CLICK THE IMAGE NOW TO ORDER ONE BEFORE THEY'RE ALL GONE!

You may discover that when grouting a floor, you can mix two or three times this amount, but for the first batch, mix a small amount until you learn how to grout.

CLICK HERE to get FREE & FAST BIDS from local tile contractors if you want to bail out of this DIY project.

How Much Time Can The Grout Sit in a Bucket?

The grout can usually only sit in the bucket about 20 minutes. The hotter the air temperature, the grout powder and the water, the less time you have to install it once it's mixed.

You can extend the working time of mixed grout if you refrigerate the grout powder, use cold water to mix it and apply the grout if the room temperature is 50 F.

If you're doing this job solo, then you need to realize that you'll spend time removing excess grout from the floor tile and striking the joints with a grout sponge.

As you do this tedious work, the mixed grout can harden in the bucket. This is why you don't want to mix too much grout up until you discover how fast you can use it up.

Can I Add Water to Stiff Grout?

IMPORTANT TIP: Never ever add more water to grout that's become stiff in the bucket. This added water will weaken the grout that was in the process of transitioning from a plastic mix to an artificial rock!

What is the Correct Grout Consistency?

The correct grout consistency is when it resembles warm cake icing. It needs to be spreadable but not so thin it would pour from a bucket.

Mixing grout to the right consistency is very important. You want the grout to be workable so it can be spread with a rubber float, but it should not be so wet that it resembles moist, runny cake icing.

I feel the best consistency for either sanded floor or wall grout is when the grout is stiff enough that it can be formed almost into a ball and hold its shape. Think mashed potatoes for wall grout and nice firm applesauce for sanded floor grout.

What is a Rubber Grout Float?

A rubber grout float is a special tool you use to spread the grout and pack it into the spaces between the tiles.

Now that the grout is mixed, it's time to put it in the gaps between the tiles. You achieve this with a special rubber float that spreads the grout across the tile.

Rubber Grout Float

This is just like the rubber grout float I've used for decades. Care for it and it will treat you well. CLICK THE IMAGE NOW TO ORDER ONE.

Always pull the rubber grout float across the grout lines at a 45-degree angle. This prevents the edge of the float from dropping down into a grout joint and scooping out grout from the joint. Dip the float in clear water before using it on the tile.

Remove as much excess grout from the tile surfaces as possible with the rubber grout float.

What is a Grout Sponge?

A grout sponge is one that has all rounded edges and corners. Never use a sponge that has sharp 90-degree edges and corners. These will remove grout from the lines.

You need to strike the grout joints after they've gotten a little hard. If you try to finish the grout too early and it's soft, you'll remove it from the joints.

Grout Sponge

Here's a fantastic newer sponge that will do a great job of cleaning dried grout haze. CLICK THE IMAGE NOW TO BUY ONE.

Grout joints that are fully filled, look better, clean easier and they protect the fragile edges of the ceramic tile.

Should I Practice Grouting?

Yes, you should practice grouting on a test panel in your garage before trying it on a wall or floor.

Since you are a beginner, the most important tip I can give is for you to practice grouting on a piece of tile-backer board in your garage. Install some scraps of the floor tile or a cheap tile that is similar to the one on your floor.

Attach this tile to the piece of backer board that is just laying on the garage floor. The next day, mix some grout and apply it.

Wait a few minutes and remove the excess grout and grout film with a grout sponge. Get a feel for the process before experimenting on your real floor.

How Much Water Should be in the Grout Sponge?

There should be very little water in the grout sponge. Squeeze as much water out as possible.

When removing the grout film from the tile, use a grout sponge that has rounded corners, and be sure to squeeze out all excess water from the sponge before the sponge contacts the grout. Change the rinse water frequently.

What Causes Grout to Fail?

The biggest cause of grout failure is water. Either too much is used to mix the grout or too much is used when removing the grout film from the surface of the tile.

Excess water dilutes the amount of Portland cement in the grout. When this happens, the grout can turn to powder or simply crumble in a short amount of time.

How Far Should You Apply the Grout?

You only want to grout as much tile as you can reach across. Kneeling on top of freshly grouted tile joints is not a great idea as you try to finish the floor. Think about where to start grouting the tile and how you will exit the room once you are finished.

How Much Grout Should I Buy?

Buy plenty of grout before you start the job. Be sure it's fresh, and absolutely make sure the grout is from the same batch or dye lot.

To ensure perfect results, it is often a great idea to blend different bags of the dried grout together to make sure the finished color of the grout is uniform.

CLICK HERE to get FREE & FAST BIDS from local tile contractors if you want to bail out of this DIY project.

Theresa had a grout problem with her new ceramic tile floor. The installer didn't clean the tiles properly after grouting. CLICK HERE to read her story and the helpful tips.

Column 701

Cleaning Paint Brushes

cleaning paint brush

An old paint can, some warm water and soap and a quick wrist is all it takes to clean a paint brush. ©2017 Tim Carter

Cleaning Paint Brushes TIPS

DEAR TIM: I'm having trouble cleaning paint brushes. My high-quality paint brushes are stiff halfway up from the tips, even though I have been using latex paint and washing them with warm water immediately after each use.

I've tried using the plethora of products that claim they will restore paint brushes, but none have worked.

In fact, they seem to harm the brushes. How do you clean paint brushes so they last for years? Is it possible, or should I just buy disposable paint brushes and throw them away after each job? Jack L., Findlay, OH

DEAR JACK: It's time for some tough love.

Operator Error

The expensive brushes are being ruined because you're not cleaning them properly. It took me a few years of experimentation to figure out one way to properly clean paint brushes, no matter whether they are synthetic fiber used for latex paint or natural fiber used for oil paints.

Believe it or not, I have a few paint brushes that have been used over one hundred times. They look like new, and the bristles have no paint in them where they connect to the brush body.

CLICK HERE to get FREE & FAST BIDS from local painters so you never clean a brush again! WOO HOO!

Best Paint Brushes Video

Watch this video so you know what brush to use where and why.

Brush Renewal Products - BAH!

You couldn't pay me to use brush-revival products. I've read their labels on many occasions, and the skull and crossbones image tells me that some of these products are highly toxic.

Examine the label of these products and you'll often see the chemical names acetone, methanol, methylene chloride, toluene and xylene.

Some of these are very dangerous and can cause serious and permanent health issues. It's easier and safer to simply learn how to care for your paint brushes rather than try to bring them back from the dead.

Before You Dip

The process of cleaning a paint brush starts at the beginning of the painting day. All too often, I see people take a new brush or a dry one and dip it directly into the paint.

This, in my opinion, is a mistake. On hot, dry days the paint on the outside of the brushes up near the handle can harden within an hour or two.

Wet The Bristles

You can prevent this, or slow the hardening of the paint, by wetting the brush with water before using it. Use water when applying latex or water-based paint.

If you are painting with oil-based paint, dip the brush in paint thinner before getting paint on the brush. Be sure to lightly shake out any excess water or paint thinner before dipping the brush for the first time into the paint.

Brush At Breaks

If you take breaks during painting, you need to get the brush out of the sun, and wrap it with a damp rag if you are using latex paint. This rag stops the evaporation of water and other chemicals from the paint. It keeps the paint on the brush fresh.

Use a rag soaked in paint thinner if you are applying oil-based paint. It's advised to store the paint thinner-soaked rag and brush in a closed container for safety. If painting outdoors, I'll actually clean my brush if I stop to eat lunch. It only takes two minutes to clean a brush, so I don't lose much time from my well-deserved break.

Brush Protectors

There are some very clever inventions you can use to keep the paint on a brush from getting hard while you take a break. If you use one, be sure to keep it out of direct sunlight.

brush cover

This is a plastic case you put your brush in while you take a break. It seals tight preventing air from drying the paint. CLICK THE IMAGE TO ORDER IT NOW.

Paint Brush Protector Video

Watch this video to see how these plastic covers work.

Never Upside Down!

I have seen people ruin a brand-new paint brush the first time they clean it. They turn on the sink faucet and then turn the brush upside down to get the water stream to shoot straight into the tips of the bristles.

Never do this.

It's totally unnecessary.

No Pressing!

Another bad idea is pushing down on the bristles so they bend at a 90-degree angle to squeeze out the paint. This stresses the bristles and causes premature bristle failure.

Brush Out First

Before you start to clean a brush, try to get as much paint out of it by brushing it on a scrap piece of anything. It could even be a cardboard box. Don't press so hard as to really bend the bristles. You're just trying to get off the easy-to-remove paint.

CLICK HERE to get FREE & FAST BIDS from local painters so you never clean a brush again! WOO HOO!

Rinse Next

Through trial and error, I discovered that the best way to clean brushes that have latex or water-based paint in and on them is to rinse as much paint out as I can with warm water flowing over the outside of the bristles, toward the bristle ends.

Swish It

The next step is to use an old paint can that's been cleaned of all paint. I fill this can halfway with warm soapy water. Two tablespoons of common liquid dish soap works well in a half-gallon of water.

Dip the brush into the soapy water and rapidly move it back and forth, making sure the bristles do not touch the bottom of the can.

Be careful, as vigorous movement can splash some of the warm soapy paint-saturated water onto your clothes or in your face. Twenty seconds of back-and-forth motion will remove 95 percent of the paint from the entire brush.

Clear Rinse

Refill the can halfway with just clear warm water and repeat the process. If the water turns slightly cloudy, it means you still have more paint in the brush.

Clear Swishing = Clean

Continue the fresh-water rinsing process until the water stays perfectly clear. If there is hardened paint on the handle or tops of the bristles near the handle, use a stiff nylon brush to clean off this paint.

paint brush comb

This is a specialized tool with brass stiff bristles to clean the semi-hardened paint from bristles up near the ferrule. The brass will not harm the bristles. The other side is a comb for once the brush is clean. CLICK THE IMAGE NOW TO GET THIS TOOL.

Brush DOWN the bristles with the stiff brush. Push down only do NOT try to brush up and down.

Do NOT scrub the bristles at a 90-degree angle to remove the paint.

Suspend Test

The best way to determine if there is any residual paint in the brush is to suspend it in a clear container after you think it is clean. Use a string or thin wire through the hole at the end of the brush handle to suspend just the bristles in clean water.

Let it sit in the water for about four hours. If there's any latex paint left in the brush, it will turn the water cloudy. This means you have to be more thorough when you are cleaning the brush.

No Shaking But Comb It

Once clean, comb the bristles. Then hang the brush from the wire to get it to dry.

brush and roller cleaner

This is a handy tool to comb paint brushes after they're clean. The other side you use to scrape as much paint as possible from a paint roller before you start to clean it. CLICK THE IMAGE NOW TO BUY THIS GREAT TOOL.

Do not shake the water out of the brush and bend the bristles. Once dry, insert the brush in the handy protective cover that came with it from the paint store.

CLICK HERE to get FREE & FAST BIDS from local painters so you never clean a brush again! WOO HOO!


Column 686

Brick Pavers

brick pavers sidewalk

This brick paver sidewalk has endured severe frost heave, snow, ice and heavy traffic. It can take lots of punishment. It's Achilles heel is that the color fades over time. This sidewalk was a deep brown when installed and now is very light in color. ©2017 Tim Carter

Brick Pavers TIPS

DEAR TIM: It’s time to replace our sidewalk, and I’m leaning towards brick pavers. Before I invest this money, I’d like to know as many pros and cons about this building material.

Should I use clay brick pavers? I’m also interested in different brick paver designs and ideas. What brick pavers would you use and why? Leslie W. Tacoma, WA

DEAR LESLIE: I’ve installed my fair share of brick paver sidewalks in my lifetime.

Brick Is Timeless

I’ve also used them with great success on large patios and steps. At my last home, every person who saw our front brick sidewalk and our two brick paver patios always commented on how gorgeous they were.

CLICK HERE to get FREE & FAST BIDS from local patio and sidewalk brick contractors. Show them the laser brick below!

Color & Texture

I truly believe that brick pavers make a great sidewalk because they are so distinctive. The color, texture and sheen of the brick are so unlike concrete, perhaps the most common sidewalk material.

Natural stone can also create a unique sidewalk look, but it’s often the most expensive paving option.

Clay & Concrete

There are two primary types of brick pavers in my opinion: clay brick and concrete brick. Decades ago the rage was to install colored concrete brick pavers that required no mortar. They interlocked with one another and could withstand all that Mother Nature could dish out if they were made correctly.

Newer Shapes & Patterns

This paving product is maturing and the designs, colors, shapes of the concrete brick continue to expand. One advantage of this material is that you can have a new sidewalk installed and completed in hours not days. That might be a major consideration for you.

Concrete Color Fades

But understand that the color of these concrete paving brick will change and fade over time. Guaranteed.

And the fading gets worse by the year.

Pigments & Cement Paste

The color is achieved by adding pigments to the concrete mix. These pigments become part of the cement paste that coats the sand and gravel in the brick.

But over time, this ultra-thin cement paste on the top surface of the brick wears off exposing the true color of the sand and gravel. You may not like that faded color in two, five or ten years. Realize that the sun's ultraviolet (UV) light will also work to break down the pigments that are in between the sand grains causing further fading.

Paver Patio Brick Video

Watch this video for a few tips.

32 F

Climate is a big factor with brick sidewalks. Brick pavers in Tampa, Florida, and other warm climates that never see freezing temperatures, will survive longer than brick of any type in a cold, freezing climate.

If you use concrete brick, you should consider a brick paver sealer every few years to minimize water penetration into the concrete brick. CLICK HERE to get a fantastic one that's made with silanes and siloxane ingredients.

Penetrating sealer concrete masonry sealer can

This is a magnificent silane - siloxane water repellent that soaks into concrete. CLICK THIS IMAGE NOW TO ORDER IT.

Clay = Colorfast

I prefer thin brick pavers made from real clay. The color of the material is solid through the entire brick.

Purchase ones that have been made for cold climates, and they’ll last for possibly over 100 years. The hotter the kiln and the longer the brick are left in the kiln, the harder they get. These will have a SW rating from the manufacturer. The SW stand for severe weathering.

CLICK HERE to get FREE & FAST BIDS from local patio and sidewalk brick contractors. Show them the laser brick below!

Athens Ohio Brick

You can see paving brick used in roadways that are well over 100 years old in many cities. Athens, Ohio is one that comes to mind as my oldest daughter went to college there.

While walking across the roads there, I had lots of images of the workers installing brick pavers well over a hundred years ago. Even after being scraped with city snow plows and abused by heavy trucks, many of the brick look like they just came from the brick manufacturer. This tells you that clay brick can last in your sidewalk.

Infinite Designs

Brick paver designs are as plentiful as cobs of corn in a farmer’s field. A clever installer can install a serpentine sidewalk for you. Curves are no issue.

If you prefer a more geometric design like herringbone or crosshatching you might see in a cane chair, that’s also possible. Many brick manufacturers have great photography of how their brick can be used to create more patterns and designs than you can imagine.

Engraved Brick

If you want to go all out and make your sidewalk very distinctive, consider some engraved brick pavers. Companies use lasers to cut into a brick’s surface and etch any words, names or designs that you might want.

etched brick

This is a laser etched brick made for me. The detail is incredible. This brick measures 8 inches wide and 4 inches high. So you can see how fine the laser can cut. The laser MELTS the clay turning it to GLASS. The laser etching will last for centuries outdoors unless you beat on it with a hammer. © Copyright 2017 Tim Carter

You could engrave several or many brick that have a welcome message or even some poem that sets the mood as your guests walk up to your front door. The possibilities are endless.

Cheap Price = Cheap Product

As with any product, use caution when looking at wholesale brick pavers or discount brick pavers. Be leery as to where they were made. Brick made in China or some other foreign nation may not be up to our standards.

Unscrupulous businessmen may not care if your brick sidewalk crumbles. Buy brick pavers from an established business in your town. Ask about the weathering index for the brick. Not all brick are made the same.

Cleaning Brick

Oxygen Bleach

Stain Solver is MADE in the USA with USA ingredients that are food-grade quality. CLICK THE IMAGE to order some NOW.

Cleaning brick pavers is easy. You can use Stain Solver oxygen bleach solution to remove algae, dirt and mold.

Stain Solver is Made in the USA with USA ingredients. It's non-toxic to nearby plants, trees or expensive landscaping.

It's a powder you mix with water and apply with a garden hand-pump sprayer.

The trick is to apply it to dry brick and allow the Stain Solver solution to bubble and fizz for up to 30 minutes. Keep the brick very wet with the solution.

After waiting, use a stiff push broom or scrub brush on a pole to get the algae off the brick. Rinse with hose water.

Brick Cleaning Video

Watch this video to see how to use Stain Solver to clean algae off clay patio brick.

Chlorine = TOXIC

Avoid chlorine bleach as it is highly toxic to grass, landscaping and trees.

Pressure Washers = BAD for Concrete

Pressure washing will erode the cement paste off of concrete brick, so use those machines with great care.

A pressure washer will not harm a clay brick surface if the brick has a severe-weather rating. This rating certifies the brick is very dense and very hard as a result of being fired in the kiln for a longer time.

CLICK HERE to get FREE & FAST BIDS from local patio and sidewalk brick contractors. Show them the laser brick above!

Column 851

Water Heater Venting – Serious Business

water heater venting

Water Heater Venting | Can you see the mistake in this photo? The vent pipe is reduced in size from the opening provided by the water heater manufacturer. After this discovery, the homeowner immediately installed a 4-inch pipe from the heater to the chimney. © Copyright 2021 Tim Carter

Water Heater Venting TIPS

DEAR TIM: I recently had my heating system replaced with a high-efficiency system. The new furnace vents directly through the wall to the exterior. My water heater is now the only thing venting into the masonry chimney. I'm concerned about exhaust gas damage that might be occurring inside my chimney. Do you think it's necessary to have a chimney liner installed? Robert K., Norwich, CT

DEAR ROBERT: Venting of any fuel-burning appliance is serious business.

Should Vent Pipes Meet the Code?

Water heater vent pipes must meet the current building code. They can be death traps.

The vent for your recently orphaned water heater may not have been checked by the furnace installer. Many building codes mandate that once modified or changed, all fuel-burning appliance vents must be sized according to code.

What is an Orphaned Water Heater?

An orphaned water heater is one that vents into a chimney flue liner that used to accept the exhaust gas of the water heater and usually a furnace. A new high-efficiency furnace may now vent through a plastic pipe that exits a sidewall of the home, not the chimney. Thus, the water heater vent is now an orphan in the chimney.

I suggest that you contact your local building or fire department inspector. These two public servants should provide you with the information to ensure your hot water heater and your chimney meets code.

CLICK HERE to get FREE & FAST BIDS from local chimney sweeps who can inspect your chimney for defects.

Are Water Heater Drafting Dynamics Complicated?

The dynamics of drafting are complicated. Traditional masonry chimneys and fireplaces have precise design dimensions. They were designed and sized to vent very hot flue gases from old coal, wood burning, or low-efficiency gas furnaces.

The exhaust gas temperature of modern gas furnaces and water heaters is much lower than past appliances because much more heat is harvested so you waste less money up your chimney.

Chimneys are like water pipes, they can only handle so much exhaust at a given pressure. Imagine if the huge boilers of your local power plant tried to exhaust up your house chimney.

There simply wouldn't be enough room to handle all the smoke and ash.

Will Water Heater Exhaust Go Up in a Large Chimney?

On the contrary, if you tried to exhaust your furnace and water heater into a power plant chimney, the exhaust gases very likely wouldn't rise.

The giant chimney of the power plant is filled with a column of cold, dense air.

The small amount of warm, or hot air, from your water heater would have a tough time offsetting this falling air that's trying to enter your home. If that were to happen, it could drag some of the exhaust gas back into your basement. This could cause a carbon monoxide poisoning issue.

Will an Oversized Flue Liner Create Condensation?

An oversized flue liner will create condensation problems. The exhaust gas temperature from the heater may not be sufficient to heat up the dense masonry enough to stop condensation from forming. 

Herein lies the problem. Your chimney's existing flue liner may be oversized for the orphaned water heater. This can, in some instances, create condensation problems inside of masonry chimneys.

Water vapor is a byproduct of the combustion of natural gas. If the inside of the chimney cools down too much or there is too much cold air inside the chimney, the water vapor can condense and saturate the masonry inside the chimney before it can escape into the atmosphere.

Sometimes the condensed water contains acids that can chemically attack poor quality mortars.

Should I Use a Stainless Steel Liner?

It's best to use a stainless steel chimney liner if you're high-efficiency water heater or furnace exhausts into a masonry chimney.

stainless-steel-chimnney-liner

This is a kit that allows you to install a stainless-steel liner inside a larger masonry chimney clay flue. CLICK THIS IMAGE NOW TO BUY THIS KIT.

Does a Furnace Help Keep a Chimney Warm?

Before you installed your new furnace, your old low-efficiency furnace cycled on and off frequently. This process kept the inside of the chimney warm. That heat source has been removed.

Although the water heater does contribute heat to the chimney during its off cycle, it may not be enough to prime the vent so to speak.

CLICK HERE to get FREE & FAST BIDS from local chimney sweeps who can inspect your chimney for defects.

Who Produces Building Codes?

Currently, there are many organizations that produce building codes. For many years, the American Gas Association (www.aga.org) and the National Fire Protection Association, Inc. (www.nfpa.org) have authored the National Fuel Gas Code.

This code, as well as other uniform building codes, contains tables and charts that people use to properly size and install chimneys for fuel-burning appliances. Research is currently being conducted by the Gas Research Institute that may create changes used in sizing masonry chimneys.

In other words, code refinements are forthcoming with regards to venting modern fuel-burning appliances.

How Big Can the Chimney Flue Liners Be?

You can do a quick check of your chimney to see if it meets an old rule of thumb and some of the current codes. Measure the diameter of the exhaust pipe leaving your water heater.

If it is a 3-inch-diameter round metal exhaust pipe, the inside cross-sectional area of the clay or masonry chimney flue liner should not exceed 49 square inches. Most flue liners are square or rectangular. Thus if square, the inside measurement should not be more than 7 inches on the sides of the square. If rectangular, the length X width calculation of the inside of the liner once again, should not exceed 49 square inches.

If the metal round metal exhaust pipe is 4 inches in diameter, the flue liner cross-sectional area should not be larger than 88 square inches. Do the math the same way as in the above example for a 3-inch-vent pipe.

Can I Slide a Metal Liner Into a Larger Flue Pipe?

If you find that your chimney does not meet the code or it is too large, you can reduce the size of a chimney lining. There are approved corrugated metal pipes that you can snake down the chimney and connect to the exhaust pipe of your heater.

What is a Slurry Solution for Relining a Chimney?

Some chimney companies can reduce the size of the chimney by pumping a cement slurry around a giant inflatable bladder. Low moisture content cement and vermiculite mortars can also be used to create a new inner lining.

If you decide to reline your chimney, by all means make sure you do it under the guidance of your local building department officials.

CLICK HERE to get FREE & FAST BIDS from local chimney sweeps who can inspect your chimney for defects.

Column 205


How to Paint Wrought Iron

How to Paint Wrought Iron TIPS

How many homes in lots of the older cities around the USA have traditional and durable wrought iron porch railings, decorative porch supports or majestic wrought iron fencing? My guess is tens of thousands.

It could be hundreds of thousands.

Wrought iron is one of those materials of old that's proven itself. In almost all cases, it's a high-quality steel with few impurities in it.

That's why it doesn't turn to rust powder in just a few years.

Most wrought iron I've seen has stood the test of time. With just a little care on your part, you can preserve it so other future families that own your home can enjoy it too.

Degree of Difficulty: Two Hammers out of Five.

CLICK HERE to get FREE & FAST BIDS from local exterior painters who know wrought iron.

Needed Supplies

 Gather the following supplies:

paint with primer

Here's a great newer paint that's got the primer built in. This saves you TIME AND MONEY. CLICK HERE TO ORDER THIS PAINT. It comes in many colors. While you're buying this paint at Amazon, be SURE TO GET all the other tools you need in the following list.

Get These Tools

  • paint scraper
  • wire brush
  • assorted small paint brushes
  • paint cleaning tools
  • drop cloths

You may want to consider using a power drill equipped with a wire wheel if you have lots of rusty spots to prepare. You may also consider a versatile oscillating multi-tool to speed up this work.

Paint Is Glue

Paint is simply a colored glue. Any paint chemist will confirm this. All glues like to bond to surfaces that are clean, free of oil, dust-free, no rust, no rust scale, etc. The better condition the thing you're painting is in, and assuming you purchase a high-quality paint and matching primer, you can expect to get ten or more years out of a paint job.

Scrape Away

The most common problem with wrought iron is peeling paint with rust under the paint. Scrape off as much of the paint as you can. Use a wire brush or a power tool equipped with one that allows you to remove the rust so you see bare metal. Wear a special dust mask that will keep any of the paint dust out of your lungs. There's a very good chance you might be dealing with older layers of paint that very likely contain lead.

X-O Rust Paint Video

Watch the following video. You'll be blown away by the test panels showing how good this paint is next to the name brand you were going to buy.

The video shows a spray paint, but this same paint is available in quarts and gallons for large jobs.

Rub The Rust

The success of your new paint job is based on the amount of time you spend in getting ready to paint. Most people don't want to invest the time to get rid of any and all rust. You must do this. It's non-negotiable.

CLICK HERE to get FREE & FAST BIDS from local exterior painters who know wrought iron.

Remove Dust

Once you've removed all rust, take a dry older paint brush and dust off all bare metal. Wipe down any existing painted wrought iron to remove any dust and dirt. Dust is your enemy.

Follow Label Instructions

Read the label on the metal primer can. Follow all the instructions, paying attention to the temperature limits. If you're trying to paint in the early spring or late fall, you could bump up against the lower temperature limit. Also pay attention to the time it says you have to wait to re-coat with finish paint. Some metal primers will allow you to paint metal that has a light coating of rust.

Finish Paint FAST

You'll get the best results with your finish paint if you apply it as soon as the primer says it can be recoated. You'll achieve a better mechanical and chemical bond. Plan ahead so you can apply the finish paint soon to the primed areas and not have days of time between the priming and the finish paint application.

Best Weather

You may think it's best to paint on sunny breezy days. That's the worst time. Overcast days with light or no wind are the best and if the temperature is around 65 F, it's ideal. Be sure there's no threat of rain until such time as the paint is dry.

Brush Tips

Apply the finish paint with the brush of your choice. If it's an oil paint, dip the brush in mineral spirits before you dip it in the paint. Getting the bristles wet with the solvent will make it easier to clean the brush later. If you're using a water-based metal paint, dip your brush in water first.

Don't Put It Off

The key to an easy wrought iron paint job is keeping up with it. If you allow the existing paint to fail miserably, then you'll have more prep work to do that's mind-numbing. Remember, purchase the most expensive metal paint and primer you can. Expensive paint almost always has the best ingredients.

CLICK HERE to get FREE & FAST BIDS from local exterior painters who know wrought iron.

Column: HT042

Foundation Height

foundation height

This simple drawing shows that a foundation must be 18 inches higher than the highest point of grade on the lot within 10 feet of the foundation. Copyright 2018 Tim Carter

Foundation Height TIPS

Did Dead Builders Know Best Foundation Height?

If we could conjure up the spirits of several custom home builders who've been dead for about 100 years, I am afraid they'd be most disappointed.

No doubt they would shake their heads when they gazed upon house after house in the modern suburbs in many cities that had the top of their foundations skimming just above the final grade of the soil that surrounds each house.

In fact, we might even hear them mutter, "What was that builder thinking..."

History, Legend & Myth

Did you read J.R.R. Tolkien's book Lord of the Rings? It was made into a great three-part movie.

At the beginning of that movie is a fascinating quote taken from J.R.R. Tolkien's book:

"And some things that should not have been forgotten were lost. History became legend. Legend became myth. And for two and a half thousand years, the ring passed out of all knowledge."


The Lord Of The Rings

You can discover much about life and how to build castles that withstand dragon fire watching this movie. Great love story too. CLICK HERE NOW TO ORDER THIS MOVIE IN ANY FORMAT.

For the most part that's what's happened with the knowledge of foundation heights. Who knows, I may be the last bastion of this nugget of building gold.

CLICK HERE to get FREE & FAST BIDS from local builders. Show them this column.

There are many things about building that are taken to the grave with builders and remodelers. It's unfortunate because most don't spend the time to record what they know for future generations.

The Internet, with comments on pages and videos, is helping to slow the loss of information, but the trouble there is much of the information is incorrect, incomplete or written so poorly as you can't understand what's being said.

When Should I Talk to My Builder About Foundation Height?

If you're in the planning stages of building your new home and/or are talking to various custom home builders about a new home, you need to talk about foundation heights. This topic simply deals with the distance from the top of the foundation down to the finished grade that touches up against the foundation and the soil within 10 feet of the foundation.

It may not seem important to you now, but once you are moved in and it rains hard for several days, you will wish foundation height would have been just above "How big will my kitchen be?" on your top-ten wish list.

What is the Ideal Foundation Height?

Look at the below crude drawing I made. The bottom of the green swale should be about ten feet away from your house foundation wall.


grade level drawing

I made this drawing. You can see the foundation wall with a typical sill plate and floor joist. The red line is the lot before the excavator shows up. The top of the foundation should end up 18 inches ABOVE the red line. Use the dirt from the hole to create the slope away from the foundation. (C) Copyright 2017 Tim Carter ALL RIGHTS RESERVED

How Smart Were Old Builders?

I'm constantly amazed at the intelligence of many old builders who have departed this world. It's indeed a shame more builders do not "build them like they used to".

Drive around the older sections of your city and you'll undoubtedly see homes where the first floor level is two or even three feet above the ground outside the home. Often these homes have steps that lead up to the front door. They often have dramatic front porches where you can sit and gaze down upon the gorgeous neighborhood.

CLICK HERE to get FREE & FAST BIDS from local builders. Show them this column.

Why Were Old House Foundations Higher Out of the Ground?

I firmly believe this was done for several reasons. Powered excavating equipment was not available or readily available. It was less expensive to dig shallower foundations.

foundation height

This is an old stone foundation on Mt. Desert Island in Maine. Note how high out of the ground it is. Smart builder indeed! Copyright 2018 Tim Carter

Foundation walls that protruded above grade allowed basement windows to exist without the modern sunken semi-circular window wells. These exposed windows could let in more light and ventilation into the basement. The dirt removed from the excavation could be gently graded away from the house to create wonderful positive drainage.

Did Wood Rot Happen?

Rainwater that splashed on homes rotted those close to the ground. It didn't take smart builders long to figure out that if you kept the wood up about 30 inches from the ground, you'd have minimal, or no, rot.

This had to be another motivation to keep the foundation up out of the ground.

Are Newer Home Foundations Too Deep?

But scan the new homes in subdivisions today and you'll rarely see a home built this way. Is the new method better?

I think it's debatable, especially in light of the modern uniform building codes. The codes speak to foundation heights.

Typically the codes say the amount of exposed foundation should be between a minimum of 4 and 6 inches above the finished soil that touches up against the foundation. Remember this is a minimum distance.

The building code is actually a set of minimum standards. Many homeowners think just the opposite. Building your home to the code standards is like getting a 70-percent grade on a test.

What Does the Building Code Say?

Furthermore, the code will often state the ground around the foundation must slope away from the house. Read this code section and it will almost always say the ground must fall 6 inches vertically for the first 10 feet of horizontal distance away from the foundation. What do all of these numbers have to do with foundation height you might ask? Plenty!

CLICK HERE to get FREE & FAST BIDS from local builders. Show them this column.

Who Establishes Ground Height in New Subdivisions?

The developer of a subdivision establishes the finish grade of the lots before construction begins. The word grade references the level of all the ground on your building lot before you start to dig a hole for the foundation.

Builders need to be sensitive to these established grades. A good builder determines the highest point of ground near the home and sets the top of the foundation in relation to this high point.

What Happens if My Foundation is Too Low?

When a new home builder decides to set the foundation height too low, all sorts of problems happen. The ground around the home tends to be very flat.

Positive drainage is either minimal or may not meet code. Sidewalks leading from driveways to the front door can act as dams trapping water movement away from a house.

These sidewalks become a barrier to establishing the needed positive drainage away from the house as they sit too high.

Can Mulch Create Water Dams?

The problem gets even worse when the landscapers show up. They'll often mulch in these areas and create negative drainage. Because mulch is piled up, the water in some areas around your home may actually drain towards the foundation!

You'd think this is all common sense, but the older I get the more I believe common sense is something that needs to be taught, not acquired by experience.

What is the Best Foundation Height?

Typically, I'd set all of my foundation heights about 18 inches higher than the highest point of grade within ten feet of the finished foundation. Doing this allowed me to create 12 or more inches of fall within the first ten feet of horizontal distance.

It also produced 6 inches of exposed foundation above the soil around the home. Remember, you can put the foundation up higher to get more slope!

Are Gentle Slopes Possible?

I'd use some of the excavated soil to create gentle slopes away from the house in as many directions as possible. When done properly, these slopes did not interfere with the grade established by the developer.

Houses built in this fashion do not appear to sit high out of the ground. They appear stately as they sit on the artificial rise you create with the dirt that's brought up from digging the foundation.

What's more, the house sports positive drainage from all sides so that flooding rains do not inundate the basement space.

CLICK HERE to get FREE & FAST BIDS from local builders. Show them this column.

Column NH001

Asphalt Patching

asphalt patch

Use asphalt patch in a bag to fill a shallow pothole. Cold patch asphalt can work well if installed correctly. ©2017 Tim Carter

"The key to successful pothole repair is preparation, and the use of the right materials."

Asphalt Patch TIPS

DEAR TIM: My blacktop drive is in fairly decent shape except for a few potholes. I am confident that I can do the asphalt patch repairs but wonder what can one do to make a permanent patch?

The highway crews in my area don't seem to have much luck as potholes seem to reappear in a short amount of time.

Is cold patch asphalt the best material to use to fill holes in blacktop? What is the best way to repair cracks? Mary Ann M., Bowling Green, OH

DEAR MARY ANN: Patching holes in asphalt surfaces can be done successfully, if you have some time, purchase the right material, and a use a few basic tools.

Why Do Asphalt Potholes Happen in Winter?

Many potholes tend to form in cold weather after a period of snow and ice is followed by a thaw. The water that thaws and soaks into the cracks of the asphalt refreezes at night. The ice expands as it freezes and blows apart the asphalt.

Thousands of potholes can appear overnight and spread like an epidemic. Highway crews often work in adverse weather and dangerous traffic conditions. It's unrealistic to expect perfect results when many holes need to be filled in a short amount of time.

What is the Best Asphalt Patch?

The best asphalt patch is hot mix asphalt. To get the absolute best repair of the pothole, the asphalt next to the pothole must be reheated and blended into the patching material. Watch these two amazing video to see how it's done. The first video shows a larger machine, but the second video is a smaller man-powered machine you roll around!

The key to successful pothole repair is preparation, and the use of the right materials. As I said before, the best material to use for pothole repair is traditional hot mix asphalt.

This product is made at plants that mix liquid asphalt, sand and different sized gravel into a mix that flows while it is hot. As it cools, the liquid asphalt hardens producing a very durable surface.

CLICK HERE to get FREE & FAST BIDS from local Asphalt Contractors who can repair or resurface your Asphalt Driveway.

It's not easy, nor is it feasible, for you to buy hot mix asphalt. If you buy a small amount, by the time you get home it will not be workable.

Is Cold Patch Asphalt DIY Friendly?

Cold patch is very DIY friendly. It comes in manageable bags and you can patch holes as small as 2 inches by 2 inches.

You need to use a new and improved cold asphalt patching compound. It's absolutely the next best thing.

cold patch asphalt

CLICK THE IMAGE to get a permanent Cold Patch Asphalt.


Do you need to patch your asphalt? Save time and money by using my Asphalt/Blacktop/Tar & Chip Installation & Repair Checklist. I offer a 100% Money Back Guarantee.


For many years, asphalt plants have made a cold patch asphalt that was intended for temporary patching purposes. This older material was difficult to work with and the asphalt binder that coated the stone particles often stripped off in a relatively short amount of time.

When the asphalt disappeared, so did the patch. Fortunately, there have been some major advancements in cold patch asphalt technology.

Are There Newer Cold Patch Asphalt Polymers?

Yes, there are newer cold patch asphalt materials that contain polymers. The polymers increase adhesion so the cold patch sticks to the old asphalt.

New synthetic polymer adhesive chemicals are now added to the asphalt that allow the cold asphalt patching products to produce permanent repairs when installed correctly. They're easy to use and very affordable.

Does Cold Patch Flow Like Lava?

Yes, cold patch flows out of the bags slowly like lava from the Kilauea Volcano in Hawaii.

The new cold patch asphalt mixes flow readily when you use them. If you've ever seen a video of how lava creeps across the land in Hawaii, you'll know how this cold patch material flows from the bag.

The material begins a curing process as soon as it's exposed to air and it's compacted. Thicker patches of cold asphalt are not necessarily better as they possibly will require longer periods of time to fully cure and harden.

How Do You Install Cold Patch?

The best way to install cold patch is to make sure the bottom of the pothole is slightly larger than the top. This dovetail shape helps hold the patch in place much like a filling in your tooth.

Long lasting repairs require some minimal effort on your part. The key is the shape of the hole before it is repaired.

The bottom of the hole should be wider than the top of the hole when you begin to add the cold asphalt. This is how dentists ensure a tooth filling doesn't fall out.

By making the bottom of the hole bigger than the top, you create a dovetail joint much like cabinet makers have used to securely join two pieces of wood.

Mason Chisels

CLICK HERE to see an assortment of chisels that will help you shape blacktop potholes.

What Cold Patch Asphalt Chisels Are Best?

The best cold patch chisels are ones about 1.5-inches wide. I'd use a cordless hammer demolition hammer to get the job done in seconds.

cordless demo hammer

This is a great cordless demolition hammer that will accept a wider chisel to trim the sides of an asphalt pothole. CLICK THE IMAGE NOW to have it delivered to your home.

Use a chisel to create vertical faces on the sides of the hole that extend down to the solid base material or down to a previous layer of solid asphalt. Be sure to remove any loose pieces of old pavement and any dust.

What is the Minimum Cold Patch Asphalt Thickness?

The minimum thickness of patching material at any edge should be 1 inch. The preferred thickness of the patching compound is approximately 2 inches.

If you have a deep hole to repair, install angular crushed gravel in the bottom of the hole. Compact this gravel well before you add the cold patch material.

Do I Need to Use a Hand Tamper?

Yes, you should use a hand tamper to compact the asphalt patch. Coat the bottom of the tamper with diesel fuel to prevent the cold patch from sticking to it.

Tamping tools used for compacting gravel or the cold patch material are easy to handle. They're normally an 8x8-inch plate of steel. Just make sure you don't tamp your foot!

asphalt patching

CLICK THE IMAGE to see a wide variety of Steel Tampers that can compact Asphalt for repairs.

Take your time to compact it very well with a steel tamper before you add the cold asphalt patching compounds. Once the gravel is compacted, add the cold asphalt so that it slightly above the surrounding pavement, level it and use a flat steel tamper to compact it.

How Long Before You Can Drive on Asphalt Patch?

Some of the new cold asphalt products maintain that they can be driven on immediately. This is true, but as each day passes, they get harder and harder.

Avoid concentrated loads on fresh patches. Kickstands from bicycles and motorcycles can create dimples.

Automobile tires that turn while the car is stationary can also damage a brand new patch.

Should I Seal the Cold Patch?

No, do not apply asphalt sealer to the cold patch. The sealer will prevent the patch from getting hard.

Once you have completed your pothole repairs, wait a long time before you think about sealing it.

Some places say to wait at least 30 days before you apply a liquid blacktop sealer. A sealer that is applied over a fresh patch will cut off the necessary supply of air to the cold asphalt. The cold patch needs the air to cure.

If this happens, the patch can remain somewhat soft for a long period of time. If you're going to seal a cold patch, be sure the sealer has silica sand in it to fill the voids between the small cold patch aggregate.

How Do I Do Asphalt Crack Repair?

I repair asphalt cracks using an epoxy that comes in a caulking tube. I press small stones and scatter sand in the fresh epoxy to make the crack match the asphalt.

blacktop epoxy crack filler

This is the crack filled with the epoxy BEFORE the stones and sand are placed. Copyright 2018 Tim Carter

As you wait for the cold patch to fully cure, take your time and clean out any cracks in the driveway area.

Remove as much loose material as possible and fill them to within one-quarter inch of the surface with a great epoxy crack filler.

Wait one week and then fill the crack to the top. Place small stones and sand in the fresh epoxy to disguise the crack. This two-step process will help to create a smooth surface at each crack location.

blacktop crack repair

Here's the fresh epoxy completely hidden by sand and stones pressed into the goo. It really works. Copyright 2018 Tim Carter

Old Blacktop Crack Video

Watch this video, but don't use the black goo in the caulk tube. About four years after I taped this video, I discovered a BETTER product to squirt into the crack. It's an amazing epoxy that comes in a caulk tube and is made for concrete.


But I tested it on my blacktop drive and it worked FAR BETTER than the old technology black goo. CLICK HERE to BUY the epoxy.

The epoxy you should use is demonstrated in the video below.

IMPORTANT TIP: You do want to do the SAME PROCESS you'll see in the top video with respect to pressing in small stones and sand into the epoxy so you don't see the crack once done. Be SURE TO READ the column below the second video!!!


CLICK HERE to read a recent column and see DRAMATIC before and after photos using the cool epoxy.

Companion Articles:   Tips on Patching Blacktop and Asphalt, High Performance Asphalt Repair Products, Asphalt (Blacktop) Patching Material

CLICK HERE to get FREE & FAST BIDS from local Asphalt Contractors who can repair or resurface your Asphalt Driveway.

Column 283

How to Build a Temporary Wall

simple tools

These simple tools are all that is required to build temporary walls. ©2017 Tim Carter

How to Build Temporary  Walls TIPS

DEAR TIM: I'm moving into a rental house, and need a few temporary walls to partition off a portion of the living room to create an office. My idea is to put in an L-shaped wall in the corner of the room to create a 6 x 9-foot office.

Is it possible to put in a temporary partition wall that I can take down without any damage when I move out?

Ideally, I'd like the small office to be as noise proof as possible, since I have small children. I plan to work from home. Brian M., Lafayette, CA

DEAR BRIAN: It's indeed possible to build one or more temporary walls in this new apartment that can be removed at a later date. If done properly and with care, there will be little or no evidence any walls were ever installed.

Temporary Walls Require Minimal Tools & Skills

The skills and tools required to do this are minimal. You will need several helpers at various parts of this job. The hardest part will be holding the top plate of the wall up against the ceiling as you tap a few of the vertical studs in place.

It's probably a great idea to enlist a helper and have two step ladders handy.

Don't Try Friction Fit - Walls Can Tip Over

The temporary wall partitions can be friction fit between the floor and ceiling, but I'd not recommend this. Seasonal changes in humidity and even moisture loss from the studs you use can cause the wall to come tumbling down.

You'll want to toenail the studs to the top and bottom plates. Twelve-penny common nails will be fine for this. Be sure the nails don't penetrate the finished floor beneath the bottom plate.

Secure To Ceiling

All you have to do to keep the walls from tipping over is make them fit tightly and use an occasional fastener through the top plate into the ceiling. These small holes, if you decide to make them, will need to be spackled and painted when you take down the wall.

CLICK HERE to get FREE & FAST BIDS from local remodeling contractors who can build your addition or remodeling projects.

Remodelers Build Temporary Walls

Temporary wall partitions are built on a regular basis by many remodeling contractors. The walls are needed to temporarily support loads as bearing walls are removed and replaced with beams.

This is a durable extremely accurate level that will last a lifetime. CLICK THE IMAGE TO order one today.

Magic Builder Tricks - Sill Sealer

Homeowners don't want to see where the temporary wall was installed just as your landlord doesn't want to see you damage his building. I discovered many cool tricks over the years that helped me eliminate damage to finished ceilings and floors.

To protect the ceilings and walls from damage and help soundproof at the same time, I installed a one-quarter inch thick piece of foam between the rough lumber top and bottom plate faces and the surfaces they contact.

This product is sold in rolls and called sill-plate sealer. It is used to stop air infiltration between the top of a house foundation and the first piece of lumber installed on top of a foundation.

foam sill sealer

This is foam sill sealer. It matches the width of either 2x4s or 2x6s. It will seal out dust and noise. CLICK THE IMAGE NOW TO BUY IT.

Foam Stops Dust & Noise

Before any cuts are made to the vertical wall studs, determine where the wall will go and take precise measurements between the floor and ceiling. Check the measurements in many locations as the floor and ceilings can be out of level.

circular saw corded

This is a wonderful corded saw. It will last generations if you care for it. It cuts very accurately. CLICK THE IMAGE NOW TO BUY THIS SAW.

The foam will help you achieve a tight fit if you cut the vertical wall studs three inches less than the exact distance between the floor and ceiling. This assumes the bottom and top plates you install are each 1.5 inches thick.

Build Long Wall First

Start with your longest wall, and cut the two end vertical studs first. Have your helpers hold the top plate in position as you tap the end studs in place. If they are loose, you can close the gaps with tapered wood shims.

Drill Toenails

Once the studs fit snugly, use a drill to create angled holes at the ends of the studs that allow you to drive three-inch long drywall screws through the studs and into the top and bottom plates. The screws will lock the studs into the plates. Screws can be removed easily when it is time to remove the wall.

IMPORTANT TIP: Once you have all wall studs in place, it is time to get ready to drywall. Don't even think about installing electric in these walls as that would be a significant safety hazard. The power for your office equipment will need to come from existing wall outlets on the permanent walls.

klein-tools-tape

This is the great tape measure I have that has the fractions marked on it if you need help. It's VERY EASY on the eyes. CLICK THE IMAGE NOW TO ORDER ONE.

Sound Batts Keep Things Quiet

Before you drywall, install sound-batt insulation in the stud cavities. This will not eliminate noise, but it will surely help you.

sound insulation

Add these batts to keep sound transmission down between the two rooms. CLICK THE IMAGE NOW TO ORDER IT.

You can also help reduce noise by installing different thickness drywall on each side of the wall. Use ½ inch on one side and 5/8 inch on the other. This eliminates noise caused by sympathetic vibrations.

Do not bother taping the drywall where it contacts the walls and ceilings. Use a simple wood trim nailed to the new wall surface to hide the unsightly gap between the new drywall and finished wall and ceiling surfaces.

If you plan to install a door, consider using an exterior door that has complete weatherstripping. Noise travels through air. Regular interior doors have all sorts of air gaps between the door and the door stops on the jambs.

Be careful about hanging any cabinets on the temporary walls. This weight can make them top heavy and more likely to tip over. The L-shape of the walls gives the system a certain amount of stability, but only if the two walls are joined tightly together in the corner where they meet.

CLICK HERE to get FREE & FAST BIDS from local remodeling contractors who can build your addition or remodeling projects.

Column 685