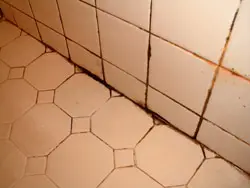
Remove Mildew from Grout | This is gross mold growing on shower tile. It's pretty easy to stop this from happening.
Remove Mildew From Grout TIPS
- Use non-toxic cleaner Stain Solver certified organic oxygen bleach
- Remove hard water deposits with vinegar
- Scrub deposits with a stiff scrub brush - WATCH VIDEO BELOW
- Prevent mildew using a squeegee on tub/shower surfaces to remove all water
- CLICK HERE to Get Tim's FREE & FUNNY Newsletter!
DEAR TIM: It is a long, long story but the bottom line is that my ceramic tile shower is a mess. There is mildew everywhere and other really tough stains that are nearly impossible to remove. Is there a way to make the white grout look like new?
It seems that the mildew has penetrated deeply into the grout. What can I remove mildew from grout and restore the shower to its original condition? What can I do to prevent this from happening again? Molly S., Orangeburg, SC
DEAR MOLLY: Six weeks ago a friend of mine had the same problem. One day while we were with our kids at the community swimming pool he said he tried many off-the-shelf cleaners and products at grocery stores to clean his tile shower. He was not satisfied with the results and was ready to tear out the tile and grout and start over.
Does Oxygen Bleach Remove Mildew?

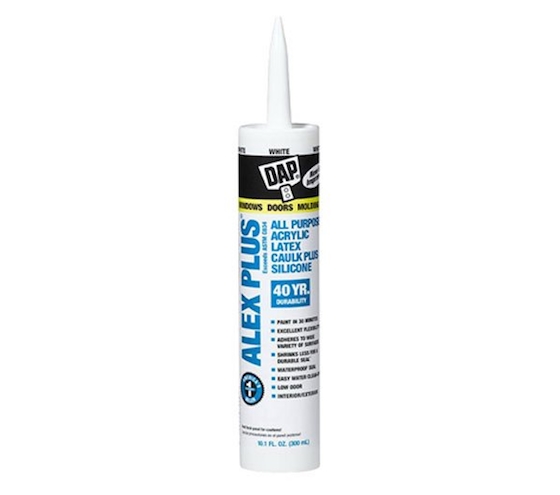
Stain Solver is MADE in the USA with USA ingredients that are food-grade quality. CLICK THE IMAGE to order some NOW.
Oxygen bleach is one of the best things to use to remove mildew and mold. It's non-toxic, it has no odor, and some are certified organic like STAIN SOLVER.
When I told him how to solve his problem, he couldn't believe it. I gave him some magic powder that I happened to have in my car and he used it. Two weeks ago when I next saw him at the pool, he said his shower looked like new. Ah, another satisfied customer!
While he had some products at his house that would work, most of them, like chlorine bleach, produce toxic odors and can ruin clothes and carpets in bathrooms if you're not careful.
My friend got amazing results because he used a miracle product called Stain Solver that I had discovered while doing research on how to clean and seal a deck of all things!
Non-Toxic & Certified Organic Oxygen Bleach
Stain Solver a certified organic oxygen bleach that has no odor and does an amazing job of safely cleaning mildew, mold and soap scum from tubs and showers.
It also cleans anything that's water washable, including ceramic tile, grout, acrylic tubs, whirlpool tubs, vinyl siding, tough stains from clothes, etc. If it's water washable, Stain Solver will clean it. But that's a story for a different day. Let's worry now about cleaning your shower!
If you want to see all the things that Stain Solver can clean, assuming you have time, go look at all of the Before and After photos sent in by customers. CLICK HERE to see them.
My favorite before and after photo set is one about a baseball cap of all things. You'll not believe your eyes! CLICK HERE to see the cap and read the short story about it.
To restore your ceramic tile shower to near perfect condition, you're going to need several things. Get a new scrub brush that has stiff nylon or plastic bristles, a roll of paper towels, a gallon of white vinegar, some certified organic Stain Solver, some liquid dish soap, and some old clothes.
How Hard is it to Remove Mildew?
It can be hard work to remove mildew from grout if you've allowed it to grow for weeks and months.
There's a very good chance the stains and dirt have taken months to accumulate. It's very likely mold and mildew can be locked into layer after layer of paper-thin hard water deposits.
Don't think you are going to complete this job in 30 minutes or less. The entire process is going to take place over a period of hours and possibly several days if the mildew and mold is out of control. If you do have complete success in just 30 minutes, you're very lucky!
What is the First Step to Remove Mildew?
The first thing to do is to use the scrub brush to remove as much mildew, dirt, soap film etc. as possible from the tile and grout. Mix up a simple solution of Stain Solver using hot tap water.
Mix two tablespoons of Stain Solver powder to one quart of hot tap water. Stir continuously until dissolved. Be sure you stir until all the small powder balls have dissolved, then put the solution into an old spray bottle.
What is the Second Step?
Spritz the dry tub, shower, and wall surfaces with the Stain Solver solution. Apply so it runs down the walls. Let the solution sit for about fifteen minutes allowing the powerful oxygen ions to work. The longer you let it soak and work, the less scrubbing you have to do.
Spray on more Stain Solver solution after ten minutes. Grab a stiff scrub brush and squirt a small amount of liquid dish soap on the brush and get it wet. After the fifteen-minute wait period scrub the walls and floor and rinse.
Use enough extra water to get the soap to really foam up as you scrub. This removes dirt, soap scum and mildew at the surface. Rinse all surfaces with clear water.
How Do You Remove Hard Water Deposits?
After this cleaning process, you will probably have some dull stains that won't budge both on the tile and in the grout. These are very likely locked in place by hard water deposits. You'll remove those using some paper towels and white vinegar.
White vinegar is best and you can see dramatic before and after photos of how well vinegar removes hard-water deposits by clicking or tapping here. Scroll to the bottom of the page.
Saturate some paper towels with the vinegar and place them over the hard water stains. Do this on the floor and any vertical surfaces. The wet paper towels will readily cling to vertical surfaces. Vinegar is a very mild acid and it works slowly but efficiently to dissolve the alkaline hard-water deposits.
The vinegar will need to work for hours. Stop back every hour to make sure the towels are still wet with vinegar. Pull away a towel and scrub the deposits.
They may completely wash away. If they do not, pour fresh vinegar on the towels and allow the chemical reaction to continue. Heavy deposits can take up to eight or twelve hours or so to completely melt away. The trick is to keep fresh vinegar on the towels.
Once you have all of the hard water deposits removed, clean the shower again with Stain Solver to remove all traces of vinegar.
How Do You Remove Residual Mildew?
It is now time to attack any residual mildew that has stained the grout. To get the BEST RESULTS, you need to make sure any tile grout is dry. Use a fan to dry the grout in a few hours. The reason you want the grout to be dry is simple.
If it's wet, the fresh Stain Solver solution you'll be applying can't soak into the grout because water is filling up the micro-pores of the grout. It's mission-critical the grout is dry so the micro-cleaning oxygen bubbles from Stain Solver can soak deep into the grout.
Mix up fresh Stain Solver and apply it to the stained grout. You may have to use paper towels just like you did with the vinegar. Saturate as many towels as necessary and put these in contact with the mildew-stained grout.
It can take hours and possibly a few days to bleach out all of the mildew in the grout. Come back every hour or so and pour on more fresh Stain Solver solution to ensure it never evaporates.
Be aware that once you mix the Stain Solver powder with water, it only works for six hours. If you need to clean over a few days, you'll need to mix new solution every cleaning session. That's why you should not mix more than a quart each time.
How Do You STOP Mildew Forever?
To prevent the mildew and mold once you have it clean, it helps to understand mildew. It's an organism that requires food and water to live. Showers and bath areas provide the moisture and you provide the food every time you use soap, shampoo, cream rinse, etc.
The dirt and oils you wash from your skin and hair are food for mildew. Dust that can be floating around your bathroom is food for mildew. If you minimize or eliminate the food and water, you can eliminate the mildew.
The first step in mildew prevention is to squeegee your shower and tub after each use. Wipe down all walls and the floor with the squeegee to get as much water as possible into the drain.
If you have a shower curtain, shake it well before using the squeegee to get water off of it. Leave the shower curtain pulled back or a glass shower door open so the shower area air dries as fast as possible. Leave the bathroom door open as well so the humidity in the room drops as fast as possible.
It's important to clean the shower every two weeks. You need to remove invisible body oils, soap film, etc. from the surfaces so there's no food for the mildew to munch on. Believe me, if you do the above things, your shower will be mildew-free for years to come.
| Message from Tim: |
Years ago while researching a column about cleaning decks, I discovered the wonders of Oxygen Bleach. It is perhaps the 'greenest' cleaner I know of as it uses oxygen ions to break apart stains, dirt and odor molecules. There are no harsh chemicals, and it works on just about anything that is water washable.
I decided to create my own special blend using ingredients made in the USA. In fact, the raw materials in the active ingredient are food-grade quality registered with the FDA. I call my product Stain Solver. I urge you to use it to help clean your ceramic tile and grout. You will be amazed at the results!
Companion Articles: Bathroom Mildew Removal, Oxygen Bleach Tile Cleaner, Ceramic Tile Cleaner Products
Column 284


 Get a
Get a