February 7, 2016 AsktheBuilder Newsletter

It's SUPER S * * * * * !

I don't think the NFL allows me to publish the actual name or I'm guilty of trademark infringement.

Anyway, forget about Peyton's Retirement Party and Cam's Romping Around until later tonight.

Right now I want you to play the LE Johnson SOFT-Close game!

I hear you, "Tim, for GOSH sakes, what in the world is this SOFT-Close all about?"

Well, when you play the game and click the Submit Form button at the bottom of the game, I EXPLAIN what it's all about.

Just go play the game and have fun laughing.

You'll discover some AMAZING uses of LE Johnson products, AND I guarantee you'll have more respect for my sanity.

Go ahead CLICK HERE NOW to play this wacky game.

If you're a new subscriber, you're going to LOVE my crazy games. Wait until you read the multiple-choice answers this time.

Have a great Sunday, or Monday if you're Down Under!

Tim Carter
Founder - www.AsktheBuilder.com

Do It Right, Not Over!

February 5, 2016 AsktheBuilder Weekend Warrior Update

I'll make this pretty brief for a Friday WWU (Weekend Warrior Update).

Yesterday, I took the day off and did a cool amateur radio activation.

With my friends Jim and Dave, we went to the former home of Augustus Saint-Gaudens.

Don't know who he was?

CLICK HERE to discover more. There's a very cool video at that page. Be sure to watch it.

What a difference a day makes in New Hampshire! Just thirty minutes ago, I finished blowing 3 inches of fresh snow!


.
MYSTERY LINK! So you think you know it all about porosity. Hah! CLICK HERE to see if you're all-knowing.
.


Magic White Crystals​

Recently I've been getting lots of email about white crystals.

CLICK HERE to watch this video for a full explanation.

Driveway Sealer on a Roof

I'm not kidding you. You've got to read this question from Jim.

CLICK HERE to read the wacky question and my reply.

BIG GAME on Sunday

Remember, I'll have a super fun game for you to play on Sunday morning.

Here's a clue for you:

What was one of the selling features of Charmin?

That's enough for today.

Check your Inbox first thing Sunday morning!!!

Tim Carter
Founder - www.AsktheBuilder.com

​Do It Right, Not Over!

Driveway Sealer on Roof

Sometimes I get the most interesting questions.

Like this one from Joe Naymik who hails from Cleveland, OH.

Joe wrote, "Is it possible to use a product like a driveway sealer (black top) to seal the plywood on a roof?  I want to use that like ice guard before I install my roof.  It is a lot cheaper and 1 can roll it on before I set the plywood."

The answer is absolutely positively NO!

I think the best analogy I can offer up would be to ask if you could use a cold chisel and hammer to perform delicate brain surgery. Driveway sealers are not designed to be used as a roofing product. Period.

Get the best ice and water shield product I use. It's money well spend if you don't want leaks. It's the only thing to put on your home.

Your method would do nothing to stop leaks. The best underlayments span the gaps between the sheets of roof sheathing and they seal to themselves. They create a complete barrier to water infiltration.

CLICK HERE to buy what I used on my own home, Joe.

NOTE: When you click the two above links, be careful when you read some of the user comments. It's clear to me that some of the people commenting FAILED to read the product instructions. It's clear to me they have no experience with looking at roofs after they've leaked. Who would you trust - an award-winning builder / remodeler who's installed the product on many jobs AND covered his entire house with it, or some ill-informed consumer or young roofer who failed to read the installation instructions?

February 3, 2016 AsktheBuilder Newsletter

As usual, there's so much going on I don't know where to start.

Yesterday I had a very important phone call with an advisor about my upcoming book about defective roof shingles.

Have you taken my Defective Roof Shingles survey? If not, CLICK HERE.

Feel free to forward this email to any friends, relatives, co-workers, enemies, unicorns, etc. that you feel have an asphalt shingle roof that's falling apart or about to.

The call was very good and when the person at the other end heard all the details and facts concerning my research, he simply couldn't believe how I had all my bases covered.

I'm thinking seriously of taking advance orders for the book. If all goes well, I believe it could be ready in both digital and print format in five weeks.

I'll know more in a week.

Here's the BEST NEWS of all about the book.

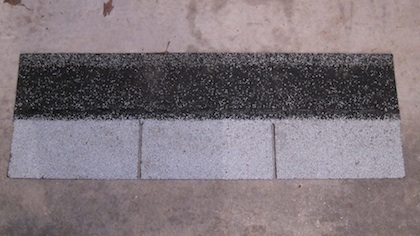
If you just happened to put on a new, or newer, asphalt shingle roof that's doomed to fail, I reveal in the book a simple thing you can do to extend the life of the shingles by twenty or even thirty years!

I also reveal the asphalt shingles I'd buy if I had to put them on my house. Yes, there is a brand that appears to last like the shingles of old.

Speaking of old shingles, I want to thank you for coming through for me. About ten days ago I put out a request for shingles that were OLD - ones that had never been put on a roof.

You may have been one of my subscribers that came through. One man, Jim in Harrison, OH, had a bundle of shingles that had never been opened from 1970.

That's not a typo. He picked them up himself from the Philip Carey loading dock in Lockland, OH in 1970.

Why do I need to have some old shingles? You'll discover why in the book. And when you do, you'll be seething mad.

.
MYSTERY LINK! CLICK HERE for a photo of something you'd LOVE to have on your property line!
.


Super ATB Game

on S * * * * Sunday

The NFL owns the trademark on the phrase Super Bowl™ and I believe Super Sunday™. I own two trademarks and respect all that.

Anyway, this coming Sunday is the big game. But it happens at night and I'm going to have something for you to do on Sunday morning EARLY.

It's going to be a fun game, and you're going to discover a new product that I believe is going to get you to say WOW! out loud as you sit in front of your computer.

So be SURE you open a special newsletter edition this coming Sunday morning. I'll have it waiting for you as soon as you get up, unless you're like my mother-in-law Mary Jane who used to get up at 4:15 am each day.

Watch for this on Sunday. I can't wait to hear what you have to say about this new product.


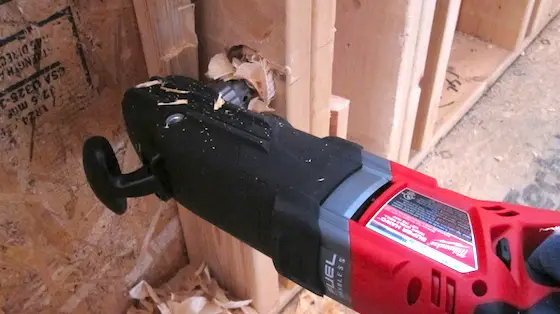
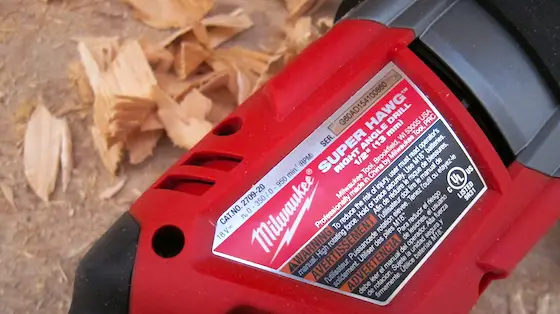
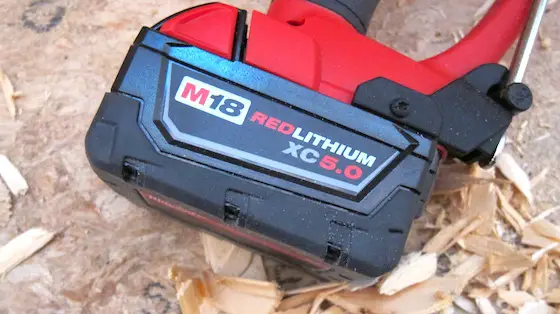
Milwaukee Super Hawg Tool Review

WOWZA!

CLICK HERE to read my review of this unbelievable tool.

Bathroom Remodel Update

It's official. I'm about to undertake a massive complete bathroom remodel here at my own home.

I hear you.

"What's in it for ME, Tim?"

How about you being able to see the entire process in well over 100 videos that will probably be spliced into 30 or so in a massive playlist. Would that get your attention?

The videos will be FREE.

I'm going to be using all Kohler and Sterling products in this job. You're going to see some spectacular fixtures to be sure.

Each and every step will be taped and I'm going to try to explain WHY I'm doing whatever you're seeing.

The video series will start with a before video showing the crazy planning mistake made when this house was built.

It's important for you to know that I did NOT build this house I'm living in.

I also plan to do some sort of LIVE Google Hangout with you being able to chat in questions - or if you can't do that, I can have you email me some of your burning questions and I'll answer them live in the video stream.

I believe I'll be starting on this project in the next two weeks.

Beth and Whitewash

Overnight Beth from Cincinnati emailed me asking if I might be able to stop by her house and talk to her about the magical whitewash finish I did on a past job of mine.

She was unaware I had moved to the great Northeast Kingdom of New Hampshire. Getting me to and from New Hampshire is possible, but she chose not to do that.

She wants to transform her red-brick home with a time-tested material that is simply gorgeous. This is the same magical material Tom Sawyer used to coat that 9-foot tall nearly 100-foot long fence.

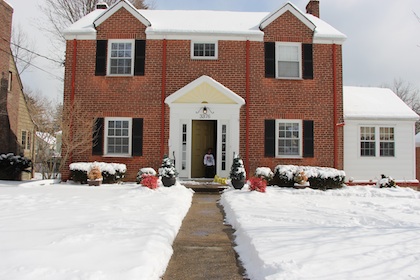
Years ago, I was fortunate to have a job where we could take whitewash - it's a special mixture of hydrated lime and other secret ingredients - and put a coating on brick that makes the house look like an English cottage or some manor home.

CLICK HERE to read about the process and to see a smaller photo of part of the giant room addition I whitewashed. This coating can last for DECADES and needs no attention.

Most painters have no clue about whitewash or how to do it.

Beth is probably going to use my private phone concierge service as soon as the snow melts at her home. That way I can coach her over the phone to ensure her house comes out exactly as she desires.

Okay, that's enough for today.

I'll be back to you on Friday. Remember, a BIG FUN game is happening early Sunday morning. Be sure to check your email on Sunday after you get up.

Tim Carter
Founder - www.AsktheBuilder.com

Do It Right, Not Over!

Milwaukee Super Hawg 2709-22 Review

You may not know this, but among other things I'm a master plumber. Yeah, the Ask the Builder founder is a plumber too!

I've been one for over 35 years and during that time I've loved installing waste, vent and water supply lines.

As you might expect, I've used beefy corded right-angle drills for decades to drill the huge holes through studs and joists for 3, 2 and 1 1/2-inch drain pipes.

These high-torque tools are what you need to bore through 2x material in seconds.

When I heard about a cordless right-angle drill that could do what corded had done for decades, I had to experience it to believe it.

Just two days ago I got to use the Milwaukee Super Hawg on a real job site putting in real plumbing pipes.

Here it is just after drilling the hole necessary to put in the kitchen sink drain pipe. Photo credit: Tim Carter

Here it is just after drilling the hole necessary to put in the kitchen sink drain pipe. This is the image featured in the February 3, 2016 Newsletter. Photo credit: Tim Carter

When it bored through a double 2x6 without even a whimper, I was speechless.

Here it is chomping through the wood like you'd bite into a soft marshmallow. Photo credit: Tim Carter

Here it is chomping through the wood like you'd bite into a soft marshmallow. Photo credit: Tim Carter

This two-speed tool has 0-350 RPMS in low gear and 0-950 RPMS is high.

This nameplate has graced job sites for decades and will continue to do so as long as Milwaukee engineers keep producing great tools like this. Photo credit: Tim Carter

This nameplate has graced job sites for decades and will continue to do so as long as Milwaukee engineers keep producing great tools like this. Photo credit: Tim Carter

With the 18-volt battery installed, the tool weighs in at 14 pounds, but that's needed to offset the torque the tool develops.

This battery could have supplied all the power to drill all the holes on the entire job! Photo credit: Tim Carter

This battery could have supplied all the power to drill all the holes on the entire job! Photo credit: Tim Carter

You can visit the Milwaukee website to get all the fancy specs on this tool if you want, but all you really need to know is that it works and if it does bore over seventy-five 2 and 9/16-inch holes as it says on the box the tool came in, that's all you need for a day or two's work.

On this big job I just finished with two full baths, a kitchen, laundry room and master bath with a whirlpool I only had to drill a total of 34 holes for all of the waste and vent pipes. That means I could have done the entire job on one charge.

Remember, this tool comes with internal battery and tool intelligence. Small microchips in the battery and the tool work in tandem to deliver TOP performance and to protect your investment from overheating or damage.

Thanks Milwaukee! CLICK HERE to buy a Super Hawg right now.

Planning the Perfect Job

If you could look over my shoulder as I read my incoming email from homeowners, you’d probably shake your head as I do sometimes. Not a week goes by that I don’t have to offer up a grim autopsy report to a hurting homeowner. All too often the problem can be traced to poor planning early in the process.

Some homeowners, you may be one, do take the time to think things through before the job is bid. Other homeowners, like Maureen from southern California, use my private phone concierge service to make sure they’re not heading for trouble before they turn a spade full of dirt or tear out a wall on an interior remodeling job.

The bottom line is you’ll be much happier, you’ll get the best bid prices and you’ll avoid costly change orders if you just take the time to do great planning as you march through the design phase of your upcoming job. You need great plans no matter if it’s a simple kitchen remodel, a room addition or a brand-new home.

Degree of Difficulty: hammer-4-5

Step One: Planning a job is work. It’s not something you hope works out. You have to be actively involved and you need to pull on past experience to ensure things will go well. For starters, use your existing home as the baseline for what you are going to do. Your tight spots need to be identified. Closets that are too small and rooms that are too tight all need to be put on a list so those mistakes never happen again.

Step Two: For example, imagine you’re remodeling your kitchen. Stop and make a list of all the things that are wrong in your current kitchen. Where are the traffic jams? Where do you wish you had more counter space? Where is there poor lighting? This list of defects is the foundation of coming up with a new kitchen that will be a joy to be in and will produce minimal frustration.

Step Three: Resolve to pick out every item you intend to use in your job as the plans are being formulated. It’s vital you know the sizes of all appliances, fixtures, windows, and even doors. Something as simple as cabinet hardware needs to be considered because the knobs or pulls you want may not work with the cabinet door design you select. You’ll discover quickly what items are custom ordered and take months to get.

Step Four: If your new job requires new windows, be sure you have a grasp of how much glass area is really going to show. The rough opening the carpenter builds for the window may seem huge, but by the time the window is in place, and depending if the window has internal vertical dividers, you may be shocked at how little glass or natural light will enter the room. All too often I hear complaints from homeowners about windows being too small.

Step Five: Are you building a new home? Now is the time to rough in basement bathrooms for future use. It often takes a plumber just a few hours to put in the pipes before concrete is poured. Be sure you put a floor drain in the mechanical room where water heaters and boilers are located. If there’s a leak, the water stays in that room and doesn’t migrate to the rest of the lower level.

Step Six: Plan for future electric needs. If you feel you’ll need extra electric in remote parts of the house and you’re building a new home, now’s the time to install a blank conduit or two or three from the main panel to remote parts of the house where you may need cables. This simple task could save you thousands of dollars in the future.

Step Seven: Perhaps you’re building a room addition or a new home. You need to take graph paper and make tiny colored cutouts of the exact furniture you’ll be using in each room. Place the pieces of paper on the large scale graph paper so they represent the final furniture layout. Provide for enough space between pieces. Doing this you’ll get the room sizes just right and not too small.

Step Eight: Don’t skimp on your deck or patio! Decks built just 10 or 12 feet away from a house wall are too narrow for even a 4-foot diameter table and chairs. Do the same exercise with the paper cutouts and use current room sizes in your home to validate what you come up with. Look at how spacious or cramped your current dining room is when it’s filled with people at the table. Is there enough room for people to comfortably get in and out of chairs? If so, this is how big your deck or patio needs to be.

Summary: I have countless past columns and videos at my AsktheBuilder.com website that talk all about planning tips and how to avoid costly nightmares. I suggest you stop by and poke around before you fall into the giant planning trap of death!

Column: HT049

New Home Floor Bounce

DEAR TIM: I’m in the planning stages for building a new home and I don’t want bounce in my floors. My last home felt like a trampoline yet it was built to code. My new home is going to have a massive kitchen with a giant island that will have a 10-foot by 5-foot solid granite top. I’m worried that the kitchen floor might sag and have bounce to it. What’s the cause of bouncy floors? Can you share the secret to eliminating the bounce in a new home floor? I know from experience that it’s tough to solve it after the fact. Tony M., Greenville, SC

DEAR TONY: Congratulations on your new upcoming home. It’s always exciting to be on the verge of a new home. The planning process you’re now working through is by far the most important time you can spend. Over the years I’ve seen lots of heartache hidden in plans that were ill-conceived. The other issue I discovered as I was advancing through my career is the inability of many to visualize what a home will look like based upon two-dimensional floor plans and elevations you see on large sheets of paper.

As you might expect I’ve been in homes that had quite a bit of floor bounce. They were also built to code and therein lies a major problem. I think the building code is a good thing, but unfortunately most people equate a home built to code as to being one that is well built. That’s not the case. If a home is built to the code requirements it’s about the same as you getting the lowest possible score to pass a test.

The floor under this kitchen with a massive granite countertop better be stiff or it will bounce more than a trampoline. Photo Credit: Tony Mishler

The floor under this kitchen with a massive granite countertop better be stiff or it will bounce more than a trampoline. Photo Credit: Tony Mishler

The cause of bounce is traced to the normal flex that is part of wood floor joists. Even solid steel i-beams can have flex. It’s all very complex with wood because the amount of flex varies depending upon the species of wood and the grade of the actual pieces of lumber. Engineered lumber wood i-beams also can have flex in them, but they can be designed to be exceedingly stiff.

Some of the bounce I’m seeing in today’s new homes is a result, in my opinion, of abandoning time-tested technology. If you look at the wood-frame construction of older warehouses and homes you’ll always see wood cross bracing in between the floor joists.

This cross bracing consisted of small 1x3 material that formed the letter X. The end of one of the pieces of the 1x3 would be nailed to the top of a joist and the other end was nailed to the bottom of the adjacent joist.

This cross bracing helped transfer the concentrated load from one or more joists across the entire floor system. For some reason the building codes seem to have discarded this trick discovered by carpenters and builders from hundreds of years ago. It always saddens me when I see great building methods allowed to float away down the river of time.

Speaking of time, let’s go back to when I built a room addition for Matt Motz. Matt was a gentle giant and quite knowledgeable about residential construction. I was the successful bidder on a very interesting master bedroom / family room two-story addition that was to be attached to his 120-year-old farmhouse. Matt knew all about bouncy floors and insisted that his wood-frame bedroom floor be as stiff as a steel-reinforced concrete slab set on steel i-beams!

He knew the building code allowed simple 2 x 10’s to span the width of the addition but he instructed the architect to put in wood floor trusses that were 20 inches tall! My guess is this floor system had a deflection standard at least twice or three times what would pass inspection in the building code. I can tell you that the floor had absolutely no bounce in it when five or six corn-fed construction workers jumped up and down on it trying to get it to bounce.

Talk to a residential structural engineer and she’ll advise you of several possible ways to avoid floor bounce. There are many ways to achieve your goal. I happened to love working with the floor trusses because it made running plumbing, heating and electrical cables a breeze. No holes ever had to be bored because the trusses had so much open space in between the webbing.

If your wood floor system will be supported by a beam in a basement, realize that you must also pay attention to the size of the beam. Beams can be ordered and specified with different stiffness just like the wood floor joists. I always tried to convince homeowners to use taller beams for two reasons.

The taller beams not only were stiffer, but they also allowed me to create wider spacing between the columns in the basement that supported the beam. In my own home my support columns were spaced at 16-foot intervals when in most homes you’d find them every 9 feet.

The money you invest with a seasoned structural engineer at this phase of the project will keep you very happy through the years. Believe me you’ll be able to design and construct a wood floor that will be as stiff as my back after lifting 2 x 12 x 16-foot southern-yellow-pine joists all day long!

Column 1129

January 26, 2016 AsktheBuilder Newsletter

This is going to be really short. I've been blasted busy the past week. That's why you didn't hear from me.

In just about 45 minutes, 7:45 am, I need to be out the door on this frosty winter's morning to start roughing in the plumbing drain and vent lines on a friend's house.

I hope to tape a video tomorrow showing you some of what's happening, but it depends on all sorts of things.

I've got some great news about several things to share, but once again, I need your help. This is VERY important.

Do You Have an ...

old three-tab shingle in your garage, shed or barn? I'm talking about one like this:​

I don't care what color it is. Here are the minimum specifications:

  • It needs to be in original condition
  • It needs to be at LEAST 40 years old
  • You need to be able to VERIFY the age within a few years

If you have a shingle like this, or a bundle that's just been sitting around from when your house, barn, garage, shed, etc. was roofed all those years ago, you'll really be helping MILLIONS of other homeowners.

PLEASE reply to me if you have some ancient shingles - or know of someone who has one or two - around your home.

Bathroom Remodel Video Series

I'm about to embark on a serious bathroom remodel here at my own home.

The original architect and owner of this home must have been doing drugs when they planned the existing basement bathroom. When you see it, you'll agree.

I plan to do a complete step-by-step video series starting with a before tour and pointing out all that's wrong with the bath.

Then I intend to show you each and everything I do explaining WHY it's being done. Often that step is skipped in most videos.

Best Part: These will all be for free on my YouTube channel.

I also plan, at a few critical times, to do a live Hangout where you can ask questions about where I am on the project in case I don't answer your questions in the video.

I've not yet figured out the best way to do the Hangout, but I'll probably experiment soon so the best production value is achieved.

Watch for an announcement about this.

.
MYSTERY LINK! I'll bet you didn't know the following about a certain exterior building material!!!
.


Klein Tools MM700 Multimeter Review

I had the opportunity to test a handy electrical multi-meter last week. It's really a tool you should have at your home.

CLICK HERE to read all about this tool and how to use it around your home. You may think a tool like this is for pros only, but you're wrong.

A multi-meter can save you a service call from an electrician. It can help you troubleshoot issues in your car.

You can even determine if a light bulb is really burned out!

Don't think for a minute that tiny multimeter you might have that's the size of a deck of cards is equal to this one. When it comes to multimeters, size does matter. You need one that's not going to melt if you try to test something with more juice than what a tiny meter can handle.

When you read the column you'll see links to BUY it. It made by Klein Tools and ask any electrician and she'll tell you - they make nothing but quality.

CLICK HERE to watch a video I made about the tool!

Okay, I need to scoot to eat breakfast and get going.

I'll at least take a photo to share with you today.

Oh, one more thing!!!!!!

LAST CALL on Front Door Install DVD

My New Front Door Install DVD is on sale.

I FORGOT to send you a LAST CALL reminder last week.

You now have just 24 hours to get the DVD at the sale price of just $22.50 with FREE SHIPPING in the USA.

There is SO MUCH CONTENT there are TWO DVDs in the set!!! I believe when I shot the job there are over forty step-by-step videos!!!

I burn these myself and I'll autograph them if you BUY IT NOW.

CLICK HERE NOW to order it.

I've got to go. Sorry, I had no time to check this for typos and errors.

Tim Carter
Founder - www.AsktheBuilder.com

Do It Right, Not Over!

How To Fix Wood Rot Video 4 of 4

How To Fix Wood Rot Video 4 of 4

Tim Carter shows you step by step in this four part video series how to repair wood rot and SAVE hundreds and thousands of dollars.  

Carter reveals an amazing wood fortifier product and a two-part wood epoxy that can be sanded, stained, and painted.

After the fortifier and epoxy are cured, you can shape them and completely restore rotted wood.

Rotted wood railings, rotted window sills, rotted decking boards, rotted siding can all be repaired with these magical products.

CLICK HERE to BUY the products Tim uses in this video series.

Click here for Video 1 of 4.

How To Fix Wood Rot Video 3 of 4

How To Fix Wood Rot Video 3 of 4

Tim Carter shows you step by step in this four part video series how to repair wood rot and SAVE hundreds and thousands of dollars. 

Carter reveals an amazing wood fortifier product and a two-part wood epoxy that can be sanded, stained, and painted.

After the fortifier and epoxy are cured, you can shape them and completely restore rotted wood.

Rotted wood railings, rotted window sills, rotted decking boards, rotted siding can all be repaired with these magical products.

CLICK HERE to BUY the products Tim uses in this video series.

Click here for Video 4 of 4.