I spent the end of last week discovering a way that you and I can start to collaborate on all sorts of exciting building and remodeling projects. I'm blazing a trail into uncharted territory using a new platform called Kickstarter.com.
What does all this mean to you? If everything goes as planned, you're going to be treated to some great video content that I've wanted to create for you for years, but simply didn't have the resources to do it.
The brilliant minds behind Kickstarter.com have solved that problem. As you can imagine, it's pretty exciting for me to be right at the brink of having some of my knowledge-sharing dreams come true.
I love doing videos about building and remodeling, but there's always that troublesome financial aspect. I have to pay the bills to create the content. Ugh. The free model of giving away this content that's been a hallmark of the Internet is simply no longer providing enough revenue to produce the videos. Many video producers like me are having to come up with imaginative ways to create the content you need.
In a few minutes, you're going to discover how we're going to work together to create this unbelievable video content. Thank you, Kickstarter.com!
Tip of the Week - Extra Storage Space
Is your house cluttered? Do you constantly bump into things in your garage when you open the door to get into or out of your car? You probably need a shed.
Most sheds are built with 8-foot-tall walls. You can increase the storage capacity of your new shed by a whopping 25 percent for next to nothing!!! How? Just use 10-foot wall studs instead of the standard 8-foot studs.
The amount of time to install the stud is the same. The cost difference is hardly anything. You just have to spend a little more for exterior siding and sheathing. But in return, you get lots of BONUS storage space for years to come!
Want to know more about building sheds? Wait till you see what I have for you just below.
Screen Printing T-Shirts
Do you know the ink science and fine points of screen-printing T-shirts? I need to know the best process that creates the longest lasting graphics. If you work in the industry or have great info to share, please reply to this email. Change the Subject Line to: T-Shirts Tim
Great Folding Closet Door Hardware
There's a good chance you've had issues with folding closet doors in the past. In almost all cases, the chattering, sticking and failure to stay closed can be traced to inferior hardware.
You can get easy-to-install folding hardware kits from LE Johnson that are perfect for remodeling or new construction. I can't begin to tell you how well LE Johnson door hardware is. I've used it on my jobs for years, and you can find it in all the homes I built for my family!
 The "positive pivot locks" ensure the top pivots stay in the track. The pivots surface mount on top of the doors, so that's a huge time saver. The track the pivots glide in comes with a factory-applied wood finish. You can paint it too.
Everything mounts on the door jambs, nothing on the floor! That's a huge improvement and allows for a gorgeous carpeted look. The brackets allow for easy adjustment of doors that may be warped. LE Johnson's engineers have thought of everything!
You can't beat the lifetime guarantee. What more do you want to know? Oh, where to buy this sweet hardware kit? Easy! Just visit the LE Johnson website to buy the hardware.
LE Johnson paid me to provide this writeup. But understand that I only do this for products I'd use in my own home. I realize you want to know about the things I use too.
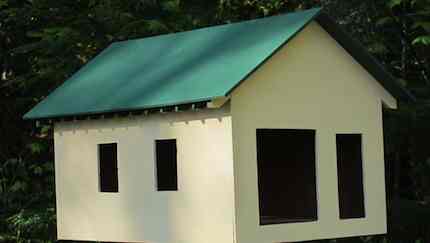
The Shed Project
Here's the exciting news. I'm building a wonderful shed starting the end of June, and I really want and *need* you to become part of the process. The Shed category at my website is one of the most popular ones each and every spring and summer. If you're like most, it's no wonder. There are so many things you can do or store in a shed.
The reason I'm building the shed is simple. I want to create for you, my readers and subscribers, the most authoritative and detailed DIY step-by-step videos of the shed building process. Right now I've already identified well over 100 videos that will be put into about 30 separate eBooks explaining each step of the building process.
When each eBook is loaded to my shopping cart, it will be priced at $7 each. You may only need to buy one or two to explain a step about the process. If you need all the eBooks, they will be deeply discounted when purchased as a set.
But I'm not trying to sell you shed eBooks. I'm trying to get your help to create them. However, If you do want to buy some, just wait till you see the enormous discount that 300 people are going to get. Oh my, each eBook in the series for just $1 each!
I've looked and looked online, and I can't find anything that contains the amount of detail I intend to show you in each video. I want to share my knowledge so you can build the shed you've always dreamed would magically appear in your backyard.
I've done hundreds of simple DIY videos over the years, but never have I attempted to tackle such a large video project all at once. The costs to do this from start to finish are staggering. The prices for materials, videographer, editors, etc. all add up quickly.
This is very similar to the process of making a television series or even a motion picture. Hours and hours of video will need to be shot and edited. This is completely different from the three or four 90-second videos like you normally see me do.
Just like a movie producer needs help from the big film studios in Hollywood, I need your help now to make this happen. If you decide to assist to make this video series a success, we'll start doing more of these projects together. Think about all the possibilities: remodel a real bathroom start to finish, remodel a kitchen so you discover all the things you need to know. I think you get the picture.
I already know what you're thinking because my buddy Chuck told me you'd be uttering, "What's in it for ME, Tim?" I get it, that's normal. Well, there's lots in it for you, but we'll get to that in a moment.
In the past few weeks, I've stumbled across a website called Kickstarter that makes it easy for you and I to work together on any number of new projects. I'm serious, if you want to work side-by-side with me for a day or two to discover secret building tips I've marinated for over 40 years, then you'll be able to do it.
If you'd rather just watch the shed project each day from the comfort of your own home while viewing it through a webcam, then you'll be able to do that.
If you want the exact plans, all the 100 or more step-by-step videos of the entire shed-building process as it happens, you'll be able to get that.
Here's how it works
Let's say you decide you want to help me make my dream come true - the creation of all these great videos for you. All you do is pledge, not give, some amount of money. You can pledge as little as $5, and you'll get something in return. The link to the project is just below.
You may be one of the thousands of subscribers over the years that have requested AsktheBuilder.com hats and T-shirts. Well, the day is here! There's going to be all kinds of swag including hats and T-shirts.
Be aware this is not a charity project - I'm NOT asking for a donation. By pledging, you become part of this event. If you help fund this project, I give you something in return.
Here's how it works. I have to set a funding goal for the project, and that goal MUST be met within a certain amount of time - in this case 30 days from the day I make the project live on Kickstarter.com.
The payments for projects on Kickstarter.com are all handled by Amazon.com for safety and security. If you have an Amazon.com account or purchase from there regularly, it's EASY to pledge, cave-man simple in fact. Amazon does NOT charge your credit card when you pledge. They just hold onto the information and wait to hear if the project reaches its goal after 30 days.
If we don't reach the goal in 30 days, your pledge evaporates and you owe NOTHING. The project then doesn't happen, and we just move on.
Let me make that clear. If the project doesn't meet the funding goal, then your credit card does NOT get charged. This is a great built-in safety, as it ensures the project will succeed as it has enough money to pay the bills!
I'm confident you will want to help me to create all the videos so you can use them to build your dream shed.
I'm sure you're curious about how all this works. Please go to the Kickstarter FAQ page and poke around. That way when the project launch happens, you'll be totally up to speed. FEEL FREE TO send me questions. I'll absolutely answer them for you. Are you ready to go see the project? Click here to go to my shed project on Kickstarter.com!
Geothermal Heating and Air Conditioning - Do the MATH First!
I was reading a short article in the April 2012 edition of Remodeling magazine. A remodeler named John Tabor located in Rockville, Maryland, decided to put in geothermal heating and cooling in his house.
So as not to tear up his entire yard to install the piping, he went vertical, drilling three 450-foot-deep wells into solid rock. He should have had a clue living in *Rockville*. He could also have looked at a soil map or geologic map before he decided to do it this way to see what he was up against. But I digress, being a geologist.
Cutting to the chase, he spent $88,000 on the entire system. The article said he got a 30% Federal tax credit and some other county and state rebates. Let's say he was *lucky* and John got 50% of the project paid for by you and me with all the tax credits and rebates. That's what happens when you get tax credits. The rest of us taxpayers foot the bill.
For him to start to SAVE money, he first needs to PAY BACK the $44,000 plus any interest he's paying in financing costs. Once he does this, he FINALLY gets to say he's SAVING money.
Let's say, for sake of discussion, that his total heating and cooling bill in his mild Maryland climate is $2,000 a year. The article says John's heating and cooling bills have dropped 33 percent. That's swell!
You have to be careful in your savings calculations because fuel costs can go up and down and the weather and temperatures are not consistent. Last year was a pretty mild winter. It's very complex trying to calculate the real payback, trust me.
But using our crude math, this means each year John has $660 in savings to use to pay off the $44,000 plus interest. Let's not even take the interest into account.
In 67-years, he's able to pay off the $44,000! Yippeeeeee! Oh, he needs to pay off the interest too. All the math wizards are going to email me about inflation, present value, future value, etc. I get that. Let's just do some rough math here for sake of discussion. Keep in mind that it's entirely possible for fuel costs to drop as we develop more of our natural gas resources.
Suffice it to say, John is not going to be SAVING money for many years. Be sure you do the math to see when you actually will save money before you ever get talked into some fancy energy-saving project.
I've already received some email from subscribers that actually have received a payback, but realize every case is different.
Cleaning Tip of the Week - Dishwasher Detergent ALERT!
A few months back, I talked about how the manufacturers of dishwashing detergent changed their formulations. Well, I'm convinced there are now more problems.
Because the new formulation was not cleaning as well and consumers were complaining, I think the soap manufacturers have decided to solve the problem by adding more pumice or fine silica sand to the liquid and powdered soaps. This added material makes the soap much more abrasive.
 Adding abrasive compounds to dishwashing machine detergents is nothing new. You need this grit to get dishes clean as just spraying soapy water on dishes inside your dishwasher will not get them clean.
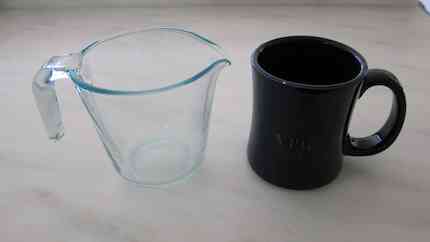
Here at the Carter house, coffee mugs, measuring cups, etc. are showing accelerated and damaging wear to any printing on the glassware. The measuring cup in the photo used to have bright red markings. The blue mug used to have white and red printing on it.
If you have valuable china, mugs, plates, etc., you better start washing them by hand. I could be totally wrong, but all of this pain is being caused by government regulations. If this is the case and you know about them, share them, and I'll provide an update next week.
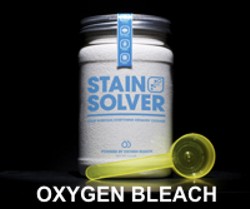
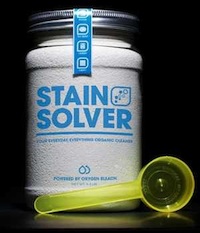
You can add my Stain Solver to your dishwasher if you want. It does a great job of not only cleaning and helping to sanitize your dishes, but it also DESTINKIFIES your dishwasher in case it has a moldy odor.
Sincerely,
Tim Carter


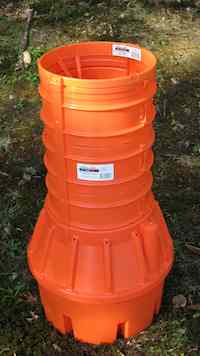 Are you building a deck or any other structure that needs a pier foundation? Would you like your concrete slab that's in a cold climate to be immune from frost heaving? If so, you need to read about how to properly build concrete piers that will not lift up out of the ground.