What's in This Newsletter?
Latest News
Tip of the Week
The NH Meet Up
Video of the Week - New Roof Sheathing
New Home Becomes Bath Remodel Coaching
Reuse - Recycle Guide
Tool Review - Drill Sergeant
Product Review - GloPlate
Q & A - Building In Bad Weather
I enjoyed a gorgeous New England weekend here on Loch Winnisquam. Crisp and cold, but the temperature is going to rise over the next few days. The snow has been sculpted by the wind out on the lake and it's gorgeous.
This morning my ego got a little bruised by a subscriber. It's a long story, but she wished that Mike Holmes would come build her home. Ouch! I totally understand the power of TV, and that's why Mike is so big in people's minds.
Suddenly I realized that you may know very little about my background, and that it was my fault this subscriber didn't want to kick Mike to the curb and have me come to save her from the anxiety of building.
For the record, I don't build houses any longer - but that didn't stop the bruise. :->
Here's a quite long autobiography for you to read if you're so inclined. Believe me, I'm about to shorten it significantly. If you want all the details of my early life, you better read it now.
Suffice it to say, I'll go head-to-head against Mike any day. I'm sure he's a heck of a nice guy. I've never run into him at one of the big shows.
Tip of the Week
Bob Davenport ordered some Stain Solver over the weekend and in the note area he said:
Years ago, my wife Patricia Windsor-Earp, asked you how to remove wall anchors. You said no woman had ever asked that question, and you wanted her to ask it on your radio show, so your listeners could hear your reply: "Never try to remove them, push them through the wall, spackle the spot, and move on.
So there you have it. When it comes to plastic wall anchors, you'll most probably do more damage trying to pull them out than by tapping them in. Be sure to blow any dust from the hole before you patch to get a nice secure patch.
The New Hampshire Meet Up
I was blessed to have the company of four delightful subscribers at the Route 104 Diner in Meredith, NH this past Friday. I was joined by Eunice, Julie, Gary and Emile.
 I'm always at a disadvantage at these events because I have no clue what anyone looks like, whereas, you know what I look like. When the RSVPs started coming in, and I saw Emile, in my mind I pictured a younger woman with a unique spelling of Emily.
HAHAHAHA, the joke was on me. Emile got stuck in traffic because of an accident and walked in about seven minutes late. He was no young woman, but he is one fascinating individual who's got a ton of hands-on remodeling experience.
We talked about a range of topics and as I always do, I asked what I could do to make the newsletter better. New product reviews was the first thing mentioned by Gary.
I told Gary, it was his lucky day as you will be seeing many new tool and product reviews in coming issues!
I so enjoy these meet ups. Please always open each newsletter and scan it to see if I'm coming to your town. If I do a driving road trip, I'll post the route because who knows, maybe you live near where I'll be driving.
Video of the Week - New Roof Sheathing
Who would ever think there'd be a major advancement in roof sheathing. After all, you just nail on sheets of OSB, right? Wait till you see this new material.
After watching the video could you please do me two huge favors ? Can you click the Like button if you indeed like the video? You'll see a thumbs up Like button just below the video and to the left.
I also need you to please leave a comment. What I'd love for you to comment on is something about how you like new product videos, how the videos help you make purchasing decisions, or how you trust the information, etc.
Honest comments like that can really go a long way to ensure I keep investing the time to create the videos. Thanks!
New Home Becomes Bath Remodel Coaching
I got back lots of very valuable data about the proposed New Home Coaching Course. It's going to happen.
The most interesting feedback was about Live-Streaming TV Coaching on bath and kitchen remodeling! That should come as no surprise as many are remodeling instead of building new homes.
I've decided to do the Bath Remodel Coaching Course first. It's going to be really cool. There will only be room in the course for 25 students. I'll have more details very soon.
There will be a cost for this Coaching Course. It will be affordable. It will come with a Money-Back Guarantee.
If you want to be in the first class that WILL start within weeks, you MUST go here to get in line. I'll be sending you more details very soon. I will mention it again here in the newsletter, but only those who sign up will get in the first class.
The class will feature:
- You watch via live streaming TV
- Three 90-minute broadcasts
- Live Chat during the broadcast
- Broadcasts will be saved - watch when you want
- You Submit Questions Before Class
- Much, Much More
Reuse - Recycle Guide
Oh my, some great reuse tips came in since last week! Bob has a great use for pants hangers, Sharon's got a cool use for old tires, Rose really has a fantastic use for shoe boxes, Stephen knows what to do with scrap pieces of 4-inch PVC pipe, etc.
Get the point? I need you to send in a tip or two, preferably with a nice color photo, of anything around your home that you reuse for some other purpose than what it was originally intended. Click here to submit a tip with photo.
When I get 50 of them, I'm going to assemble them into a nice document, and because you helped create it, you will get it for FREE.
But, we're not stopping at 50 reuse tips! We're going to just continue to create more of these guides. So please start sharing!
Tool Review - Drill Sergeant
I received a tool accessory several weeks ago. It's a driver bit, drill bit, screw, etc., holder that employs Velcro (TM) to keep your drill and driver accessories on-board the drill or the driver.
It's called the Drill Sergeant.
One part of the Velcro strip attaches to your tool using a self-adhesive strip. Think of a hairband on top of a woman's head if you will.
The only trouble is, I couldn't find one of my drills or drivers that it would work on. The shape of the plastic casing, transmission shift levers, air cooling ports for the motors, etc., all were in the way of where the manufacturer shows you to apply the Velcro strip.
In one photo it shows attaching it to the side of the cordless battery. That may work on old models, but not on the cordless tools I have.
The bottom line is that this is a great tool accessory, you just have to make sure it's going to work on your power tool.
Product Review - GloPlate
 This technology has been around for years, but this is a pretty slick implementation. It's a light-switch cover that has two glow-in-the-dark strips on either side of the toggle on-off switch.
I can see how it could come in handy up here in New Hampshire. I have to tell you that when the moon rises late or sets early, or there is dense cloud cover, it is as DARK as molasses up here. I've been like a pinball bouncing off furniture on more than one occasion while getting up to answer Nature's call.
Q and A - Building in BAD Weather
DEAR TIM: I want to start construction on a home, but just about everyone wants me to wait for months because bad weather is just around the corner. Can you build a home in the rainy season or in the middle of winter without causing problems to the structure? What are some tricks one can employ to make headway each week so that the house can get done sooner rather than later? Does rainwater hurt all the lumber as the house is being constructed? Jason S., Cutbank, MT
DEAR JASON: All of your questions are great. You're going to love the answers too. To continue reading this column, just Click Here.
Don't forget - Do it Right, not Over,


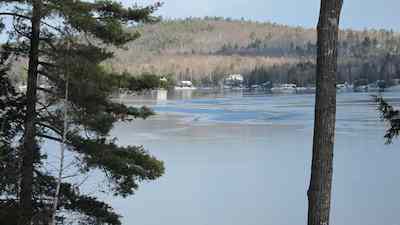 The big lake here at my house finally iced over three nights ago. Several days ago, the wind finally calmed, and it was 3 F when I awoke.
 Here's the plan. Think of things you buy, use and rather than throw away, you reuse it for some other purpose. It can be a container, it can be a tire, a tool, anything. That's the point, it can be anything you repurpose at your home.
 So two days ago, we taped a pretty funny video. Please, please