December 22, 2011 AsktheBuilder Newsletter And Tips

What's in This Newsletter?

Latest News
Wet-Dry Vac Guide
Facebook News

This could be the shortest AsktheBuilder.com newsletter in history. Why? Most are in a dither about Christmas!It's just days away. We celebrate Christmas here at the Carter family. You may celebrate a different holiday and call it by a different name, but the sentiment is most likely the same.

Peace on Earth - Goodwill to Men - and Women of course!

I've got very big news to announce in a couple of weeks. The best part is it involves you. I'll be needing your help to make the new initiative work well.

I'm also in a great mood. Why? The Winter Solstice, which happened about twelve hours ago, is one of my favorite days of the year. The days begin to get longer - at least for all of us Up Over!

The Long-Awaited Wet-Dry Vac Guide

I want to thank you if you were one of the many that co-operated and sent in a useful idea as to how to get the most from a wet-dry vac.

I've assembled the tips in a lackluster document. Oh how I could use Meghan's design talent or that of someone else. I draw stick people.

Anyway, I hope you enjoy the tips. Feel free to forward the file to anyone you want once you download it.

Click here to download the wet-dry vac tips. It is in a PDF Adobe file.

MERRY CHRISTMAS to you and yours!

Facebook Fan Page

AsktheBuilder on Facebook
Are you a Facebook user? If so, you'll probably love my AsktheBuilder Facebook Fan page! I try to do things there each week that don't appear in this newsletter. I'm also on Twitter if you do that.

Pegboard and Hooks

DEAR TIM: One of my New Year projects is to organize my garage and workshop. My tools are scattered everywhere and I waste time looking for them. My dad used pegboard for his tool organization, but the simplistic hooks never seemed to fit the tools properly. I want as near a custom solution as possible. Surely you've come across some great pegboard as well as pegboard hangers and hooks that work well. Talk to me about the workbench that should be up against the pegboard if you can. Help me Tim, you're my only hope! Lisanne L., Denver, CO

DEAR LISANNE: Oh can I speak to wasted time looking for things. That used to be the bane of my existence until I just knuckled down one weekend and designed a series of storage shelves and pegboard that completely solved my problems.

This is my favorite pegboard and hook system. The pegboard is metal and the hooks will NEVER come out when you take a tool from the wall.  Photo Credit: Tim Carter

This is my favorite pegboard and hook system. The pegboard is metal and the hooks will NEVER come out when you take a tool from the wall. Photo Credit: Tim Carter

My dad also had the traditional pressed wood-fiber pegboard. In fact, I believe it's still pretty popular. But I was also disappointed with the hangers and accessories that go with the wood system. Often they would come off the wall as I removed the tool. Talk about frustrating! And if you use a tool often, the friction caused by moving the hook enlarges the hole in the wood panel.

Several years ago, while at an industry trade show, I saw a new inventor who had suffered like so many and solved the pegboard problem. I actually walked by his tiny booth, but stopped dead in my tracks and did a 180-degree turn and went back to see what he had. Oh, am I ever glad I did that!

This genius developed a system of metal panels that allowed you to use your traditional round pegboard hooks and accessories if you wanted, or you could upgrade to his nearly unlimited assortment of metal hooks and hangers that fit into narrow slots on the metal pegboard.

You may not think this is a game changer, but it is. The most compelling aspect of this system is the way the metal hooks and hangers slide up and then down into the slots. The metal hooks and hangers lock into the metal board and absolutely will not come out when you reach for your tool.

You can easily remove the hooks and hangers if you wish to re-arrange how your system looks. But realize that in normal day-to-day use, the pegboard hooks that fit in the slots will not come out.

Here's the best part. I don't care what tool or thing you have that you want up on your pegboard, the metal pegboard system I use has a hook, hanger, shelf, bracket, parts bin, etc. to hold absolutely anything you can dream of putting up on your pegboard.

Here are some examples of what I can put on my pegboard with ease using the special hooks and the metal board system. I can hang any cordless drill or tool. A special shelf holds spray cans of paint or adhesive with a extra vertical surface on the front of this shelf to hang small tools. A handy shelf that has a dowel rod for a roll of paper towels is on my wall system.

How about a bracket that hold plastic parts bins? Yes, I've got it. U-shaped brackets for ratchets and wood chisels are right there on my pegboard. Horizontal u-shaped brackets for hammers, baseball bats, shovels, flashlights, etc. can be found on my system. Special brackets for screwdrivers are also on my pegboard.

Oh, and I forgot to tell you the metal panels, hooks, hangers, shelves, etc. come in an assortment of bright colors. You can mix and match. If you want the tough industrial look, you can go with galvanized metal panels. Suffice it to say I pretty much guarantee you'll fall in love with this system like I have. In fact, I'm willing to bet you a dinner for two at my favorite chili parlor you'll love it.

The biggest mistake you can make with a workbench that sits in front of a pegboard system is making the workbench too deep. You'll be tempted to make it at least 24 inches deep, but I'm here to tell you that's a mistake. You'll have a very hard time reaching over the workbench to get to tools that you need.

I prefer a workbench that's no more than 20-inches deep when it's in front of pegboard. I want convenience when reaching for a tool.

If I need more space to work on, I use a stand-alone table in the workshop. What's more, the work bench height and work table heights are not always the same. You may discover, depending on your height, that you want a workbench that's at least 36-inches tall. If you're a short person, you may discover that a 32-inch height is absolutely perfect.

Test this by just temporarily supporting a piece of plywood and try to work on things as you would on a work bench. If you discover that you're standing on your tip toes or lifting up a shoulder to do something, the work surface is too high.

You can watch a great video about the metal pegboard system I use at my AsktheBuilder.com website.

Column 914

December 14, 2011 AsktheBuilder Newsletter And Tips

What's in This Newsletter?

Latest News
Teaching Moment From Marjie
Buying Building Products Survey
LIVE TV for AsktheBuilder.com!
Lot Of New Videos
Facebook News

We're bearing down on Christmas. It's now less than two weeks away. If you're looking for some great tools for that special someone, you should look at my Christmas Gift Guide. I link directly to it at the end of a VERY COOL survey about online shopping. Please give me 90 seconds of your time and take the survey. You'll see it below.A close friend of mine is in distress right now. It's a very long story, but it's about  a battle going on between he and his siblings over their mother's estate.

This friend of mine deals with attorneys all the time in his business, so I asked him what advice he would give to others so they can AVOID all the heartache and stress he's experiencing. His answer was so obvious I shouldn't have even had to ask it.

He said, "Tell your subscribers if they have a will they should spell out exactly what happens to all property. They should NOT assume that their children get along and will divide things peacefully. If you want the china to go to daughter #2, then say so in the will. If you want certain guns to go to certain children or friends, say so. If you leave it up to the kids to divide property, it can get ugly."

Think about dealing with this on a personal level after the New Year. Don't hope things will work out after you're gone. Don't drive a wedge in your family after you've been sent back to Heaven.

Oh, the Wet-Dry Vac Guide! I PROMISE I'll have that for you next week. Each day some great new tips come in, so I'll finish it today. In fact, I'll send you the link to it tomorrow. It'll be a VERY short email. Watch for it.


Teaching Moment From Marjie

If you're offended in the LEAST with a small common curse word, stop reading now. One of my subscribers exclaimed it last week.

Marjie Darling wrote to me after the last newsletter went out:

"Damitall Tim!!! When I got bought gutter guards, the distributor told me it'd help prevent the ice dams.

Then when I got the dangerous ice dams that finally slid down and ruined my porch roof, I went online and was rebuked by so many that I was almost convinced that it was MY fault.....

.... THANK YOU for finally validating my experiences. (I had a simple line in my last newsletter that said regular gutter guards actually accelerate the growth of ice dams. I was talking about in the last newsletter a Heated Gutter Guard that melts snow and ice.)"

Marjie, you could have avoided all that pain if you had just come to AsktheBuilder.com BEFORE you signed the contract. If you would have typed:  gutter guards ice dams     into my search engine, you would have discovered my past column about Ice Dams and Gutter Guards.

Please, please, please, take the time and do research at AsktheBuilder.com before you sign a contract or BUY a product.


Buying Building Products Survey

I'm curious about how you shop. Unless you live under a rock, you know more and more people are buying things online. The more I know about how you do things, the BETTER job I can do in this newsletter to satisfy you.

Would you please take just 90 seconds and complete a quick survey for me? I sincerely appreciate it.

Once you complete it, I link you to my Christmas Gift Guide. You'll LOVE seeing all the great tools in it that I use just about each week. Wait till you see the very cool flashlight and the decorator sledge hammer. It's so fancy, you'll keep it in your living room.

LIVE TV for AsktheBuilder.com!

After the New Year, I'm going to start to do LIVE streaming video. I've not decided on the format, because I want you to help design the show.

I'll be in a little indoor studio, not at a job site while doing the LIVE show. I'm building the set right now and I chose to use a product that you should use in your home - Wall Control!

Wall Control makes, perhaps, the coolest metal pegboard in the world. I love this product. They were kind enough to donate the product for the set. If you want in your workshop, garage, garden shed, etc. what I have, just go to the Wall Control website. I do NOT get a commission from Wall Control for anything you buy from them. It was in my last home and I have it here in New Hampshire in my garage.

Doing live TV on an indoor set limits what I can do to a large degree. In other words, I can't show you how to build a house in a little studio. I can't show you how to lay brick or finish concrete either.

Just imagine me being at your house and sitting at your dining room table with you. What do you think I could demonstrate there at your table that would be of great interest to you? Please reply but change the Subject Line to: LIVE TV.

What simple projects would you like to see me explain? Or, would you just want me to answer YOUR questions live like I used to do on my live radio show for twelve years? Maybe you want to see new products.

Tell me what you want to see me do on LIVE TV. The shows will be recorded so you can watch them later if you miss the LIVE event.
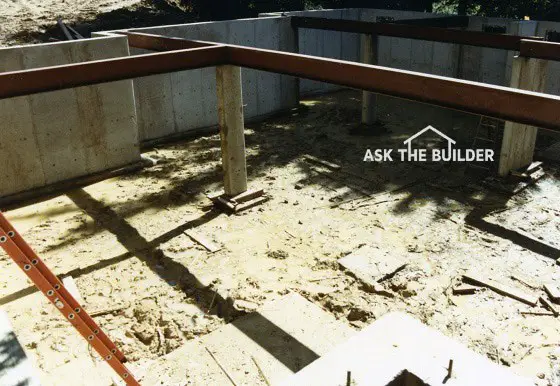
 

Lots of New Videos

Oh my do I have some videos for you to watch! I was at a new home construction site over the weekend and tried to capture some of the great things I saw.

I often forget that much of what is second nature to me fascinates you! This is why I'm going to try to tape more and more videos like this.

Here are the latest videos:

Garage Design Video

Basement Insulation Tips Video

Door Framing Tip Video

Lally Column Video

Prefab Frame Walls Video

Framing a Door Video

One last thing, PLEASE consider taking my Shopping Survey before you go.


Facebook Fan Page

AsktheBuilder on Facebook
Are you a Facebook user? If so, you'll probably love my AsktheBuilder Facebook Fan page! I try to do things there each week that don't appear in this newsletter. I'm also on Twitter if you do that.

Window Header Insulation Video

Hi, I'm Tim Carter and I am at a new residential construction site in New Hampshire. It's cold. It's winter time. But that's what I want to talk about - insulation.

Above this window opening is the header and it has a blue piece of insulation in place. In the old days, there would just be a wooden header over the windows to carry the wood. This will keep the weight from above pushing down on the window or door.

When there is just solid wood in the header, it provides very little insulation. Wood is a conductor and doesn't insulate. This head is constructed with two blocks of 2x6s and one piece of foam insulation on the inside to keep it nice and warm.

This insulation has an R value of 10 and is closed-cell rigid foam. A really good product. So when you are building or remodeling, be sure you have a nice insulated header over your windows and doors.

Garage Design Video

Hi, I'm Tim Carter and I'm here at a great new construction site in New Hampshire. I am in a garage that is being built. At this point, it doesn't even have a roof on it. The walls are framed and I want to show you a couple of neat things about the design of this garage. You should keep these in mind the next time you build a garage.

The wall next to the garage door (the door is nice and wide; 10-feet wide works for larger pickup trucks, SUV's; never less then 9-feet wide) extends almost 4 -feet past the garage door opening. Most garages have only 2-feet to the side. By the time you store garbage cans, bicycles, or anything else, you don't have enough room to open your car doors. Coupled with the extra wide garage door, there will be plenty of room to open the car doors without bumping into any thing.

Second, check the depth of this garage. This one is nearly 26-feet deep. This allows for a workbench or storage cabinets to be placed at one end of the garage and still have room in which to pull the vehicles.

These are just two simple tips to keep in mind when designing your next garage.

Prefab Frame Walls Video

Hi, I'm Tim Carter and I'm here at a new residential construction site in New Hampshire. I want to show you something. See all these walls that have been built? Well, they weren't built onsite.

CLICK or TAP HERE to discover much more about factory-built walls for a home. It's really the only way to go because the precision is far better than stick-built walls done by dopey carpenters and their helpers.

Typically, it is called stick framing where the lumber company brings a big pile of lumber of various types and sizes. Then the job site carpenters measure and cut and fabricate the walls. But all the walls for this house were built at a factory and shipped here on a flatbed.

Check this. This is a wall section that was built at the factory. It is going to be an interior wall because there is no sheathing on either side. This section has been actually measured down to the 1/16th of an inch, and comes with the double top plate on it. The top plate has an overhang where it will butt up against another section where it turns a corner.

That's how sophisticated the pre-engineered and pre-built wall sections are. And it really doesn't cost any more, but it allows construction of the home to go much faster.

Lally Column Video

Lally Column

These are steel beams in my own home I built in Amberley Village, Ohio. The beams are 10 inches tall and weigh 31 pounds per linear foot. You can span up to 14 feet with these! © 2017 Tim Carter

A lally column can be made from wood, steel, concrete or concrete block. It's a vertical structural member that supports a horizontal beam. Steel and wood must be protected from fire damage.

Lally Column - Best Ones Are Sand-Filled Steel

Revised February 2018

A lally column is a standard structural member found in just about every building.

The lally column supports a lot of weight. It's important to realize a concrete footing under the concrete slab distributes the concentrated weight.

A concrete floor is often poured on top of the concrete footing and the lally column might sit on the floor.

A point often overlooked is hollow steel columns must be filled with sand so they don't bend and fail in a house or building fire. A hollow steel column will bend like soft taffy candy in a hot fire.

Related Links

House Steel Beams and Columns - Great Photos Here

Column & Beam Construction - Using Wood Works

Free & Fast Bids

CLICK HERE to get FREE & FAST BIDS from local steel fabricators who make & install great columns.

The Lally Column Continuous Load Path Problem

Concentrated loads may start up high in a building. Solid blocking or support must be under these loads from high up in the building until they pass through the lally column and down to the earth under the footing.

You can see an example of this in the video above. At the top of the column is the structural header, but above that is a block of wood that touches the underneath of the subfloor. The reason that is important is once the house is built upstairs, there will be a post sitting on top of this block and lally column. This upper post will be supporting weight from the roof.

The upper post can't just sit on the subfloor. It would be too much weight for the floor. Direct load bearing all the way down to the ground below. You can see how that happens with the wood column above, solid subflooring, the support block above the support header, then the header and finally on to the lally column.

You have to be sure your bearing points are all properly supported all the way down.

Basement Insulation Tips Video

Basement Insulation Tips

Hi, I'm Tim Carter and I'm here at a new home construction site in New Hampshire. We are down in the basement to talk a little bit about basement insulation. Look at this.

This is the poured basement foundation wall. It has damp-proofing and even water-proofing on the other side. But concrete can hold water for a long time. And in the Northeast, the ground gets cold and can actually freeze almost four-feet down. This causes the concrete basement wall to almost become an ice-cube. This radiates the cold inside, so you want to stop that.

Two things. First, if you insulation using a solid foam (in this case, 2-inch of rigid closed-cell foam insulation), it acts as a really great water barrier. And it does it from both directions. In case water vapor comes from inside the basement and would touch the bare concrete wall, it would form condensation. That would be the fuel for mold and mildew. If the concrete has water in it, this type of insulation will stop the water vapor getting into the basement.

Secondly, this type of insulation should go all the way from the slab to the top of the concrete. Once the 2x4 wall studs are installed tight against the insulation, fiberglass insulation will be added between the studs. But first, be sure to use a special tape to tape over the joints where two pieces of the rigid foam meet. The tape will be made by the foam insulation manufacturer so that it will stick to their foam.

One last thing, this particular rigid foam insulation sheets comes tongued-and-grooved. This interlocks with the next piece of foam, creating a tighter seal. Insulate your basement this way when you build or remodel.

Door Framing Tip Video

Hi, I'm Tim Carter and I'm here at a new home construction site in New Hampshire. Want to show you something that is kind of cool with a little bit of detective work.

Look at the sawdust near the door frame opening. Do you know what caused that pile of sawdust? That tells you that something used to be there and has been removed.

At another door opening, you can see that the bottom wall plate running all the way along the wall. This is what helps keep the legs of the door frame in align. Without the bottom plate, one door leg might be tilting in and the other out. That would make the door installation tough. By keeping the base plate in place when you frame the wall, you keep the door frame in proper alignment.

Framing A Door Video


Hi, I'm Tim Carter and I'm here at a residential job site in New Hampshire. I want to show you a little about wall framing and wall construction and how it's done. This is what is behind the drywall in your home and you don't typically see it.

This door opening will lead to the garage, but look at the two studs running vertically on the side of the door frame. The stud away from the opening is called the King Stud. This stud runs all the way from the bottom plate to the top plate.

The other stud is called the Jack Stud. This stud is shorter and ends at the door frame header. The door header has two other 2x6's that run up and down (hidden behind the insulation). These short studs will allow support for the floor joists that will run above them.

So the interior Jack Stud is like a support column for the header. You wouldn't want to depend on just nails driven through the studs to support that weight.

That is a quick overview of the door framing behind the drywall in your home. Window framing is almost the same.