What's in This Newsletter?
Latest News
Seattle & Philadelphia Meet Ups
Sewer Smell from Floor Drain
Steel Garage Door in LA
Facebook Photos
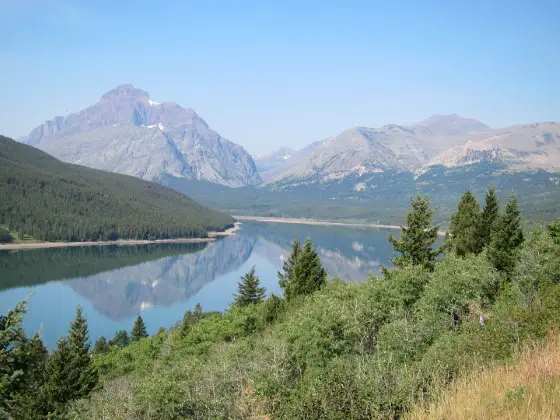 The past week I've been on a journey of a lifetime. Forty-two years ago, I made my first trip away from Cincinnati, OH heading west. It was a road trip with two buddies.I'll never forget seeing the Rocky Mountains for the first time as we approached Denver. Then going through the Sierras and eventually the Grand Tetons on my way back home. It was eye candy to a budding first-year geology student.
But I always wanted to visit the Canadian Rockies as my wife Kathy was there while I was with my buddies. She said they were magnificent.
I decided I was going, but life got in the way. That is until this past week. Here are just a few photos of what I saw. If you can get out here, do it. Congratulations to the Canadian National Park System for preserving this natural beauty for all future generations.
Seattle and Philadelphia Meet Ups
I'll be in Seattle, WA on Tuesday with some time to kill around lunch time. Then I'll be in Philadelphia on Friday September 23rd around 3 pm with 4 hours to kill before flying back to New Hampshire.
If you're a new subscriber, a meet up is where you and I get together at a local coffee shop, restaurant, etc. to just chat and get to know one another. You can ask any question you want about Ask the Builder, how it works, questions about your home, etc. I'm always interested in discovering more about you!
If you want to hang out in either location, now is the time to pipe up. Reply to this email, but change the Subject Line to one of the two cities so I can get back with you ASAP. I'm staying at the Hyatt Olive Hotel in Seattle, so I'd like to meet close to there. In Philadelphia, I need a ride from the smaller commercial airport northeast of the city into town and then to PHL. If you can assist with that, it would be swell.
Sewer Smell from Floor Drain
Heather, from Redford Township in Michigan wrote to me:
"We have a smell coming from our floor drains in our basement. There is water in these drains. We have had them snaked out and even replaced a floor drain. The smell is coming from the drain in the laundry room which is below our kitchen. Can we cement this drain in. Since we have 2 other drains. or does something else need to be done?"
Heather, we need to absolutely verify the odor is coming from that drain. One way is to take a think piece of plastic and tape it well over the drain. Be sure you use a fantastic tape that sticks to the concrete and the plastic has no holes in it.
Ventilate the space after you apply the plastic to remove any odor present. Go back in a few hours or the next day to see if there is an odor. If not, then there is a good chance the drain is the culprit.
I would then take off the plastic and remove the drain grate. Take it outdoors and clean it off.
Take a toilet brush and some of my Stain Solver Oxygen Bleach and clean the sides of the pipe riser that extends up from the buried P-trap under the floor.
I would mix up at least 5 gallons of oxygen bleach solution and pour a gallon into the drain making sure the sidewalls of the pipe get coated with the solution. As you scrub with the brush, dump plain clean water down the drain.
The source of the odor could very likely be a biofilm that's growing on the sides of the pipe. This film can be very gross and slimy. It absolutely will produce a strong odor.
Once the pipe, grate and trap is clean, the drain should be odor free. Don't hide this drain with concrete or stucco. That is very bad jujumagumbo.
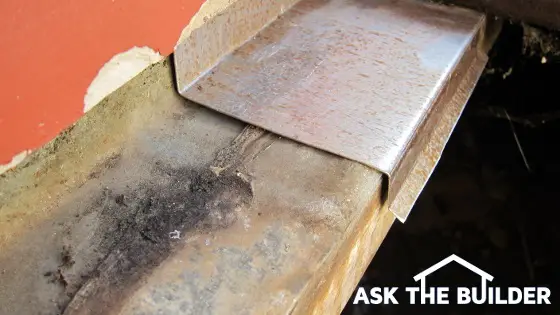
Steel Garage Door in LA
I'm traveling with my very good friend Russ. He and I left Salt Lake City last Saturday and started driving north towards Jasper, Alberta, Canada. Then we turned southwest and are now heading to Seattle via Kamloops, Vancouver and Victoria, BC.
As you can imagine, there are hours and hours to fill with conversation. Russ asked me about new garage door for his detached garage located in the foothills of the mountains east of Los Angeles.
I told him I'd put in a durable and attractive steel Clopay overhead door. I've had great success with these doors.
But Russ asked me if it wasn't a better idea to install an insulated steel door that has two layers of steel with foam insulation between them.
He was stunned by my answer and we debated it at the end of breakfast today.
I've been to Russ's house many times and the garage bakes in the sun from late morning to late in the day. The door faces due west.
As you can imagine, the sun bakes the roof, the walls, etc. start to heat up. The roof shingles alone can heat up to close to 160 F. This heat transfers to the wood sheathing, the rafters and all items in the garage raising the temperature inside. Russ wants the garage to be as cool as possible.
I pointed out that an insulated garage door will slow down the transfer of heat. After all that's what insulation does - slows heat transfer.
What's more, the insulation inside the door, will also heat up. If you could insert a temperature probe into the door at the hottest point of the day, it would absolutely be well above the air temperature.
I told Russ to read my past column about Hot Garage Ventilation if he wants a cooler garage.
Facebook Photos
 Are you an AsktheBuilder FAN on Facebook? You should consider it. Why you ask?
Each week I answer questions on the Fan Page that you don't see other places. You get to discover all sorts of new things there that I don't put on AsktheBuilder.com.
Oh, and did I mention it's FREE? You can't beat that. Free Fun and Knowledge. Don't believe me, go click the link above and read many of the comments under the photos I upload.
I urge you to become an AsktheBuilder Fan on Facebook!


 I'm back in New Hampshire after nearly three weeks of travel. It was a business/pleasure/business trip that started in Philadelphia, then to Salt Lake City, up through Montana then to Banff and Jasper in Canada, over to Vancouver and Victoria in British Columbia and finally ending in Seattle. Can you see why that's probably too much travel at one time? I loaded some