DEAR TIM: What can you tell me about shallow refrigerators that don’t project out past the line of kitchen cabinets? They look gorgeous in my opinion. Are they really practical? Do you lose lots of space? I’ve seen some of these appliances that have a door panel on them to match the kitchen cabinets so you don’t even know it’s a refrigerator. How in the world do you make that work? Diana F., Austin, TX
DEAR DIANA: I believe what you’re talking about is a counter-depth refrigerator. These appliances have been around for almost thirty years, possibly more. Back in the 1980’s, I installed my first one and liked it so much I put one in the new home I built for my family. That refrigerator was still working perfectly 23 years later when I replaced it for another in a remodel job at my home!
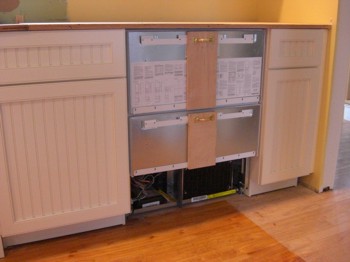
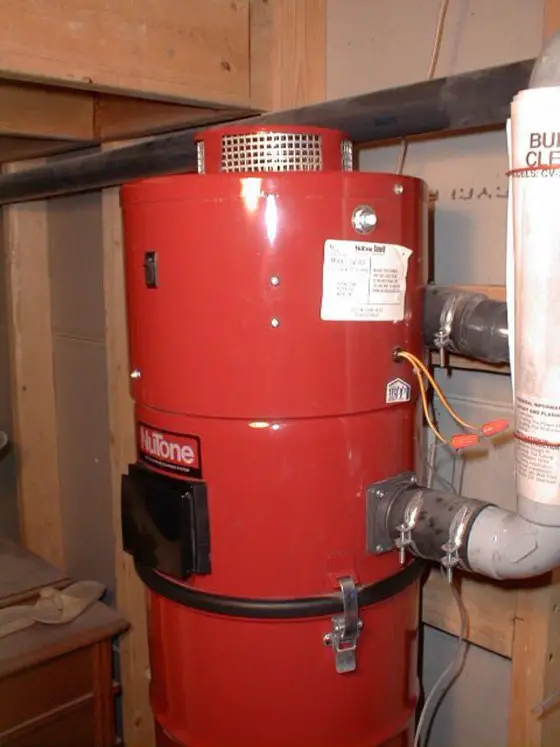
Believe it or not, this ugly steel box is a counter-depth refrigerator. Once it is dressed up with the decorative wood panels and its kickplate, you’d think it was drawer cabinet. PHOTO CREDIT: Tim Carter
Back in those days there wasn’t much competition. The refrigerators were absolutely high-end appliances you’d typically find in expensive homes. But now, there are quite a few brands that offer refrigerators that don’t project out past the plane of the front of the cabinets in an average kitchen.
As you might expect, there is a vast difference between makes, models and features. What’s more, not all shallow refrigerators can be finished in the way you describe, that is, with the custom door panels. These are frequently called integrated refrigerators. Did you know that you can get integrated freezers, dishwashers, ice makers, etc.? If you want to hide all your kitchen appliances behind matching wood panels, it’s absolutely possible.
There’s no doubt these appliances are practical. If you were to open one of these refrigerators, I’d bet money you’d ever notice the couple of inches they lack in depth. What you’ll immediately notice on some of the better models is the extremely efficient use of space. The drawers, shelves and storage cubbies in the doors ensure there is no wasted space in these gorgeous refrigerators.
Five years ago, my wife and I embarked on a massive kitchen remodel in our previous home. I discovered something about refrigeration that I didn’t know. Prior to that remodel, we had a combination refrigerator freezer. I believe many people were like us. We did have a stand-up freezer in a back room for other frozen goods.
But what we discovered is that if you just have a refrigerator, foods tend to last much longer and don’t dry out because the humidity in a refrigerator-only appliance is higher than in a refrigerator/freezer combo unit.
Sure enough we got a separate refrigerator and a set of freezer drawers that were stand alone in another part of the kitchen. We were stunned to see how long vegetables, fruits and other things stayed fresh in the refrigerator. They didn’t dry out and shrivel up like they used to.
When you combine both functions in one box, the colder temperature of the freezer extracts lots of the humidity in the appliance simply because the colder air gets, the less water it can hold. You may want to consider getting a separate freezer if you want really fresh fruits and vegetables.
I don’t know if you’ve seen them, but the refrigerator drawers and freezer drawers are sensational. I just installed a set of refrigerator drawers in our current kitchen. This appliance is the exact size of a 27-inch base cabinet.
It’s an integrated set of refrigerator drawers so when I screw on the decorative wood panels, you’ll think it’s just a regular set of deep drawers one might store pots and pans in. My wife LOVES it. We put our leftovers in one of the drawers so they don’t get lost in the regular refrigerator behind other foodstuffs.
Attaching the decorative wood panels to integrated appliances, including refrigerators, takes some serious skill and patience. There are many finish carpentry tricks you have to employ, not the least is working with tolerances of 1/16th inch or less.
Typically there are metal brackets that interlock with the appliance. These brackets have to be carefully placed on the backside of the wood panel with the aid of a template. Using special screws often supplied with the appliance, you attach the brackets and then slide it into place on the door. It usually takes several tries to get the wood panel precisely where it needs to be.
Dealing with the sides of an integrated refrigerator are even more problematic. You almost always need to get a finished side panel from the cabinet supplier. This side panel takes the place of the cabinet frame in a regular cabinet. Keep in mind that the actual appliance is often the same depth as the cabinet boxes and that the drawer and door fronts of the cabinets are in the same plane as the finished panel you’ll place on the refrigerator.
Try to visualize how the countertop will finish out at the sides of the refrigerator and this finished side panel. You’ll probably need the help of an experienced kitchen designer or top fabricator to draw out this very important detail.
Column 874


 I'd like to talk to the idiot medieval knights who slayed the last dragons. We've had a constant flow of storms here in the Northeast and although I LOVE the beauty of the snow, I'm growing tired of raking it off the roof here and dealing with it near my front door.
 I was wondering for those who live within driving distance to central New Hampshire if you'd want to have a sleepover meet up? You and your significant other would rent a room for one night - you could stay the entire weekend if you want - at the Atwood Inn. Wait till you see their new website and the videos of all the rooms!! Go watch the video for the White Mountain Room, but be sure to watch the video first on the home page for it to make sense.