June 1, 2010 AsktheBuilder News And Tips

What's in This Issue?

Latest News
ServiceMagic
Sharpening Chainsaw Chains
Staining Decks in New York - Test Update

I do product reviews frequently. Please read my Disclosure Policy to understand the relationship between me and the companies that make the products or offer the services I review.

FOLLOW ME ON TWITTER

Friendly Question Reminder!

If you have a question for me, don't hit the Reply button just yet. Go immediately to my web site and type in the keywords about your problem into my Search engine. The search box is at the top of every page of my web site. You could have your answer in seconds if you do this! Please pay attention to all links you see at my web site. The exact products and services you often need are right in front of you, and you might be ignoring them.

Latest News!

Last week, I was getting ready to test exterior paint colors on my house here in New Hampshire. The house has a mix of dark green Andersen casement and double-hung windows. The house was built in 2002, and many of the vinyl parts of the windows have experienced significant color fade. I wanted to get rid of the fade so I could get the correct complementary colors on the body of the house.

I called Andersen to see if there was a wipe-on product that would restore the color much like you do with automotive vinyl. Much to my surprise I discovered the vinyl color fade is covered under warranty.

The Andersen folks sent out a professional painter, John Resnick with his crew to apply a special lacquer coating that matches the original finish. John's sister Lizzy and another employee Randy make up the team.

John, Lizzy and Randy do interior and exterior painting, wallpaper work and commercial painting. He told me he services much of Massachusetts, southern Vermont, New Hampshire and Maine. If you need a quote from a real professional, give John a call. 978-831-3924. Be sure to mention my name! Wait until you see the trailer he brings to the jobsite. Wow!

If you have some of these faded green Andersen windows, I suggest you contact Andersen now and get them taken care of. To the best of my knowledge, no other Andersen windows are suffering this fading issue.

I can't say enough good things about Andersen's response to this situation. It's refreshing to see companies that respond positively to problems. All too often companies run away from predicaments instead of running towards them. Remember, only contact Andersen if you have the dark green windows like mine.

ServiceMagic

I need your help. Are you a contractor that gets leads for your business from ServiceMagic? If so, can you please email me ASAP. I have some questions to ask you. Thanks in advance!

Exterior Painting Tip

As I just mentioned, I'm getting ready to paint the house here in New Hampshire. I wanted to paint an entire section of the house to get a good feel for the look of the paint on the siding and trim. As I've done my entire career, I washed the surfaces with soap, water and some of my magic Stain Solver.

Why do this? Be sure to read the label on any paint you intend to use. Everyone I've ever seen says: "Apply to a clean, dry surface." I don't like using pressure washers on houses because they blast water into cracks and behind the exterior surfaces if not used properly. What's more, they can leave behind a thin film of dirt.

The house is currently painted red with green trim. Surprisingly it doesn't look dirty at all. There's no visible dirt, dust or diesel soot on the siding. The exact opposite is true about my home we're selling in Cincinnati. I just washed it down last December and a month ago, it had a coating of soot on it. Imagine how much of that soot is in my lungs from all the years living in the city! But I digress.

As I washed the house here, the water in the bucket turned red and you could see the sun-damaged red pigment come out of the paint on the siding as I rinsed it. Based on past experience cleaning the solid color stain of my house in Cincinnati, the Stain Solver aggressively removed the damaged finish. That's a good thing when you're getting ready to repaint or stain.

Sharpening Chainsaw Chains

Up here in New Hampshire, people are busy as beavers getting ready for next winter. Now's the time to cut firewood as it needs time to season and dry so it burns hot. To cut wood efficiently and effectively, you need a sharp chain that cuts straight.

I tested a fantastic tool that sharpens chains used to cut logs and firewood. It's the Timber Tuff upright bench mount chainsaw chain sharpener. This tool works just like a compound miter saw. It has a spinning abrasive disc that you can rotate and tilt to match the grooves in cutting teeth of the chain.

If you've ever sharpened a chainsaw chain by hand, you know the issues you can have. The slightest mistake will have the chainsaw blade cutting the logs in a curve. This causes the blade to bind.

Using a professional tool like this Timber Tuff machine keeps the cutting teeth in the exact alignment they had when the chain left the factory. The best part is the price of the tool. It's just a little over $100. You'll save that money quickly in time and aggravation. If you use chain saws heavily, you'll love this tool.

It's sold at a few retailers, all with different prices! Take your pick:

Tractor Supply
Gempler's
Mills Fleet Farm

Staining Decks in New York - Test UPDATE!

Joan Rowland, from Lindenhurst, NY emailed me:

"We live on a river on long Island NY.  How often do we need to stain/seal our deck?  We cleaned (not power washed) and wood-lifed it last year and it looks a little faded. Is this an annual project?"

Joan, it depends on the sealer / stain you decide to use. I used a clear sealer last year that failed in just four months. I'm in the midst of a test now to see how three different sealers work. In rare cases you may get a deck stain/sealer to last three years. Colored sealers, because of the pigments they contain, may fare better for you, but these will fade over time from the direct ultraviolet rays of the sun that blast deck surfaces in the middle of the day.

I just taped the one-month video two days ago. I'll be loading that video tonight and will share it with you next issue. After one month, all the stains/sealers look pretty much the way they did when applied. The original deck stain test video showing the beginning of the test is available to watch.

AsktheBuilder.com

How to Paint

DEAR TIM: I’m embarrassed to say that I’ve never painted walls or woodwork. My dad always did it and I had no interest in helping. I now need to know how to paint as I just bought my first home. I tried painting the walls in my living room and made a huge mess. The paint looked good going on, but now looks transparent. Can you instruct me how to paint interior walls, ceilings and woodwork? How did you learn to paint? I’m so frustrated and am reluctant to call my dad. Angela P., Scranton, PA

DEAR ANGELA: I appreciate you asking me for advice, but your dad is the man who should be consulted. I say this assuming you’ve got a great relationship with him. He’ll be honored that you asked for his help and guidance. Being a dad, I can tell you that it should bring him great joy to hear his daughter ask for a demonstration of his skills and magic when it comes to painting. Do it. Make the call now.

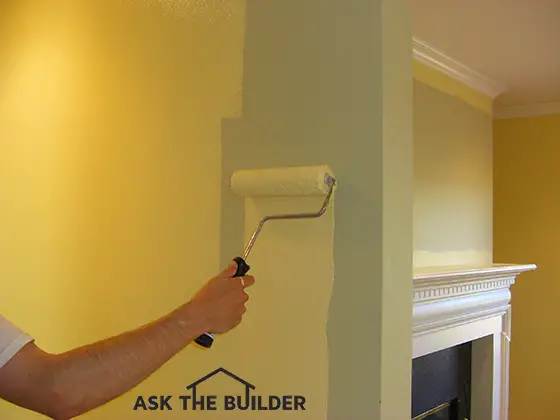
Painting with a roller looks easy. Believe it or not, it takes a considerable amount of hand-eye coordination to achieve professional results. ©2017 Tim Carter

In case he’s out and can’t pick up the phone, I’ll fill in. First, it’s absolutely impossible to share even a small percentage of what I know about painting in this tiny column. What’s more, instruction works best if you’re in the same room as the teacher. You need to see the actual techniques.

Let’s start with painting tools. Professional painters typically purchase the best brushes, roller frames, roller covers, etc. Why? Because these tools produce better results faster.

Make sure you match the brush with the paint. Polyester brushes are typically used with latex or water-based paints. I prefer using angled brushes for many tasks, but find they are a must for painting woodwork trim and cutting in paint where one color is up against another. I’m not a fan of the sponge brushes, but you may end up liking them.

Roller covers come in different thicknesses of the nap. I prefer to use one that has 3/8-inch nap for painting walls and ceilings with a flat finish paint. If you’re painting coarse masonry surfaces, you’ll want a 1/2-inch or thicker nap. If you’re painting a smooth surface with a high-gloss or semi-gloss paint, you may want a short-nap roller cover that has 1/8 or 1/4-inch nap. Smaller nap produces less texture in the dried paint.

Not all paint is created equal. You get what you pay for. Remember that paint is, for the most part, glue with color in it. There are special paints for different situations. For example, if you want to know how to paint drywall, especially new drywall, you’ll quickly discover that you need to use special primers that both prime and seal in one step. Some newer finish paints make the claim of not needing these primers, as they include the heavy pigments and porosity sealers in the finish paint product.

The problem with your poor coverage could be related to the quality of the paint, your painting technique or both. A considerable amount of the volume of many water-based paints evaporates from the surface you paint, leaving behind a very thin film of pigment and the chemical glue. If you spread the paint too thin as you work it, when the paint dries there simply is not enough pigment and adhesive to cover what was on the wall before you started.

Most paint cans have printed on the label the recommended coverage rate. For many years, a gallon of latex or water-based paint would cover about 300-400 square feet of surface area. When you do the math, you’ll discover that one gallon of paint should cover only the walls in a small 10-foot by 12-foot room that has 8-foot ceilings.

Be sure you read the label on the paint can before you start your next job. If you want the best results, follow the instructions. When they say to apply to a clean, dry, dust-free surface, they mean it. Remember, paint is glue and for it to stick well, the surface needs to be clean.

When painting ceilings, you’ll discover that adjustable fiberglass extension poles will save you time. Using this accessory, you can paint ceilings without making numerous trips up and down a ladder. The same is true for walls. I have numerous adjustable extension poles that screw into the base of the roller frame.

Clean up after the paint job is over is an art all itself. You can ruin a high-quality paint brush in no time if you clean it incorrectly. Never hold the brush up-side-down in a stream of water. This drives paint higher up into the bristles and fans them out. It’s better to dip the brush in a can of soapy warm water and shake it back and forth in the frothy mix. Do this with the rinse water as well until the water remains clear as you shake the brush.

If your house has a septic tank do NOT clean your brushes indoors. You don’t want latex paint residue entering the septic tank or leach field. Clean your painting equipment in a large bucket indoors if necessary and dispose of the cleaning water safely outdoors in a sand pile or other media that will capture the paint and not pollute the soil or ground water.

Column 833

How to Stain a Deck

Staining a deck

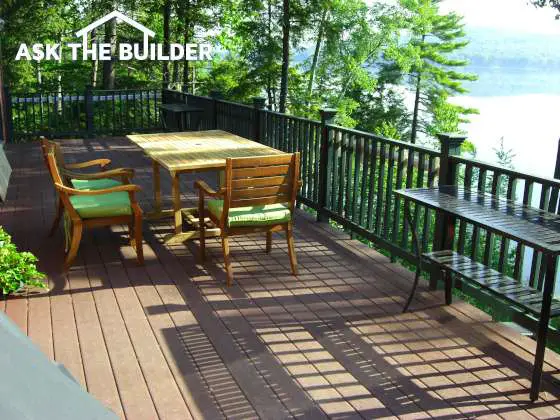
One of your decisions when staining a deck is to choose whether you want a colored or clear finish. PHOTO CREDIT: Tim Carter

How to Stain a Deck

DEAR TIM: I just bought my first home, and I have to discover how to stain a deck. I have so many questions. For example, how do you clean a deck before you start? Is there a difference between deck stains? Should I just paint my deck instead? Are there decks that don’t have to be stained? Jamie F., Nederland, CO

DEAR JAMIE: Let me start by saying that it’s impossible to completely cover this topic in the small amount of space I’m allotted. There are books written about all your questions and the one’s you failed to ask. But I can tell you that I’ll give you a crash course on cleaning and sealing a deck that will yield you great results over time.

Let’s start with selecting a stain. You can get at least two types of deck stain or sealer. One type is a penetrating finish that is designed to soak into dry wood. Other deck stains are formulated to perform much like varnishes or urethane. These products soak into the wood, but they also form a film on the surface much like a sheet of plastic wrap.

The problem with these film-forming deck stains is that they almost always peel when they eventually fail. The peeling is unsightly, and when you go to re-stain the deck, you must completely remove or strip off the old film. As you might imagine, this can be a tough job.

I prefer the penetrating deck stains and sealers that don’t peel when they fail. It’s easy to prepare a previously stained deck for re-coating if you have a penetrating finish on the deck.

You’ll next need to decide if you want your deck to be a color or do you want to have a clear finish. I happen to prefer colored stains that are a medium color of brown. Some people love a clear look that shows the natural color of the wood from the mill, while others happen to adore the gray look you see on weathered boardwalks or fishing piers.

The pigments used to color a deck stain perform a very important job. They help to absorb the ultraviolet (UV) light from the sun that bleaches out the natural color of wood causing it to turn gray. Some clear deck stains contain ingredients that also act as a sun screen much as the sun-screen lotions we put on our own bodies.

I tested the latest clear technology deck sealer last year and it failed miserably. The cedar wood I applied it to looked great for a month, then it started to turn gray. Within four months, my cedar wood looked like it was a neglected fishing pier it was so gray.

I complained to the sealer manufacturer and they sent me three different ones to test. I applied the products about a month ago, and I’ll know more by the end of the summer. I shot a video (see below) that’s also on my AsktheBuilder YouTube channel that shows me applying these deck stains.

You need to clean all wood surfaces before you apply and deck stain or sealer. This cleaning process is meant to get rid of all dirt, weathered sealers or stains, and any damaged wood fibers that may be barely hanging on at the surface.

Many people promote the use of pressure washers when cleaning a wood deck. If you use too much pressure, the wrong tip on the cleaning wand, and/or hold the tool too close to the wood, you can cause serious damage to the wood. The enormous pressure easily erodes the soft spring wood that’s in between the darker bands of summer wood. To get the wood smooth again, you have to sand the deck. That’s a tremendous amount of work.

I’ve found that cleaning the deck with oxygen bleach is a less-aggressive method that works well. Don’t confuse oxygen bleach with household chlorine bleach you might have in a white plastic jug in your home. Chlorine bleach takes the natural color out of wood, it’s highly toxic to all vegetation and trees around your deck, and it can accelerate the corrosion of any metal fasteners and structural connectors.

Oxygen bleach has none of these bad characteristics. It’s a powder you add to warm water. The oxygen ions that are then released in the solution are powerful cleaners that deep clean the wood. It’s best to apply the oxygen bleach to dry wood so it soaks in deeply cleaning the wood.

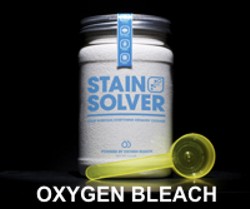
Stain Solver Oxygen Bleach

CLICK the bottle above to order Stain Solver Oxygen Bleach

I would never paint a wood deck. Just this past weekend I was on a friend’s wood deck that had been painted a few years ago. The paint was peeling off in many places, and as you might imagine, the deck looked horrible.

My friend asked what the best thing to do in this situation. Knowing that she didn’t have a lot of time or inclination to restore the deck to it’s original natural wood, I suggested she just clean the deck, let it dry, and then repaint it. I only said to do it this way because she then told me that in a few years they were removing the wood decking boards. My friend intends to replace the wood with synthetic wood decking that never needs to be stained or sealed.

Column 832

May 18, 2010 AsktheBuilder News And Tips

What’s in This Issue?

Latest News
Cutting Off Fingers
Solar Attic Fans
Funny Home-Improvement Stories
Deck Stain Sealer Test
Mechanical Plumbing Vents
Chain Saw Chain Sharpener Test

I do product reviews frequently. Please read my Disclosure Policy to understand the relationship between me and the companies that make the products or offer the services I review.

FOLLOW ME ON TWITTER   

Friendly Question Reminder!

If you have a question for me, don't hit the Reply button just yet. Go immediately to my web site and type in the keywords about your problem into my Search engine. The search box is at the top of every page of my web site. You could have your answer in seconds if you do this! Please pay attention to all links you see at my web site. The exact products and services you often need are right in front of you, and you might be ignoring them.   

Latest News   

I got my exercise last week and it continues today! I went up and down from the garage to that attic no less than 40 times, maybe 50 as my son Tristan and I emptied the attic of years worth of clutter. It was a rainy day, and the temperature in the attic probably never got above 72 F. Just after sending this newsletter to you, I'll then start to carry up old games and 25 years worth of the Carter family life from some shelves in the basement storage room.

This is all happening here in Cincinnati as I get ready to move Kathy and Kelly up to NH later in the summer. The Victorian home here I build back in 1986 has a traditional walk-up attic that you'd expect to find in an older home, but not a modern one less than 25-years old.

I framed the attic the old-fashioned way with rafters instead of trusses. If you're building a new home or even a room addition, any rough carpenter worth his salt can frame a roof almost as fast as setting trusses. I say this assuming the roof is pretty simple.

If your builder or remodeler insists on using trusses, be aware you can get special storage trusses and even full attic trusses that allow you not to waste space up in the roof area.

Cutting Off Fingers

My ad salesman Loren sent me a video to watch that demonstrated a cool table saw that can prevent injuries. The person being interviewed said in the USA there are about 3,000 fingers and thumbs cut off in table-saw accidents per year. That nearly ten per day.

This saw is called the SawStop. The inventor got the idea back in 1999, and it took over four years before the saws went into production.

Solar Attic Fans

As summer is just about here, attic temperatures will begin to soar. It can easily get to 130 F and above in an attic. Several years ago, I installed two solar-powered attic fans in my attic that were GUARANTEED to lower my attic temperature.

I urge you to read about the results here my column about solar attic fans.

Funny Home-Improvement Stories

A month ago, I introduced a new feature to the newsletter: Your Funny and Embarrassing Home-Improvement Stories. Here's one that was sent to me by Wendy from Centerville, OH:

When my husband I lived in our first little house, someone gave us a humidifier for our furnace. My husband, never mechanical, installed it himself, but it didn't work. For several days I heard him down in the basement swearing. Finally we called a professional. My husband told him of all the trials and tribulations he had gone through. We all went down to the basement. The furnace guy looked things over, then flipped the ON SWITCH! It worked perfectly fine after that!

Wendy, I can relate to that. About two years ago, I couldn't get my scanner to work. I hadn't used it in quite a while and the button on the front of the panel wouldn't turn the machine on. Frustrated, I was about to go buy another scanner when my teenage son Tristan asked me what was going on. Within seconds the scanner came alive. Tristan gleefully exclaimed, "Dad, all you had to do was flip on the Power switch right here on the side of the scanner." Duh............

Do you want to share your funny or embarrassing story? Share it here.

Deck Stain Sealer Test

The day before I came back to Cincinnati from NH, it was a glorious spring day on Loch Winnisquam. I decided to start a real test of three wood deck/dock sealers. I had cleaned and sealed my cedar dock back in June of 2009, but the nano-technology clear sealer I used failed miserably. The wood turned gray within months.

I taped a video of the testing process. I urge you to watch it. I'll do followup videos at two-month intervals this summer until the dock comes out of the water. You'll see I had some fun taping this video. Pay attention and listen for the harp.

If you've had tremendous success with a CLEAR wood deck sealer, please email me with its name. I'm looking to test other brands this summer. I want to know if you have used a clear PENETRATING sealer that keeps the wood looking great for at least two years. Send me closeup photos of your deck wood that looks great and tell me the name of the sealer you used.

Mechanical Plumbing Vents

A friend remodeled his kitchen three years ago, and his sink ended up in an island cabinet. Prior to that, the sink had a standard vent line. The plumbing code allowed him to install a mechanical vent in the sink base cabinet. I've never been a fan of these vents as I always felt the spring mechanism in the vent would fail or slowly fail over time.

Sure enough, his sink has started to drain slowly because the vent is failing. You can vent an island sink with a loop vent that works well. Make sure your plumber does this in lieu of one of these inferior mechanical vents.

Chain Saw Chain Sharpener Test

I'll be finishing the testing of what appears to be a magical and affordable chain-saw chain sharpening tool this weekend. I'll share those results in the next newsletter. If you use a chain saw, you'll want to read this review.

AsktheBuilder.com

Lighting Wall Sconces

DEAR TIM: I simply love the look of wall sconce lighting. Sconce light fixtures look elegant and can do a great job of casting light in a hallway, bathroom or near a bed. Can you share any tips you’ve undoubtedly discovered in all the years you’ve worked with lighting wall sconces? I’m worried about selecting the right size in all the applications where I want to use these lights. How do you pick one that’s perfect? Anna S., Edgerton, WI

DEAR ANNA: Reading your question I had to stop and ponder how many lighting sconces I have in the last house I built. I lost count at twelve! There are probably a few I forgot. You can find these gorgeous light fixtures both inside and outside my home. The two at our front door are so special that we’re taking them with us to use on our new home.

Wall sconce lighting requires some precise planning if you want everything to be balanced and centered. PHOTO CREDIT: Tim Carter

Wall sconce lighting requires some precise planning if you want everything to be balanced and centered. PHOTO CREDIT: Tim Carter

You’re correct about all the places a sconce light can be used. However, there are countless other places in a home where they work well. For example, wall sconce lighting provides great light in bathrooms or powder rooms, outdoor lighting at any door, and even articulating sconces for reading lights in a study or library. I think they are the ideal light fixture in a window seat area where you need a splash of light for reading or accent lighting. I’m just scratching the surface with locations. A lighting designer could easily list ten or more location where they can be used.

The most important tip I can share about wall light sconces is ensuring that you have them at the correct height off the floor for what you’re trying to light. Be aware of the glare that can be produced from a bare bulb, so keep in mind how the bulb is shaded and at what height does the shade not offer any protection to your eyes. This is of paramount importance if you plan to be seated in an area where the fixture will be.

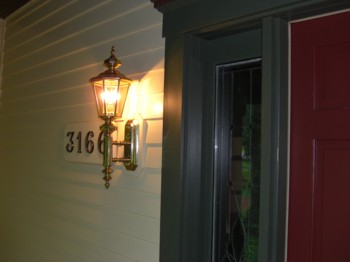
These two outdoor sconces are sized correctly and are at the right height off the porch floor. PHOTO CREDIT: Tim Carter

These two outdoor sconces are sized correctly and are at the right height off the porch floor. PHOTO CREDIT: Tim Carter

Be aware of things near a sconce light. Will the light fixture interfere with a door that opens or a medicine-cabinet door? Will the sconce light be too close to either an inside or outside wall corner that could make the fixture look awkward and out of place?

When working with outdoor sconce lights, you need to take into consideration the finished wall surface. If it’s smooth like brick or stucco, then you usually don’t have a problem with mounting the fixture. But if the wall surface is lap siding or some other material that’s not in the same plane, you almost always have to make a back plate that the wall sconce is mounted to so that the finished edge of the fixture is in complete contact with the wall surface.

This outdoor sconce seems gigantic, but when viewed from a distance it's the perfect size for the door and porch. Note the custom mounting block behind the fixture. PHOTO CREDIT: Tim Carter

This outdoor sconce seems gigantic, but when viewed from a distance it's the perfect size for the door and porch. Note the custom mounting block behind the fixture. PHOTO CREDIT: Tim Carter

I had to make special rectangular wood blocks for the sconce light fixtures at my front door. Each sconce fixture has a massive solid brass rectangular base plate with the corners clipped at a 45-degree angle. My wife asked me to make a larger wood base plate that was the same shape, only larger creating an even border around the fixture base. It’s a handsome way to accent the sconce.

It can be very tough to select a sconce that’s the right size. I’ve seen mistakes made at both ends of the spectrum. On the outside of a home, I’ve seen grossly oversized sconces next to a front door. Inside a home, I’ve gazed upon tiny sconces that looked like they belong in a child’s dollhouse.

Scale or size is something that you need to have a feel for and/or get some professional input. I can remember holding our front-door lighting wall sconces in my hands thinking they were huge. From the tip of the finial to the bottom of the fixture, it measured 25 inches. It was massive. But when I hung it on the wall next to the door and stood back 50 feet on the sidewalk, it was perfectly sized.

The closer you will stand to observe the thing being lit, the smaller the sconce should be. Let’s take a bathroom mirror as an example. You’ll be standing just 24 inches away from the fixture as you apply makeup or shave. A sconce light here should probably be no taller than 9 or 10 inches.

Last year, I had to install not one bathroom sconce light, but four. What’s more, they had to be perfectly positioned because of the tilting wall mirror that was being used above the vanities.

To solve this conundrum, I decided to make an exact cardboard cutout of the mirror and place it on the wall studs in the exact position where the mirror would be after the vanity was installed, the wallpaper up, etc.

This mirror template, with the centerline of the mirror supports clearly marked, allowed me to install the rough electrical boxes at the precise height they needed to be so the fixture base would not interfere with the mirror supports. What’s more, I was able to place the electrical boxes the correct distance away from the sides of the mirror so the light fixtures didn’t interfere with the movement of the mirror. Everything worked out perfectly in the end.

Column 831

Asphalt Shingles

DEAR TIM: I know asphalt shingles are affordable, but I want to know what are some tips to extend their life. I’m planning a new home and would love any advice you might offer about roofing with asphalt shingles. I’ve noticed the cost of asphalt shingles has gone up, and wonder if now is the time to lock in a price. Tom K., Philadelphia, PA

DEAR TOM: Every home I’ve owned has had asphalt shingles on the roof. I’ve never been let down or had a failure of any type. I’ve seen blisters on shingle, I’ve seen curled corners and some that have prematurely failed. There are many reasons for failures, but I can tell you that installing asphalt shingles as directed in the written instructions on the package will almost always lead to long-term success.

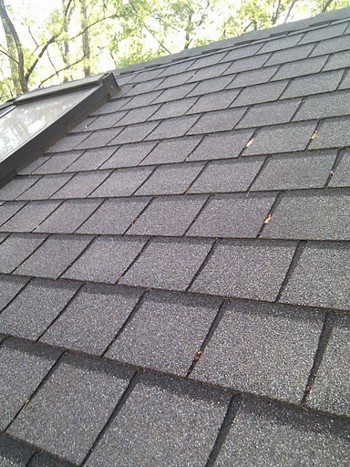
These are asphalt shingles made to look like slate. With a steep roof slope, they can easily last decades. PHOTO CREDIT: Tim Carter

These are asphalt shingles made to look like slate. With a steep roof slope, they can easily last decades. PHOTO CREDIT: Tim Carter

Let’s start with the basics. Asphalt naturally repels water, and it’s a readily available commodity so long as we continue to use crude oil. Asphalt is a by-product of refining crude oil. It’s what’s left over after the lighter-weight solvents are extracted from the black gold that’s pulled from the bowels of the earth. Because oil prices go up and down, prices of shingles do the same. Lock in prices when you see them low.

If exposed to sunlight, the ultraviolet rays will readily break down asphalt shingles. That’s why the shingles you see are covered with the small colored ceramic granules. These create a powerful sunscreen and offer you different colors to match your exterior decorating scheme. Many shingle manufacturers make shingles that have special colored granules that contain copper. These help to prevent the ugly black roof-algae stains you might see on your existing roof or that of a neighbor.

Frequently asphalt shingles get a very bad rap when it comes to roof leaks. Many homeowners blame the shingles for the dripping water, when in reality the leak can be traced to poor workmanship and almost always a flashing issue. Flashings are transitional roofing materials that connect the asphalt shingles to something that’s poking through a roof or immediately adjacent to a roof.

For example, you’ll discover flashings at chimneys, plumbing vent pipes, ventilation fans, dormers, roof vents, valleys, etc. I’ve never had a leak in any of my homes that have asphalt shingles, even though I’ve had hundreds of different types of flashings installed. If you install shingles and flashings correctly, you simply don’t have leaks.

Remember that shingles work like feathers on a duck. They overlap one another and use gravity to create a weather-tight seal. If you blast water up a roof or water backs up because of an ice dam or other obstruction, you can have a leak. There are special barriers that you can apply to the wood roof deck before you install the shingles that will stop leaks like this. I highly recommend them if you live where heavy snow accumulation is expected or where violent wind-driven rain is a possibility.

Even though you don’t intend to get up on your roof and pound the nails that hold the shingles in place, I urge you to read the installation instructions that come with the shingles. They are easy to read and won’t take long. You’ll have a great understanding of the accessory products that are required to ensure you have a leak-free roof.

Roofing underlayment or felt paper is almost always called for. Some shingle manufacturers will have very specific layout requirements, especially if you decide to use architectural asphalt shingles. These shingles tend to mimic the look of other roofing materials like slate or wood shakes. If you don’t space the shingles correctly, the final look of the roof may not be as dramatic as it could be.

If you’re on the fence about color selection, you can do a quick experiment that may only cost you $100 or less. I suggest that you purchase one or two bundles of shingles and have a worker lay them out over your existing roof so that you can see them from the ground. Do this on a calm day with little wind. If you have a steep roof, you’ll have to nail them in place with the minimum amount of nails just to keep them from sliding.

Stand back at the road to see what they look like. You’ll be surprised how the color is more dramatic when you see large patches of shingles versus that small piece that’s on the sample board.

When you buy asphalt shingles, be sure to take into account waste. You’ll have at least five percent waste, if not more, if you have lots of hips and valleys on your roof. If your roof is made up of two simple rectangular sloped surfaces, you’ll have virtually no waste.

Don’t let a roofing contractor talk you into skipping steps that are in the written instructions. Doing so can void the warranty that comes with the shingles. Pay attention to all the requirements that are in the instructions, even something as silly as the position of the nails.

Be sure you have plenty of ventilation to exhaust hot air from the attic. I’ve found over the years that the simple turbine vents do a magnificent job of vacuuming hot air from attics.

Column 830

masonry-water-repellent masonry-crack-sealant

The above product links are affiliate links. I get a tiny commission if you purchase these from Amazon.

Deck Stain Video

Deck Stain Video

I am down on my dock, with lots of wind in the background. It is April 30, 2010. A year ago, the dock was completely cleaned and stripped. It was in horrible condition, looked gray and was a mess. I am getting ready to apply a top quality, nano-technology wood sealer and preservative. But after the year, the wood had turned gray instead of a keeping it’s natural wood coloring. The sealer had turned colors.

After talking to the wood sealer manufacturer, they indicated that another test should be done. But instead of just testing their product, I will be testing several products. The dock will be divided into sections. One section will get a color-tinted product from the same manufacturer. The next section will be the clear product, that I applied a year ago. The third section is another brand name sealer. The last section won’t get any sealer. It will serve as the control. Showing what will happen if nothing is done to the wood dock.

The dock extends out into the lake so it gets direct sun most of the day, from as soon as the sun comes up until late afternoon. Plenty of sun for a really good test.

The dock has been prepared according to the directions on the containers. The wood surface is clean, dry and even sanded with 60-grit sandpaper. The wood dock is made of cedar. The instructions call for two-light coats, separated by no more then 20-minutes. In the windy conditions, the second coat can be applied within several minutes.

The label says it is very important that the product does not dry between coats. The application will be done to the label’s instructions. Separate brushes will be used so there is not cross-contamination between products.

EB015 Cleaning & Sealing Deck eBook CoverThe first sealer is normally watery and easy to apply. It will soak into the wood as it is applied. The first coat is very light with no puddles.

The second sealer has the look of milk, but it will dry clear. As it is applied, the white coloring starts to turn clear. It is applied as the first one, a thin coat with no excess. If there is excess sealer, it can start to peel at those locations.

The third sealer is the competitor’s brand. It is also a clear sealer and it goes on clear.

After a few minutes, according to the instructions, the second coat is applied to the three sections.

Flash forward to the future!! (Video editing is amazing.) Lots of people have been asking the names of the three products being tested. The names won’t be released until the test is completed.

Returning to the test planks. After all the sections have dried, the first one has a brown tint. The second milky looking sealer has dried completely clear. The third one, which was also clear, is not the same clear as the second one. And the final section is just bare wood.

Flash back to the present!! It will be interesting to see how these three products weather throughout the summer. Additional videos will be taped during the summer so you can see how the test is going. So check back later for video updates.

Update: In Tim's July 20, 2010 Newsletter, he provides results for this test. Click here to read those results.

This video was mentioned in the May 2, 2010 Newsletter.

Rust Spray Paint

rust spray paint

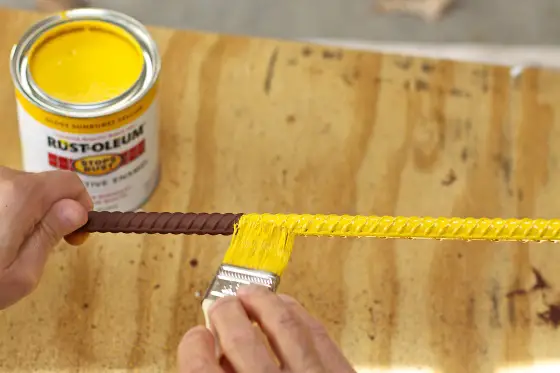
This steel bar could have been painted much faster with rust spray paint. PHOTO CREDIT: Brent Walter

DEAR TIM: Painting some rusty steel is on my to-do list. Does anti-rust paint really work? I’ve not had much luck in the past. What type of rust-stopping paint have you used with good success? What are the tricks you’ve used to ensure the paint doesn’t flake off over time? Any tips you can share would be greatly appreciated. Sandy P., Greensboro, NC

DEAR SANDY: I’ve got lots of experience painting rusty steel and iron. Over the years, the different paint products I’ve used have changed, however, I continue to have great success keeping the metal from rusting.

If you travel much, you see rust-stopping paint in use on many interstate highway bridges. Rust is a major headache for these structures as well as countless factories, buildings, towers, etc. that are exposed to the weather. Because steel is such a strong and affordable building material, it’s used everywhere. The trouble is, when left unprotected, it wants to oxidize forming the rust that can weaken it and make it look bad.

WATCH the following video about a super RUST-PREVENTATIVE spray paint. You can also buy this paint in cans.  CLICK or TAP HERE to order the paint you see me use in the video.

The coatings industry has been developing incredible paints and coatings for years that will protect steel from rust. I remember well over 30 years ago seeing some of these specialized paints at a paint store I bought from on a regular basis. These paints were not out on the shelf for normal customers, as they were special coatings that were used by institutions and large-scale commercial painters.

If you visit any decent paint store, they’ll have in stock rust preventive paint. Often the trick is to purchase a special primer that’s meant to be used on bare steel or steel that may have a fine coating of rust. These primers are developed to bond well to the oxidized steel. Remember, you can get a chemical bond happening with certain paints. That’s what you want after all, a great bond between the steel and the paint.

You can also purchase a popular national brand rust paint called Rustoleum. I’ve used it for years with great success. This is a consumer brand paint that can be found in just about every hardware store and home center. It comes both in a rust spray as well as a brush-on paint. I’ve used both with fantastic results.

The biggest tips I can give are to always read the label on whatever paint you decide to use. First make sure you can paint the object correctly. Some paints and rust-inhibitor paints want the steel to be rust-free. Other paints allow there to be some rust present.

The instructions on the label almost always call for you to scrape off any flaking rust or metal scale. This is just common sense when you think of it. The better job you do preparing the metal, the longer the paint job will last.

Pay attention to the temperature guidelines as well. Don’t paint in extreme conditions where you’re at the limit of the paint’s tolerances. Take your time and be sure you coat the surface of the metal completely. Great lighting can help you here.

Avoid skipping steps. If the finish paint you intend to use says to use a special rust primer paint, use it. Don’t try to substitute a different primer. Many finish paints are formulated to bond very well to the primers made by the same company.

Read on the paint label about re-coat times. It’s always a great idea to follow painting the finish paint as soon as you’re allowed to apply it. When you do this, the finish paint can bond both chemically and mechanically to the primer. You get superior results when you can paint like this.

I like to paint steel with a spray gun when I can. It takes some extra time to set up to prevent over-rust paint spray, but in the long run it can be a time saver. Be very careful you don’t over thin the paint should you use spray equipment. Too much thinner will weaken the paint.

Rust painting can be fun in a weird way. If you expose someone to this painting, they almost always feel the paint will not bond to the rust. Little do they know that the paint chemists understand what’s going on with the rust and steel.

I’ve painted some rusty gas piping that’s exposed to the weather with amazing results. I used the correct primer and made sure the steel pipe was clean, dry and dust free. The rust primer went on great and dried well. A few hours later, I applied the finish paint made by the same company.

Two years later the steel pipe looks like I painted it hours ago. There’s not one place where the paint has flaked or the gloss has dulled. Get good paint, read the label, follow directions to the letter and you should have rust-free metal for many years.

Author’s Note: Tom R. of Pickerington, OH, offered this helpful suggestion regarding rust prevention.

"In today's column, you spoke of rust prevention. I have a suggestion for your request for tips. For many years, I have used a product called "Rust Mort", which I obtain from Sherwin Williams auto paint stores. This is a very watery product that is brushed on the rust. It removes scaling rust, but not the rust itself. It goes a long way.

Let it stand for 24 hours. The solution will turn the rust into a black oxide. The solution will not convert the surface if there is no rust present. Rinse the item & to remove any solution that may have remained on the surface or a painted area. Failure to rinse may result in adhesion problems.

Prime the surface and allow it to dry, then refinish with a good rustproof paint. Takes two days, but it works. We used this in the body repair auto industry. I used this process 13 years ago on a camping pavilion next to a lake. The roof joists were steel double X girders, and in bad shape. They are still in good condition as of last year. I was amazed.

Contents: Phosphoric Acid 75% (7664-38-2), Chromic Acetate(39430-51-8), Isopropanol (6763-0), Water.

Hope this helps."

Column 829
May 2, 2010 AsktheBuilder News And Tips

What's in This Issue?

Latest News
Deck Sealer Test
Mountain Lion
Overstock Stain Solver Sale

I do product reviews frequently. Please read my Disclosure Policy to understand the relationship between me and the companies that make the products or offer the services I review.

FOLLOW ME ON TWITTER

Friendly Question Reminder!

If you have a question for me, don't hit the Reply button just yet. Go immediately to my web site and type in the keywords about your problem into my Search engine. The search box is at the top of every page of my web site. You could have your answer in seconds if you do this! Please pay attention to all links you see at my web site. The exact products and services you often need are right in front of you, and you might be ignoring them.

Latest News

Yesterday, May 1, 2010, my son and I drove 15.5 hours from NH to Cincinnati, OH. He finished his second year of college the day before and came back to Cincinnati to be with many of his high school buddies.

It's spring, and wow were the bugs out. They were especially brutal through upstate New York. It reminded me of the opening few minutes of the movie Men in Black where that alien smuggler was driving that van in the desert night.

Overnight here in Cincinnati, it rained. It was raining when I got up. That was a blessing for bug removal as the constant saturation and humidity rehydrated the bug carcasses.

I went outdoors in a light rain with my dog Lady about an hour ago, she love chasing the stream of water from the hose, to take advantage of this gift from Mother Nature. With a little soapy water and a sponge, I got rid of all the bug bodies with very little effort.

This is pretty much the way you can get rid of many stains. You just need to rehydrate the dried deposit. Rehydrate simply means adding water back into the mix. Some things don't rehydrate well. In those cases, you need my Stain Solver. More on that below.

All too often I get a desperate email from a person who was impatient and ruined a surface. Usually the damage happens by immediately scrubbing the stain instead of allowing water to naturally soften it. This aggressive behavior, mixed with an abrasive cleaner, can spell disaster for counter tops, acrylic showers and tubs, painted surfaces, even glass.

I'll often use a paper towel to rehydrate a stain. I saturate the towel with water and then lay it on top of the stain. I push the towel against the surface like wallpaper. You can do this on vertical surfaces as well as flat. Let it soak for 30 minutes or an hour. Don't do this on surfaces harmed by water.

Deck Sealer Test

In the last issue, I talked about how I was going to do a test of three deck sealers on my cedar boat dock. I applied the sealers on Friday, and taped the video doing it!

I'm hoping the video will be post produced this weekend, so I can share it next week. Wait until you see this video. The difference between the two *clear* sealers was like night and day. I also had a little fun in the video. Good thing I don't make my money as a comedian. I'd be living in a cardboard hovel.

Mountain Lion

Last weekend, I met a neighbor who lives very close to the woods I own in NH. He showed me photos of mountain lion tracks in the snow taken not far from my property. Yikes! I thought those bad boys were west of the Mississippi!

A quick Google search shows that these beasts are absolutely being spotted east of the Mississippi. Read this six-year-old story from USA Today.

Overstock Stain Solver Sale

Last Thursday, I told you about the mistake we made in packing too many four-pound boxes of Stain Solver for the huge spring sale. I MUST get these overstock items out of the new warehouse.

Acckkkk! You can save 20 percent off the normal price, but only until Tuesday May 4th at midnight Pacific Time.   I used the Stain Solver to clean my dock before I shot the videos about the deck sealer. I use it in my laundry. You may be a person who's used it to clean floor tile grout.

On Thursday when I announced the sale, I got inundated with questions about what does it clean. Bottom Line: Stain Solver cleans anything that's water washable.

A man from California asked if it would clean dog *poop* from a new white carpet. My answer, " ... in about five seconds!" Yes, it can take stains out of carpets in seconds. I cleaned numerous stains from my daughter's carpet back in March. It gets rid of red wine stains, grape juice, Kool-Aid, orange and red cream soda, etc.

One customer I talked with on the phone the past few days told me how it completely restored upholstered chairs the arms of which had gotten soiled.

I urge you to act now. I honestly have no idea when the next Stain Solver promotion will be. This sale only happened because we made a mistake, one that I'm pretty sure will never happen again.

Oh, and please read this if you're a new subscriber and get torqued about promotions in free newsletters.

AsktheBuilder.com