| Be sure to read the special Author's Note at the end of this column. It provides updated information on this topic. |
DEAR TIM: I have to tackle an attic insulation installation at my home. Winter snuck up on me and my heating bills need to go down if at all possible. Is installing additional attic insulation hard? How can I tell if I have asbestos attic insulation now? Can you teach me how to install attic insulation like a pro so that I don’t hurt myself or my house? What are some of the things you discovered the hard way all the years you worked in attics? Leah W., Goffstown, NH
DEAR LEAH: If you’re thinking of replacing attic insulation and there is any chance it’s made from asbestos, stop now. Take a small representative sample of what you have now and send it to an independent testing lab in your area. They’re easy to locate, especially if you have access to the Internet. Do a search for “asbestos testing labs” and you should discover many that will allow you to mail them the sample. Asbestos is a sinister product that has killed many who’ve worked with it and others who were exposed in a secondary fashion by being near a worker or his clothes.
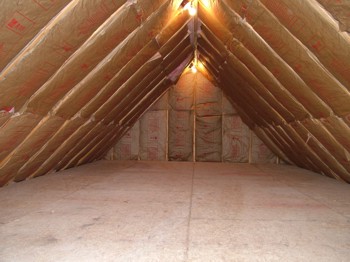
This attic storage area can be insulated in just a few hours by a serious do-it-yourselfer. PHOTO CREDIT: Tim Carter
Assuming you don’t have asbestos in your attic, this can be a pretty straightforward project. Perhaps the hardest part will be deciding from the types of attic insulation you’ll use. You can choose from fiberglass, cellulose, foam and even reflective attic insulation. Books have been written about each of these, so it’s impossible for me to tell you in this short space the pros and cons of each one.
Let’s assume you decide to use fiberglass. The first thing to do is determine if you’ll use blown-in fiberglass or batts. The blown-in fiberglass requires a heavy machine that chops up, fluffs up and blows the insulation particles through a large-diameter flexible hose. You typically have a person near the machine feeding it bales of fiberglass, while you’ll be in the attic broadcasting the fiberglass as it chutes from the end of the hose. Some call this loose-fill attic insulation.
Be sure to read all the instructions on the bales of fiberglass to ensure you take all the needed safety precautions. Wear all the right clothes, a fantastic mask so you don’t get the tiny airborne fiberglass particles in your lungs, and goggles. I urge you to have great lighting up in the attic so you can see what you’re doing. If you use batts, just roll those out according to the instructions on the packaging. It’s caveman simple to install residential attic insulation batts on top of an existing ceiling when you’re in an attic.
There are many things you have to take into consideration so you protect your home. This is but a partial list. You need to be concerned with ventilation. Don’t pack the insulation in where the roof passes over the exterior walls. You need to make sure air from any soffits can pass over the insulation on its way to the peak of the roof. A 2-inch space is usually sufficient for this.
Be very careful in the attic where you step. You don’t want to punch through the ceiling with your foot into a room below. Don’t step on any cables or wires in the attic. If you have an older home with ancient knob-and-tube wiring, you really will have a tough time. This wiring is easy to identify. Each wire has coal-black insulation on it and it’s strung between porcelain insulators that are nailed to the ceiling joists or rafters up in the attic. You are not supposed to cover this wiring with insulation as its original design was to dissipate heat into the air. Insulation in contact with the wires can cause it to overheat and start the black wire insulation on fire.
You also need to be on the lookout for any older recessed lighting fixtures. Many of these can have wires that feed them that can catch on fire if they overheat. Some older recessed lights were never intended to be directly covered with insulation. If in doubt, construct a box using plywood around each fixture allowing a minimum of two inches of air space between the wood and any part of the fixture. This air space will help prevent the fixture from overheating when you cover the plywood box with insulation.
Attic insulation costs, especially if you do it yourself, can be recaptured pretty quickly. The trick is to inspect for any air leak passageways where cold attic air can drop down interior walls. Look for these problem areas around plumbing vent pipes where they penetrate the top plate of a wall. Be sure the holes drilled in top wall plates for electrical wires and cables are caulked. You don’t want cold air seeping into the center of your home.
If you decide to get quotes from an attic insulation contractor, be sure you install depth gauges up in the area that will be insulated so you can pop your head up into the attic to see if enough insulation was installed across the entire area.
You may wonder what the best attic insulation might be. That’s really hard to say, as each one has different properties. In the end you’re looking for R-Value. Try to add enough insulation that you meet the minimum guidelines as set forth by the Department of Energy.
Fiberglass will not support combustion. I’ve received emails and comments at my website from contractors and firemen who’ve had fire problems with cellulose, even though the manufacturers say it’s fireproof. It’s possible the problems were from a bad batch. Foam is usually installed by a pro, and it almost always is flammable. Be sure to ask about that.
Routinely I am blessed to hear from professionals and industry experts who share in-depth and updated information about a topic. You'll absolutely want to read the letter I received from the President of NAIMA (North American Insulation Manufacturers Association). It really helps clarify some of the points I just touched on in the insulation columns.
....
We've received other emails with similar problems or questions. Here's one from Dawn W. of Parma, OH, regarding knob and tube wiring.
"Is it safe to use USA Insulation's Tyrpolymer foam in a 1950's house with knob and tube wiring?"
Dawn, as mentioned above, knob and tube wiring is designed to dissipate heat through the exposed wires. If the wires are covered with insulation, there is a possibility of overheating.
Column 808