DEAR TIM: Last week our neighbor’s house burned to the ground. That intense fire spread to our home. The brave firefighters and our domestic fire sprinklers helped save our home, but the water damage was enormous. I’m wondering what we could have done differently to minimize the damage and help prevent the spread of the fire to our house. I got a true baptism of how fire sprinklers work when I rushed into the house to grab some things that were irreplaceable. Veronica H., Wrightwood, CA
DEAR VERONICA: I’m really sorry for your loss, and glad to hear that you’re alive and unharmed. You running into the house to save items could have transformed you into a grim statistic. We’ll discuss in a moment how that was totally unnecessary. I’m sure the fireman scolded you for that impulsive action.
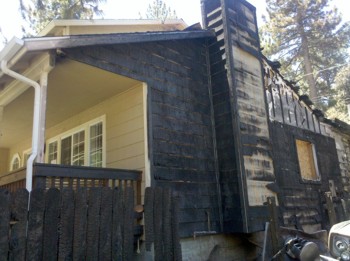
This home was saved from the valiant efforts of the firemen and internal fire sprinklers. PHOTO CREDIT: Veronica Hill
You’re in a select group as very few existing homes have a residential fire sprinkler system. Recently the International Code Council included fire sprinklers as a mandatory requirement in its residential building code. This would apply to new homes and those that are, perhaps, significantly rehabilitated. This building code is used by many local governments across the nation as a guide, but your local officials have the ability to delete this section about sprinklers from the body of the code.
Let me say that volumes of books have been written about residential fire safety, prevention, minimizing losses, etc. In this tiny space I can’t begin to cover everything or any one thing in the needed detail. There are numerous associations, your local fire department, many national insurance companies, etc. that have fantastic advice just waiting for you to ask for it.
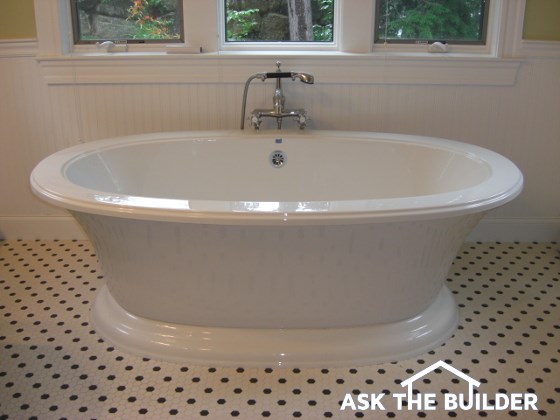
Your automatic fire sprinkler system no doubt did a good job of stopping the spread of the fire, but if many of the sprinkler heads went off because of the intense invasion of heat from your neighbor’s house pouring into your windows, you can see why the water damage to your possessions was severe. Imagine taking a garden sprinkler and setting it up in your living room allowing it to run for an hour or so.
To protect valuable stored possessions from water damage, it’s probably a great idea to enclose them in plastic bags and keep them up off the floor. You also want to store them low in the house as heat rises. Putting valuables up in an attic is problematic as firefighters typically ventilate the attic trying to push the fire inside the house up through the roof. This means heat in an attic will be intense as they ventilate the fire.
The plastic bags can cause a huge issue if the heat from the fire melts them. So they are by no means a silver bullet. One-of-a-kind items that are of incredible value need to be stored in a fireproof safe. However, this can be a problem if you want them on display.
The spread of fire from your neighbor’s house to yours can be slowed to an extent. The use of fireproof building materials on the exterior walls is a great start. Stone, concrete block, brick, fiber-cement siding, etc. are all fireproof.
But the weak link on most houses is the roof overhang. Builders, because of good practice and code requirements, install ventilation in roof overhangs, especially at the lower ends of a roof. Fire and hot gases can easily enter these openings and set the underside of the roof on fire in minutes.
Your builder can use fire-resistant lumber for the roof sheathing and framing, but it’s usually expensive and it’s no guarantee the wood will not burn. When you do the cost vs. value analysis, it just doesn’t make economic sense as there are so few house fires like this.
Designing some sort of giant exterior water sprinkler that creates a wall of mist between your house and the neighbor’s house would be ideal, but that’s also impractical. Firefighters use this methodology to protect houses once they arrive at the scene. Perhaps they were doing that at your home, but in reality it was needed in the first minute of the fire, not 10 or 15 minutes after the valiant fire crews arrived and set up their defenses.
Important paper records, sentimental photos, valuable documents, etc. can all be duplicated now with relative ease. There are amazing digital scanners that can scan stacks of paper in just seconds per sheet. Dedicate just 20 minutes each day until you’re finished to go through all your things. Once complete, you’ll have a digital copy of everything that’s of value to you. The trick is to put that digital content on multiple external hard drives and store them at friends or relatives houses. You don’t want those hard drives in your home where a fire can consume them as well as the originals.
Be sure to take videos of all of your possessions twice a year. Scan receipts of all things you purchase. You’ll need these records (save them offsite) to prove to an insurance company that you owned all the things you have. Imagine how hard that is to do as you’re fighting back tears talking in shock with an insurance adjuster while you both stare at a pile of smoldering ash and cinders.
Below are some additional pictures of the interior damage to the house.
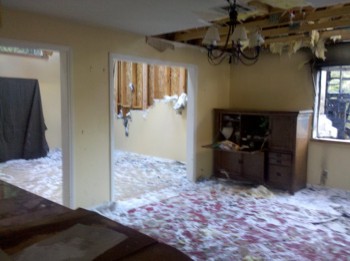
PHOTO CREDIT: Veronica Hill
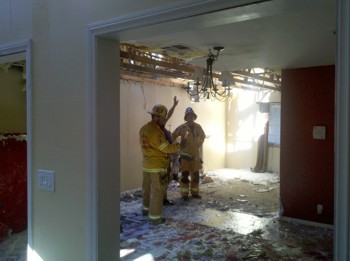
PHOTO CREDIT: Veronica Hill
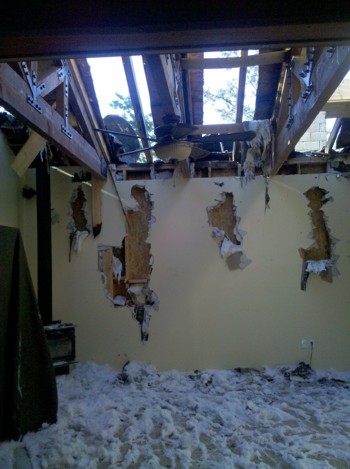
PHOTO CREDIT: Veronica Hill
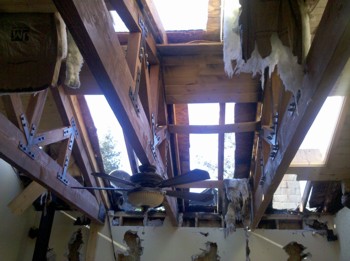
PHOTO CREDIT: Veronica Hill
Column 838