DEAR TIM: Bathroom lighting is my current project, as I have two bathrooms that are being completely remodeled. What bathroom lighting fixtures have you had success with in your jobs? In the largest bathroom, contemporary lighting might interest me. Can I install one of those nifty makeup light and mirror fixtures that I often see in hotel bathrooms, or are those only permitted in commercial buildings? Carol S., Manassas, VA
DEAR CAROL: I don't know if there is a silver bullet when it comes to bathroom lighting and bathroom lighting fixtures. There are many wonderful options, and I think your biggest problem is going to be limiting your selections to just a few. When you visit a real lighting supply house that just sells lighting fixtures, I predict you will develop a mild headache from the mind-numbing task of looking at all of the delightful lighting fixtures.
To make matters worse, most lighting supply houses only display five or 10 percent of the light fixtures that are available. Be prepared to spend hours looking through catalogs that contain thousands of photos of bathroom lighting fixtures.
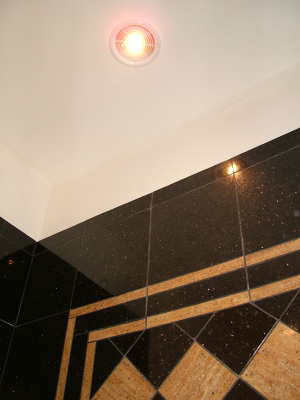
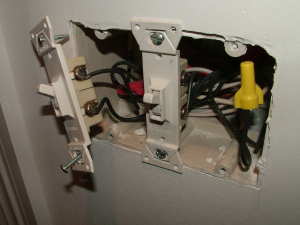
This halogen light is also an intake duct for a remote bathroom fan. The halogen bulb produces a brilliant white light. PHOTO CREDIT: Tim Carter
The best success stories I can share come from both personal experience, and many of the jobs I have completed over the years. Believe it or not, I am still learning how to best utilize light in bathrooms. New bathroom configurations and layouts create new bathroom lighting opportunities. The trick is to approach each job or bathroom with a new attitude.
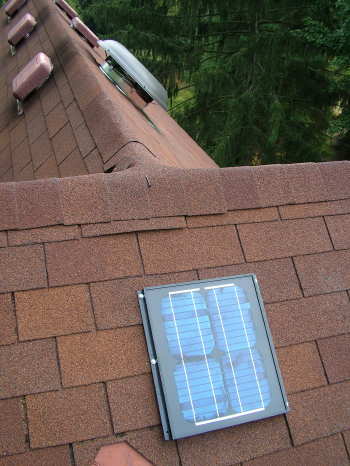
The first thing to consider is that you have two lighting sources, and both should be considered. I think that people often underutilize and neglect natural lighting options. Windows, skylights and tubular lights that pipe sunlight into a bathroom should used whenever possible. There is no substitute, in my opinion, for brilliant sunlight streaming into a bathroom space in the morning. It is a wonderful way to start the day. Bathrooms that face away from the sun can benefit from skylights that reflect natural light from the sky and clouds. The same is true for windows, as they will let light in no matter which direction they face.
Artificial bathroom lighting is what most of us are used to. Standard light fixtures that use any number of different types of incandescent light bulbs can be found in tens of thousands of bathrooms across the land. But newer halogen and energy-efficient fluorescent bulbs should be considered, as they create a different palette of color. Be aware that different bulbs produce noticeable color spectrums ranging from a warmish golden hue to a blistering white light as you might experience outdoors at high noon on a cloudless day in the mountains.
The biggest mistake you can make in bathroom lighting is to have too little. My experience has shown that you need 300 watts of incandescent lighting per 50 square feet of bathroom. You can have more, but I think you will discover quickly that more than 8 watts per square foot could be overkill.
A combination of different lighting fixtures almost always produces a magical effect. I call this layering light. In my daughter's bathroom, I installed two recessed halogen lights over the vanity that are operated on a separate switch. Two other recessed lights, one in the center of the room and one over the tub, are operated by a second switch. When just one switch is on, the bathroom has a nice welcoming glow. When both are on, the bathroom lighting is just right for bathing or brushing your teeth.
Indirect bathroom lighting is another trick that many people seem to ignore. This form of lighting forces the builder/remodeler and the electrician to hide the actual light fixture, and bounce light from it onto a wall or a ceiling. Indirect bathroom lighting is ideal if you are going for a dramatic look. It is a great way to highlight wallpaper or decorative elements in a bathroom.
You can do contemporary lighting and switch to a different style in a few years. Almost all electrical lighting fixtures mount to the same electric boxes in walls and ceiling. Plan ahead to make sure you have enough side wall and ceiling clearance for most larger fixtures. Installing those lighted makeup mirrors is easy. They connect to a standard wall electrical box. Be sure the box is firmly attached to a stud or wood blocking in the wall.
Visit model homes on weekends to get real-time bathroom lighting ideas. I also urge you to look at many of the home design and decorating magazines for other ideas of unique bathroom lighting.
Be sure all moving doors in wall cabinets and medicine cabinets are able to operate fully and not hit lighting fixtures. Some lighting fixtures can be mounted too closely to mirrors and cabinets creating huge problems once you discover they are in the way and interfere with you gaining access to a cabinet.
Column 645