Window washing used to drive me crazy. I went over the edge one month ago, while installing beautiful replacement windows in my own home. I was trying to get them clean and simply made the windows look worse. No matter how much spray cleaner I used and new clean paper towels, there were still streaks. The worst part was when the sun hit the glass. Before direct sunlight poured through the windows, they looked really pretty good, especially at night. But then the next day, Wow! - Streak City!
Take a Deep Breath
When I finally had enough, I just stopped and collected myself. I thought, "Wait a minute. I have seen super clean glass at restaurants, gift shops, car dealerships, etc. I have NEVER seen a professional with a spray bottle of blue liquid and a roll of paper towels or old rags. They use lots of water and squeegees!"
I then picked up the phone and called the owner of one of the largest window cleaning companies in Cincinnati, Ohio. He chuckled as I told my story about my inability to get a perfect job. Once he explained the reality of what happens to window dirt when you don't use a squeegee, the light bulb in my brain went off.
The Right Tools
The tools to clean glass are not extremely sophisticated. There are two different scrubbers that you can choose from to wash the dirt from window glass. The most common one resembles a lambs wool applicator or a medium nap fleece. This scrubber accepts lots of water from a bucket and it washes a moderately dirty window in a flash. You just have to rub the scrubber across the window in curving motions to loosen the dirt and transfer it to the fleece on the scrubber.
If your windows have dried tree sap or some other deposit that is water soluble, then you should use a porcupine scrubber. This tool has medium length synthetic hairs, some of which have small barbs or coarse tips. These tips really do a swell job of getting rid of sticky stuff on glass. If you don't want to buy a fancy scrubber, you can use a tile grout sponge or a natural sponge. You just want a tool that will collect the dirt, not spread it around.
The squeegee is most important. You want a professional one. These differ from many you see at hardware stores, grocery stores and the ones you frequently use at gas stations. Professional ones have replaceable rubber blades. The blades slide into a brass channel. The blades are actually held firmly in the channel by brass clamps that fit onto each end of the rubber blades. Some professional window cleaners change their rubber blades each day. I doubt you will need to do this, but switching them every 2 to 3 months may not seem unreasonable. I would always have at least two spare blades on hand.
You have to buy a brass handle when you buy the squeegee. The total cost for the best 18 inch pro squeegee with a handle - are you sitting down? - is $10.00!
Lint Free Cloths
Are there such things? Every rag I seem to use from my rag pile either produces lint or it doesn't seem to absorb water. You bet you can get absorbent lint free cloths. They are a knit type fabric. The paint store I talk about later in this Bulletin has lots of them. They are inexpensive, and professional window cleaners buy them all the time.

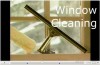
Click here to watch Tim's video on window cleaning tools.
Professional Cleaners
What happens if you don't want to do your own windows? Call in a professional. If you have standard windows, you are going to be amazed at how inexpensive the cost actually is. Keep in mind that most people wash the exterior surfaces about 4 times a year. The inside surfaces are usually washed twice a year. Certain rooms may need more frequent cleanings if there is lots of dirt or grease in the air.
If you hire a professional, make sure that they are bonded and have all necessary insurance documentation. Simply ask for copies of their certificate of liability insurance and their worker's compensation insurance certificate. A bonded company is one that also offers you protection against theft. If a strange window cleaner comes into your house and steals something, you want to make sure that you can get reimbursed. Trust me, it has happened before!
Column B302