Steam Room Construction Tips

Steam Room Construction Tips

When I did the research for this column, I found it very interesting that the manufacturers, who make the steam generation units, offered no written or detailed construction tips for steam enclosures. In talking with them, they all said the same thing, "There is way too much liability and there are too many different contractors involved."

You see, there are several steps that are involved and if one of them is done wrong, you can have a moisture problem. I have built several steam enclosures that have withstood the test of time. Here is how I did it.

One Piece Barrier

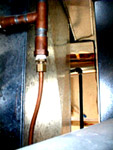
The steam generation units create vast amounts of water vapor. This gas can get through grout, cement board, moisture resistant drywall, etc. with no problems. If it gets into a wall cavity and comes into contact with a cool surface, there is a great chance the water vapor will change into liquid water. If this happens, mildew, rot and fungus aren't far behind.

The solution to this problem is the installation of a high quality one piece vapor barrier on the entire inside surfaces of the steam enclosure. The floor of most of these rooms is either a tub, a fiberglass shower pan or possibly ceramic tile. Tubs and shower pans are impervious to water vapor and a ceramic tile floor will be as well, provided it has a CPE membrane like Cloraloy under the cement mud base.

In any event, you need to cut a giant piece of vapor barrier that will be able to cover the ceiling and all walls and be able to drape into the inside surface of the ceramic liner or the tub or shower pan. It is not unlike cutting a piece of wrapping paper to cover a birthday or holiday present. One piece of paper covers the box and you make the necessary folds to get it tight at the corners. The only difference is that you are wrapping the inside of the box.

The best vapor barriers to use are cross laminated virgin polyethylene vapor barriers. These products can't be found at home centers. You need to search and find Concrete Supplies. You should be able to find small companies that sell specialty concrete epoxies, finishing aids, and other products to commercial concrete installers. This is where you will find these awesome vapor barriers.

A Two Person Job

Installing the vapor barrier will be a two person job. Someone has to hold the vapor barrier tight to the ceiling while the other person begins to nail it. You must make certain that the barrier is centered and that you will have plenty of material to cover the ceiling and walls in one piece. Remember, it drapes inside the floor barrier or tub so that if water condenses on the barrier, it flows into the tub or floor pan and then into the drain.

Cover all Wall and Ceiling Surfaces with Tile

For a high performance steam shower, you want tile walls and ceilings. The glazed surface of the tile inhibits vapor penetration and allows the steam buildup to happen faster and be more intense. Other dense natural stone or man-made stone look-a-like products can perform well.

If you use tile or a natural stone surface, I recommend cement board as the substrate. The cement board will not deteriorate over time. Moisture proof drywall will fail eventually.

If you use tile for the ceiling and walls, absolutely make sure you apply the tile with thinset mortar, not organic adhesives. The thinset is basically cement and lime and will also stand the test of time.

If you use cultured marble, paint the cement board with a high grade 100 percent acrylic white primer. Allow it to dry for 3 days. Then use clear 100 percent silicone caulk to attach the cultured marble to the cement board. This will insure that you do not have colored shadows that show through the cultured marble.

Companion Articles: Steam Bath Unit Companies, Steam Bath Check Up, Steam Showers & Baths - Simply Soothing, Steam Room

Column B275

Steam Bath Unit Companies

Steam Generation Unit Companies

There are quite a few companies that make steam generation units. It is actually quite surprising to me in as much as you normally don't see many of these things in most houses. The units come in all sorts of shapes and sizes and design.

One of the things you should be looking at is the actual design. Here is what I would be interested in knowing:

  • How close does the unit need to be to the shower area?

  • Can the unit be installed in a nearby area so that if and when it needs to be serviced, it is easy to access the steam unit?
  • If you have hard water, how will mineral deposits be removed from the heating coils or plates?
  • How many steam heads are required for different sized shower areas? Will one head be enough for your shower or does it require two or more?
  • How long does it take for steam to begin to flow from the head once the unit has been turned on?

I am familiar with one of the manufacturers of the steam units. It is a low pressure steam system that has a unique back flush design feature. After each use, the Roma units back flush and clean out the tanks. The Roma units also feature stainless steel heating plates that will not corrode. I happen to be a big fan of stainless steel - especially when you are dealing with water and rust!

Here are the steam generation unit companies. Call them for literature and see what you think of these wonderful devices.

  • Accurate Industries

  • Almost Heaven
  • Amerec Products
  • Crane Plumbing
  • Jacuzzi
  • Kohler Co.
  • Pacific Sauna & Steam
  • Roma Steam Baths
  • Sauna Craft
  • Steamist

Companion Articles: Steam Room Construction Tips, Steam Bath Check Up, Steam Showers & Baths - Simply Soothing

Column B275

Steam Bath Check Up

Soothing steam ...... Can you feel it? Have you ever been in a steam room in a health club or gym? I can tell you that it is a wonderful experience, especially on a cold winter day. Of course, if you live in the Southern USA or in Cincinnati, Ohio during the summer of 1999, then you don't need a steam generation unit. Simply walk outside into the heat and humidity on a blazing summer's day! You get to sweat for free.

Critical Steps

I have gotten complaints from homeowners and readers who have said that their steam units don't work and are useless. When you start asking questions, you usually find out quickly that just one thing is wrong. Everything has to be just right for a steam unit to work properly. Here are some critical points you must do:

  • Have you purchased the right sized unit? Size is a function of the cubic foot area of the steam enclosure AND the wall surface material/construction.

  • There is no exposed drywall or plaster in the steam room area.
  • The door or opening from the shower area to the bathroom fits fairly tightly.
  • There is no open space above the door. In other words, when the door is closed, no air can escape from the steam enclosure.
  • The steam head has been placed the correct distance up from the floor.

These are just a few of the steps you must take to make sure a steam generation unit produces and maintains a luxurious amount of steam in your shower or steam room. It isn't hard to follow the steps, you just need to make sure all of them are indeed followed!

I always highly recommend that you get a copy of the written installation instructions before you have one of these installed. Don't assume that the plumber or the builder knows how they are installed! Not only that, each unit may have slightly different requirements.

Close is Better

The steam generation units can be placed a distance away from the steam room or shower area - often up to 20 feet, but the closer you keep it to the shower area, the better off you will be.

Plumbing Connections

Installing a steam generation unit is not really too tough. The fitting and piping requirements are fairly standard. You must pay attention to the types of materials that are suggested. When the manufacturer says to use a brass pipe nipple, DON'T use a galvanized iron one instead! Do exactly what you are told to do. It is very possible that you will need to get supplies from a real plumbing supply house, not a home center.

Read the Enclosed Papers

Just about every steam generation unit comes with trouble-shooting and maintenance instructions. Take a few minutes and read those. It can save you lots of time in the future. I like to save all paperwork for these items and store them near the unit. Use a zip-lock plastic freezer bag for storage purposes and tape or attach this bag to the wall near the steam generation unit. Do not tape the bag to the unit as it may interfere with ventilation, plumbing or electrical connections. Use common sense.

Hard Water

If you know you have hard water, you need to prepare yourself for periodic cleaning and maintenance. Mineral deposits will form on the inside of the unit and will cause problems if you don't clean the heating elements and other parts as required.

Keep in mind that white vinegar does an excellent job of dissolving these mineral deposits. It doesn't smell great but it really works. Thick deposits may require overnight soaking. In extreme cases you may have to soak items for days and change the vinegar solution every 12 hours or so. Simply follow recommendations provided by the manufacturer.

Be sure to use a timer with the units, especially if you have health problems! Check with your doctor before using one.

Companion Articles: Steam Room Construction Tips, Steam Bath Unit Companies, Steam Showers & Baths - Simply Soothing

Column B275

Take a Tour of Your Toilet

Take a Tour of Your Toilet

Toilet problems are frustrating. To make matters worse, when the average person peers inside a toilet tank, they recoil in fright. Not from the water, but from the jumbled assortment of parts and such.

While seemingly complex, the working parts of a toilet are somewhat simple. There are really only three main components:

  • The Fill Valve or Ball Cock
  • The Flapper Valve
  • The Overflow Tube

The Fill Valve is the automatic device that allows water to rush into the tank each time the toilet is flushed. A float triggers this action. As soon as the water level in the tanks drops, the float drops and the fill valve opens. Old fashioned fill valves had a cumbersome float ball on an arm. They are still made! They can be tough to adjust and over time the float can become waterlogged. Newer fill valves have sleek designs that disguise the float. The good news is that these fill valves are inexpensive and simple to install.

how a toilet works video thumbnail

Click here to watch a video on how a toilet works.


The fill valve also supplies water to the bowl as the tank refills. It does this via a small flexible water tube that runs from the base of the valve to the top of the overflow tube.

The flapper device controls the flow of water from the tank into the toilet bowl. When operating perfectly, the flapper rises up when you turn the flush handle. It actually stays in the open position for 5 to 10 seconds and then drops back down stopping the flushing action and allowing the water level in the tank to rise again.

Flappers that stick open cause the water to run and run. A flapper may stick because of sand or grit on its hinge. The chain that lifts the flapper may be old and worn out. In any case, they are easy to replace.

The overflow tube is a fixed device in the center of the tank. It serves two functions. After each flush, water flows into this tube to fill the bowl with water as the tank refills. The tube also acts as an emergency water escape route in case the fill valve does not shut off. Water can flow into the tube and down into the bowl until such time as you shut off the water.

Emergency Shutoff!

This has happened to everyone: You flush the toilet and water doesn't leave the bowl. Water starts to creep up the toilet bowl rim! A huge, gross mess is going to happen if you don't stop the flow of the water into the bowl! You can do this if you react quickly. Remove the tank lid and immediately place your hand into the tank and force the flapper valve back down onto the seat. This will stop tank water from entering the bowl. Water may still flow into the bowl from the water supply tubing that feeds into the overflow tube. This is a minor amount of water in most cases, but if you feel the bowl is about to overflow, then pull the little water pipe out of the overflow tube and redirect its flow into the tank. Don't worry about sticking your hand in the tank water. It is pure and fresh! It is the same water you drink each day or use to brush your teeth! The sidewalls of the tank often get stained over time from dissolved minerals in the water. This is why the water appears yucky even though it is fresh.

In fact, if you wake up one day and your local water main has broken leaving you high and dry, you actually do have water! Dip some water from the tank to wash your face or brush your teeth. I know this sounds crazy, but the water is perfectly fine.

Give it a Try

Take the lid off your toilet tank and putter around. See how things work. Try to force the flapper down. Be prepared!

Phantom Flusher

CLICK HERE to read how to Catch The Phantom Flusher


Column B297

15 Toilet Tune Ups

Toilets need regular maintenance. They are probably one of the most frequently used mechanical objects found in the residential home. They rank right up there with the refrigerator door hinges, kitchen faucet and television channel control knob with respect to number of uses each day. If your toilet is making you crazy, here are some things you can do that will make it work like new.

1. The Night Moaner

As people retire for the night to sleep, water pressure in municipal water systems begins to rise. This increase in pressure can be transferred to a worn ball cock valve and cause it to vibrate ever so slightly. This is the moaning you are hearing. Get a new valve.

2. Ghost Flushing

Does your toilet tank start to fill on its own? In other words, run for 5 or 10 seconds and then stop? This can almost always be traced to one of two problems: poorly fitting/leaking flapper and/or a refill tube that is too long. A worn flapper or corroded flapper seat will cause water to slowly drain from the tank into the toilet bowl. After an hour or two the water level drops enough and the fill valve kicks on. This same thing can happen if the flexible water line that runs from the base of the fill valve to the inside of the overflow tube is too long. This will siphon water from the tank. New fill valves come with a special clip that holds the end of the water line up and ensures that water will stay in the tank where it belongs.

3. Multiple Flushes

Do you flush your toilet and get two for the price of one? If so, the water level in the tank may be too high. Adjust the float control on the fill valve and try to drop the water level in the toilet tank one inch or so. Do a trial and error test to get the water level just right.

4. Partial Flushes

You flush the toilet and get cheated. The flapper valve can get waterlogged over time and flop down too quickly. The chain that connects between the flapper valve and the flush handle may be too tight. Adjust it one link at a time. The water level in the toilet tank may be too low. Adjust the fill valve so that more water enters the tank. You may have a first generation low flush toilet. If so, you are toast! These toilets have basic design flaws. They simply don't have enough energy to flush the toilet bowl correctly. If you have one of these 1.6 gallon flush nightmares, hold on, help might be on the way. It appears that the 1992 law requiring these bad boys might be repealed. If this happens, 3.5 gallon toilets may come back.

5. Whistle While it Works

As the toilet tank fills and is almost done, it makes all sorts of high pitched noise, right? You probably have an old fashioned ball cock fill valve with a float ball on an arm. These valves close slowly as the water level rises and the valve starts to vibrate as this happens. The solution is a new fill valve. These new valves stay open completely until the toilet tank is filled. The shut off is instantaneous.

6. Tough Toilet Bowl Stains

Do you have stains in your toilet bowl that just won't budge? If so, DON'T use abrasive cleaners! Use white vinegar or muriatic acid to clean the bowl. White vinegar is safer, but takes longer. Muriatic acid can clean a toilet bowl within minutes. Be careful!

7. Toilet Bowl Water Level Drops

After you walk away from the toilet and the tank has filled, does the water level mysteriously drop? If so, two things can be wrong. The toilet may be partially clogged. The clog can actually cause a siphon and pull water from the bowl. The other possibility is more severe. There can actually be a crack or small defect in the colon of the toilet. This is the channel that water passes through to get to the drain pipe. A colon crack or defect means it is time for a new toilet.

8. Low Energy Flushes

If you have hard water, the water release holes in the lip of the bowl my be clogged with hard water deposits. Pour a quart of muriatic acid down the overflow tube in the tank to clean these holes. You should hear a sizzling sound if the deposits are heavy. The acid will not harm the toilet. You can also try to open these holes with a toothpick if you do not have acid.

9. Shaking Toilet

Does your toilet rock when you sit on it? If so, the grout between the toilet and the floor needs to be replaced. Grout should be used instead of caulk. Caulk is flexible and will allow toilet movement.

10. Water Leaks at Base of Toilet

If you see water leaking around the base of the toilet or in the room below when it is flushed, the wax gasket between the toilet and the drain pipe flange has to be changed. This is not a DIY friendly task although the TV shows make it seem so! If you tackle this, make sure you have access to another toilet as you may be opening a can of worms!

11. Shut Off Valve Leaks After You Service the Toilet

After you have turned the water on to the toilet, the pesky little valve develops a leak around the handle. To solve this problem, use an adjustable wrench to tighten the outer packing nut that surrounds the valve stem. Just turn it clockwise a little bit to stop the leak.

12. Water Supply Tube Leaks

The supply tube between the toilet tank and the floor or wall leaks at one or both ends. You need to use a flexible tube and make sure that it is entering the valve at a 90 degree angle. If not, the compression ring will leak for sure! Tighten the nut at the toilet first and then make sure the supply tube enters the valve at a 90 degree angle. Then, tighten the compression nut at the valve.

13. Save Water With Brick?

Installing brick in a toilet tank to displace water may help save a little water, but it often causes greater problems. Drop one while installing it, and you will crack the tank. The brick can also interfere with the operation of the moving parts in the tank.

14. Loose Toilet Seats

Inexpensive toilets seats often have inferior tightening bolts. Buy a quality toilet seat and follow the instructions to get a tight fit.

15. Slow or Noisy Refill Water Flow

If the water entering the toilet enters slowly, the shut off valve may be only partially open. Check to make sure this valve is open all the way. If water rushes into a toilet tank and you think it is going to explode, try to adjust the shut off valve so that the water flow is more controlled.

Column B297

Electronic and Magnetic Home Water Treatment

Electronic and Magnetic Water Treatment

Magnets seem to be the rage lately. Some people claim they can promote rapid healing of injured tissue. Other people claim they can make hard water soft. There are believers and non-believers of both statements. The Water Quality Association has formed a special task force to come to some sort of conclusion with regard to magnets and water. Their report is due by mid to end of 2001. I can't wait to see the results.

An engineer friend of mine tested a unit one year ago. His water was very hard - nearly 13 grains. After installing the unit according to manufacturers directions, he could not tell a difference in water quality. On the other hand, a friend of mine in Colorado recently installed one. Here is what she had to say after the device was working for about three weeks: "...It's been installed a few weeks now. The reaction from my friend who hated our un-softened water was that it was better. I'm seeing essentially no salt residue from water spots on top of the coffee pot, faucet handles and humidity tray for orchids."

These two bits of data are consistent with what many say. A system may work one place but not another. Water chemistry, water flow rates through the piping, water hardness and temperature all affect the performance of a certain device.

The U. S. Department of Energy publishes periodic Technology Alerts. They happen to have one about magnetic and electronic water softeners on the Internet. It is an extremely well written and detailed report on this topic. IF you don't have Internet access, then you MUST go to a friend's house or to the library to get this report. It is definitely worth the trouble. Pay particular attention to the text in the Abstract. Read it twice! Then read the 7th paragraph in the first section "About the Technology".

In 2001 the U.S. Army Corps of Engineers published Public Works Technical Bulletin 420-49-34 titled Magnetic Water Treatment. It's available on the web in PDF format. The purpose of this bulletin is "to transmit information on a demonstration of magnetic and electronic devices marketed as effective alternatives for scale prevention in water systems."

Certified Water Softener Manufacturers

The Water Quality Association (WQA) has a Gold Seal program where manufacturers submit products for independent testing. Those that pass deliver top performance. Be sure to buy a softener that has the WQA Gold Seal! To find a list of these manufacturers, go to the WQA website and click on Product Certification.

Column B310

Traditional Water Softeners vs. Magnetic Water Softeners

Hard water can really be a nuisance. If you have exceptionally hard water, scale buildup can cause premature failure of water heaters, water supply lines and significant water spotting problems around the house wherever water dries and leaves the water soluble minerals behind.

Certain parts of the United States have naturally occurring soft water, but they are by far in the minority. Many, many folks in the USA have hard water to one degree or another.

Traditional Timers

A vast majority of water softeners rely on electricity to operate. The primary mechanism that consumes electricity is the timer that starts the periodic regeneration process. Water softeners operate by ion exchange. They pull the hard water chemicals out of the water and replace them with salt ions. After so many gallons of water flow through the softener, the resin bed fills with hard water minerals. The timer kicks on at a predetermined time and the water softener back flushes all of the hard water chemicals out and fills the resin bed with new salt ions.

A Waste Potential

Traditional timers can cause problems. What happens if the resin bed is only 60 percent filled with hard water chemicals? If the system regenerates when the timer turns on, then you waste electricity and salt. A better option might be a softener that does not use electricity and only regenerates when the resin bed needs to be back flushed. The Kinetico Company makes a water softener that does just this. It is water powered. This technology makes it an on-demand system. It creates soft water as you need it and for how long you need it. It has the capability to make soft water indefinitely as long as you supply the unit with the necessary salt.

Freedom From Timers

Traditional softeners require you to guess your water usage. You may be lucky and guess right. What happens if you need to use more water than usual? Well, if you don't re-calibrate the softener, then you will not have soft water.

The Kinetico unit solves this problem with a dual tank design. As one tank fills with hard water deposits, the second tank takes over as the first one regenerates. This allows you to use as much water as you want with little or no worry of ever running out of soft water.

Magnetic Units

Are you interested in buying a magnetic water softening unit? If so, keep several things in mind. These devices do not remove anything from the water. High energy electrical fields that surround water lines after the magnets have treated the water may reverse the effects of the magnets. This portion of the water treatment field is currently in the midst of a heated controversy. Personally I don't know who to believe. I tend to think that there is some truth on both sides. This is based upon actual user feedback I have received. Some devices work for some people and other devices seem to do nothing.

The Water Quality Association (WQA) should have a good answer by the end of 2001. Expect a fair report to be issued on the performance of residential magnetic and electronic water softening devices.

We already know that industrial and commercial magnetic devices work. But, the same can't be said for all household devices. It is my hope that the WQA's report uncovers just what is required to make a magnetic system work on just about any residential system. There is no doubt that many people would be interested as long as they could count on 24/7 performance.

Related Column - Magnetic Water Softeners

Column B310

Simple Toilet Tips – How Toilets Work

The toilet is quite possibly the most frequently used mechanical device in most homes. If you have a spouse and children I can say this for a fact. Think about it. How many times a day is a toilet flushed in your home? The only other device that gets as much use might be a lavatory faucet or a kitchen faucet. This heavy use means that the odds of breakdown or problems are great. Fortunately the mechanical devices in most toilets are simple, time tested and very reliable.

When Problems Happen

When a toilet problem does happen, it can be minor or major. Flushing problems are often more irritating than catastrophic, although a clog can have catastrophic results IF the toilet continues to run while the clog occurs! For this reason, it is always a good idea to watch the flushing action to make sure water and waste is moving on its way down through the drainage system.

Click here to watch a video on how a toilet works.


Don't Panic

To avoid problems before they happen and panic sets in, it is a good idea to learn how a toilet works. When you get a chance, remove the lid from your toilet tank and lay it flat on the floor. Lids tilted against walls have a tendency to slide and then break.

Note how the toilet works. The decorative handle on the outside of the tank is attached to a lever. At the end of the lever is a chain that connects to a rubber flapper valve. When you activate the handle, the lever lifts the chain and the flapper valve magically begins to float. With the flapper valve open the water within the tank can flood down into the toilet bowl. This rushing water is what flushes the toilet. Once about 80 percent of the water has left the tank, the flapper valve drops on its own to stop the flow of water into the tank. But as you watch, note that water is still running into the bowl. This water is coming from the fill valve that is now refilling the tank. As it fills the tank, it also sends water via a small tube down the overflow tube that leads to the bowl. This water flowing into the overflow tube is necessary, as it is the water that brings the toilet bowl water up to the filled level. Once the tank water reaches the fill line the fill valve should stop the flow of water into the tank and the bowl. It sounds complicated, but in reality it is very simple.

By observing a working toilet, you will now be mentally equipped to handle problems as they occur.

Parts are Cheap

You can replace all of the moving and mechanical parts inside a toilet tank for under $15 in most cases. What's more, you can get high quality parts for this small investment. The biggest challenge in removing the old parts is shutting off the water to the tank. If the valve under the toilet does not work, you need to shut off all the water to the house. If you have an opportunity to replace valves anywhere in the house, be sure to install ball valves. Ball valves cost maybe $2 more than a regular valve with a washer but they are far more reliable and rarely do they not work.

Backup Plan

Don't start working on a toilet at 9:00 pm. Don't do it if you are a rookie and don't have a second toilet in the house. What happens if something goes wrong? If you need to call a professional to bail you out, will they be available? Keep all of these things in mind before you start!

The Five Gallon Bucket

Do you need to flush the toilet without using toilet tank water? It can be done! Simply fill a 5 gallon bucket with water and pour it into the bowl. You get the same results as if you had tripped the handle. It is a nice trick to know.

Need a Special Toilet - that Flushes Up!

CLICK or TAP HERE to read my column on a Toilet That Flushes Up!

Column B332

Solder Tips for Copper Tubing

solder copper

How to solder copper pipe - You do this when you melt the solid solder and allow it to flow into the tiny gap between the tubing and the fitting. The red arrows point to the silver-colored solder. Copyright 2018 Tim Carter

"The biggest mistake a rookie makes soldering copper is they allow the heat of the torch to melt the solder. Do NOT do that."

How to Solder Copper Pipe Checklist

  • The copper tubing and fittings must be clean
  • Stir up the flux paste
  • Use lead-free solder
  • Copper must be heated so it melts the solder NOT the torch flame
  • Watch the following video:


How To Solder Copper Pipe - MOST IMPORTANT TIP OF ALL

The biggest mistake a rookie makes soldering copper is they allow the heat of the torch to melt the solder. Do NOT do that. You must heat the copper tubing and fitting for about ten or fifteen seconds before touching the solder wire to the hot copper.

The HOT copper will melt the solder, not the torch.

To solder copper pipe you must heat the copper pipe and the fitting to be soldered to a sufficient temperature. When the copper is hot enough, it will actually draw the solder into the joint by capillary attraction. Believe it or not, the solder will actually flow uphill.

What is the Best Torch to Use?

A simple propane torch that uses screw-on bottles will adequately solder pipe up to 3/4 inch in diameter.

propane map torch kit

This is a great torch kit. This one is MAP gas which burns hotter than propane. A regular propane tank will fit the torch. CLICK on the photo to have this delivered to your home in days. WATCH the video of it below.

Plumbers generally use acetylene torches for two reasons. The acetylene burns hotter than propane allowing for faster solder times. The acetylene is available in larger tanks which attach to handy hoses and lightweight torches. If you want acetylene, you just need to go to a large plumbing supply house or a place that services welders.

What Types of Solder Can I Buy?

Solder, which is available in leaded and no-lead versions, attaches to the pipe on a molecular level.

50 50 solder

This is solder that has a 50 percent lead content. Look at the numbers on the end of the spool. Do NOT use this solder for water pipes for drinking water. CLICK THIS PHOTO to buy the solder for use in leaded glass, soldering wires, and other projects.

how to solder copper pipe

This is lead-free solder. Use THIS SOLDER for a copper pipe that drinking water passes through. CLICK THE PHOTO NOW to have it delivered to your home in days.

How Does Solder Work?

Solder works by bonding to the copper pipe when it's heated. It's very similar to how two pieces of steel get welded together.

The surface of the soldered joint actually becomes an alloy where the copper and solder intermix.

Why Does the Copper Need to Be Clean?

The copper pipe needs to be clean so the atoms of copper can easily bond with the atoms of molten solder. The solder WILL NOT BOND if the copper is oxidized or dirty.

For this to happen, the copper must be very clean and free of oxidation. You can clean copper pipe in any number of ways. You can use coarse steel wool, sandpaper and/or a wire brush. Special round wire brushes come in a variety of sizes to clean the inside of copper fittings and valves. Simply twist the brushes or pipe to clean them. Even if you purchase a new copper pipe, it should also be cleaned. You only need to brighten the area which is to receive solder.

Why Do I Need to Use Flux?

Flux is a chemical which helps you solder. Flux prevents the copper from oxidizing as you heat the copper with the torch.

It actually finishes up the cleaning job you started with the sandpaper and brushes. In addition, it prevents the pipe from oxidizing as you heat it. You can solder without flux, but it is really difficult! Flux is applied to both the pipe and the fitting with a handy miniature paint brush. You do not need massive amounts to be effective. Besides, once you start to heat the pipe, 90 percent of it boils off and evaporates.

What are the Different Types of Solder?

Solder is available in generally three types: 50 percent lead/50 percent tin; 95 percent tin-antimony/5 percent lead; and lead-free solder.

Any water supply pipe should be soldered with solder that contains no more than 5 percent lead. If possible, use the lead-free solder. The 50 percent lead solder is used for copper drain lines. It melts at a lower temperature and is able to bridge larger gaps as it cools. This is handy when working with large diameter (up to 4 inches!) copper pipe and fittings. You MUST pay attention when you buy solder. The 1 pound rolls look very much alike. Carefully look at the label as you might purchase the wrong one.

How Do You Light a Torch?

Plumbing torches can be lit with matches, lighters or preferably a flint striker. Some torches have built-in igniters. Watch this video:

CLICK HERE to purchase the torch you see me use in the above video.

Matches and lighters can be dangerous, as you might not put them out. A flint striker makes sparks which ignite the flame. Plus, a single flint in a striker can last a homeowner 10 years or more! Flame temperature is important. You need to set the flame on medium or high to generate enough heat to melt solder. If your flame is adjusted correctly, it will burn different shades of blue. You will notice at the center of the flame a darker blue section that comes to a point. This is the hottest part of the flame. You apply this part of the flame to the copper pipe.

How Do I Heat the Copper Pipe?

Don't be afraid to heat both sides of the pipe. Rotate the torch around the joint for even heat distribution. When I use my acetylene torch and I am soldering 1/2 inch pipe, I can usually heat the pipe to the correct temperature in 10 seconds or less. A propane torch may take 15 to 20 seconds.

How Do I Prevent a Fire When Using the Torch?

You prevent a fire by using a thin piece of sheet metal as a heat shield. Place the shield in between the copper tubing and anything flammable.

Always look beyond the pipe. Extremely hot temperatures extend out beyond the visible portions of the flame.

You can easily scorch lumber or wires. If you are soldering near old lumber or in joist spaces near vertical walls, you can start your house on fire easily. Be careful and use flame shields. These are flame resistant fabrics or simple pieces of sheet metal which absorb and/or deflect the heat.

Always have a 5-gallon bucket of water handy in case you do start a fire. If you have water still on in the house and can have a charged garden hose right next to you, that's the best thing.


solder video

Click here to watch a video on soldering copper pipes and fittings.


How Do I Apply the Solder?

As you heat the pipe and fitting you will see the flux begin to boil and evaporate. Once the flux stops boiling the pipe is generally hot enough to solder. Move the torch away and touch the solder to the pipe.

It may take 2 to 3 seconds for the solder to melt. If the pipe is horizontal, apply the solder to the top of the pipe. The solder will roll around in an instant.

If you have done the job right, a droplet of solder will be at the bottom of the joint. You can flick this molten solder away with an old rag.

Blowing on the joint will allow it to cool. It will be hot, but rub the joint quickly with an old rag to remove flux residue. This will also polish the solder. Check the joint closely to see if you see a silver colored band around the entire joint. If so, your first solder joint may be perfect. As I would say on a job, "Another quality installation!"

Column B353

Ice Makers – Connection Photos

Compression and Flare Fitting Photos

Here are some photos that may help you visualize the way you hook an icemaker up. Visit a REAL plumbing supply house or an old hardware store to get really good parts and advice. They will show you how all of the parts fit together. You don't always get this service at the big box home improvement stores!

This photo shows the 1/4 inch soft copper line coming down from a 1/2 inch copper tube. In between is a brass adapter that screws into a 1/2 inch female copper adapter - you can see the white Teflon tape at this joint. The 1/4 inch tube connects to the brass adapter using a nut and a brass ferrule. The soft copper tube fits perfectly inside the ferrule - it resembles a ring on your finger. You can see those two parts just to the right of this line in the photo to the right. As you tighten the nut on the adapter, it compresses the brass ferrule to make a tight joint.


In this photo, there is a flare fitting coupling. This allows you to connect two pieces of soft copper to one another. The top of the fitting accepts a flared piece of copper. See the nut on the other end? As you tighten it, it makes a tight joint on the rounded machined face you see at the top of the fitting.


Assorted compression type fittings. The top & middle ones are toilet tubes. Bottom one is a Delta tube.

Column B353