DEAR TIM: I want to build a deluxe garden shed, but I have serious concerns about where to place the shed on my slightly sloping lot. The best location for the shed is under a giant maple tree. A traditional foundation system I feel would cut into far too many roots. Placing a concrete slab on the sloping ground is also somewhat of a challenge. What foundation system can I use that will cause the least stress to the tree and provide plenty of oxygen and moisture to the tree? How is it installed? Barbara H., Loveland, OH
DEAR BARBARA: Gosh! Maybe you should just come over to my house to see what I am doing. Believe it or not, I am in the midst of building a garden shed for my wife Kathy and I am facing the same set of challenges. Placing our shed under the maple tree in our back yard was important for many reasons. In fact, I had to obtain a zoning variance to build my shed because some of the tree's roots were in the way of my foundation.
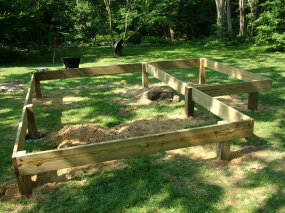
The vertical 6x6s at the corners and mid-span of the beams are the piers or columns. They are resting on concrete pads poured below the frost line in the soil. PHOTO CREDIT: Tim Carter
This giant maple tree and I faced off 19 years ago when I built my home. The one corner of the attached garage was only seven feet from this majestic tree that provides us with beauty, shade and abundant helicopter seeds. When the backhoe ripped into the ground to dig the garage's trench footer, giant roots were shredded. I thought Kathy was going to go into shock, and I must say, I was distressed as well. We followed the advice of a certified arborist and nursed the tree along. It is healthy now and there was no way I was going to risk the tree's well being with the planned shed.
I decided to use a traditional pier foundation system that is very common in many parts of the nation. A pier foundation is very different from a traditional foundation. Whereas a traditional foundation has a continuous-spread concrete footer that transfers the foundation wall load to the soil, a pier foundation has small square or circular pads of concrete located at strategic locations around the outer perimeter of the structure. Some larger structures need additional support pads inside the outer boundaries of the structure, but I doubt your small garden shed will require this.
Large diameter posts made from treated wood or steel rise up from these concrete pads and connect to the underside of the structure. In essence a structure with a pier foundation mimics a standard table with legs. By raising the structure up off the ground using this foundation system, air can still get to the soil and any water that runs across the soil can still get to all parts of the tree's root system.
If your shed is square or rectangular in shape, you may only have to dig four 16-inch diameter holes in the ground to support the entire structure. These holes would be located at the four corners of the structure. The posts that come up from the ground connect to horizontal beams that support the floor joists and exterior walls. If your soil strength is sufficient, the concrete that is poured at the bottom of the holes will easily support your shed for years to come.

This 6x6 has been notched to allow the weight of the beams to be supported by the wood, not nails or bolts. PHOTO CREDIT: Tim Carter
If you decide to use treated lumber for the vertical pier posts, make sure it is rated for direct burial in the ground. Not all treated lumber is the same. Some is rated for above-ground use only. Furthermore, you may want to talk with a local pest exterminator. I recently had to remove a treated-lumber play set and was shocked to discover extensive termite damage to one of the buried treated lumber posts. If chemicals are allowed to be used in the soil outside your home, they will readily diffuse into the loose soil that is backfilled around the wood posts.
I would also recommend that all lumber for the entire floor system of the shed be treated lumber. Many people do not realize you can purchase treated lumber plywood. When you use this plywood for the shed's floor, you don't have to worry about condensation and mold on the underside of the flooring that would quickly rot out regular wood flooring. If you bring in wet gardening tools, damp soil or if water blows into a door, it will be of no concern as it will not cause wood rot in the treated-flooring system.
If you have seen a traditional wood deck that sits four or more feet off the ground, you have seen a pier foundation system. A typical deck has two or three posts away from the house and these posts are connected to a beam. One end of the floor joists of the deck rest on top of the beam or are hung from the beam with special framing hardware. Often the other end of the floor joists are hung from a board that is attached to the house. Had the carpenters used additional posts and a beam near the house, the deck would sport a full-fledged pier foundation system.
Be sure you use the right nails, bolts and hardware with the treated lumber. The newer treated lumber requires hardware that has an extra-thick zinc coating to resist corrosion. Residential treated lumber has a different chemical composition that can cause rapid corrosion of traditional metal fasteners.
Column 576

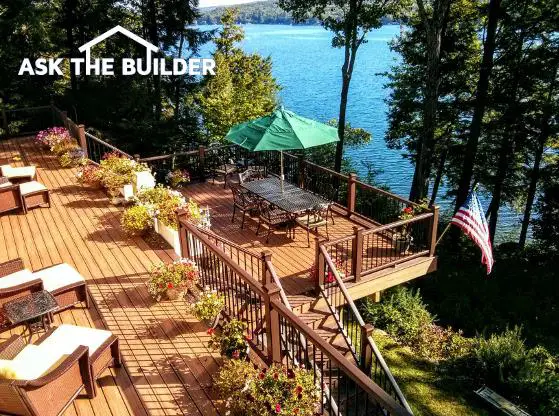 Decks are big business. I mean BIG business. I have built many, many decks in my career, but never gave it much thought as to how people became disenchanted with the periodic maintenance. Not only that, some areas of the country (South and Southwest) have harsh weather conditions that are brutal for wood and wood sealants. It only makes sense that someone would try to produce an alternative decking material that requires no maintenance.