Slabjacking Tips

Slabjacking

The first challenge you face is getting an experienced slabjacker. An experienced slabjacker can usually determine why a slab settled. He/she can also tell you if the settling is complete. Remember, some settling continues for years!

Make sure that you ask what is going to be pumped under your slab. Avoid slabjackers who simply use topsoil or drilling mud. These materials just aren't the best products. Professional slabjackers use different mixtures and combinations of materials depending upon the job. BUT, these mixtures always contain Portland cement. The cement gives the grout strength after it gets hard and prevents erosion of the grout.

Ask the slabjackers if they will collect and save the dust from the drill holes. Request that this dust be mixed with the material used to plug the drill holes at the end of the lift. By doing this, there is a good chance that the color of the holes will closely match that of the slab. Failure to do this will result in a polka dot slab.

As usual, ask for copies of Worker's Compensation and liability insurance certificates when you receive your bid or quotation. I know, I know, it says right on their contract that they have this coverage. Well, do they? A professional will not hesitate to give you copies of these certificates.

Why not call the Better Business Bureau? Ask if there are any unresolved complaints. If so, consider finding another slabjacker. You may pay slightly more, but it will be well worth it in the long run.

Reinforcing Steel in Concrete

Reinforcing Steel

Steel adds enormous strength to concrete. Concrete is strong in compression (squeezing) but weak in tension (pulling apart). You can pull concrete apart quite easily. For example, let's pour a slab on fill dirt. The fill settles and a hollow spot develops under the slab. Now let's drive my truck across the slab. The concrete stretches (pulls apart) to fill this hollow spot.

Put steel into the slab and it may take a tank to create the same effect. The reason is simple. The typical steel you buy at the supply house is almost always grade 40 steel. This means that it takes 40,000 pounds per square inch (PSI) of pulling pressure to tear the steel apart. Your slab, on the other hand, has only 1/10th the strength in tension as compression. Typical residential outdoor concrete is supposed to be 4,000 PSI in compression. This means it only takes 400 PSI to crack or pull it apart. Adding enough reinforcing steel can make the concrete 100 times stronger than without the steel!

I always had fantastic results by constructing a grid of steel in my slabs. By placing the steel bars two feet on center in both directions, I created a cage of steel. This steel must be surrounded by concrete. If you simply place it on the dirt, gravel or soil it will be worthless. The tension forces in a slab are concentrated in the lower third of the slab, so you should place the steel at the top of this boundary.

If you want to get fancy, you can purchase little supports that suspend the steel above your fill material. I usually used small broken pieces of brick or concrete block to support the steel. If your slab is larger than the length of the steel bars, be sure to overlap the steel at least two feet and tie the steel together with thin wire.

Concrete Lifting

Lifting Concrete

The technology to lift concrete slabs has been around for many years. Highway slabs, airport runways, factory floors, etc. have been successfully raised for the past 40 years. However, until recently, the companies that did this work seemed to completely ignore the residential market. Now, in most cities, you can locate an individual who can magically raise a sunken or tilted concrete slab, floor or set of steps.

How is it Done?

The technology to lift concrete is centuries old. It is the same technology that is used to raise your car on a hydraulic lift at the car repair garage. Holes are drilled through the tilted concrete, usually two inches in diameter. A mixture of cement, sand, fly ash and water is then pumped into these holes under pressure.

This mixture has the consistency of a thick mortar. As it begins to flow beneath the slab, it exerts an equal pressure on every square inch of the concrete. Thus, if the pump produces just 50 to 100 pounds per square inch pressure (which isn't much) it can easily raise the slab.

You see, a concrete slab that is four inches thick only weighs 1/3 pound per square inch! Now do you see why it is so easy to raise a sunken or tilted slab?

Why did the Concrete Sink?

Good question!! There are all kinds of reasons. Usually, concrete slabs around your house tilt or sink because they were placed on fill dirt that was not compacted. This can happen just about anywhere.

For example, what about a sidewalk that is next to your foundation? How about a garage slab? What about a portion of a driveway or sidewalk that crosses a utility trench (one that contains a water, sewer, electric or phone line?) These situations almost always involve an excavation where dirt may have been simply dumped in after the work was complete.

Herein lies the problem. Buildings are built on dirt all the time. If done correctly, a house built on dirt will not settle or develop structural problems. The trick is to build the house on undisturbed dirt or soil that has good strength, or build it on compacted dirt that will support the structure.

Compaction

How many times have you dug a hole and tried to put the same dirt back in? Have you ever been able to do it without much work? I didn't think so. When you dig dirt, you fluff it. That is the technical term. In other words, you introduce much more air space around each clump or dirt particle than it had in the ground.

So, if you or your builder simply dumps dirt into a hole, trench or alongside a foundation, it will always have too much air in it.

The process of compacting dirt simply removes this excess air. Many years ago, shepherds noted that the paths that sheep walked on were very firm. They figured out that the shape of the sheep's hooves did an excellent job of compacting the soil on the path. That is why that big round roller that you see behind a bulldozer is called a sheep's foot roller!

Mother Nature will compact dirt. But, she often takes a while to do it. The sewer trench in my front yard continues to settle even after 10 years. Gravity and rainwater continue to force out the air I dumped into the trench.

This type of settlement not only causes concrete to tilt inwards towards the foundation, but it also causes a majority of basement leak problems. People generally don't recognize the the slow process of compaction as performed by Mother Nature.

Concrete Patching, Additives & Epoxies

Expensive Stuff

Concrete is made from basic, inexpensive raw materials. However, transportation and placement of these materials is costly and labor intensive. Because of its high cost and durability, people expect concrete to last for a long time. This is not an unreasonable expectation, as I have seen concrete 50 plus years old that is in very good shape.

But sometimes things go wrong. Your concrete drive, sidewalk or patio may experience a popout (depression caused by a piece of stone that explodes for numerous reasons). Those living in cold climates may experience spalling, a condition where the top surface of the concrete peels off. A corner of a concrete step may crack and fall off due to a handrail post expanding (rust and/or freezing expansion). In any event, a patch can be employed rather than replacing an entire segment of the concrete.

Challenging Task

I have seen numerous attempts at patching concrete. The majority of them have failed miserably. There are many reasons for patch failure. I'll try to cover some of the most persistent causes.

Concrete, in its original form (when first mixed) sticks together because of the cement. When the cement is mixed with water, a chemical reaction begins that is really pretty neat. Very small crystals begin to grow. These crystals interlock with one another and lock onto the pieces of clean sand and gravel. Also, when concrete is mixed, there is usually lots of extra water around to help keep the crystals growing. And grow they do, as the crystal growth slows down but can continue for years.

However, when patching, these two conditions are not always present. The area to be patched may be dirty and bone dry! If this is the case, there is a great chance that the patch will fail.

Water, water everywhere...

Remember when I spoke above of the growing crystals? The same thing happens, to a large degree, with many concrete patching compounds. They also need water for their crystals to grow.

Many people forget that concrete can and does absorb water. You can demonstrate this easily by getting on your hands and knees. Do this and place a drop of water on a piece of concrete. Observe what happens. The water, in almost all cases, readily soaks into the concrete surface.

When you place water based patching compounds on dry concrete, the concrete robs the water from the patching compound. No water, no crystals. No crystals, no bond. It is that simple.

Dirt also gets in the way as well. If dirt blocks the crystals from bonding to the concrete to be patched, all that happens is that the crystals bond to the dirt, not the old concrete.

Additives / Bonding Agents

To improve the chances of a patch sticking to old concrete, there are two categories of materials that you should consider. One category is additives and the other is bonding agents. They work towards the same goal, but they do it very differently.

Additives are chemicals or compounds such as rubber, vinyls, acrylics and different polymers that are sometimes added to portland cement mixtures. All they do is simply make the concrete mixture stickier. These compounds can be in a dry form premixed with a patching compound, or a wet milky liquid that you add to your patching compound. In either case, they work quite well when applied to a clean surface.

When using concrete patching compounds that contain additives, be sure to follow the instructions carefully. Some of these compounds must be applied to dry concrete surfaces, while others instruct you to wet the area to be patched. You must pay attention!

Bonding agents are glues that are applied to the old or damaged concrete surface that is going to receive the patch. These are almost always liquid compounds that you simply brush onto the clean, dust free area to be patched.

Once again, you must follow directions to the letter to achieve the best results. It is possible to use both compounds to maximize your chances of success. In other words, you can purchase a patching compound that contains additives - these are usually labeled as containing vinyl or acrylic,etc. - and use it in conjunction with a bonding agent. Always check the labeling to make sure the materials are compatible.

Epoxies

If you really want to go all out on your patching project, consider epoxies. These are no different than regular epoxy. You simply mix equal parts of a resin and a hardener together, often with a sand aggregate. You apply it and BINGO, super patch! The problem with some epoxies however, is coloration. You may not be really excited about the finished color. Some are white, beige, and very light grey. In contrast, regular Portland cement patching compounds dry to a medium grey.

The Old Stand By

Guess what? You can use just plain cement, sand and sometimes pea gravel to patch that hole. If done properly (50 percent cement - 50 percent sand and/or gravel), your patch will perform just fine.

Concrete Repair Products Manufacturers

Manufacturers of Concrete Patch Products

Some of the manufacturers, besides making great products, also have very informative product literature. For example, the Quikrete Company has a book that may interest you. It is called Build and Repair with Concrete. The Portland Cement Association (www.cement.org) also has a huge amount of excellent literature on concrete. Go to the bookstore on their web site. Many of the publications are available for free download.

At the same time, consider ordering a book called The Homeowner's Guide to Building with Concrete, Brick & Stone. This is a great book that covers building new masonry projects as well as maintenance and repair. No homeowner should be without this book!

  • Abatron, Inc.
    • Abocrete - concrete repair product
      Aboweld - epoxy repair compound
      Abocoat - concrete coating product
  • Quikrete Companies
    • Vinyl patching compounds, bonding adhesives, concrete acrylic fortifiers, concrete cleaners (acid free), quick setting cement & more.
  • Bonsal Sakrete Concrete
    • Complete line of concrete patching compounds and repair/ maintenance products.
  • Tamms Industries Company
    • Concrete repair admixtures, bonding agents, and sealers.

Other companies who make concrete repair products:

    • Ardex Engineered Cement
    • AVM Industries
    • DAP
    • Kryton Intl.
    • Maxxon Corp.
    • Quality Systems Inc. (QSI)
    • Sinak Corp.
    • Sto Corp.
    • United Gilsonite Laboratories
    • White Lightning Products Inc.
    • W R Meadows
    • Xypex Chemical Corp.


Are you one of the manufacturers listed above? Do you want your company name to be a link to your website? Click here.


Concrete Crack Repair Tips

concrete slab crack

Concrete Crack Repair | Here's a normal concrete shrinkage crack in a basement slab. One year after the slab is poured you can start to think about repairing it. You have several options. See below. Copyright 2019 Tim Carter

Concrete Crack Repair Tips - It's Detail Work

What Concrete Crack Repair Options Are Available?

You have several options to repair concrete cracks:

  • inject the crack with epoxy
  • fill it with gray ceramic tile grout
  • patch with expanding hydraulic cement

What is the Best Epoxy To Use?

The best epoxy for concrete crack repair, in my opinion, is made by PC Products.

concrete crack repair

This is the magic epoxy that fits into a regular caulk gun. I've used it with great success. CLICK on THE PHOTO NOW TO HAVE IT DELIVERED TO YOUR HOME.

As you might imagine, the prep work before installing your patching material is the most important part of the job. This is really true of most building and remodeling jobs.

Why is Prep Important?

The concrete surfaces need to be clean and free of all dust and anything else that will interfere with the bonding of the repair material to the sides of the crack.

Is Epoxy the Best Material for Concrete Crack Repair?

Epoxy is a fantastic repair material. Most are quite thick so the crack needs to be about 1/4-inch wide for you to be able to inject the epoxy with ease.

You can buy a durable epoxy that has a special mixing nozzle. I demonstrate it in this video:

What is the Caulk Gun in the Video?

Here's the fantastic caulk gun I used in the video. It's designed to give you lots of control when you squeeze the handle.

high quality caulk gun

My caulk gun is just like this one. Once you use a gun like this, you'll throw away the one you have that has the click notches. They're pieces of crap. CLICK on THE IMAGE NOW TO ORDER THIS GUN.

How Do You Repair Cracks and Holes on Flat Concrete?

You can use sanded ceramic tile grout or Portland cement mixed with fine or medium sand to repair large cracks and holes in concrete.

Most repairs on flat surfaces, such as a driveway, patio or sidewalk, consist of filling a depression or hole. The hole usually has tapered sides.

These tapered edges can cause real problems for the long term durability of the patch. The patching compounds thin out at these spots and can easily peel or fail. The result is an unsightly second area to patch the following month or year.

How Do You Prevent the Failure of the Patching Compound?

I have had the best success patching when I alter the sides of these holes. This can be done with either a chisel and a hammer or a saw equipped with a masonry blade.

NOTE: Always wear eye protection and/or ear protection when doing this type of work. Small pieces of concrete, dust, metal or masonry blades can cause severe eye injury. Hearing loss is a real threat as well.

The challenge is to remove the taper from the edges of the hole. If you are successful, the finished edges will be 1/8 inch thick or so instead of tapering to a feather edge.

SECRET TIP: Mix pure Portland cement with water to the consistency of latex paint. Brush this into the crack or the hole immediately before filling with the patching material. Do NOT allow the cement paint to dry. Work FAST.

How Do You Mix the Patching Materials?

Always follow directions. Most compounds should achieve the consistency of cake icing or a very thick gravy (don't eat these compounds!) Only mix enough compound that you can apply in 15 to 20 minutes.

How Do You Apply the Patching Material?

When using water-based repair compounds, wet the surface to be patched, if you are not using a bonding agent. If using a bonding agent follow directions carefully.

For deep repairs, consider installing hardened nails in the depression. For extra deep repairs, drill a 1/2 inch diameter hole and pound a 1/2 inch piece of reinforcing steel into the hole. These items will help hold the patch in place. Be sure that these pieces of steel are at least 1/2 inch below the top of the patch.

Use a finishing tool (magnesium or wood float, steel trowel, etc.) to finish your patched area. Finishing is an art and takes practice. You may have to wait a few minutes until the patching compound begins to stiffen to achieve the desired results. Practice in some out of the way spot, if in doubt.

When you are satisfied with the patch, cover it with a piece of plastic. Weight the edges of the plastic so it will not blow away and so air cannot blow underneath the plastic. This is very important!! Keep the plastic in place for three to four days.

What are the Best Weather Conditions to do Concrete Crack Repair?

Sunny, hot, breezy weather is the worst time to do this type of work! Many people think it is the best time. These conditions cause the patching compound to dry out too fast. Fifty-five degree F weather, overcast and damp is a great time to do this work. If you insist on doing it in warm weather, do it in the early morning. Then, shade the repairs so the sun can't hit them.

Don't attempt to repair concrete in freezing weather. The patches will readily freeze and fail. Use common sense.

Installing Concrete Overlays

Time to Work

Let's get to work! Now that the concrete surface is clean and all loose material is gone (you did do that didn't you?), we just need to provide the forms to create crisp lines on the sides of the slab.

You can do this with 3/4 inch thick pieces of 1x4, or 1/2 inch pieces of plywood which have been ripped cleanly and evenly with a table saw. Hold the edging up to the desired thickness of your overlay. A gauge block works great for this! What's that? Well, let's say you are doing a 1/2 inch overlay.

Listen to Podcast 3

CLICK this image and listen to the first call on the podcast. I talk to Vic about how he can do a concrete overlay and save THOUSANDS of $$$. Copyright 2018 Tim Carter

Cut a 4 inch by 4 inch piece of plywood and set it on the old surface at the edge. Hold your form board flush with this little block, nail the form board to a stake to secure the established height and you are ready to rock and roll.

Pre-existing Cracks

Undoubtedly, your concrete surface may have some original control joints or other cracks. These must be marked on the sides of the forms. Why? Because these cracks WILL telegraph through the new overlay. You need to install your own new control joints with a standard jointing tool to make a nice new line!

You can also take care of this condition by pouring the overlay in sections. Simply do one block at a time. Install a form board the same height or depth of the overlay in between the two side form boards. This will produce a nice crisp line for you as well.

The Materials

Your material requirements are simple and inexpensive. You need Portland cement, fine and coarse sand, and possibly some pea gravel. You will need pea gravel if you intend to do an overlay thicker than one inch.

The cement and fine sand are used as your glue. The cement, coarse sand, and possibly pea gravel are used for the overlay material.

If you are doing a thin overlay, less than one inch, moisture loss from the thin overlay is critical. If water leaves the mixture too quickly, the overlay can be subject to plastic shrinkage cracks and 'curling'. The overlay can actually delaminate from rapid moisture loss.

One of the ways the material looses water is by suction from the old concrete. In other words, the concrete sucks the water from the fresh overlay. To avoid this, the old slab should be wetted and kept wet for 12 hours before you start. You can do this by wetting the slab and covering it with a plastic sheet. Be sure to remove standing puddles before starting to work.

The Mixtures

You don't need fancy admixtures or bonding agents to get great results. Good old cement will do just fine. The mixture for your overlay consists of coarse sand, cement and possibly gravel. You want a minimum of seven bags of cement for each cubic yard of overlay you apply. For purposes of volume measurement, this equates to three parts sand to one part cement. Of course, if you add more cement, say 2.5 parts sand to one part cement, your chances of success will do nothing but increase.

If you are doing an overlay that contains gravel, you would mix two parts gravel, one part sand and one part cement.

The cement paint is easy. It is a one to one mixture of fine sand and cement. Of course you can also go a little heavy on the cement to get a greater bond. You mix these two ingredients dry and then add water to make a slurry just like a rich paint. Only mix what you can use in one hour or less. Remember, it is easy to mix up a quick batch!

Consistency

Remember earlier when I said that water is the primary cause of concrete failure? Well, don't goof up! I would like to see you mix up your overlay material so that it resembles a somewhat stiff mortar. If you can readily pour it from your wheelbarrow and it flows like a bowl of clam chowder soup, too much water!!

I would like to see the consistency of thick oatmeal. Remember it can't be so stiff that you can't easily spread it.

Ten Feet at a Time

Let's work in sections. Don't try to tackle the entire driveway at one time, especially if you have not finished concrete before. Let's just do 10 feet or so at a time, or work block to block on top of the existing surface. We already talked about recreating lines and how to form at a line.

Remember that as you mix each batch, that batch has a separate setting time than the one before. It is kind of like putting rolls in an oven at different times. They will all brown at different times! You don't want to get caught trying to mix or install a new batch while the other one is ready to finish!

Blending Your Overlay

Earlier we talked about different levels where the bad surface meets a good one. If you have to taper your overlay to meet a surface that is flush, it is not a problem. The overlay material without pea gravel can be applied successfully in a layer as thin as 1/8 inch! Just make sure that it has a good amount of cement in it. If you dilute this thin layer with water, it will surely fail.

If you are doing an overlay that contains pea gravel, you will need to mix a batch of overlay that just contains sand. This overlay will be blended into the gravel batches as you get close to the surface you are working towards. In other words, you may wish to start to taper your overlay four feet away from the flush surface. The last four feet of overlay will then contain lesser and lesser amounts of gravel. The final foot may be just the pure sand mix.

The Paint

OK, the stuff is mixed and we are ready to go. Well, did you have your helper mix up a batch of cement paint? Great! Is the surface damp? Wonderful! The helper should start to paint the old surface just ahead of the individual who is applying the overlay. Don't put paint down that can't be covered with overlay concrete within five minutes!

Screeding & Finishing Tips

Use a straight 2x4 or other board that will stretch beyond each form board by one foot. This is how you level off the overlay material. Start at one end. Using a back and forth motion like sawing a piece of wood, slide the board over the form boards while you advance it like a bulldozer. Fill in any low spots as you go.

Within a matter of minutes, maybe a half hour, the overlay mixture will get fairly stiff. You can imprint it with your thumb say 1/16th inch. It is time to finish. Use a wood or magnesium float or a broom to give the slab your finish. Brooms are easy. You just lightly drag it over the material. Floating requires some technique. Don't press too hard. Use a circular motion and lift the leading edge of the float so it doesn't dig in.

After you are finished, spray the surface with curing compound or cover it with plastic for four to five days. Rapid moisture loss will weaken the overlay! The following day, feel free to lift the plastic and mist the concrete. Keep the top surface damp and you will have an awesome surface!

Concrete Overlays & Associations

Curing Surface Problems

Often, the concrete below the surface is in good shape. The surface peels away because the cement which holds the sand and gravel together was very likely diluted by the installer.

This happens when the finisher sprinkles water onto the concrete surface or floats the bleed water back into the concrete while working it. This extra water simply dilutes the cement in the upper surface.

podcast 3

CLICK this image and listen to the first call on the podcast. I talk to Vic about how he can use a concrete overlay to save THOUSANDS of $$$. Copyright 2018 Tim Carter

With less cement present, the concrete is very susceptible to damage by ice formation or pressures exerted by salt crystallization. With enough cement present in all parts of the concrete, it can withstand years and years of snow, ice, salt, etc. That is a proven fact.

The Fix

Do you drive the Interstate highway system? If so, you probably have seen bridge resurfacing/restoration projects happening.

Here in Cincinnati, workers have been applying a one to two 2 inch concrete overlay on top of the old concrete surface. No doubt they use specialized bonding agents and a special mix due to the abnormally high traffic loads and abuse the bridges receive.

You, however, can redo your driveway in a simple fashion that will last for many, many years.


Want perfect concrete work? Find a pro by using my Concrete Work (Sidewalks, Driveways, Patios & Steps) Checklist. I offer a 100% Money Back Guarantee.


Adhesion - The Key

The concrete overlay you are about to install will succeed if it adheres or sticks to the old surface. If it does not, it will simply peel like your existing surface. Regular Portland cement is an excellent glue or adhesive. Just think - had the original concrete mason/finisher done his/her job, the Portland cement in the original mix would be working just fine.

Adhesion of the new overlay to the old concrete has both a physical and chemical aspect. The Portland cement crystals grow into and chemically bond to the clean, old cement matrix. Mechanically, the greater the surface area of the bond the more crystals will grow and create greater adhesion. This simply means that the rougher the surface, the better the bond!

Thus, it is to your advantage to remove all loose concrete, dust, etc. from the surface. A pressure washing to blast away concrete that appears sound but actually isn't is not a bad idea!

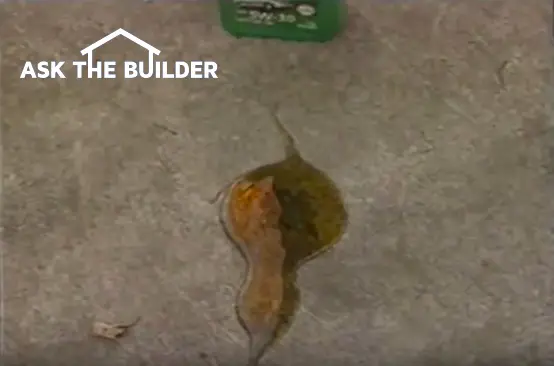
Grease and oil stains will interfere with adhesion. You must remove them using soap, solvents or a combination of the two.

Once all of the loose material and contaminants have been removed, wash the surface to be repaired with soap, water and a stiff broom. We want it squeaky clean. Rinse to remove all soap, dirt, dust, etc.

The Overlay - How Thick?

The thickness of the overlay is critical. It is often dictated by conditions other than the slab you are going to repair. In other words, the slab may abut a garage slab or city sidewalk. The current levels of these two surfaces may be level! What do you do then? I'll tell you in a moment.

I have successfully installed overlays that are only 1/2 inch thick. These can easily be accomplished by a novice homeowner. The thin overlay allows a large area to be covered by a minimal amount of material. For example, if you install a 1/2 inch overlay on your driveway, and your driveway measures 648 square feet, you only need one cubic yard of overlay material! That is not much. Your original driveway probably required 10 times as much material.

Concrete Overlay Literature Sources

The following two organizations have the absolute best information on all aspects of concrete and concrete installation. Each has an online Bookstore listing all of their publications. Their literature is authoritative, easy to understand and user friendly. Check it out!

  • American Concrete Institute (www.concrete.org)
  • Portland Cement Association (www.cement.org)

Concrete Installation Guidelines

shovel mixing concrete

Here’s some concrete in a wheel barrow that’s been mixed by hand and it nearly perfect in consistency. Photo Credit: Tim Carter

Concrete installation is not easy. The material is heavy and you only have a limited amount of time to finish it to get great results. Adding water to it at any time after it's mixed increases the chances of failure.

Revised February 2018

Concrete Is A Magical Material

Concrete is a remarkable material. It's important to realize it's man-made artificial rock.

Think about how this material that once mixed has a plastic consistency like pancake batter and hours later it's hard. A month later it's so hard it can support a skyscraper!

Concrete technology is, in fact, a science. There are scientists who devote their entire life to working with this material. These people research methods to improve it and its use.

My guess is that just about everyone has seen concrete being poured. Concrete begins its life as four basic ingredients:

  • sand
  • gravel
  • Portland cement
  • water

These are blended in precise quantities so it has the consistency of pancake batter. It's a plastic material at this stage.

Related Links

Secret Recipe for Long-Lasting Concrete

Special Tricks for Installing Concrete in Cold Weather

This concrete mix transforms into a solid material usually within a matter of hours. The length of time depends primarily on the temperature of the mix, the outdoor air temperature, and the amount of direct sunlight striking the concrete.

I must tell you that each and every time I work with concrete I marvel at this transformation.

Free & Fast Bids

CLICK HERE to get FREE & FAST BIDS from local concrete contractors.

Crystals Grow During Concrete Installation

If you know how and why concrete transforms from the liquid to the solid state, you'll more easily understand why concrete fails or experiences surface defects.

The Portland cement powder is the glue that holds the sand and gravel together. An irreversible chemical reaction called hydration starts to happen when water is added to the dry powder.

This reaction causes tiny crystals to begin to grow. The crystals act like Velcro® and lock together the tiny grains of sand to the pieces of gravel. This reaction continues for months after the concrete is initially mixed.

The needles of the crystals begin to interlock with one another and begin to penetrate microscopic holes and cracks in the sand and gravel. The crystals cement everything together. No pun intended!

Concrete Stiffens Within Hours

The growth of the crystals can be monitored. If you have ever had the pleasure of working with and finishing concrete you can feel the crystals growing. As each minute or hour passes after the concrete truck has left the job site, the concrete becomes progressively stiffer. It soon gets to a point where it will support the weight of a person using an automatic finishing machine. The growth of the crystals allows this to happen.

Things can go wrong if the crystals grow too fast. For example, you may not be able to achieve the desired finish because the concrete gets too hard to fast to put on a desirable top finish. Hot weather is the most common reason the crystals grow faster than you or the finisher would want to have happened.

If you're pouring concrete in hot weather, you have to have plenty of finishers on the job to ensure the concrete doesn't get hard before it's finished.

You can add special chemicals to the mix to slow down the hydration reaction.

CLICK HERE to get FREE & FAST BIDS from local concrete contractors.

Concrete Surface Defects - Some Common Causes

Concrete surface defects are often caused as the crystals begin to grow. One of the biggest reasons for surface defects is the addition of extra water to the mix and/or the use of water on the surface of the concrete as a part of the finishing process.

Both of these practices are frowned upon by concrete scientists. The reasons are numerous, however, they all have to do with those silly cement paste crystals.

Water is the Friend and Foe of Concrete

Water is frequently added to concrete after it arrives at a job site. Concrete finishers often will look at the batch as it begins to discharge from the concrete truck.

They may think that it is too stiff. The addition of extra water makes the concrete flow easier. There will be less work. They think they will have more time to finish the concrete.

Concrete was initially mixed at the concrete plant has plenty of water. In fact, as long as accepted work practices are used in placing and finishing the product, the concrete has extra water. Professional installers who use slip-form equipment to pour barrier walls and concrete curbs in new subdivisions use concrete that's got so little water in it, there's no need for wood forms to hold its final shape.

Watch these two videos to see proof of this. Regular concrete finishers could never work with this material by hand because it's far too stiff.

Water Is Lightest Of The Four Ingredients

You can actually observe this fact if you pour concrete on top of a plastic vapor barrier. Frequently, after the finishers have bull-floated the concrete to smooth it initially, water migrates to the surface of the slab. This is called bleed water. It comes to the surface because it is actually the lightest component of the entire batch!

The addition of extra water at the job site alters the chemistry of the crystal reaction. The cement paste is severely diluted. The cement particles are farther apart from one another and not as many crystal needles interlock.

The concrete will be weaker if you add extra water. The addition of extra water during the finishing process produces the same results, however, just the top layer of concrete is usually affected.

Water is often added by finishers because the concrete is getting too hard to finish. The growing hydration crystals will be broken apart if you add water to the top surface at this time. The addition of water allows the finisher to more easily work the surface of the concrete.

It's a mistake to allow this to happen. You prevent this by having enough workers finishing the concrete so no water has to be added.

Another key point is the entire batch of concrete is mixed at the same time. This means the hydration crystals are growing at the same rate throughout the mix.

Remember, if you are finishing a large slab alone, the crystals are growing everywhere across the slab!

CLICK HERE to get FREE & FAST BIDS from local concrete contractors.

Concrete Curing & Sealing Tips

Curing Concrete - Critical!

Curing is the process of maintaining an optimum environment (temperature & humidity) around the fresh concrete for a specific period of time so that the concrete can achieve its designed strength and durability characteristics.

The chemical reaction that occurs when you mix water and cement is called hydration. This hydration is a two stage process. The initial stage happens quickly. This is the transformation from the liquid to the solid state. It can happen in less than four hours. After this, the reaction slows down. The reaction can continue for months and sometimes years! Crystals continue to grow and the concrete keeps getting stronger and stronger.

However, for this reaction to continue the concrete needs water! If the freshly poured concrete is left open to the atmosphere the relative humidity of the concrete will rapidly drop below 100 percent. The water is evaporating into the atmosphere. If the humidity level drops below 80 percent, the hydration reaction can actually stop. If this happens early in the life of the concrete, the concrete may only achieve half of its design strength!

Stopping the Evaporation

There are several ways to stop the water from leaving freshly poured concrete. You can cover it with burlap or other cloth and keep it wet; it can be covered tightly with plastic; or you can spray a liquid curing compound onto the concrete.

Liquid curing compounds are easy to work with. These products are basically liquid 'plastic'. They form a watertight barrier that prevents water from evaporating from the concrete. The use of water and burlap can waste huge volumes of water. Sheet plastic must be installed so that absolutely no air can get under the plastic. Wind can be a big problem. Curing compounds are the only way to go.

Get your Deicing Saltquestions answered in the AsktheBuilder Deicing Salt eGuide. Packed with Questions and Answers regarding the use of rock salt on its affect on concrete. Available now at the AsktheBuilder Store as an Immediate Download.

The key to using curing compounds is their immediate application once you have lifted your trowel from the concrete for the last time. Do not hesitate to apply these compounds! On sunny windy days, the water is leaving the concrete at an incredible pace. It is not uncommon to experience plastic shrinkage cracks in concrete under these conditions. The trick is to finish the concrete as quickly as possible and spray the curing compound right away. On large jobs, a separate person should be following behind the finisher and applying the curing compound as the finisher is working just ahead. Believe me, it is that critical.

Concrete Sealants

Earlier, we discussed the crystals that create concrete. If you could look through a powerful microscope at concrete, you would be amazed. It is far from a solid compound. It would look similar to a giant metal jungle gym that you often see in city parks, the steel bars being the needles of the crystals. Just like in the jungle gyms, there is free space between the needles of the crystals.

Water is easily absorbed into concrete that has a wood float or magnesium trowel finish. This is the type of finish that is most common on residential sidewalks, patios and driveways. These finishes are slightly rough for skid and slip resistance.

When water freezes, it expands. In fact, the volume increase is approximately 9 percent. Since water, in liquid form, is not compressible, this means that as it begins to freeze it pushes things out of its way. In concrete, the water and ice begin to push against the needles of the crystals. These needles break and fracture. Once enough needles are broken, the concrete begins to fall apart. The manifestation of this phenomena is spalling and pitting of the surface.

Deicing salts create the same problem. When the salts melt snow and ice, they create a saltwater brine which is absorbed into the concrete. Weird osmotic pressures build up inside the concrete as the salt brine solution becomes more concentrated. These pressures break the needles of the crystals as well.

What to do?

The best defense against freeze/thaw damage and salt brines is to minimize the absorption of these liquids into the concrete. There are wonderful sealants available that do just that. However, not all sealants can be used in all climates.

Certain sealants are comprised of a liquid in which millions of tiny solid particles are suspended.These sealants penetrate into the concrete surface. After the liquid evaporates, the tiny solid particles are left behind. These particles fill many, but not all, of the spaces between the needles of the crystals. Enough spaces are blocked so that water and other liquids can't squeeze into the concrete. However, water vapor that is in the concrete can escape from the remaining openings.

This is very important if your concrete is subjected to freezing temperatures. Water vapor which is trapped in concrete can build up, freeze, and break needles! Be sure to purchase a breathable sealant if you live in such a climate.

Certain common concrete sealants are not breathable! Beware!