Garbage Disposal Smell

Garbage Disposal Smell

Garbage disposal smell originates down in the dark bowels of the machine. There are several ways to deodorize the disposal. Copyright 2018 Tim Carter

"The spinning motion of the disposal blades throws a slurry of garbage up on the sides of the disposal chamber and..."

Garbage Disposal Smell Removal Tips

  • Fill sink 1/3 way with water before grinding
  • Pull stopper and turn on the disposal
  • A surge of water helps rinse sides of disposal
  • Use certified organic oxygen bleach and dish soap to remove odor

Related Links

Garbage Disposal Odor - Yucky!

Septic Tank Garbage Disposal - Yes, a Special One!

Tim Carter Short Video Showing How to PREVENT Garbage Disposal Odor

DEAR TIM: My garbage disposal stinks. My wife has been fighting with a stinky garbage disposal. It's relatively new (I replaced it for other reasons last year).

She's tried many different approaches to cleaning, and yet to her the smell returns. Before I pop the drain pipe and see if there's something accumulating down there, do you have any tips for cleaning a garbage disposal? Leo N., Seattle, WA

DEAR LEO: This is pretty simple to solve but because you now have an odor problem, it is going to take a little work. Let me explain what has probably happened over time.

Where Do Garbage Disposal Smells Come From?

The garbage disposal smells come from rotting food inside the machine.

This decaying food creates a biofilm inside surfaces of the garbage disposal.

What is the Wrong Way to Use a Garbage Disposal?

The wrong way to use a garbage disposal is to not use enough water before, during, and after grinding the food waste.

Many people simply throw garbage down into a garbage disposal, turn it on while some water is running through it and quickly turn the disposal off as well as the water.

Where is the Rotting Food?

The spinning motion of the disposal blades throws a slurry of garbage up on the sides of the disposal chamber and the small amount of water coming from the faucet doesn't always completely wash this organic slurry off the sides of the disposal.

Does Rotting Food Create an Invisible Gas?

Rotting food creates an invisible gas as well as a feasting place for nasty bacteria.

If this slurry of organic debris is not completely washed off the inside of the disposal, it begins to rot and this decomposition produces a foul gas.

If you do this enough times - meaning not rinse off the organic slurry, it can harden over time and then becomes a problem to clean. You have to re-hydrate the hardened slurry.

How Do You Clean Garbage Disposal Smells?

The best way to clean garbage disposal smells is to re-hydrate the food slurry. You can do this by filling your sink about 1/3 of the way, or more.

Once the sink is filled with clear water, pull the stopper allowing the water to enter the disposal. At the same time, turn on the disposal to swirl the water in the drum. Keep the sink water running as you do this.

Wait about thirty minutes and repeat the process. However, before pulling the stopper add a generous amount of liquid dish soap to the sink water. As the water flows into the disposal with the machine on, squirt more soap into the whirlpool of water.

Keep the water running so you have a soapy foam slurry inside the disposal.

You can also add certified organic oxygen bleach to help get rid of any residual bacteria.

How Do You Prevent Garbage Disposal Smells?

The key to preventing garbage disposal smells is to rinse the disposal well after each use. Once the food has been ground up, fill the sink 1/3 of the way up with clear water.

Remove the stopper, leave the water running and turn on the disposal. The swirling action of the disposal should remove all of the food slurry from the inside of the machine.

CLICK HERE for FREE & FAST BIDS from local handymen who can clean your disposal.

Column 566-A
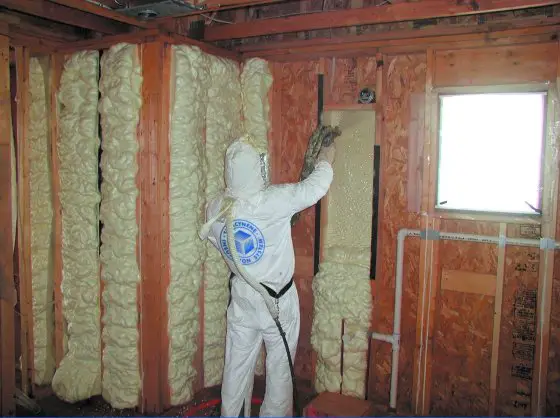
Foam Insulation

 spray foam insulation

Foam insulation fills every nook and cranny in a wall. It is typically installed by professionals and can be messy to work with. It is not really a do-it-yourself job. PHOTO CREDIT: Icynene. Inc.

Spray Foam Insulation

DEAR TIM: Is foam insulation as good as the manufacturers claim? Is 2 1/2 inches of foam better than 5 1/2 inches of fiberglass? Is it necessary to install 2x6 walls if you only need 2.5 inches of foam insulation? What about spraying the foam directly to the roof? I've heard if you use this on the underside of the roof instead of fiberglass insulation blown on the attic floor, you don't need to do ventilation under the roof? Is this true? Does it make financial sense to use it? Dan J., Cedar Rapids, IA

DEAR DAN: I used spray foam insulation on a job of mine about 20 years ago. A customer who owned a poultry slaughterhouse insisted on it as he used spray foam insulation in his refrigeration delivery trucks and on certain walls at the actual meat processing plant.

Back then at least in my neck of the woods, foam insulation was a commercial product and it was tough to locate an installer who would spray it in the wall studs of a home. Although I can't prove it, I might have been the first contractor in Cincinnati, OH to install foam insulation in a residential home. The person who did the installation told me at the time he had never heard of it being installed in a home before.

How does spray foam compare to fiberglass insulation?

Spray foam insulation is a superb product. As far as comparing thickness of foam to fiberglass, that is a simple comparison on a product-by-product basis. You need independent test results that confirm what the R-value is per inch of thickness of a given product. R-value is a measurement of thermal efficiency; it is a measurement the resistance to heat flow. The higher the R-value number the greater resistance the insulation has to the movement of heat.


Learn the secrets for successfully installing insulation with my Insulation Installation Checklist. I offer a 100% Money Back Guarantee.


So if you want a given R-value, then you simply specify a given finished thickness. Typically closed cell foam products produce a higher R-value per inch than batts of fiberglass.

Do wall studs affect the insulation?

As for wall thickness, there are other considerations such as plumbing stacks, wind loads, concentrated loads, etc. I believe that the wall stud you should use has nothing to do with the insulation. You will need to install whatever wall stud that meets the structural and mechanical needs of the home. Wall cavities do not have to be totally filled with foam insulation to perform well.

Because foam insulation typically can be significantly more expensive than fiberglass or cellulose insulation, you need to determine if it makes good financial sense to invest in it. If you install it and it has the same finished R-value as fiberglass and/or cellulose, then your heating and cooling bills will be almost identical. This means that it does not makes sense to install it as you save nothing to heat and cool your home.

Remember, your furnace and air conditioner can't see what is in the walls, but they do know what the total heat gain and heat loss of the house is. Yes, the foam insulation can cut down on air infiltration. But a properly installed house wrap and a case or two of caulking can do nearly the same.

How do you save money on heating and cooling costs?

To save lots of money on heating and cooling costs, you must significantly lower your overall heat gain and heat loss. This is accomplished by decreasing the size of your home or increasing significantly the R-value of the home's insulation.

But increasing R-value is not a silver bullet. As you add more insulation, the heat gain and heat loss does not respond in a linear fashion. It doesn't take long to reach a point of diminishing returns.

So before you make up your mind, talk with your HVAC contractor and ask him what the wall R-values of any insulation must be to significantly cause a reduction in the size of the furnace or air conditioning unit. That calculation takes just minutes to do.

Need help with the R-values of insulation? CLICK or TAP HERE to get FREE QUOTES from local companies that can insulation your house.

Once you have projected heat-loss and heat-gain calculations, you can then ask the foam insulation contractor how much it will cost to hit that target. Then start doing the math. See how much you save initially on the cost of the smaller furnace and air conditioning unit. Then see how much extra the foam insulation costs versus traditional fiberglass or cellulose.

Finally, ask your local utility company to see if it can project what the cost to operate different-sized heating and cooling equipment might be over a five-year period. Do the addition, subtraction and multiplication and see where you end up.

Column 565

Decks and Patios – Scale Building Plans

ipe wood deck

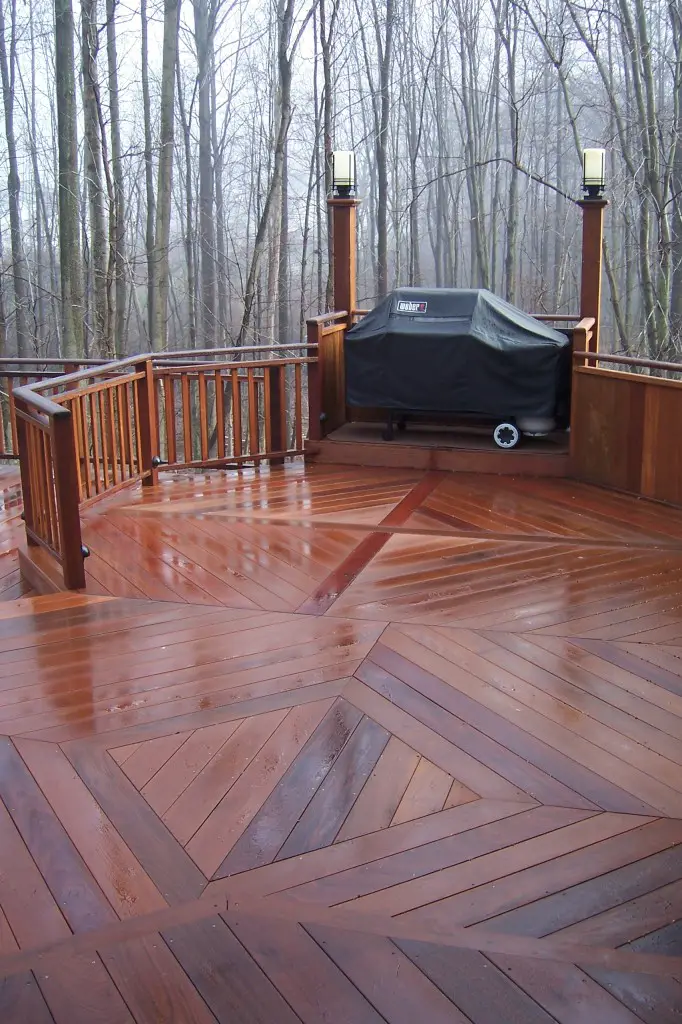
Here's a partial shot of Corey's IPE deck. Look at that craftsmenship. WOWZA!

The Plan

You've thought through your spatial requirements to accommodate the seating, pass-through space and furniture placement. You know how many people you'll likely need to make room for on your new deck or patio. See "Patio or Deck Plans".

Now the fun begins. The easiest way I have found to create a simple plan is to use 1/4 inch graph paper. This is pre-lined graph paper that has four lines to the inch. This type of paper is available at many office supply stores or where you might buy school supplies. Usually, it can be found in 8 1/2 x 11 inch size. This is large enough for our purposes. Buy a pad of this paper if possible, as one or two sheets will not be enough.

What scale to create your plan layout?

The next step is to create small colored cutouts of the pieces of furniture you intend to use. There is nothing hard about this exercise. However, you must decide upon the scale of the plan. I prefer to stick with 1/4 inch equals one foot. That is the size of the blocks on the graph paper, so it is easy to remember that each block on the graph paper equals a one foot square. You will use a separate piece of the 1/4 inch graph paper for your cutouts.

Cut out your furniture to scale

Take the measurements of your furniture and begin to create little squares or rectangles to scale. For example, most regular chairs measure two feet by two feet. Simply cut out a piece of the graph paper two blocks on a side and you have your chair. There is nothing to it! Do the same thing with all the pieces of furniture, including a grill if you intend to have one. If you are going to use a four foot diameter round table, you will find that a quarter (25 cents) is just about the perfect scale size. Check it for yourself. Trace around the quarter, cutout this disk and color it with a marker or colored pencil. I realize that this seems like child's play, but it does work and it is very effective. The coloring is very important. It allows you to see the cutouts on the graph paper. I suggest that you use a different color for the different types of furniture. Make the tables one color, the chairs another, and any benches or special pieces a third color. This will allow you to more easily place the cutouts without confusion.

Don't forget the hallways!

The rest of the job is easy. Take a new piece of graph paper and at the bottom, draw a line across the paper. This line represents the side of your house on which you intend to construct the deck or patio. If your house is irregularly shaped, attempt to duplicate the shape to scale. It will pay big dividends to take the time to do this. In the example at the bottom of the page, I have duplicated the rear of my house to show you what I mean. Locate accurately on the line any doors which you will use to enter or exit the patio or deck. OK, remember the 'hallways'??? Let's put the first one on the plan right now before we go any further. Draw a line from the door or doors across the new patio or deck (even though we haven't drawn it yet!!!) which will replicate the center of the path you will use to get to your lawn, garden, car, driveway, etc. Get the point??? If there are going to be any other pathways or 'hallways' draw them now. If you have decided that you want your 'hallways' four feet wide, draw a faint line parallel to the center line of your path two feet on one side or the other of the center line. Do the same thing on the other side of the center line.

Need help with planning and building your deck? CLICK or TAP HERE to get FREE QUOTES from local companies that specialize in decks and patios.

You should not place any furniture in these pathways. Surely you do not want to have to move them every time you walk out onto your patio or deck? OK, now start to place the cutouts on the graph paper in an arrangement that you feel will work. If you are happy with the arrangements inside your present house, simply copy them. Be sure to be realistic about the spacing between pieces of furniture. If in doubt, simply measure the distance between things in your present rooms. Don't forget to do it to scale. As a test, if you decide to use a four foot diameter table with four chairs, you will need a minimum of a 10 foot by 10 foot area just for these items! Also,that does not count one inch of space to comfortably walk around the table and chairs! Remember, you generally have to pull a chair one foot away from the table to be able to sit down. Check it for yourself.

The last part of your plan is to draw the outer boundaries of your deck or patio. This is entirely up to your tastes. You can simply draw straight lines, or you can add flair to your design by introducing curves. In any event, try to leave enough room behind furniture so that it is not at the edge of the deck or patio. Someone could scoot a chair or table backwards and tip into the grass or landscaping. Think of it, you have gone this far to create a workable plan, so adding a foot or two in either direction seems to make sense.

Before you put your plan into action, be sure to check and recheck your dimensions and the scale of the cutouts. Good luck with your plan!

Column B16

Patio or Deck Plans

patio paver colored concrete

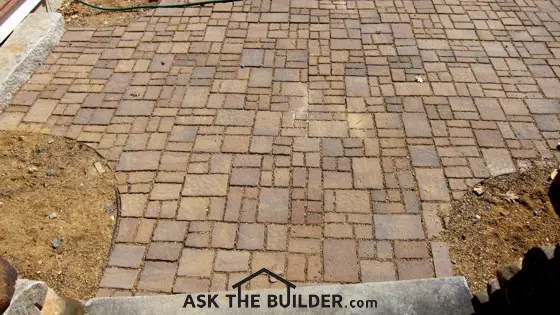
The individual stones of this patio are fooling you. Three or four of each are actually part of a larger block of colored concrete. Photo Credit: Tim Carter

Develop Your Patio or Deck Plan Before You Build

Frequently, people begin construction of patios and decks without well thought-out plans. I have personally seen this mistake made hundreds of times. The mistake occurs for a very simple reason. Most people layout a patio or deck with string or pieces of wood in an effort to define the area. While this seems like a good idea, it can actually be very deceiving. A 12 foot by 14 foot deck or patio may seem like a large area. In many cases, a deck or patio this size is as big as the largest size room in the average house. However, you will be surprised to find out that you can barely fit a standard size patio table and chair set on a deck or patio of this size. Let's find out why.

trex-transcend-deck

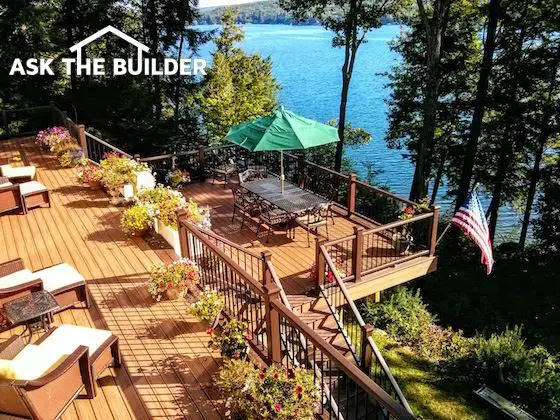
Here's my own Trex Transcend deck. There's lots of railing. It didn't take long to understand how to do it with professional results. Copyright 2017 Tim Carter

I have advocated good planning for many years. Good plans are the key to a successful project. A good plan is not necessarily a complicated one. I feel that a good plan is one that is well thought-out and that works.

The first step is to decide upon the use of the patio or deck. In other words, what do you intend to do on the patio and deck and how many people will be doing it? This step is the key to the entire planning process. You must know how many people you intend to have on the patio or deck for the majority of occasions. Knowing this, you generally try to provide seating for all of these people. This seating can take the form of benches, chairs or seating around a table. The seating can be any one of these choices, or a combination of elements.

Now that you have determined how many places to sit, you are ready to begin your plan. But first, I need you to go to your existing living or dining room. Do you notice the 'hallways' in each of these rooms? They are the pathways that allow you to move from one place to another within the room. You must create these same 'hallways' in your patio or deck. Don't forget these!

While you are still in these rooms, check to see how wide these 'hallways' are. Generally speaking, you should find that you have a minimum width of three to four feet. That is a comfortable distance to walk through. Verify this distance in your own home with a tape measure. Determine whatever measurement you feel comfortable with and write it down.

Furniture Selection

The next step is to determine what furniture you plan to use on the patio or deck. Quite possibly you already own the furniture. If not, go to a store and select the furniture that you intend to use. Don't forget to select any small tables that you intend to place around the patio or deck. Generally, these tables are used to place drinks or food on. Frequently, people overlook these tables. Now, make a list of the furniture indicating the quantity and size of each piece. Try to round off the measurements to the nearest 1/2 foot.

To learn how to apply your well-thought out plan to paper to create a scale building plan, read on here.

Column B16

Building a Screen Porch – Plan to Avoid Headaches

hodges bay antigua

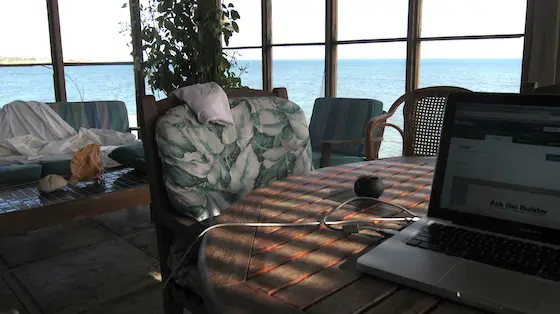
You're looking at Hodges Bay through the screened porch where I spent lots of time working and sleeping! It was so glorious to be right next to the water. Photo credit: sleepy Tim Carter

I have built my fair share of wooden screened porches. They are truly enjoyable projects. One of the things I like best is the instant, or nearly so, gratification from the rapid construction progress. In other words, at the end of each day there appears to be a tremendous amount of progress. Being an impatient type of guy, I never received this type of fulfillment when building large room additions or custom homes. It seemed like things took forever. No doubt the homeowners often thought the same!

Great Porches are No Accident!

Have you ever gone over to a friend's new house? Especially if it is a market or tract home? If so, when you walked through the dining room I will bet you felt cramped. The table, chairs, buffet, china cabinet, etc. barely fit. Everything seems compressed. Do you know why this happens? Poor planning - it will get you every time. Your screened porch project must begin with an excellent plan. If it is a full blown set of beautiful blueprints, great! If it is a semi-detailed sketch on some 1/4 inch graph paper, that is fine as well. The point is simply that you must think before you act.

Two years prior to this article, I wrote some in depth information about this subject. It concerned patio and deck planning. Review the information at these two links: You may wish to look at it as it goes into great detail as to properly sizing a patio or deck. The same principles apply to screened porches, since they are simply decks or patios with a roof! The bottom line is that you must size the porch so that it is big enough to comfortably contain all of the furniture you plan to place within it. You must also account for interior hallways within the porch. Those are the pathways between doors and furniture.

Costing the Project

Before we go any further, we better make sure we have enough money. This is accomplished by doing a material takeoff. This is simply a list showing the type and quantities of materials. For example, you would calculate the cubic yards of concrete you need for foundation piers. What about treated lumber floor joists? What size and how many? You start from the bottom and work your way to the top of the porch. Are you beginning to see the value of well thought out detailed plans? I thought you would!

If you spend the time to produce detailed plans which show both the screened porch floor plan, side and front elevations, and a detailed typical cross section of the floor, wall and roof assembly, guess what? You can get the detailed material takeoff with complete pricing done for FREE in many instances! Most full service lumber companies have an employee(s) that does this all day long. You simply give them your plans and several days later or maybe a week, they give you your plans back with a detailed itemized computer printout of virtually every thing you need! My lumber company did this for me on every job.

What Next? A Building Permit

Just because you want a screened in porch doesn't mean you can have it. Many cities, towns and counties have zoning and building codes that must be followed. You will have to take your plans to the proper government officials to make sure that what you want to do is OK with them.

IMPORTANT NOTE: If you decide to draw your plans yourself, make sure the government entity will accept them. Some building officials will only accept plans, or portions of plans, drawn by registered architects or engineers. Stop by the building permit office and ask what is necessary to obtain a building permit before you get too deep into the process. There is nothing worse than having the building department reject your plans. That can really ruin your day.

Now, if you're ready to actually build your screened escape room, go to " How to Build a Screen Porch" - Part I , Part II , and Part III. I'll take you through the paces to get your screened-in haven up -- and you in it --enjoying the fresh breezes, bug-free, with your family and friends!

Column B412

Lot Selection – 25 Tips – Part III

survey map

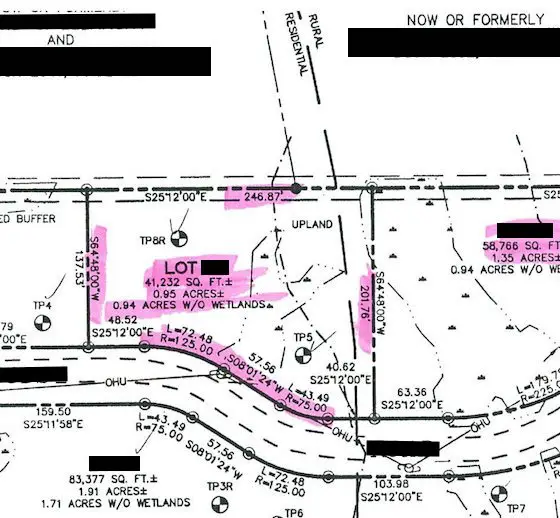
This is a typical plot plan survey document. You can see the property lines, the pins at all the corners and bends as well as the distances along the property lines. Don't even look at a lot unless you have this in your hands and you can read all the print on the document. Copyright 2018 Tim Carter


See Part I of "Lot Selection- 25 Tips"

See Part II of "Lot Selection- 25 Tips"

Water

Do you need water at your site? Do you intend to drill a well? What will it cost? Is the water pure? Wells can be expensive. The water may be salty or have a high mineral content. Ask neighboring lot owners, if any, how their water is. Talk with local drilling companies and obtain cost estimates.

The best wells are ones that are pounded, not drilled. Drilling can sometimes fill the cracks in the bedrock that are the pathways for water to enter the well. Pounding a wall helps create more beneficial cracks.

Survey

Buying any property without a registered house lot survey is insane. Negotiate for the seller to pay for the survey. It is NOT unreasonable, since he/she should have to prove to you what you are going to get in the deal.

Only fools buy on the HOPE principle. Don't "hope" that your lot line is over there or that you really have 10 acres and the creek is on your property.

Free & Fast Bids

CLICK HERE to get FREE & FAST BIDS from local land surveyors who can show you your exact land!

Access

Is the access to your lot excellent? Do you have to build a long, expensive driveway? Do you have to cross a stream? Will a fire truck, or moving van be able to get close to the house? Maybe access is too good. Maybe the lot access is too close to an intersection. What about adjoining land? Will you have to give access across your lot to logging companies who will timber Federal Lands next to yours? Trust me, you wouldn't be the first.....

Common Roads - Undedicated

Do you have to share a common roadway or driveway with access to another lot or a group of lots? This can be a nightmare. What happens if you are the first to build and subsequent construction activity ruins the road or driveway? Who pays? What happens if you want to seal the blacktop and your neighbor doesn't?

Panhandle or Flag Lots

These are what I call back lots. A narrow strip of ground allows you to get to and from the street. These lots can be mistakes. Utility trenches may end up beneath the drive. Your front yard may be in someone's backyard. I haven't seen a good one yet, but I'm still looking.

If you can't resist buying a flag or panhandle lot, be sure the handle or flagpole section is at least 40 feet wide. This gives you room to bury utilities on the sides of the drive and to plant some privacy bushes.

Easements

An easement is a legal permission slip, often permanent, which allows someone else to cross your land in a certain spot.

In certain instances, depending upon the type and size of the easement, it can be a BIG MISTAKE!

The lakefront house I owned in New Hampshire had an easement across it allowing my neighbor to drive up to the cul de sac. It's important to note that I had an easement across a portion of his land so I could get to the cul de sac as the top section of our driveway is shared.

Trex Transcend Deck

Here's my own Trex Transcend deck. There's lots of railing. It didn't take long to understand how to do it with professional results. Copyright 2017 Tim Carter

Try to avoid lots that have easements. If you must have one, try to see if it can be on one edge of the property, not through the middle.

By all means purchase Owner's Title Insurance with your land. The title insurance policy can protect your investment should some future easement or title flaw come out of nowhere in the future.

Mineral Rights

Yes, your lot may have mineral rights! There could be oil or some other commodity product such as gravel near or beneath your lot. A friend of mine found out that his country lot was going to be next door to a brand new gravel pit. Now that could really ruin your day....

Tax Rates

Be sure to investigate the tax rate for your lot. Is it reasonable? How will improvements on the lot be taxed? If the land is currently zoned agricultural, it may have an artificially low rate. Once improved, you may lose the agricultural tax rate. Check with the local tax authority.

Encroachments

Guess what? Your fence might not be yours. In fact, your house might not be yours! It has happened. In fact it happened to me! Using stakes set by a surveyor, I once built a commercial building on someone else's land by 1 foot! It cost the surveyor $25,000 for a 2 foot by 100 foot piece of land! Encroachments can be expensive to fix. Attorneys almost always have to get involved to separate the legal issues. A survey performed before you buy will usually reveal them, but, as in my case, it is no absolute guarantee.

CLICK HERE to get FREE & FAST BIDS from local land surveyors who can show you your exact land!

Column B154

Lot Selection – 25 Tips- Part II

survey revised plot plan

See " Part I - Lot Selection- 25 Tips"

Here are 8 more tips and hints to keep you on the right track when making decisions about which of various residential lots you want to buy. Here is Part II of "The Smart Way to Select Your Lot - 25 Tips".

Zoning

Zoning laws tell you what is permitted to be built on a lot. This ranges from your house to playsets, to fences and even shrubs! These laws can be loose or highly restrictive. Corner lots can be severely penalized as they face two streets. You must research what the zoning laws permit you to do or not do on your lot. It may take you hours to read through them, so be prepared.

Wind

In my county we have a giant landfill. Every now and then there is an article in the paper about nearby homeowners who complain about odors. Don't buy a lot downwind from a landfill, a factory, sewage disposal plant, animal farm, or any other odor-producing operation. Check with the local U.S. Weather Office for prevailing wind directions and times of year! For example, if the winds shifts seasonally and blows towards your lot in the winter when windows are closed, it might not be a big deal.

Flooding

Flash floods and ordinary river or tidal flooding should be considered. This is especially true if your lot may be in the lower reaches of a drainage basin. Development farther up in the drainage basin may concentrate and cause overflow of streams and creeks that historically have not flooded. Talk to existing property owners about past flood levels.

standing water in back yard

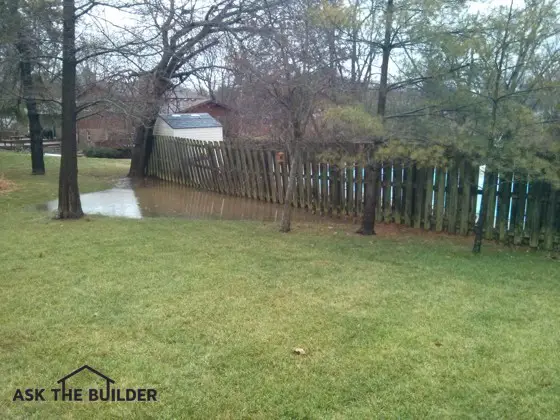
This ponding of rainwater is not normal. The next door neighbor blocked the natural swale with a new swimming pool. Photo credit: Tim Carter

Septic Systems

If your lot has, or you will be required to use, a septic system, be sure the soil can handle it. Not all soils will test positively. You may be required to install a modified leach field that can cost thousands of extra dollars. For advice contact the local Health Department which conducts the testing.

Future Area Development

Fifteen years ago a woman who worked with my wife moved into a house in the country. It was on a state route which ran parallel to an Interstate highway. The house and the state road were about one mile or so from the interchange. Well, guess what? It isn't the country anymore! Their house was swallowed by huge commercial development. You must be aware of growth trends and what might/will happen to your land and that which surrounds it. Land that is attractive to commercial developers can transform from farmland to blacktop parking lots with a simple zoning change. Remember, money talks ...... and commercial developers have a lot of it.

Geology

You need to be aware of the geology of your region. Are there faults? Are you in an earthquake zone? What about landslides or periodic mud slides? Buying in the Southwest? Did you know that raging flash floods pour out of the mountains every fall and winter? Maybe they will engulf you and your new home?

Toxic Waste

You read about it all the time in the paper. There are many places where toxic waste has been dumped illegally. Odds are you will never know. However, does your new lot have an old road or driveway? Is it remote? Are there areas where vegetation is dead or growth is stunted? Look for clues...

Fill Dirt Sites

If you are buying a lot in a new subdivision, stay away from lots near storm sewer pipes or culverts. Stay away from lots on the edge of hills or in unnaturally 'flat' areas. These areas are prime suspects for fill dirt. Even as I write this Bulletin, I am an expert witness in a lawsuit where a house was built on fill dirt. The lot was a creek bed before development. A pipe was installed and dirt dumped along side the pipe to 'create' a buildable site. BEWARE!

Read on for Part III and the final few tips to buying your land or lot the smart way.

Column B154

Buying A Building Lot Tips

cleared building lot

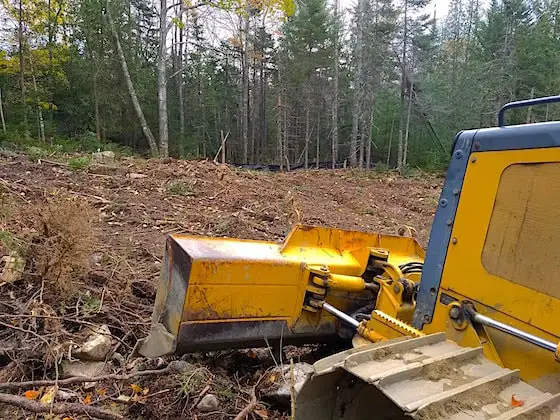
Buying a building lot - This is a cleared building lot. It's time to stake out the foundation so the foundation hole can be dug. Copyright 2018 Tim Carter

Buying a Building Lot Tips - Mistakes Can Be Costly

Three-Part Series - Part One of Three

The following is the first of a three-part series of what I think are some of the most important things you should look for when buying a building lot. Tim featured this first part of the series in his October 20, 2018 AsktheBuilder Newsletter.

Download the three parts of the series to use as a checklist when you decide to look at building lots.

Many of these are important whether the lot is vacant or has an existing home built upon it. Remember, the land is a real asset. Buildings are temporary. The land is the basis of long-term value.

What is the Best Size for a Lot?

Is the lot the right size for what you intend to build? Is there space for games/recreation? How about an outdoor pool or storage building? What about future expansion - will the lot support a room addition of reasonable size?

Be aware of the setback lines that are part of just about every lot. The part of the lot between a setback line and the actual property line is OFF LIMITS. This means you can't put any part of the structure in this zone. The setback lines can consume up to 40% of the actual lot in some cases! BEWARE of setback lines and discover where they are when buying a building lot.

survey map

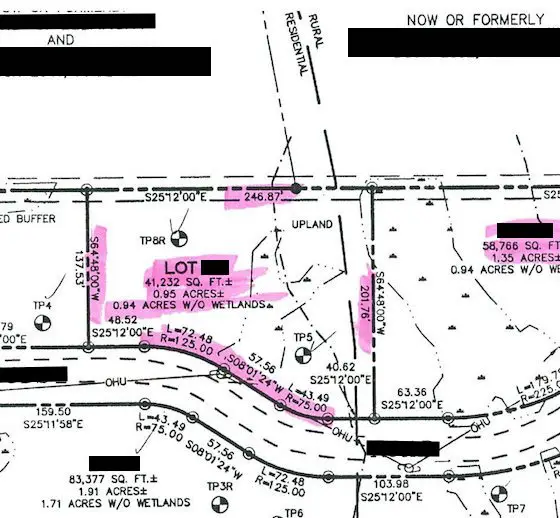
This is a typical plot plan survey document. You can see the property lines, the pins at all the corners and bends as well as the distances along the property lines. Don't even look at a lot unless you have this in your hands and you can read all the print on the document. Copyright 2018 Tim Carter

Is Slope Important in a Building Lot?

Most people are fooled by level ground. What appears level may actually be a significant slope. If the ground is vacant, roughly stake out the house and driveway.

Hire a builder/remodeler with a transit level or rent one. Take elevations.

If your house has a basement and the lot falls more than 7 feet across the footprint of the house on the land, you WILL have problems! If it's a slab house, it should have no more than 18 inches of fall across the footprint.


What About Available Utilities Serving the Lot?

Are utilities available? Natural gas, electric (overhead or underground?), city/county water or well, public sewers, telephone, etc. Without utilities, you enter a time warp and go back 100 years or more.

Do you have to pay extra to tap into utilities OR has it been paid by the developer? Watch out, these tap-in fees can be astronomical if the developer tries to pass them on to you. Is the existing sewer REALLY public? You would be surprised how many miles of sanitary sewer are private!

Septic systems can be shared. My neighbor here in New Hampshire shares a leach field with four other homes. If just one home fails to maintain their septic tank by getting it pumped every three years, then the leach field can go bad. You may have to pay for part of a failed leach field that's not your fault.

Should I Consider Fire Protection?

Did you ever look at your homeowner's policy? A huge portion of your bill is based on fire coverage. Your lot location is rated: distance to closest hydrant, size of water main feeding hydrant, certification level of the local fire department, etc. The lower your rating in these areas, the higher your premium! You better get a quote from your insurance salesperson before signing a sales contract to buy the lot.

How Do I Determine City/County Services?

What kind, if any, of services, are provided to you or your road frontage? Is the road plowed? How is garbage collected? Do you pay extra for garbage removal? Are there special property assessments for past or planned improvements?

Is Compass Direction Important?

Are you building a passive solar house? Do you want to orient your deck a certain way? Do you want to bake under the hot afternoon sun on your deck? What about your swimming pool? Will your lot be shaded in the afternoon or early evening?

hiking compass

This is a great compass to have while looking at lots. As of 2018, it was priced at $9.99. CLICK THE PHOTO now to have it delivered to your home.

Are you on the north face of a hill in the Northern Hemisphere? If so, your ground surface may not see direct sunlight for two or more months! It will be frozen and damp all winter! Buy a $10 compass and keep it in your glove compartment.

What about Water Drainage?

Surface and subsoil drainage is one of the most important things you must consider. Vast amounts of water can move downslope through the soil.

Linear French Drain Streaming Video

Do your own DIY install of a Linear French Drain with Tim Carter's time-tested methods and materials! CLICK IMAGE TO ORDER NOW!

If you plan a basement, the walls may act like dams. Heavy rainfall can cause water to run overland towards your lot. Is your lot on a moderate rise where water will flow around it?

Is your new lot in a valley or a swale? Will this valley or swale have 5 or 8 feet of water flowing through it when the 100-year flood hits four years from now? This exact thing happened to a friend of mine in what appears to be a typical ordinary suburban neighborhood!

How Significant is the Soil When Buying a Building Lot?

Another key point is the soil. Don't overlook the significance of soil when buying a building lot. There are countless different types, all with different strength, drainage, fertility, etc. characteristics. Some clay soils shrink and swell in response to moisture content.

During droughts, the soil may fall beneath your foundation or slab and cause severe cracks! You can get free soil maps from your county agricultural extension office. It may take a few phone calls, but it will be well worth it.

CLICK HERE for Part Two of the Buying a Lot Series and 8 more tips for help in buying the land or lot you will call home!

Also featured in the February 11, 2016 AsktheBuilder Newsletter.

Column B154


Part III – How to Build a Screen Porch – Roof, Paint, and Electrical Requirements

hodges bay antigua

You're looking at Hodges Bay through the screened porch where I spent lots of time working and sleeping! It was so glorious to be right next to the water. Photo credit: sleepy Tim Carter

See Part I "How to Build a Screen Porch - Frame and Square the Floor"

See Part II "How to Build a Screen Porch - From Foundation & Deck, to Walls and Support"

The Roof

The shape and pitch of your screened porch roof can add much to the overall look. Try to match the pitch or slope of your house roof. If your house has a hip roof, mimic it. A hip roof is very strong and helps to lock the walls together. Make sure that you produce an adequate overhang such as 14 to 16 inches.

Roof framing can indeed be a challenge. Cutting and fitting rafters will probably be the hardest part of the job. There are several books available on the topic:

  • Framing Roofs (For Pros by Pros Series). Fine Homebuilding Magazine. 2003.
  • Roof Framing. Marshall Gross. Craftsman Book Co. 1989.
  • Roof Framer's Bible: The Complete Pocket Reference to Roof Framing. Barry D. Mussell. Craftsman Book Co. 2003.

Electric Requirements

Be sure that you plan for electric in your porch. You may need outlets for radios, table lamps or TV's. How about an overhead light or paddle fan? You need to design your screen panels or small walls below the panels to accept receptacles and wires. Also, if your porch floor is low to the ground, guess what? You had better run your wires BEFORE you install the porch floor. I told you that you would have to think ahead!

Painting / Staining

This is one of the most important parts of the project. Wooden screened porches can require huge amounts of ongoing maintenance. You need to minimize this work. You can do it by pre-painting every piece of redwood or cedar before it is installed. Remember, these porches will get wet! Water will find its way to unpainted wood, soak in, and then cause the paint finish to peel. Take the time to prime and paint all wood on all edges before it is installed. Remember to paint any cut edges after they are trimmed. Paint the screen panels BEFORE the screens are installed. Heck, you can even paint the roof rafters and underside of the roof plywood before they are installed! I hate when paint drips onto my face!

Too much work for you? CLICK or TAP HERE to get FREE QUOTES from local companies that will do your screened porch for you!

Column B412

Part II – How to Build a Screen Porch – From Foundation & Deck, to Walls and Support

See "Part I - How to Build a Screen Porch"

The Foundation

Nothing bothers me more than deck posts that are not centered on piers. Builders and homeowners go to great lengths to try to figure out where to dig piers. They can spend hours! Then you go to build the deck and find out that you were off by 6 inches. That is why we just built the deck outline FIRST. Now that the corners of the porch have already been established you can easily drop a plumb bob and find the center of your piers. Since you haven't placed any other floor joists, it will be easy to dig the holes with a post hole digger standing both inside and outside the box.

I prefer to dig to the frost level in my area and pour an 8 inch thick layer of concrete in the bottom of the hole. Then the next day, I insert the treated lumber post which is attached or notched to accept the joists. I fill around the post with rounded gravel to within 6 inches of grade level. The final 6 inches are filled with another layer or doughnut of concrete. By doing it this way, it is easy to replace the post should it become necessary.

The Deck

Construct the deck or floor of the porch after you install the remainder of the floor joists. Use treated lumber for all of this. Do not put any spacing between your decking boards. They will shrink slightly over time creating a slight gap. Before you start nailing, you may want to consider pre-finishing the deck boards with a sealer, especially the underside and the edges that will not be exposed after you nail them down. Also, how about getting your electrical feed wires installed and possibly a gas line for your grill. You better think about how these things are going to get from the house to the porch!

The Walls

The walls of the screened porch are simply screened panels that fit between posts that support the roof structure. The types of panels are up to you. To minimize posts, you will need to create large panels. The width of the panels is a function of the width of screening material that is available. Do not build your panels and then try to find screening! Plus, building the right size will minimize waste of screening. Local lumber companies will be able to hook you up with someone who makes screen panels. If you want to make your own, or use prefab panels, go for it. You can always buy extra wide and tall screen doors and just use those. By the way, you don't put these panels up until the last day!

Corner/Support Posts

All of the wood that is below roof level must be treated lumber or a naturally decay resistant lumber such as cedar or redwood. I have had great success using redwood for my screened porch projects. Many people do not realize that there are various grades of redwood available. The lower grades often have very acceptable tight knots. It is very economical. I would give this serious consideration. Do not use treated lumber corner posts that you wrap with redwood. Invariably the treated posts will twist as they dry out. This will cause problems. Your design and plans should call for corner and intermediate support posts that beams rest upon. The beams span over the posts and are connected with special post and beam galvanized hardware. The Simpson Strong-Tie Company makes a full line of galvanized steel framing connectors.

Part III of "How to Build a Screen Porch " awaits! The final stages of your construction project will soon have you enjoying your splendid outdoor room!

CLICK or TAP HERE to get FREE QUOTES from local companies that can do this work for you.

Column B412