AsktheBuilder mp3 Radio Show Feb 5 2005

I present to you the lovely and talented Annetta. She is a fantastic radio producer who is always focused. To say that she will be missed is an understatement.

I present to you the lovely and talented Annetta. She is a fantastic radio producer who is always focused. To say that she will be missed is an understatement.

Each title below is a direct link to a downloadable mp3 file.  Just click the title if you want to listen.  Right click if you want to download into your computer to save and play at a later date.

The Copyright to all radio segments is owned by Tim Carter.


Show Open - Tim's Bald Spot and Annetta's Last Day

Junior - Cincinnati - Needs to Know a Toilet Rough-In Dimension

Junior - Cincinnati - Painting a Hardwood Floor

Hank - Hamilton OH - Blowing Snow in Roof Vents

Joe - Greenhills, OH - Hardwood Flooring Over Radiant Heating Tubing

Frank - Mainville, OH - Source for Wine Glass Holders

Max - Chillicothe, OH - Suspended Ceiling Height Clearance

Rudy - New Port Richey, FL - Which AC System Should be Purchased?

Rob - Clermont County, OH - Converting a Garage to a Finished Room

LuAnne - Gross Pointe, MI - Source for Stain Solver Oxygen Bleach

Todd - Adams Cty, OH - Removing Wallpaper from Old Plaster

Annetta's See You Later!

Raised Floor Systems

raised floor system -Tim's Cincinnati Foundation

See that horizontal green fascia board just above the foundation? Behind it is the first floor of my home. My raised floor allows me to have commanding views from my windows, allows abundant light to stream into my basement windows and keeps my wood floor system far away from moisture. PHOTO CREDIT: Tim Carter

DEAR TIM: My husband and I are getting ready to build a new home and the builder is really pushing us to simply pour a concrete slab directly on the soil. I feel uneasy about this for any number of reasons. The builder says it will be cheaper and I am needlessly worrying. What would you do and why? Donna S. Orlando, FL

DEAR DONNA: I can understand why your builder is pushing for a slab on grade solution for your new home as your water table is so high in the sandy soil of Florida. But the builder may be blind to at least one other option that has been around for many years. In fact, I would be willing to bet that within one or two miles of your downtown area we could find several older homes that are 50 or more years old and are not built on slabs that lie directly on the soil.


The older homes we would discover would undoubtedly have a raised wood floor system. The original builder or the architect of these homes probably cleverly disguised the fact that the home is sitting up off the ground 20 or 30 inches.

Why not build a house on a a slab?

I love concrete and think it is a fabulous building material, but I would never personally own a home that is built on a slab. There are several reasons for this. First and foremost, I want to be able to have complete access to all plumbing, electrical and mechanical systems in my house. Houses built on slabs at the very least have the plumbing drainage system buried under the slab. In some instances, heating ducts and some electrical cables are also buried. In a house with a raised floor system, all mechanical systems are readily visible and almost always accessible.

What is a raised floor system?

Raised floor system homes besides their increased functionality simply look better than the same home built directly at grade level. The wall area of the raised foundation helps to give the home both stature and balance. Homes that can be built with raised foundations in areas where basements are possible allow basement windows to be placed above grade. Windows placed above grade permit the maximum amount of available light to readily stream into the lower basement space.

People who live in areas where expansive clay soils are especially troublesome can really benefit from raised wood floor systems. Pier and beam foundations can be used that bypass the pesky clay soils that often cause significant cracks in slab-on-grade homes. Slabs can be engineered to resist expansive clay soils, but if the workmen don't build the slab exactly right, the best intentions of the engineer become worthless as soon as the soil expands or contracts.

Another often overlooked benefit of raised wood floor system construction is a savings for those who live in flood plain zones. You can often build in these designated areas, but if your first floor level is exactly at the elevation of predicted floods you pay a steep flood insurance premium. But for every foot you raise the floor level above the projected flood level, you pay significantly decreased flood insurance premiums. The savings over time can be dramatic. But in addition to those savings, imagine the peace of mind knowing your house stayed dry during a flood while a neighbor's house built on a slab might have had 28 inches of murky polluted water invading his house for days.

What about the cost savings of a raised floor system vs slab on grade?

As for the cost savings of building a raised floor system versus a slab-on-grade home, you are talking chump change in my opinion. If your builder does an accurate labor and material cost comparison, I'll wager that the extra cost of a raised wood floor system for an average home will not exceed an extra $1,500.00. Yes, it is more money, but that extra cost buys you numerous advantages as well as increased curb appeal.

Some opponents of raised floor system construction say it is too difficult to go up and down steps to get into and out of the house. It is very easy to grade the exterior of the ground around some of these houses to create a gently sloping landscaped berm that serves as a pathway to the front porch so that all but one step is required to enter the home.

There are multiple foundation types to choose from when building a raised floor system. The pier and beam method works well in areas that have mature trees and vegetation. This system requires that the builder just dig several pits to install square or round footers that support the weight of poured concrete or concrete block columns.

A traditional continuous poured footer foundation with a continuous concrete block wall or poured concrete wall can sever many tree roots and weaken or kill nearby trees that add value, beauty and perhaps natural shading in sunny hot climates. It is always a good idea to consult with a certified arborist before you decide upon which foundation method your builder is going to employ.

Column 553

Storage Solutions for Computer Data

Flash Drive Data Storage Glovebox

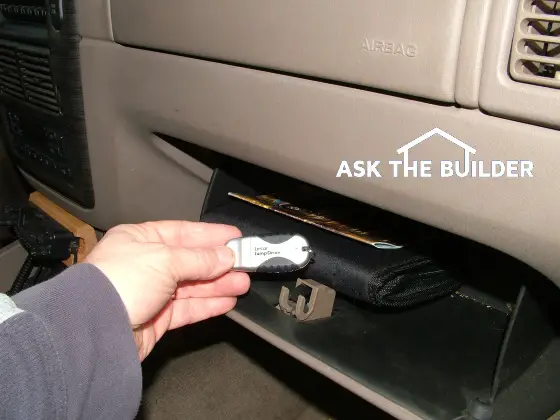
Look at that small flash drive in my fingers! It holds 1 gigabyte of information. But as technology advances, it will be obsolete in just 18 months. Putting it in my car's glove box gets it away from my house in the event of a fire. PHOTO CREDIT: Tim Carter

DEAR TIM: I have a feeling that I might be a lot like many of your readers. I have a personal computer at home and wonder what is the best way to protect it and other data I have from fires and flooding. Some of my digital photos and other data are irreplaceable. Can I build something that would be fireproof and floodproof? On a personal level, how do you protect your computer data? Chuck E. Farmington Hills, MI

DEAR CHUCK: Your question presents, I believe, one of those rare instances where many people know they have a problem, but are too lazy to do something about it, or they make excuses as to why it never gets done. But if a fire or flood strikes, then Armageddon strikes in that person's private world and they are consumed by guilt and heartache.


For example, just days ago on my own local news a woman's flooding plight was shown. Priceless family photos were immersed in basement flood waters. Had the woman just taken the time to place them 6 feet in the air instead of in a box on the floor, her photos would not be waterlogged and wrinkled.

damaged kitchen from fire

How hot does a house fire get?

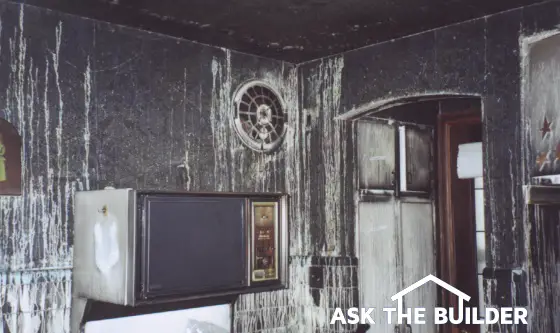
As far as fires go, they can cause damage just as fast as a flash flood. If a couch, or other combustible objects, catch fire in the room where you store your computer and other data, the temperature in the room just 3 feet off the floor can reach 500 F within three minutes of the ignition of the fire. Less than a minute later, the temperature in the room can climb to 1,400 F. Most plastic CD-ROM discs, magnetic disks and even circuit boards would be ruined within seconds when exposed to these extreme temperatures.

How about a fireproof safe?

You can buy many different fireproof safes and storage cabinets that can do a fantastic job of protecting the contents so long as they are placed inside the safe. Some may perform well in a flood if they have waterproof seals around the doors. But one of the problems is making sure the stuff you want to store fits inside the safe or the cabinet.

You can build a crude masonry storage bunker that will help protect your possessions in all but the worst fires. This structure would function much like a classic firewall in a building. Talk to any firefighter and they will tell you that solid masonry walls can take all but what the most severe fires can dish out. But the problem is dealing with an effective door to the bunker that will stop the searing gases from the fire from seeping into the masonry hut.

Store data outside the house

I solved my personal problem with the help from some computer savvy friends, two quick inexpensive purchases from the Internet and a few spare parts I had sitting around my house.

The first thing I purchased was an incredibly small flash or jump drive that acts just like the hard drive on your computer. I was able to purchase one that has an enormous 1 gigabyte storage capacity. This device is the size of my thumb, but much flatter. It plugs right into one of those small rectangular USB ports in my computer.

Once inserted, my computer thinks it is just another hard drive. I copy important folders and data onto this device, disconnect it and take it up and throw it in my car's glove box. Since I park my car on my driveway, it is safe from any house fire that might involve my attached garage. Floods normally don't cut across my driveway.

External Hard Drives

From time to time, I have discovered that I need more space than the little flash drive has to offer. It just so happens I had several older computers around I no longer use. These idle computers contained stagnant internal hard drives that still had enormous amounts of unused storage space. It only took me two minutes to remove the hard drive from one of the old computers. Fifteen dollars got me a connection cable that powers the drive and connects the old drive to my computer. I can transfer huge amounts of backup data to the old drives and store this device in a plastic bag in my car's trunk.

Offsite storage of data is critical. Some people say to store data in safe deposit boxes or other places. But that is hard to do and is a reason why most don't do it. Walking out to your car takes seconds. But if you park your car in an attached garage, then you need to develop a means to safely store your data outside of your home.

Inexpensive plastic 5-gallon buckets with snap-on lids work well as they are waterproof. But they can become saunas if you place them in direct sunlight. The small flash drives can be placed in a zip-lock plastic freezer storage bag and stored in an outdoor shed or under an artificial rock in a garden. The most important thing to remember is to protect these emergency backup storage devices from the same heat and moisture that you think might affect them inside your home.

If you ever bring one of these devices indoors and they are cold, you must allow them to reach room temperature and then wait an additional four hours before you use them. Condensation can form on the internal sensitive electrical parts of the hard or flash drives. If you apply power to them while the condensation is still present, they can short out and fail to function.

Column 552

Buy Tim a Lift Ticket

Buy Tim a Lift Ticket

Did you learn something new while you were at my AsktheBuilder.com website? Fantastic!

Well I don't know about you, but let's forget about working for a while and have some fun.

Have you ever skied before? I have to tell you, it is a wonderful time. It is easy to ski if you start out on short skies and make sure your boots are tight around your ankles and lower calves. All right, let's get out on the slopes!

What did you say?

Wait, I have to take my helmet off to hear you.

You want me to go ski alone? What?

Are you serious, you want to buy me something to repay me for helping you? Well, you don't have to, but here is what I could use:

Cup of Hot Chocolate $3.00
Slice of Pizza and a Pepsi $7.00
Packed Lunch from Off-Slope Deli $9.00
Lunch at the Lodge $18.00
After 1:00 PM Lift Ticket $24.00
All-Day Lift Ticket $35.00
Camelbak Cloud Walker Pak $60.00
Sponsor an AsktheBuilder.com Two-Day Ski Outing at the USA Resort of Your Choice - Includes a One-Day Home Improvement Consultation after the Snow Cats reclaim the slopes $4,250.00

"Tim, You should try Big Sky in Montana. Lift lines are non-existent. Don't take the tram up to the top of Lone Peak! My gift to you is for the great breakfast they serve at the Huntley Lodge." Ben Tonkins

"Maybe you need shorter skis? Try 165's. Enjoy your one day lift ticket." Sandy Bennett

Everyone wants to see what you have to say, so why not go ahead and just buy me a cup of hot chocolate. I sincerely appreciate it!

Let's meet back at the hot tub after dinner!

Whole House Inspection Checklist

Why hire an expensive home inspector if you can use my affordable checklist to ELIMINATE a house from your list?

Click Here to Buy the Checklist
Think about this: Why pay an inspector $400 or more dollars to tell you something you might discover on your own? The home(s) you are looking at may contain all sorts of flaws that can cost you lots of money after you move in.

Once you finally find a house that looks great using my checklist, THEN you pick up the phone and call the professional inspector!

If you think those FREE or less-expensive checklists you and I have seen on the Internet are going to help you, stop reading NOW! And while you are reading the $400 inspection report telling you why you shouldn't buy the house, keep repeating these words:

I GOT what I PAID for. I GOT what I PAID for.....

Click Here to Buy the Checklist
And a year from now after you have moved into the home and 3 or 4 defects surface AFTER and you are on the phone with your attorney, repeat those same words.

Do you want a powerful tool that will allow you to objectively uncover flaws and mistakes in the houses you are looking at?

If so, you need my Existing Home Checklist. The best part is that it can be yours less than 90 seconds from now.


Easy-to-Open PDF file DELIVERED INSTANTLY !


This checklist contains over 100 Vital Things you MUST look at as you walk through the houses you look at.

Also included are some great tips you need to know before you make an offer on any house. How do I know these? I happen to be a licensed real estate broker in Ohio among other things. So I know just a little bit about buying homes and what people should look for.

Each item needs to be inspected to make sure you avoid getting intoxicated by the house's sizzle.

Click Here to Buy the Checklist
My checklist allows you to protect thousands of dollars of your money. Once completed, you have a written record you can look at and review after you walk out of the door. If you visit several homes on the same day, you can print multiple copies and compare one checklist against the other. My checklist forces you to look at specific things in each of these areas and more:

  • SERIOUS Site or Lot Problems
  • Driveways
  • Decks
  • Patios
  • Roof
  • Furnace
  • Air Conditioning
  • Plumbing System
  • Kitchen
  • Bath
  • Foundation
  • Crawlspace
  • Electric System
  • Windows
  • Doors
  • Fireplace
  • Attic
  • and More!

Click Here to Buy the Checklist
EXTRA NEWS from Tim Carter:
Purchase my Easy-to-Use Home Inspection Checklist Now. This Simple-To-Use Tool allows you to spot many defects before you have to hire a real inspector. You can then eliminate a house and move on to one with fewer defects.

You have nothing to lose. If my checklist doesn't work for you, I'll give you your money back. Oh, one more thing, it's an Instant Download! You can have the checklist in your hands just minutes from now!

Crown Molding DVD


Installing Crown Molding DVD
Just $19.97 + $5.25 S&H
Total Cost: $25.22


1. Are there 20 or more scrap pieces of crown molding scattered around your miter saw?
Yes
No

2. Is your spouse still talking to you?
Are You Kidding Me?
Does Growling Count?

3. Are the joints between your miters big enough for a 747 to taxi through?
Yes
No

4. Are your cuts messed up no matter how you place the molding in your saw?
Yes
No

5. Did you know that if you make a mistake cutting one 16-foot long piece of crown molding you could instantly waste up to $75.00?
Yes
No

6. Do you realize that if you throw in the towel and hire a finish carpenter and a helper for a day to install your crown molding that he will probably charge you nearly $750.00?
Yes
No

If you answered Yes or Are You Kidding Me? in two or more of the questions above, you need my Crown Molding DVD.
 
 
Listen to what Gary Kinnett has to say about the way I explain things:

"Your instructions are so thorough it is amazing. You account for every question & issue possible. One can't fail following your instructions. Thanks so much!"

Click here to watch a quick sample of this professionally produced DVD. Be sure to turn your speakers up!

Minutes after watching this DVD you will be cutting perfect, I mean perfect, miter cuts. Your in-laws, spouse, friends, neighbors and co-workers will be amazed at your newfangled finish carpentry skills.

This DVD was shot with High Definition television equipment by a professional film and video company. It is fast-paced and will show you step-by-step how I install crown molding in just about every situation you can imagine. Beware of other DVD products out there. Some are produced using a common homeowner video camera bought at a local electronics store. To make matters worse, some only cover one aspect of crown molding: inside and outside corners.

Let me Teach You How I Cut Crown Molding for just $19.97 plus $5.25 S+H

Click Here to Order the DVD!

My action-packed DVD is totally interactive and covers the following topics:

  • Required Tools and Safety
  • Positioning and Cutting Crown Molding in a power miter saw
  • Inside Corners
  • Outside Corners
  • Ending Crown Molding on a Wall
  • Crown Molding On Top of Cabinets
  • Crown in 45 and 60 Degree Bay Windows
  • Crown Molding in Stairwells
  • Cathedral and Vaulted Ceilings
  • Fancy Crown Molding Corners and Installation Tips for Rounded Corners
  • SECRET Nailing Tips!
  • No Tedious Coping Required! Why? To create the cut line you follow with the coping saw, you have to cut the molding in the miter saw the way I show you in the DVD. Why waste time coping when you already have a perfect fit? No other publication I know of shows this trick to perfect fits in corners using just a miter saw!


 Shipping and Handling Info: The DVD is shipped Priority Mail with the US Postal Service. We have been getting superb 3-day service to the West Coast and 2-day service to the East Coast. Orders received by 4:00 p.m. Eastern Time ship the same business day!

Return Policy: This product has a money-back guarantee. Please read our Return Policy here.

Click Here to Order the DVD!

New Stanley Tools

What is so great here at the tool show? Well, for starters you must go see the new Stanley Illumination Tools. Most people would call them flashlights. But the new 369 Illuminator can run for 200 hours on just 9 AA batteries.

They just showed a new Stanley Maxlife 369 Flashlight that is going to rock your world.The handle of this illumination tool turns into a tripod so the light can stand up on its own allowing you to work with two hands.

PHOTO CREDIT: Tim Carter

PHOTO CREDIT: Tim Carter

You are looking at the new standard of flashlights powered by LED technology. The one lying flat is the Stanley Maxlife 369. The cool model next to it is has a rotating light head so it can aim straight up or rotate 90 degrees to aim sideways. Of course you can stop it at any point in between.

The new Stanley flashlights have some amazing hidden engineering. The lights operate on either 3, 6 or 9 AA batteries. Each of the aluminum tubes you see holds three batteries. The best part is that you can mix and match old batteries with new ones and it doesn't degrade the light power. If you do that with regular flashlights, the power from the fresh battery is pulled into the old or partially worn out battery and the light is dim. Not with these new LED flashlights from Stanley. They are bright!

So you are going to need a toolbox to store the flashlights and other hand tools, right? Well how about one that talks to you and tells you when you have not put a tool back in the toolbox?

The toolbox here is available in stores but is not equipped with any electronics. It was cool to see this radio controlled toolbox roam the convention center floor and cuddle up next to visitors. They didn't know what to think because they could not see how it was being controlled. It was very funny to watch this robotic toolbox move about and cause people to move out of its way.

This futuristic toolbox is a working prototype and if there is enough interest from consumers like you, they may bring it to the market. So how can you vote? Email me or get in touch with Stanley.

The mouth of the beast opened automatically! This motorized toolbox was assembled by a young Israeli who works indirectly for Stanley Tools. No doubt the inspiration came from R2D2 in Star Wars.

Granite Countertop Stains

orange juice glass on granite countertop

Here is my own Brazilian Verde Peacock granite bar top. This glass of orange juice looks pretty harmless, but the ice will eventually create condensation and a glass ring. A further danger is the citric acid in the orange juice. Who knows what it might do to unsealed granite?

DEAR TIM: I was wondering if human saliva can stain unsealed granite countertops? We just had some installed today and the guy was spitting on the suction cups prior to using them to move the pieces. Now they have dark spots where the suctions cups were in contact with the granite. Stressed Out Big Kitchen Investment Guy - Bart Jansen

DEAR BART - aka Mr. Stressed Out: I imagine anything is possible, and that saliva could stain granite. But my instincts tell me the stains are temporary.

Not all granites are equal. They are as varied as grains of sand on a beach. Different granites have varying chemical and crystalline makeups. These characteristics make them react differently when water soaks into the micro-pores of the granite. One thing this observation of yours illustrated is that liquids can soak into the polished faces of the granite surface.


The air pressure pushing on the suction cups exacerbated the situation. The 14 pounds per square inch +/-  pressure on the other side of the granite from the cups pulled the saliva and moisture deeper into the granite. If saliva was just placed on the top of the polished granite, the air pressure on each side of the granite is the same, and surface tension might minimize the depth to which the saliva would penetrate into the granite. But when you apply a vacuum, the saliva can be pulled deep into the granite.

The moisture of the saliva causes light to refract differently and this is why you see a dark spot. Once the granite dries, the dark spot usually goes away. Sealers help to block the pores and micro-cracks in the granite so water and oils sit on the surface.

Stains become permanent when the liquid can't leave the granite. Oils are one such liquid. They can be very difficult to lift from a granite surface. This is one reason pizza boxes should never be placed on a granite top. Oil can soak into the cardboard box and then pass into the granite.

Sealer bottles on granite countertop

This is the granite kitchen countertop in the last house I built in Cincinnati, Ohio. It was a gorgeous light granite and I sealed it to ensure there were no stains. Copyright 2017 Tim Carter

If the worker had just spit out a wad of chewing tobacco or been eating some spaghetti with tomato sauce, then there is a chance his saliva contained colored molecules that could stain the granite. If this is the case, the granite supplier probably has special cleaners that can be used to remove the stains.

One thing is for certain, do not seal the granite until the surface is stain-free. Sealing the granite could lock the stain into the stone permanently.

Column N8

Shrinking a Window Opening

tall window - Cincinnati House

Shrinking a tall window like this is easy. The problems begin when you try to make a window wider. PHOTO CREDIT: Tim Carter

DEAR TIM: I'm pre-approved to buy an existing home and some of the ones I like have tall windows. I don't like them and would love to convert the tall windows to short ones.

Is this possible and is it expensive? How much work is involved and what should I avoid?

Do you feel this is a job for a do-it-yourselfer or should I hire a professional? Eric G., Fairborn, OH

DEAR ERIC: Tall windows are common in many Victorian-era homes and those that sport a contemporary flair.

Big Glass = Big Light

The extra glass area lets in lots of light and creates a unique look when you are inside looking out, so be sure you give those tall windows a one or two-month test drive before you break out the pry bar. Be prepared for a little bit of sticker shock. High-quality windows can be pricey but they are worth every penny.

Free & Fast BIDS

CLICK HERE to get FREE & FAST BIDS from local replacement window contractors. Ask about AAMA Gold Label windows. They're the best.

The simple answer to your question is it is not hard to reduce the height of a tall window. It doesn't matter whether you are reducing the opening from the top or the bottom or both directions. My answer would be completely different if you told me you wanted to enlarge the width of the window. When you decide to do this, the scope of the job changes dramatically. But if you want to reduce the width and shorten a window opening at the same time, that is also a relatively easy task.

Virtually every window has a structural header or beam that passes over the opening. Windows and doors are not designed to carry any loads and for all intents and purposes they float in the rough opening where they reside. In fact, there is supposed to be a one-half inch gap on the sides and top of widows and doors so they don't even come into direct contact with the structural framing that surrounds them. If weight is placed upon a window or door you will often notice it is hard to operate, it doesn't close properly and in worse cases, the glass shatters unexpectedly.

The biggest challenges one often faces when reducing the size of a window are:

  • finding a new window that matches the original ones
  • waterproofing the new window
  • matching the exterior and interior wall finishes

You should be able to find a window that matches, or is a close match, if you are patient. For example, some wood window manufacturers still offer as an option horns on windows to match those you often see on 100 year-old window sashes. Window sills are also important to match so pay attention to the existing windows at your house and take numerous photos of them with you when you go to shop for new windows.

The flashing details around the new window are extremely critical. You can't depend upon caulk to keep you and the walls of your house dry over the long haul. You need to collect any water that is streaming down the inside of the wall above the new window and redirect this water to the exterior. Existing water infiltration barrier membranes must be securely fastened to the new window to ensure water can't get between the window and the house framing.

CLICK HERE to get FREE & FAST BIDS from local replacement window contractors. Ask about AAMA Gold Label windows. They're the best.

The actual process of reducing the opening to accommodate the new window is easy. You simply frame the rough opening to the exact dimensions provided by the window manufacturer. Use properly-sized framing materials so you can install the correct interior and exterior finishes that will be in the same plane as the current finishes. You may have to add thin strips of lumber to build out framing so that modern materials work.

The exterior finish is often much harder to match than the interior. If the exterior is wood or similar siding, avoid butting the new material next to the siding that was cut to fit the old window. Try to remove some of the existing siding so the butt joints can be randomly staggered. If the exterior is brick, take the time to tooth out adjacent brick so only the brick next to the window are cut.

You may discover that part of the job is best handled by a professional and then you can worry about finishing the interior surfaces. I would highly recommend this if you have never installed a new window before. Take a day off from work to watch how it is done so you can tackle the next one by yourself.

Perhaps the most important step in the window replacement process is the waterproofing step. A mistake here may show itself quickly, but smaller chronic leaks can do lots of silent damage that may not expose itself for many years. It is important to caulk a window once the installation is complete, but caulk should not be the sole waterproofing defense.

Pay close attention to the written installation instructions provided by the window manufacturer. They often call out the precise rough-in dimensions for the new opening. Follow these to the letter. These same instructions often have very good directions for attaching water membranes to the window. Note that the membranes and taping methods mimic how shingles are installed. The upper layers lap over lower layers.

CLICK HERE to get FREE & FAST BIDS from local replacement window contractors. Ask about AAMA Gold Label windows. They're the best.

Column 549

Wood vs. Poured Concrete Foundations

foundation wall new construction

Wood vs. Poured Concrete Foundations

"I love wood and my house contains lots of it, but I refused to use it for my foundation."

DEAR TIM: Please shed some light on the advantages on a wood foundation or poured wall foundation. We plan to build and I want a poured wall, but my wife's boss has a new home with a wood foundation and he has convinced her it is the best option. I admit their finished basement is super without posts but question the strength and durability. We hope to start building in February. My son who is a framer agrees with her. William D. Caldwell, Oregon, OH

DEAR WILLIAM: The simple answer is why not have both and an additional insulation system thrown in at the same time? What would you say if I told you a poured concrete foundation that had integral wood framing as well as closed cell foam could be erected at your jobsite in just one day? Would you be impressed if your son started to work the next morning installing prefabricated floor trusses that could span 30, 40 even 50 feet with no center support beams? It is okay, you can get up off the floor now.

My college degree is in geology and I have a special interest in history. When I look back at the Seven Wonders of the World and see the ones still standing, they are not made of wood. I love wood and my house contains lots of it, but I refused to use it for my foundation. I know structural engineers can easily design a wood foundation that will withstand all of the static and dynamic loads thrust upon it by soil and even additional pressure from uphill soil sliding down towards a wood foundation. But I desire the permanence of steel reinforced concrete which is nothing more than artificial rock.

This CCA-treated-lumber post was rated for burial. That means it was protected against decay from wood rot and insects. As you can see, something went terribly wrong. The post was only in the ground for 15 years. Imagine if this happened to your wood foundation. PHOTO CREDIT: Tim Carter

This CCA-treated-lumber post was rated for burial. That means it was protected against decay from wood rot and insects. As you can see, something went terribly wrong. The post was only in the ground for 15 years. Imagine if this happened to your wood foundation. PHOTO CREDIT: Tim Carter

As for wood foundations, what happens if the day the lumber was scheduled for treatment the worker at the plant in charge of injecting the chemicals had a fight with his wife or his boss and had a severe head cold at the same time? Is it possible the wood might not get treated with enough chemicals? Sure it is possible. Is it likely with modern quality controls? Probably not. The same can be said for concrete. Your builder may order 3,500 PSI concrete, but the ready mix plant may ship a lower strength product.

But with concrete, an experienced concrete mason can actually look and work with concrete coming out of the truck and have a very good feeling as to the amount of cement in the mix. Higher strength concretes have a completely different look than low-strength mixes. You can't say that about treated lumber.

Precast Concrete Foundation Benefits

You are in luck as you have a precast concrete foundation plant within 35 miles of your home. These foundations are ideal for any number of reasons and the best part is they are poured in climate-controlled settings and then allowed to cure in rooms where the temperature does not drop below freezing. Once the panels are cured, they are trucked to the jobsite and dropped into position with a crane. Where two foundation panels meet, the seams are permanently sealed as each panel is bolted to the adjacent one. Once the complete foundation is set, the exterior is coated as any foundation would be with a true waterproofing compound.

CLICK or TAP HERE to get FREE QUOTES from local companies that can help you with your foundation.

Use floor trusses for no center beam basements

Talk to a good residential structural engineer about your floor system. Let this person design a superb subfloor system using floor trusses or possibly wood I joists. Wood Floor trusses and some wood I joists can be made to span incredible distances with no center beams or columns. What's more, if designed properly your floors will have no spring to them at all. They will be as stiff and hard as Chinese arithmetic!

Column N6