Ventilating Attics in Hot Homes

Turbine Vent

Ventilating attic space is super easy using a standard turbine vent. They come in different colors. Some have external braces. This one you see is Made in the USA. CLICK THE IMAGE TO ORDER ONE OF THESE GREAT TURBINE VENTS.

Revised March - 2018

Ventilating Attic Spaces - Do It With Turbine Vents

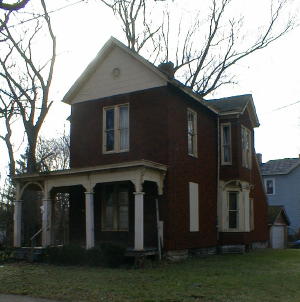
DEAR TIM: What about ventilating attic spaces in a Cape Cod style home that has a short knee wall in the upper level? I've asked three different contractors and received three different answers.

The attic and second-floor areas get stifling hot in the summer months. I'm getting new shingles installed and thought this might be the time to make changes. Joan S., Royal Oak, MI

Podcast 3

CLICK this image and listen to Ask the Builder podcasts! Copyright 2018 Tim Carter

Related Links

Turbine Vents Are Easy To Install

Hot Garage Ventilation - It's Not Easy

DEAR JOAN: You could have told me your house was a ranch, a colonial, tri-level, Victorian, etc. and my answer would be the same. High attic temperatures are a reality in just about any traditionally built home that gets direct solar radiation.

I've been in attics in the middle of the summer where it was nearly impossible to breathe. Sweat burst from my skin within seconds of entering the inferno. My best guess put the temperature somewhere near or above 140F in these wretched confined attic spaces.

Free & Fast Bids

CLICK HERE to get FREE & FAST BIDS from local contractors who can install attic ventilation fans.

This makes sense when you discover the surface temperature of the outside of a normal roof approaches 160 F on a summer day.

Flir camera roof photo

This is a photo of my own roof I took in the summer of 2015. I took it with a FLIR thermal camera attached to my smartphone. You may be able to see the white crosshairs and the temperature next to them: 155.2 F. CLICK THE PHOTO NOW TO HAVE THE FLIR CAMERA DELIVERED TO YOUR HOME.

Infrared Heat Cooking The  Sloped Attic Surfaces

Your Cape Cod home offers distinct challenges with respect to combating high temperatures and infrared heat. The bottom of the steep roof rafters typically rests on top of the first floor walls.

As they rise and meet at the center of the house, they create a smaller livable space on the second floor. Small vertical half or knee walls intersect the underside of the rafters. Most Cape Cod homes have a small flat ceiling area in the center of the second-floor living area. The rest of the ceiling space is created by the underside of the roof rafters.

Little Space To Insulate

The slanted ceiling is a huge problem area. Many Cape Cod roofs are framed with 2 x 6s and on rare occasions, 2 x 8s. The small vertical knee wall allows carpenters to use smaller dimensional rough lumber.

cape cod roof vent far shot

This Cape Cod home is easier to ventilate. Two turbine vents on the back roof will do a fantastic job so long as the front and rear soffit vents are clear and allow air to flow towards the turbine vents.

But this small lumber leaves very little space for both insulation and the required free air space above the insulation. Free air space above all insulation is a necessity. It is the conduit that permits the free flow of cool air through an attic space.

You Must Move Lots Of Air

To effectively cool your attic, which in turn helps to keep the finished living space cool, you must constantly exhaust hot attic air. The air in an attic gets hot not unlike air that gets heated in a furnace.

The actual roof surface temperature can soar to nearly 160F in direct sunlight on a hot summer day at noon. This intense heat passes through to the wood roof sheathing and wood rafters

Even though they do not glow as would a cooking element in an oven, they're radiating enormous amounts of heat. The air in the attic collects this heat and in turn, transfers it to the insulation. The actual insulation gets hot and transfers its heat directly to the finished ceiling. This is called conductive heat transfer.

CLICK HERE to get FREE & FAST BIDS from local contractors who can install attic ventilation fans.

Ventilate Attics Using Wind Power

I love using Mother Nature's wind power to exhaust hot air from attics. Wind-powered turbine vents do a magnificent job of pulling vast amounts of hot air from attic spaces. These inexpensive devices can be installed by your roofers in less than 30 minutes.

A typical home needs three turbine vents. I like to put them on the backside of a roof so they are barely visible from the front yard. Be sure to buy turbine vents that have external bracing instead of internal braces.

Powered Attic Ventilation Fans  Move the Most Air

Electric-powered attic ventilation (PAV) fans will also move lots of air. But these fans can develop so much suction they can actually draw air from inside your home.

powered-attic-vent-fan

This is an attic fan powered by electricity. They can move up to 1600 cubic feet of air per minute. Some are more powerful. CLICK THE PHOTO now to have this at your home in days.

If you use an air conditioner, this can be bad as you draw expensive cool air from your finished living space up into your attic. PAVs, as well as turbine vents, require abundant soffit ventilation or low-roof static pot vents that allow cooler outside air to readily enter the attic as hot air is exhausted.

Radiant Barriers Are Great - Dust Hurts Efficiency

I increased the comfort of my own home by installing radiant barrier chips. These highly reflective thin pieces of plastic act like mirrors and reflect heat back to its source.

They work exactly like a piece of aluminum foil that covers a casserole dish. But a single layer of any radiant barrier can lose its ability to reflect heat if it gets covered with dust. This is why the chips are so much better.

When the chips are installed tens of thousands of them float down onto the insulation. Look closely and you will discover that you might have six or seven layers of the radiant barrier on top of one another. The top layer may get dusty over time, but the chips just below work like they are brand new.

More Insulation Doesn't Mean Cooler House!

Adding more insulation will not necessarily make a house cooler. In fact, it can add to the heat load after the sun goes down. Insulation is designed to slow the rate of heat transfer.

That's great if you have a warm home and don't want the heat to seep into a cold attic. But you want your insulation, especially that which touches up against your ceilings, to be as cool as possible. If the insulation is hot, it slowly liberates this heat back towards the attic.

The best way to keep insulation cool, as well as attic air, is to move lots of air through the attic space. Even though the outside temperature may be 90 - 98F, it is much cooler than 140 - 160F. Your home air conditioner works very hard to combat extreme attic temperatures. Lower the attic temperature even by 15 - 20F and you will save money and be cooler.

CLICK HERE to get FREE & FAST BIDS from local contractors who can install attic ventilation fans.

Column 509

Move-in Deadline Creates Pressure

Move-in Deadline Creates Pressure

This bathroom is undergoing a major remodel. Each step must be done at the right time to minimize cost and get the job done fast. Photo Credit: Tim Carter

Move-in or Remodeling Deadlines

DEAR TIM: My husband and I are weeks away from moving into our first fixer-upper home. We thought we could rehab it in five weeks and are now overwhelmed with unfinished work. Move-in day is three weeks away and our new baby is due in four months. We both work on the house every free moment we are not at our day jobs, but it seems nothing is getting done. What is the best strategy to adopt before we move into the home? Jobi L., Erlanger, KY

DEAR JOBI: Your dilemma makes me feel as if I just exited a time machine. The exact same thing happened to my wife and I with our first home sans the baby complication. Almost 30 years ago, Kathy and I purchased an FHA repossessed home whose gaping hole in the roof over the master bedroom made it appear as if it had been a victim of a WWII bombing raid. I thought that three months of full-time work on the house with myself and two helpers would allow me to move into a totally rehabbed home. My math was way off. The three months turned into six months!

How do you calculate deadlines?

The first thing I would recommend is to stop for a few hours and regroup. Your situation can and should be approached as any mathematical problem. You have a crisp deadline just ahead and can probably calculate a realistic amount of time you both can work on the house between now and the move-in date. Do that calculation and be conservative in your calculations.

As soon as you finish that calculation, stop and think back about some of the tasks you have recently completed. Try to accurately determine the amount of time you spent patching plaster or painting a particular room. Think back to the amount of time it actually takes to paint a window from start to finish. These task times allow you to project how much time is required to complete a multi-faceted job with a respectable degree of accuracy.

Make an unfinished job list

It is now time to make the unfinished job list. Go into each room and make a detailed list of each task that must be done. A typical list might include: strip wallpaper from walls, wash down walls, ceiling and woodwork, patch walls, pick up materials, sand and dust walls and woodwork, paints walls and ceilings, paint windows and woodwork, clean tools, refinish floor, etc. Do this for each and every room and don't forget closets, hallways and staircases. Next to each task assign a realistic amount of time it will take you to complete that job.


Tasks to be performed Estimated Time
Remove Fixtures from Bathroom 2.5 Hours
Strip Wallpaper from Bath Walls 6.0 Hours
Wash Glue from Bath Walls 2.0 Hours
Patch Holes and Sand Walls 3.5 Hours
Prime and Paint Walls and Trim 7.0 Hours
Install Baseboard in Bedroom 4.5 Hours
Install New Closet Shelving 1.5 Hours


How many hours a week can be spend working on the project?

There is no doubt in my mind you will quickly discover that you and your husband combined can probably devote no more than 100 hours of work per week to the home. Many of these hours will be not be as productive as you might like since you will be working close to 14 hours per day. My instincts tell me that when you total the amount of hours you need to work to complete every unfinished task in the house, it will be hundreds of hours more work than you have time before the critical move-in day arrives.

Prioritize your tasks

It is now time to prioritize tasks. In my case, Kathy and I decided it was very important to have our master bedroom finished as well as the bathroom. We didn't want to go to work each day in dust-covered clothes, although for me it was an option. You must decide which rooms are the most important to finish and begin to focus all efforts on those rooms.

It is very important to make sure that you keep in mind what needs to happen to finish all tasks. For example, it would not be prudent to finish the kitchen if you discover three months from now you must remove its ceiling to replace the plumbing in the bathroom above. The time spent thinking about how tasks relate to one another will save you time and money as you progress with this ambitious house renovation job.

Be cautious around materials that can product harmful fumes!

I also urge you to consult your doctor. You need to protect your health and that of your unborn child. Some of the building materials you are working with may produce harmful fumes or by-products as they dry and cure. The existing home may have significant amounts of lead paint on the walls and woodwork. Old varnished woodwork can also contain lead. Sanding these surfaces can produce toxic amounts of lead dust that can have serious and permanent health affects.

Is it easy to underestimate the time needed for remodeling?

Underestimating the amount of time it takes to complete remodeling jobs is a very common rookie mistake. The lack of hands-on experience and professional tools, the inability to properly plan the staging of tasks and some poor quality advice found in home improvement television shows is partially to blame. Add to this the cumulative stress of fatigue and pressure from a looming deadline and the ingredients for a disaster are ready to be blended together.

It takes years of full-time hands-on experience to master certain tasks. If a person with no experience thinks they can install ceramic tile as fast and as accurately as a true professional, they are dreaming. Each craft has hundreds of small tricks that professions employ each time they are faced with a different situation. Add to this the constraints of materials that need to properly cure and dry before the next step happens and one can see why it takes weeks to do something instead of hours or days.

Old Water Pipes Must Go

DEAR TIM: My house has old galvanized iron water pipes. The water pressure is bad at many faucets and down to almost nothing in the kitchen. The volume of hot water that comes out of any faucet is especially low. I would love to replace the piping with copper, but I feel that would be far too expensive. I also don't have a clue how to solder copper pipes. Can I clean the pipes out? Should I use another material? What would you do? Tracy P., St. Joseph, MO

DEAR TRACY: Among other things, I happen to be a licensed master plumber and have had more than my fair share of encounters with old galvanized iron water lines. They were an acceptable building material back one hundred years ago. The plumber who installed those lines many years ago could have used threaded brass piping and fittings, but those materials were more expensive. Your pipes have reached the end of their useful life span and must be replaced.

Soldering copper is not as hard as you might think.

Soldering copper is not as hard as you might think.

As galvanized iron water lines age the interior of the pipe gets clogged with mineral deposits. Hot water temperatures seem to accelerate the growth of these deposits. The mineral buildup does not affect the water quality, but it indeed has an impact on the quantity of water the pipes can deliver. I have removed one half inch diameter galvanized water lines that run horizontally across basement ceilings only to discover an opening not much bigger than a cocktail straw - perhaps 1/8 inch diameter. Vertical galvanized iron water lines that run between different floors of a home do not accumulate sediment as quickly as water lines that lay flat.

I think your fear of the high cost for copper tubing is unfounded. I did a very quick calculation and I estimate that you would spend not much more than $250 for the copper tubing, fittings and valves and no more than $40 in tools to cut and solder the copper.

The task of cutting copper tubing and soldering is not as challenging as you might think. In fact, you can purchase cool copper fittings that already have the lead-free solder built-in to the fitting. You simply clean the ends of the cut tubing with an abrasive cloth, clean the inside of the special fittings with a round wire brush and then apply a thin coat of soldering flux to the cleaned surfaces. After inserting the tubing into the fitting, you apply heat from a torch for several seconds and you will actually see the solder appear at the tip of the fitting signaling to you the solder joint is complete.

You may wish to use another piping material if copper seems too daunting. Plastic CPVC piping and fittings are approved by just about every model building and plumbing code in the nation. This plastic piping is welded together using special primers and cements. You must follow the directions listed on the labels of these chemicals as the misuse of them can cause problems with water taste if excess cement finds its way inside the pipes as you work.

Simple tools to cut & solder copper tubing.

Simple tools to cut & solder copper tubing.


Look closely as these 90 degree elbows are not the same. They are both for half inch copper tubing, but the one on the left comes from the factory with the solder already in it. You simply add some flux and apply the torch to the fitting.

Look closely as these 90 degree elbows are not the same. They are both for half inch copper tubing, but the one on the left comes from the factory with the solder already in it. You simply add some flux and apply the torch to the fitting.

CPVC piping has a very high expansion / contraction coefficient. This piping grows significantly when hot water flows through it. The growth can be nearly 5 inches for every 100 feet of piping if the temperature of the water rises 100 F. Water temperature in regular household piping rarely rises 100 F, but even if the temperature goes up just 50 F, the pipes can expand causing all sorts of noise. If you decide to use CPVC, make sure the pipes are not tightly clamped and they pass through large enough holes in wood framing members so they do not bind.

Forget about cleaning out the old galvanized water lines. It is impractical and you will probably ruin the piping as you take it apart. The old threaded joints may actually be near the point of rust through and rotating them with a pipe wrench may break the pipe. I happen to be a big fan of copper and can assure you it is quite simple to solder copper tubing. There are a few tricks you will need to learn if you use traditional solder. The easiest thing to do is buy an inexpensive propane torch kit, a small tubing cutter and the soldering supplies you need. Be sure to purchase lead-free solder. Practice soldering a few joints in your garage. I am willing to bet tomorrow's lunch money that you will master it in ten minutes or less.

Galvanized iron water lines are easily identified. The outer diameter of the pipe is often 7/8 inch. The pipe is gray in color if it has never been painted. Where a pipe enters a fitting, you will see threads on the end of the pipe as you might on a standard threaded screw or bolt. Be careful! It is easy to confuse a threaded galvanized water line with threaded black iron natural gas piping. Do NOT cut into a piping system unless you know for sure what is in the pipes.

It is also not a good idea to mix and match metallic materials. I have seen many plumbers take out clogged galvanized water lines and install copper in their place. But they don't take out all of the galvanized iron piping. At some point the plumbers install a copper adapter that makes a transition between the iron and the copper. This creates a corrosive chemical reaction that causes the galvanized iron piping to begin to rust and break down. Once the corrosion gets bad, you develop a leak.

Concrete Block

concrete block house
Would you believe this home's exterior walls are concrete block? When you use concrete block, your home doesn't need to look like a warehouse.

DEAR TIM: I know this sounds crazy but I am thinking of building a home from concrete blocks. Are there any advantages? What about disadvantages? I am concerned about safety and cold temperatures. Will the block crack if it gets extremely cold? Melissa L., Braxton County, WV

DEAR MELISSA: Surely you are acquainted with fairy tales. Believe it or not, there is much wisdom in those great stories. Read the fairy tale about the three little pigs and you will quickly learn that a house built using masonry materials resists not only the big bad wolf but also wood destroying insects, fire and much more. Open any world history book or visit Europe and you will also discover things that built with stone and masonry materials can last for thousands of years.

A home built using concrete block is nothing new. Travel to the South today and you will see many homes built using concrete block. It is an excellent choice as termites can infest and start to destroy a wood framed home that does not have adequate protection. Concrete block homes that include easy-to-install steel reinforcing can stand up to vicious hurricane winds. Fire typically does not cause a well-built masonry home to collapse. These houses can often be restored with much less effort than a wood frame home destroyed by fire.

Concrete block homes also work well in areas that suffer from earthquakes. Once again the architect or engineer simply has to specify inexpensive steel reinforcing rods that are inserted into any number of hollow voids in the concrete block. A wet concrete mixture of sand, cement and sometimes small rounded gravel is then poured into these voids. This wet mixture surrounds the reinforcing steel and once it cures and hardens imparts incredible strength to the structure.

cinder block house

Here are two different styles of concrete block. The first two courses are split-faced block made to resemble stone. The block above it is traditional smooth-faced block.

It is vitally important that a registered engineer develop the specification for this reinforcing steel. It might also be in your best interest to have the engineer stop by the construction site as the home is being built to make sure the steel is being installed correctly. This may require more than one visit.

The thermal mass created in a concrete block home has numerous advantages. There is far less air infiltration if the home is built well. Concrete block homes are virtually soundproof if you purchase high-quality windows and doors that have excellent weatherstripping. The void space between the window and block must also be sealed well to stop air that acts as a sound-transmission conduit between outdoor noise and your ears inside the home. The thick masonry walls also help to maintain comfort within the home, especially if they are well insulated. Keep in mind that Native Americans used mud and masonry homes to stay cool in the extreme temperatures of the desert Southwest.

The disadvantages of building with concrete block are few in my opinion. There is a slight aesthetic issue. If your builder uses regular concrete block with no facing, your home will possibly look like a warehouse. You can purchase concrete block that has very interesting texture and shapes. Concrete block can be stuccoed readily and this extra masonry can be tinted to nearly any color so you will never have to paint the home.

You need not worry about concrete block and cold temperatures. If the block is well made and the builder installs it according to all industry standards, the block will withstand any cold weather Mother Nature can muster. The block and mortar will also resist repeated assaults of cold rainy weather for many years.

cinder block

Split-faced block when mixed with brick can add depth, color and character all at once.

You should proceed with your plans to build with concrete block. There are several associations that represent the manufacturers of this material and they probably can show you any number of photographs of homes built with concrete block. My guess is you will be amazed as the block is hidden by other common building materials both inside and out. I strongly recommend that you also hire an architect and engineer who can prove to you they have designed numerous concrete block residential homes. The experience they bring to the table will be invaluable as the plans progress.

Concrete block has been used for years to build residential homes. During the 1950's in many parts of the nation, four-inch hollow block was used as the back-up masonry material for brick homes. The outside of the home was brick, but the inside rough surface was concrete block. Furring strips were nailed to the concrete block and plaster or drywall was then applied as the interior finish surface.

The positive attributes of concrete block far outweigh any negatives aspects. The biggest hurdle will be finding a builder that is familiar with concrete block. All too often certain building methods and techniques get kicked to the curb in favor of newer methods. New does not always mean better, not by a long shot. What's more, there have been many innovations with concrete block over the years. Any decent concrete block supplier can astound you with all of the possibilities and advancements in simple concrete block.

Toilet Size Specs – 10 12 & 14

toilet side view not installed

Toilet Size Specs | It's a standard 12-inch rough-in. This is a fairly standard toilet bowl. Note the exposed colon of the toilet. It is the snake-like bulge that leaves from the left-bottom of the bowl and travels up and over the hole. The end of the colon is right at the base of the toilet foot where you see the small hole for the toilet bolt.

"The most common dimension is 12 inches from the finished wall surface."

Toilet Size Specs - 12 Inches is the Magic Number

DEAR TIM: I am looking at toilets for my new bathroom. Our current toilet measures 23 inches from the back wall to the front edge of where the toilet touches the floor. Many of the measurements in brochures seem to start at nearly 27 inches. Space is valuable in this small room. We also have a flushing problem with our current toilet. It seems to always require two or three flushes to rid the bowl of waste. Karen N., Williamstown, NJ

DEAR KAREN: I don't think you are comparing apples to apples. You measured the foot extension of the toilet. The foot is the actual surface dimension and shape of where the toilet bowl base contacts the floor. Bathroom planners and plumbers are rarely interested in that dimension. The most critical dimension is the distance from the front of the bowl where the toilet seat contacts the china bowl to the back of the toilet. My guess is that if you measure your existing toilet, you will quickly discover it extends 27 or even 28 inches from the back wall.

What is the rough-in dimension of a toilet bowl?

An often overlooked measurement is the rough-in dimension of the toilet bowl. This measurement is the distance from the back of the toilet to the center of the waste outlet hole on the underside of the toilet bowl.

It's important to realize this dimension is measured from the finished wall surface.

The most common dimension is 12 inches from the finished wall surface. But many toilet manufacturers also offer two other sizes in case mistakes are made during construction or a pesky floor joist gets in the way. It is not unusual to find toilets with a 10 or 14 inch rough-in dimension. Be sure you purchase a toilet bowl that has the correct rough-in dimension to match your current drainage pipe location.

Be aware you can also use an offset flange to get past a pesky floor joist. CLICK or TAP HERE to get an offset flange.

Do low flush toilets actually save water?

Toilet technology has made significant advancements in the past seven to ten years. In fact, certain manufacturers continue to devote significant research and development resources to toilet design and functionality. There are millions of consumers who are disappointed with the performance of toilets since the low flush water savings law was enacted in January of 1994. You are a perfect example of how that law has backfired. The intent was for toilets to save water by using less water per flush. But if you flush twice or even three times, you may end up using even more water than with an older 3.5 or 5 gallon per flush model.

CLICK or TAP HERE to get FREE quotes from local plumbing companies to install your new toilet.

How Do Toilets Flush?

Flushing toilets is all about physics and stored potential energy. The water that is at rest in the tank just before the flush has the ability to do work because of its weight and the pull of gravity once the flush handle is activated.

For the flush to be complete, this water needs to enter the bowl as rapidly as possible and encounter as little friction as possible as it leaves the bowl on its way to the drain.

You can buy toilets that have enormous three and one-quarter inch flush valve openings at the bottom of the tank. These same toilets have fully-glazed trap-ways so the water and waste slips through the toilet with minimal friction.

empty toilet bowl - not installed

Look at the bottom of the empty bowl. You can see the siphon-jet hole where the water from the tank starts to force water and waste into the colon.

Certain toilets are so well-engineered they can flush solid waste with just 1.4 gallons of water per flush instead of the industry standard of 1.6 gallons of water. This small savings per flush can add up to big savings over time. A family of four using one of these toilets can save nearly 2,000 gallons of water per year. Imagine how much water could be saved if an entire subdivision or city used these toilets.

What other advancements have been made in toilet design?

The advancements in toilet design do not stop at the toilet bowl. You or your plumber can now buy new toilets that take the hassle out of connecting the tank to the toilet bowl. In years past, I and many others struggled with bolts and washers that passed through holes in the bottom of the tank. Tighten the bolts too much and you risk cracking the china. If the bolts were not tightened enough water would leak through the bottom of the bowl.

A new tank design eliminates these holes by using a hidden steel plate on the underside of the tank. The bolts lock into the steel plate and then pass through the holes in the back of the toilet bowl. It is an ingenious concept that will save both time in installation and service calls created by leaks.


Received April 12, 2004:

"This is the first column I have read by anyone that so correctly details how the 1.6 gallon toilets work. My company has installed over 60,000 low flow 1.6 GPF toilets in the Tampa Bay area with virtually no trouble. In fact, the only problem we have is with competing plumbers who say ' ...those new toilets don't work!' Thanks for setting the record straight." Lou Bernucca

Author's Note: Thanks Lou! I am humbled to get praise from a fellow licensed plumber. TC

Low-quality toilets can have a hidden defect that is often very hard to see. Toilets have a colon inside of them that is simply the path of the trapway. The trapway is the internal sealed tube that connects the bowl with the drain exit hole at the base of the toilet. It serves the same purpose as the trap drains one sees under a standard kitchen or bathroom sink. This colon used to be hidden on many older toilets but it is now common to actually see the convoluted pathway the water and waste takes as it travels from the bowl to the drain hole in the floor.

Why do some toilets clog or are hard to flush?

Toilets that are hard to flush or that clog on a frequent basis may be the victims of poor colon design. You can clearly see the colon of a toilet in the top photograph. The bends within the colon may be too tight. The actual interior size of the colon may be small. Try to buy toilets that have a two inch minimum trapway/colon or those that have even large diameter colons. Ask the plumbing supply sales person to show you different toilets with exposed colons so you can see how some have better streamlining than others.

Special Lots Need a Superb Architect

lot with snow covering

Special Lots Need a Superb Architect

DEAR TIM: I purchased a killer river view lot and will build a dream home there as soon as I can get the house to fit on the lot. My current architect is having trouble orienting the house without having to build expensive retaining walls. I am confused as the flat area where I can build seems huge. Do you have an ideas as to what is wrong? Do I have the right person for the job? John K., Cincinnati, OH

DEAR JOHN: You may not have the right architect for this unique opportunity. Special building lots demand architects who are not only talented but also can prove to you they have successfully designed homes that sit upon special pieces of land. Perhaps my best advice to you at this time is to slow down and take your time. You have one and only one chance to get this home right. Do not make a panic decision and hope all will be well once you move in.

Why won't you floor plan fit on a new site?

Your current dilemma may be a simple issue of trying to fit a square peg into a round hole. If you are attempting to place a floor plan you really like onto this building site, it may not work for any number of reasons. The zoning restrictions may cause problems with respect to front, rear and side yard setbacks. The actual shape of the current plan may not be suited to take advantage of the vistas from the lot. There can be a host of other reasons why your current architect is having problems.

I have had the good fortune of working on land that has spectacular views. What's more, I have been extremely lucky to visit any number of houses that have been built on special lots that offer river, lake, mountain and valley views.

One thing most of these homes had in common was the extensive use of glass on the sides of the home that offered the panoramic views. In years past, you may have paid a price for this since glass used to be an energy glutton. But advancements in technology have given us coated insulated glass that helps keep heating and cooling costs low. Be sure your architect specifies the best glass you can afford.

How do you orientate the house for the best view?

I often see some architects struggle with orienting view houses so the visual site line is at a 90 degree angle to the wall that faces the view. Perhaps your architect is trying to deal with this demon. It is not always necessary to look directly out of a window to enjoy a view. Be aware that your body naturally adjusts to the view much like a tank turret rotates on the tank body to align the cannon for a shot. If you have to rotate your head or body up to 30 degrees to see the view, you will probably discover this is not uncomfortable. You can actually test this on the vacant land now by standing in a spot and rotate your head to see the actual view.


How would you like me to build your new home? It's probably impossible for me to fit your job into my schedule, but I will gladly share hundreds of my tricks and building secrets with you and your builder. Check out my New House Specifications.


If you decide that your current architect is not up to the task, it is fairly simple to find one who is. As crazy as this sounds, you can sometimes do detective work to discover who drew plans for existing recently-built homes in your area that appear to work well on other view lots. The plans for these homes are often in the archives at your local building department.

Simply knocking on the doors of these homes with sincere compliments will often work. Introduce yourself to the homeowner and immediately tell this person the purpose of your quest. Many people are proud of their homes and if they had a great experience with their architect, they will openly share information and frequently allow you to see the inside of the home.

CLICK or TAP HERE to get FREE quotes from local companies to do your architectural plans.

Once you have found several candidates for the job, you need to meet with them preferably at the lot. Go back to their office or some other place where they can show you blueprints and actual photos of homes they have designed on similar lots. If they can't do this, it is a danger signal. You do not want to be a lab rat in an experiment. You need an architect who can prove to you he or she can extract the most from your special piece of the rock.


Are you getting ready to build a new home? If you want to make sure you are using the best builder, I suggest that he fills out my New Home Checklist. This one-of-a-kind document will flush out all of the losers in the bidding process. I offer a 100% Money Back Guarantee.


I would also strongly urge you to communicate critical room sizes you must have. You know which rooms work and don't work in your current home. I would also budget money so you can host a small design competition. Ask each architect what it might cost to sketch out a quick floor plan that will work on the lot. Ask for some very rough exterior elevations so you know what the final house might look like.

Hiring an architect is an important task.

Any of the architects who are technologically savvy should be able to take photos of your view and include them in a software program that allows you to look through the windows of the plan and actually see what you will see once the home is built. The winner of this small contest just might be the right person for the job.

Hiring an architect is an important task. You need to find a person who is both creative yet will listen to what you want. Sometimes your ideas may not be practical. One method is to talk with past clients who have used the architect you are thinking of working with. Ask if there were any bumps in the road. Ask if they would use them again.

Most importantly, ask the clients what they would do differently. Were there small pesky mistakes in the plan or house they wish they could redo. You will be surprised at what you will learn if you just ask simple questions.

Perfect Kitchen Planning

wet bar sink

Kitchen Planning Secrets| This handy bar sink is next to our refrigerator. To the left of the sink is just enough space for glasses and other things you might pull from the refrigerator. But to the right of the sink, there is not enough space.

DEAR TIM: A new kitchen is on the horizon for me. I have waited years for this and want the perfect kitchen. Surely you have some advice as I assume you have installed many kitchens both large and small. What mistakes have you solved in the past for your clients? If you could wave a magic wand at my house, what would the kitchen include? Sandy K., Stanton, KY

DEAR SANDY: You nailed it. I have installed so many new kitchens - four of my own - that I have lost count over the years. Several of my past customers tell me each time I see them about particular aspects of their kitchens that they love and about things that guests point out in their kitchens. To be honest though, I don't know if the perfect kitchen is an attainable goal. Every time I try to create one, I discover a flaw or two weeks or months later after all of the tools are packed away.

Perhaps the best way to help you is to tell you things I would avoid. Over the years I have seen dysfunctional kitchens and the misery they cause. Some people become numb to the daily pain.

Can water lines, drains, gas lines be relocated in a kitchen remodel?

The first thing to do is to begin to think outside the box. Certain utilities such as water lines, drains, gas lines and high-powered electric may be in certain parts of your existing kitchen, but that doesn't mean they can't be relocated with a little effort. I distinctly remember as a small child watching plumbers move the gas line for our stove from one side of the kitchen to the other. They had to pull up a little bit of flooring, but at the end of the day, you couldn't tell anything was really different. Relocating utilities can open up a wide vista of planning opportunities.

Should you install a double bowl sink?

If at all possible, install a double bowl sink. Don't settle for a standard one. You can get gorgeous stainless steel and cast iron ones that have very deep bowls for large pots and pans. Make sure your plumber installs separate ball valves under the sink so you can easily and reliably shut off water to the sink and dishwasher. Speaking of dishwashers, focus your attention on the ones that are whisper-quiet or completely silent. I hear people complain on a regular basis about how operating dishwashers compete during phone calls and regular conversations.

Food and sundry storage is very important. Try to include a pantry closet in your kitchen. It only has to be 36 inches wide and 24 inches deep. Special shelves and compartments can be made for canned goods. Pantry cabinets work, but they can be a compromise.


Avoid flaws and mistakes when planning your new kitchen. Use my Kitchen Remodeling Checklist as your remodel guide. I offer a 100% Money Back Guarantee.


How much lighting should be in the kitchen?

Lighting is everything. Try to create levels of light. You can do this with multiple recessed lights and traditional surface mounted or hanging fixtures where certain ones are operated by different switches. Indirect lighting can create a soft glow for mood lighting when the kitchen is not in use. Skylights allow abundant sunshine to cascade into the kitchen and light the space even on dreary days.

Can kitchen countertops be more then one material?

Countertops are very important. Don't think you must limit yourself to one material. You can tastefully mix different materials. You may decide to splurge on a natural or reconstituted stone island top while using high-grade plastic laminate for the remainder of the tops. Solid surface tops can be mixed with any other top material. If you like to make your own dough for baking, you may want a cool slab of granite inserted in a food preparation area. At the very least, you can buy a stand-alone granite trivet for this same purpose.

Be sure you plan for plenty of countertop space in critical areas. You need a landing pad for things taken from the refrigerator. Ample countertop space is a must-have on both sides of the cooktop and sink.

CLICK or TAP HERE to get FREE quotes from local companies that will remodel your kitchen.

What is the best kitchen flooring?

Kitchen flooring is another mistake magnet. I learned long ago that ceramic tile and dishwashers don't play well together. There are countless chips in the tiles in my kitchen that are adjacent to the dishwasher. I realize that humans who drop dishes and silverware are to blame, and I am one of the guilty. Cork and hardwood are good choices as a fresh coat of water-based polyurethane can be applied each year to make the floor look like new. Just a very light hand sanding is required to prepare the floor for this rejuvenation.

Entire books have been written about kitchen planning. This column can't possibly talk about all kitchen issues and possibilities. Common sense needs to be applied in all situations. For example, make a list of all complaints you have with your current kitchen. Where do you need extra electrical outlets? Is it too dark at night ? Is your refrigerator too small? Do you hate to clean your cooktop?

kitchen planning book

Here's a great kitchen planning book. CLICK or TAP HERE to have it download onto your tablet.

Think about conveniences. If you hate to vacuum your kitchen, you can install a central vacuum system that has little doors strategically located on the sides of certain cabinets. When debris and crumbs fall on the floor, just grab a broom and brush them over to the discreet vacuum door. Touch the vacuum activation lever with your foot and sweep the debris into the opening. Poof its gone!

DIY Dining Table Plans – Plywood & Reels!

cable spools for table legs

DIY Dining Table Plans| Who would think you could transform these cable reels into a dining room table in minutes? Keep looking below!

"You may find this hard to believe, but I can produce the sturdy table you need in one hour for less than $40.00."

DEAR TIM: It's a very long story, but I have a dining room with eight chairs and no table. Ten days from now, I am having a dinner party and do not have the thousands of dollars at this time to buy the table I really want. I have any number of oversized table cloths so whatever table I use will not really be seen. Money is really tight after the holidays so what in the world can I do? Mary R., Cincinnati, OH

IMPORTANT NOTE: Mary R. wrote to me after her party. Her letter is far below.

DEAR MARY: Oh gosh, you are in a bind! Fine furniture that can last generations can be expensive but it's also worth the wait. But as you outlined, that option is not on the table - pun intended! As desperate as your dilemma sounds, I've been faced with them before on past remodeling jobs where I needed to provide customers a temporary table. You may find this hard to believe, but I can produce the sturdy table you need in one hour for less than $40.00.

What Size Should My Table Be?

The economy table that will hide under your tablecloth needs to be eight feet long, 42 inches wide, and 30 inches high. These dimensions match those of most dining room tables that will seat 8 people comfortably: three on each side and a person at each end of the table.

A table this size can also fit ten people if they get a little cozy.

How High Should the Table Be?

The actual height of a table is fairly critical and is commonly matched to the height of the chairs. If you have a breakfast or kitchen table in your home, move one of your dining room chairs up to it, sit down, and check to see if you feel comfortable at the table. If so, the dining room table you are going to assemble should match that table height plus or minus one-half inch.

What is the Cheapest Table Option?

The cheapest dining table you can build will use a 4x8-foot piece of plywood and two large electric cable reels.

This affordable solution can be assembled with minimal ease requires two stops on your trip to acquire material. You need to visit a lumber yard and an electrical parts distribution business.

The electric parts business is one that typically sells all of its products to residential, commercial, and industrial electricians. These are the places where you will find circuit breaker panels, specialty switches, conduit of all types, etc. They almost always have hundreds of large empty cable reels back behind the warehouse. These reels sometimes are available for free or can be purchased for a very small fee.

What is a Cable Reel?

A cable reel is a round object that holds long lengths of electrical cable. It is the same thing you have on a fishing rod, but much larger. They come in all sorts of sizes and I know for a fact you can get ones that are perfect for your needs.

You need two cable reels that measure 29 inches wide and 25 inches in diameter.

Are Cable Reels Stable?

When you place these cable reels on their side, they make solid bases for the table top. The 29-inch width becomes a 29-inch-high platform when the reels are laid on their sides. You will then place a three-quarter-inch thick piece of plywood on top of the reels to create the actual table.

dining room table

This DIY dining table was assembled in 10 minutes. The rest of the time was spent cutting the plywood and rounding the corners.

How Far Apart Should the Reels Be?

The reels should be placed in the center of the room spaced just one foot from each other. This will create 8.5 inches of overhang on the sides and a generous 17-inch overhang at each end of the table top. Once the plywood is in place, drive four 2-inch-long screws through the plywood into each reel to securely fasten the top to the reels.

How Do You Round Off the Corners?

When you cut 6 inches off the width of the 48-inch plywood to make the top, be sure to create a radius at each corner.

Use a simple wood rasp to round off the corners of the plywood. If you do not do this, there is a good chance the table cloth will tear if pulled against one of the sharp 90-degree corners. It's also a good idea to use some coarse sandpaper on the top edges of the plywood to remove any splinters.

The finished dining room table

This is the actual finished DIY dining table at Mary R's house!

Should I Stain the Reels?

If you have time, you can apply stain that matches your chairs to the lower half of the cable reels. This is not necessary, but it will help to complete the illusion.

Will You See the Reels?

I wouldn't be concerned in the least about the appearance of this temporary table. When the chairs are in place around the table, there's a very good chance you may not see the cable reels. If you're worried, use the same slight of hand magicians use. Direct your guests attention to a magnificent centerpiece arrangement in the middle of the table!


Mary R. wrote back after the party. Read her email to me below!


Can I Use Saw Horses?

If you can't find cable reels, you can use simple saw horses to support the plywood top. Many home centers have simple parts that allow you to create a saw horse using metal brackets and 2x4 material.

If you choose to do this, be sure you install diagonal cross bracing on the legs of the sawhorses. This bracing is additional 2x4 material that travels from the top of on leg to the bottom of the other leg on each sawhorse.

Without it, the horses can collapse without warning. An accident like this would be devastating while all the guests were halfway through dinner. Cable reels exhibit enormous stability. A table supported with these will rarely tip over.

January 30, 2004 - I am blessed to get wonderful emails from readers of my column. Here are two that provide great suggestions if you need to make an affordable table:

Your column in today's Chicago Tribune, January 30, 2004, recommends using plywood for a table top. I would certainly want to put an extra cloth sheet folded to the right size on the plywood before placing a tablecloth on it This would prevent more snags and serve as a "silencing cloth". Actually, I would rather see the questioner use a 36 inch flat hollow door from a lumber yard that may have a scratch or two on it. They even come prefinished. Something of this sort can be gotten at "Menard's" or "Home Depot". Just ask around. There are amazing items for little money that are damaged. Being a 75 year old woman who has been the handyman of my home for over 50 years, I enjoy reading what young people like you come up with. Believe me, there is wisdom in old age.

Sincerely,

Pat Hutchison

Author's Note: Pat, this youngster appreciates your advice! TC

Jo Potter wrote to me and shared these great comments:

I just read your column on constructing a quick and inexpensive dining table, and thought you might be interested in another method that a friend of mine used. The legs were turned spindles designed for stairs - not the skinny ones, but the ones that would be newel posts or corner posts. They had a square base, probably about 4", then some turning for detail, and a square top. On these was "box" with an edge of wood trim - slightly rounded at the top, then straight. Into this box went a solid core door panel. The whole thing was painted and looked quite nice... not at all like a table made from a door.


Mary R's Follow-Up Letter:

February 17, 2004

Well, I just got an email from Mary, the woman who asked me the question that was the seed for this column. Let her tell you how well the table worked:

Hi Tim,

I couldn't wait to let you know that we fooled 'em! The party I hosted was fantastic - great food, great fun and great friends. With all of my china, crystal, and candles out on the table, my dining room looked awesome. I've always wanted a large dining room table because we love to entertain. Having a sit down dinner for 10 is something we've always wanted to do and after last night, will do more often.

We sat down at the table at 8:15 p.m. and got up at midnight. It wasn't until about 11:00 p.m. that I finally had to spill the beans. Someone commented that they didn't remember this neat, large table in our old house so I said it was new. Then, someone said they were looking for a table and asked where I got it. I told them one of my great clients actually made it for me. Then I couldn't stand it anymore - must be that Catholic can't-lie thing in me - so I said why don't you lift the cloth and take a look. THEY WERE SHOCKED!!! They simply could not believe it. The husband of the couple looking for the table told his wife they were finished looking and going to do the same thing. I don't think she will really go for this, but it was cute how much the husband liked the table.

Mary R.

Sunroom Ceiling Ideas – Vault it & Beadboard

Sunroom vaulted wood ceiling

Sunroom Ceiling Ideas - Go Big & High

The sunroom is a room at the right rear corner of my house. You can access it from either the kitchen or the dining room. It's the private domain of my lovely wife Kathy. She has a green thumb both inside and outside the home. Her creations complement the black thumbs I sometimes get when I strike one with a hammer from time to time!

The house I live in has been a labor of love. As happens with many builders, their own house just doesn't seem to get finished before they jump feet first into another project. That happened to me.

When Did You Finish Your Sunroom?

It is a very long story, but this room sat unfinished for years. My oldest daughter Meghan jump-started me this past Thanksgiving to finally get the room finished for Kathy as a Christmas present. It happened with some help from a college sophomore apprentice and the entire family helped install the slate floor.


Sunroom Shots

What is your Sunroom Ceiling Wood?

The biggest challenge was the Douglas Fir beadboard ceiling. I did the entire thing myself and the countless trips up and down the scaffolding put me back in great shape. I felt like a monkey climbing up and down that pipe scaffold. The ceiling is a 6/12 pitch hip and the beadboard pieces that intersect at the center seam had to be perfect.

Was it Hard To Wrap the Skylight Tunnels?

The real task was getting the wood to wrap up into the skylights. There was no fast and easy way to accomplish this. It is slow, painstaking finish carpentry. All of the wood was pre-stained and urethaned before it was installed. If you have ever tried to stain wood upside down, you know why it is imperative to do this task working with gravity not against it!


Sunroom Shots

What Kind of Register Grill Will You Use?

I am still waiting to receive the authentic Victorian return air grill for this wall. This corner of the room is under the tallest aspect of the hip ceiling. It's 18 feet above the floor to the tip of the ceiling.

Why Did You Wallpaper the Sunroom?

I hung the wallpaper with the help of the apprentice and those first strips coming out of the corner were the longest I have ever installed. Believe it or not, but I really enjoy wallpapering. I find it therapeutic.

The wallpaper is 16 years old! I had bought it just as we moved in. It is/was a fairly popular pattern made by Waverly. I believe it was their English Ivy pattern. It is indeed a perfect paper for this plant room.


Sunroom ShotsWhat is the Wood around the Windows and Doors?

The woodwork is all clear white pine and matches the natural wood of the Marvin windows. The trim was custom milled and the profiles match all of the custom woodwork in the rest of the house. Custom trim is not really that expensive when you run lots of it at once.

The final shot is me laying on my back on the floor trying to show the hip ceiling as it rises to its peak. I wish I had a different lens to show this. A fish-eye lens would probably do a swell job of trying to make this 3D reality come to life on a computer screen.

Column Sunroom

Rehab – Home Restoration

Rehab - Home Restoration

Rehab - Home Restoration | A house such as this one may look great from the street, but your mind looks past all of the defects and sees the finished product. Beware!

DEAR TIM: I am seriously considering buying an as-is fixer-upper home. The boarded-up house has been stripped of all plaster, fixtures and utilities. The price is very low and I have lots of free time and not enough money to buy a home that is livable. Is it possible for me to do much of the work myself, or will I be forced to hire professionals? I know of other people who have succeeded at turning a property around, so it must be possible. What are some of the biggest obstacles? Tricia A., Albany, GA

DEAR TRICIA: I started to answer your questions by telling you that you are insane to consider this venture, but I had to stop typing. All of a sudden, I had a flashback of a 23-year-old young man who had an infinite amount of ambition and energy, few tools and equipment and very little money. This same individual bought an old, abandoned home in poor condition and completely restored it, for a sizable profit, six months later. That person was me.

What is the biggest obstacle to home renovation?

The obstacles you face are many. Some are small and others may sap all of your physical strength and willpower. Perhaps the biggest issue in my opinion is money: Do you have enough money to finish the project? This project financing can be in the form of savings and a loan(s) of some type. Do not purchase this home until you are sure you have written commitments for all of the money. Traditional lenders may not welcome you with open arms as you are not a professional builder / remodeler. The lenders would consider you a very high risk. Grants and low-interest loans may be available through local or regional government programs.

How do I start a Home Restoration?

But how much money will it cost to turn this neglected property into one that is livable? It is not an easy question to answer. You start by making a list of each and every item you will need to make this shell into a finished product. Feel free to use your existing home as a model. For example, go room-by-room and look at all of the finished surfaces. You can calculate the number of sheets of drywall each room will require. You can determine the amount and type of finished lumber trim for each room. Doors, windows, finished flooring, hardware, etc. can all be identified fairly easily. Look at every surface and imagine what it needed to make it finished.

home rehab

The exterior of this home could swallow $25,000, in 2003 dollars, in the blink of an eye.

Expensive items, such as kitchen and bath cabinets, countertops, plumbing and electrical fixtures, can also be priced out with relative ease. There are economy grades that are somewhat affordable that will work for you. Try to select fixtures that are user-friendly with respect to installation. For example, you may save lots of time buying and installing an acrylic tub and shower unit instead of buying an inexpensive steel tub and then installing ceramic tile around this fixture.

Because my new bride had a full time job, that brought in just enough money to pay our bills, I was able to work on my house 12 hours a day, seven days a week. Will you have this luxury? If not, small tasks that might take a professional a day or so could take you weeks of labor. Working on a house after putting in time at a regular job is fine for a month or so, but the added work starts to take its toll on your performance at both jobs.

Do some rehab projects need to be done by professionals?

I have seen people spend years trying to restore and remodel a house such as you describe. Your interest in the project may wane, and if that happens, you start to neglect the house that already has been neglected. Because of local laws and ordinances, some tasks you are thinking of doing may have to be done by professionals. It is not uncommon for a city to prohibit do-it-yourselfers from working with public water supply systems and sewage piping.

I would highly recommend that you try to find other people who have recently completed a project like this. Ask them if they would do it again. Ask them what surprises they encountered. Speaking of surprises, be absolutely sure you have a home inspector look at the house so a full list of defects can be compiled. You may have missed important structural damage, termite activity, lead and asbestos liabilities that can cost tens of thousands of dollars to remedy. Don't forget to assess the water service and sewage/septic situation at the same time.

How do you make sure you haven't missed anything before starting the home rehab?

The list of materials needed to restore a single family house can easily contain hundreds of items. It is imperative that you not miss many of these items. The room-by-room approach is good, but it must also include simple things such as electrical outlets, switches, cover plates, etc. Who would think there are nearly 30 parts or more just to install a circuit breaker panel? Think of all of the individual fittings needed to install all of the drainage and water supply piping in a home.

Certain tasks may require a professional. Heating and cooling equipment is very sophisticated and special tools, gauges, etc. are required to install it. Roofing work may be too intimidating for the average do-it-yourselfer. Certain cities or towns may only allow licensed people to install plumbing or electrical systems. All of these things need to be investigated, before you take the leap.

Column 498