Lots – Important Features

DEAR TIM: My husband and I are about to be transferred. We may be building a new home or buying an existing home. In either case, I feel that the lot upon which the house is built is extremely important. What things should we look for in a lot? What are some hidden defects that an unsuspecting homeowner might overlook? M.S. Hamilton, Ohio

DEAR M.S.: You have exposed an area of home ownership that many home buyers pay far too little attention to. The land upon which a house sits can either be an asset or a liability. Without careful study, you may end up with the "dog" of the subdivision instead of the pick of the litter.

Drainage is an extremely important consideration. Observe the landscape surrounding the lot. In periods of heavy rain, will runoff from higher ground overwhelm and flood portions of your lot or house? Is the lot adjacent to or traversed by a creek or storm sewer pipe which can overflow during flash floods? Is the lot in a flood plain of any type? You can check with your local planning department or the US Army Corps of Engineers for this type of information. Talk with adjacent property owners if possible. Ask them if there have been any instances of high water or excessive runoff in periods of extended rainfall.

A large majority of houses are built on soil instead of solid rock. Soil characteristics vary from region to region. In fact, they can vary drastically within a 5 acre tract! You need to investigate if the soil is stable, especially if the lot you are contemplating is located on a hillside. Some soils do not absorb water very well. This could be a huge problem if your lot requires you to use a septic system. A tremendous amount of information can be obtained from soil maps. These can often be obtained from county authorities.

Zoning laws are very important. These laws control what can be built where. You need to determine if you can build exactly what you want. You should be aware how close a neighbor can build to your lot line. If you are buying an existing home, will the current zoning allow you to add a room addition if necessary? Check to see if the zoning permits you to park your boat or motor home outside. Some zoning codes prohibit this. Pay attention to the compass orientation of the lot. Perhaps you want to incorporate solar heating into your new home. If so and if you live in the Northern Hemisphere, the side of your house with the most glass should face south. Perhaps you want the morning sun to flood your breakfast nook. If so, you better make sure that the lot will allow this to occur.

Certain areas of the nation are subject to prevailing winds. These winds can blow dust or foul odors into your house if you build or buy in the wrong location. Don't build or buy downwind from a large landfill or other potential source of foul odors. The local National Weather Service office can often provide you with prevailing wind information.

Last but not least, I would insist upon a site survey by a registered surveyor. You should absolutely know what you are or are not buying. An accurate survey will enable you to determine if there is an encroachment problem with your lot or an adjacent lot. If you proceed with a survey, always protect and preserve the corner pins. They may come in handy when you decide to build a fence or settle some other dispute in the future.

If you are like me you have dreamed of owning a home away from home. Imagine when the weekend comes, hanging out in a hammock at your own lakefront cottage, boating, antiquing in a charming little town, or whiling away an afternoon on your ocean-view porch. If you have imagined these things you need Better Homes and Garden's Second Home: Find Your Place in the Fun.

This inspiring volume will help you turn your second-home fantasy into the real thing. This book will take you through tours of gorgeous homes to see how other people have created their own great escapes. There are expert tips on everything from real estate shopping to building, remodeling, and decorating. There are hundreds of spectacular color photographs of beautiful homes and great locations. As for me, I'll keep dreaming ..... until those lottery numbers come through or some forgotten relative leaves me an unexpected inheritance, the book will have to suffice.
 

Adding a Telephone Outlet

DEAR TIM: I want to hook up my computer to a separate telephone line. The local telephone company will bring the cable into my house but I intend to complete the project. What do I need to do so that I can have my existing phone line and the new one active at the same location? Do I have to run a new cable inside my house? K.H. Rapid City, SD

DEAR K.H.: You have selected a project that just about every homeowner can tackle successfully. Telecommunications wiring is quite simple to master. If you are lucky, you will not need to run a new cable. However, for the best signal, a new cable may have to be installed. It is possible that you will have the modem up and running in just an hour.

Telephones, modems, answering machines, etc. work using just two wires. Remove your existing telephone outlet from the wall. You probably will see a single cable that contain four thin wires. If the wiring is fairly modern, you should see separate red, green, yellow, and black wires. Only two of those wires power your existing phone. Usually, the red and green wires do the work. The yellow and black wires are simply spares. The red, green, yellow, and black wires are older technology.

To obtain the absolute best voice and data system you should purchase an Underwriters Laboratory (UL) approved 22 or 24 gauge, color band-striped, twisted pair cable. This cable often contains 4 twisted pairs of wire that have blue-white, orange-white, green-white, and brown white colorations. The twisting of the wires around one another helps to eliminate interference from other wires within the cable.

If there are only two wires feeding your outlet, you will have to run a new wire to your modem location. Be sure to use modern 22 gauge UL approved wire that contains the twisted pair conductors mentioned above.

Your modem will require you to use a modern modular connection cable. This is the cable that has the funny shaped square plug at each end. The cable connects to a wall outlet which is made for these plugs. The outlets are often referred to as RJ-11 outlets. Most of these outlets have short pigtail wires that attach to screws on the back of the outlet. These pigtail wires are also red, green, yellow, and black. Unless you are color blind, you should see why this is going to be easy.

Look at your existing outlet. If the yellow and black wires are connected to the back of the outlet, temporarily remove them. Test to see if your existing phone still works. If you get a dial tone, can dial out and the spare yellow and black wires are not broken somewhere, we will be finished in no time.

Go to where the existing phone line enters your house. Here you will find the other end of the cable. You should see that the red and green wires attach to the two wires that come in from the street.

The telephone company will undoubtedly provide you with a new connection device for the new phone line. Instruct them to install it as close as possible to your existing telephone connection device. If you have traced the wires correctly, the yellow and black wires in your existing wire will become the "red and green" wires for your new modem line. Get the picture? You simply attach the existing yellow and black wires to the new incoming telephone wire. Back at your existing outlet, these two wires should produce a dial tone.

To finish the job, you need to use a handy dual outlet. You can purchase telephone outlets that have two modular connection points on one outlet plate. If you look at the back of the outlet, you will see two sets of red and green pigtail wires. Attach the red and green wire to the corresponding red and green pigtail. Connect the yellow and black wire to the other red and green pigtails. If all the wires are working, you should get a dial tone from each outlet. However, they will be two different phone numbers. Label the front of the outlet as to which outlet accesses which phone number.

Stainless Steel Sinks – Great Choice!

DEAR TIM: I need to make a decision concerning the sink for my new kitchen. I am leaning heavily towards stainless steel. What are the pros and cons of stainless steel sinks? Some sinks seem thin and low quality. Why? Can you keep these sinks looking brilliant for long periods of time? R. E.

DEAR R.E.: Ahhhhh .... there is something about that cool, silver, metal that catches my eye as well. In fact, the combination of an undermount stainless steel sink with a solid surface or natural stone countertop can really become the focal point of a kitchen. Traditional drop in sinks also can add a dramatic finishing touch to your new kitchen space.

Stainless steel was not originally developed for the kitchen industry. Just after the turn of the century Harry Brearley, an English metal scientist, was trying to solve wear problems in gun barrels. He blended chromium with regular steel in varying amounts. One day, he noticed that the scrap from these experiments didn't rust when exposed to rain. It didn't take long for steel companies to figure out where this new material should really be used!

The stainless steel found in residential kitchen sinks is not all the same. It contains different percentages of steel, chromium, and nickel. Usually the stainless steel alloy in your kitchen sink contains 18 percent chromium and 8 - 10 percent nickel. Other ingredients are sometimes added in small amounts as well. The presence of chromium allows the sink to maintain its shiny appearance. Nickel softens the steel so that it can be shaped more easily.

Just as regular steel rusts, so does stainless steel. Stainless steel rust, though, is an invisible layer which can actually make the sink more corrosion resistant. However, stainless steel sinks can be stained. Although stainless steel is a highly corrosion resistant metal, it is not immune to damage from ordinary household chemicals. Chlorine bleach, cleaners that contain chlorine bleach, muriatic acid used to clean ceramic tile, solvents found in construction adhesives and other building supplies can and will damage stainless steel.

Residential stainless steel sinks come in a wide range of designs, shapes, bowl configurations, and thicknesses. Thickness is often referred to as gauge. The gauge thickness may range from 18 to 23 gauge. This thickness difference can be dramatic. An 18 gauge steel is almost twice as thick as 23 gauge steel. The thin sinks that oilcan or flex are most likely 23 gauge. The extra money spent on the 18 gauge sinks is well worth it, in my opinion.

You can maintain and preserve the brilliant factory appearance of stainless steel. You need to minimize the use of harsh abrasive cleaners. These roughen the surface of the stainless steel. If you scrub across the grain of the factory applied finish you can harm the finish. The smoother you keep the steel, the tougher the invisible rust will become.

If you use chlorine bleach as a sanitizer, be sure to thoroughly rinse the sink after its use. Rinse completely your washrag, cleaning pads, and any other object that might rest on the sink. Always rinse all detergents as well. Some liquid or powdered soaps contain chemicals which will stain and corrode stainless steel. Try not to use rubber mats in the sink. Mats protect the sink bottom, however, they also prevent the complete rinsing of harmful chemicals. For ultimate protection, dry the sink completely after it has been rinsed.

Visit plumbing supply houses that carry a full line of stainless steel products. Look for sinks that have handy ribbed sideboards, custom fitting cutting boards, and sinks that contain suspended stainless steel grids. The grids allow you to clean heavy objects without scratching the bottom of your beautiful new sink.

Condensation – Cause & Control

DEAR TIM: This past summer I had a new heating system installed. I switched from radiant baseboard heating to a forced air system. My windows now have condensation forming on them. Is the new heating system producing excessive moisture inside my house? If not, what might be the cause of the condensation. On extremely cold nights the water turns to ice. Is there a solution to the problem? G. I.

DEAR G.I.: Too bad you couldn't have kept the radiant system in place along with your new system. I often think that the best heating system is one that utilizes both radiant energy and air circulation. Don't fret, I have only seen one house in my 25 years of building that did incorporate both systems.

Your new system may be to blame if you had a humidifier installed. The humidifier may be pumping too much moisture into the air. Humidifiers are mechanisms that attach to the sides of the ductwork very near or next to your new furnace. They are often easy to spot since they have a tiny flexible water supply line which connects them to your plumbing system.

If you indeed have a humidifier, check the control dial which regulates its operation. The indoor relative humidity must be adjusted in relationship to the outdoor temperature. As the outdoor temperature drops, so to must your indoor humidity. When you do not control this balance, condensation begins to form on the window glass.

If you do not have a humidifier, I think I know what is causing the problem. Condensation forms on your windows because the glass temperature reaches the dew point as the outside temperature drops. It is the same thing that happens to the grass on an early summer morning or when a cold can of soda or beer is taken outside in the summer time. The air that comes into contact with the cold surface cools rapidly. The moisture in this cooled air switches from the vapor state to the liquid state. The liquid water collects on the cold surface.

In your case, I think your old baseboard heaters produced enough radiant heat to keep your interior glass above the dew point of the moist, indoor air. Your new forced air system will not readily produce the invisible infrared heat that your baseboard heaters provided. This is one reason why radiant heat is so desirable.

The solution to your problem lies in lowering the indoor humidity to a tolerable and comfortable level. You may be able to do this by identifying sources of excessive indoor humidity. Excessively hot baths or showers pump huge volumes of moisture into the air. Try to take cooler showers. Cooking activities that create lots of steam might be the culprit. Try to cover pots to minimize steam rising into the air. Vast forests of indoor plants can produce large quantities of airborne moisture. Investigate to see if there are plants that liberate less moisture than others. I suggest that you invest in a high quality hygrometer. This is a device that measures relative humidity.

Take readings in different rooms each day at the same time. Chart your findings. Observe how much condensation is present on the glass at the same time. If you still have condensation after you have attempted to minimize indoor humidity, you will have to operate a dehumidifier. This device will allow you to extract moisture from the inside of your house. Continue to take humidity readings until the condensation stops or you can't stand the static electricity shocks!

Laminate Flooring

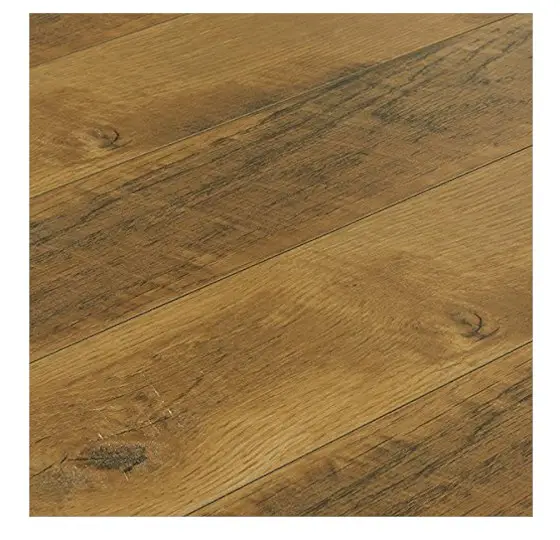
oak laminate flooring

This is the exact product I have in my man cave. You'll trick 9 out of 10 people. They'll think it's reclaimed oak from a barn. CLICK THE IMAGE NOW TO HAVE THIS DELIVERED TO YOUR HOME.

DEAR TIM: My husband and I are looking for flooring for our new home. We have seen samples of the new plastic laminate flooring. Is this the same material that is used for plastic laminate countertops? Do you feel it is the ultimate flooring product? Are there limitations as to where it can be used? S. T.

DEAR S. T.: Plastic laminate is not really new. It has been in production and use for over 25 years. It is a European product that was introduced to the United States marketplace in 1994. The manufactures of carpet, sheet vinyl, ceramic tile, and hardwood are concerned. There is a strong possibility that this new flooring material will capture nearly 18 percent of the flooring market in the next four years.

As you might expect, several of the major domestic manufacturers of plastic laminate have jumped at this opportunity. You and I as consumers will benefit. The product will continue to improve and pricing should become even better than it is today. While this new flooring material is by no means perfect, it offers distinct advantages over traditional flooring materials.

The laminate flooring materials actually offer the advantages of traditional flooring materials bundled into one product. These new materials are often installed over a foam cushion. The cushion offers resiliency similar to carpet and sheet vinyl. New printing technology allows the paper which produces the color and pattern to be incredibly realistic. This allows the laminates to compete against hardwood flooring. The space age clear plastic wear-layer can resist cigarette burns and indelible markers. In the past, this advantage was held only by ceramic tile.

If you’re interested in learning more about laminate flooring cost I have an article here.

Ease of installation is another advantage. Laminate flooring can be installed quickly with a minimum of tools. Often they can be walked on the following day. The individual pieces are milled so that they interlock with one another. Special glues are used on the interlocking edges of the flooring pieces. Most laminate products are installed over the existing floor in a floating fashion. The individual laminate planks are not glued or nailed to the floor below. Once the glued edges dry, you basically end up with a singular, giant piece of flooring.

Laminate flooring can be installed over virtually any material. To obtain the most satisfactory results, the existing flooring should be in good, sound condition. It should also be as level as possible. Loose or rotten subflooring, missing tiles, etc. should be replaced or secured prior to covering with laminate. Laminate flooring can, in some instances, be installed over thin carpeting!

This new flooring material is comparable to traditional plastic laminates. However, the clear plastic wear layer is often 20 times more durable than the one on your kitchen countertop. Beneath this hard plastic coating one often finds a 1/4 inch core of medium or high density particle board. The underside of the particle board is coated with a thinner laminate which helps to protect the particle board from absorbing moisture.

Laminate flooring is fantastic but it is not perfect. It can be damaged just like any other flooring. Any floor that is not subjected to excessive moisture is a great location for laminate. Should the particle board core be subjected to moisture extremes, it can swell and buckle. For this reason, it is may not be a good idea to install laminate flooring in a bathroom environment.

If you decide to install it in your kitchen, you must watch spills and how you mop your floor. The high density particle board cores tend to withstand moisture better than medium density cores. Basements that are prone to periodic leaks may cause problems with laminate flooring. Be sure to consult with the manufacturer prior to installing your new floor.

Column 158

Urethane Finishes – Clear & Complicated!

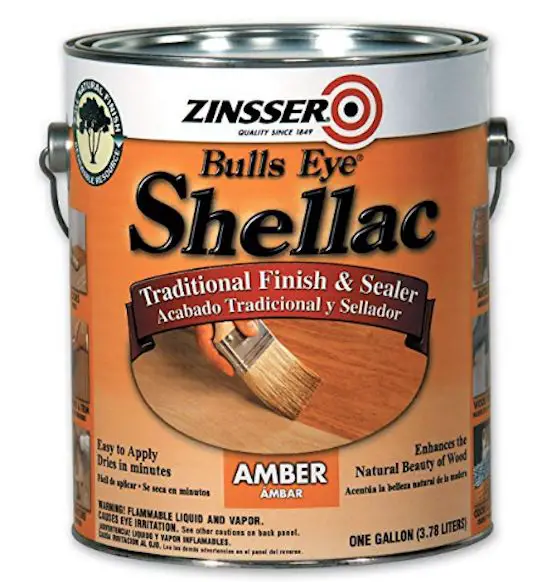
This is the BEST stain blocker you can buy. It's 100 percent shellac. It's also an amazing odor blocker. CLICK THE PHOTO to have it delivered to your home in days.

DEAR TIM: I have been having trouble with my wood front door. The clear finishes I have used all tend to flake off and peel. Is there a urethane that really works well outdoors in harsh sunlight? Or, should I use a traditional spar varnish or shellac? Better yet, should I use the new water-based urethanes? R. A.

DEAR R. A.: Yikes! You couldn't have picked a more bewildering subject. Clear coatings are very complex. There is a big difference between products. A single clear coating will not necessarily perform well on all surfaces. What's more some clear coatings don't stay clear. They can actually develop a patina or amber color over time.

There are two groups of clear coatings as far as I'm concerned. The ones that simply dry and the ones that cure. The coatings that simply dry tend to be old technology. The ones that cure undergo a chemical reaction when they are exposed to the atmosphere. If this chemical reaction occurs favorably, the resultant finish often is much more durable than the old time tested clear finishes.

Shellacs are examples of the clear coatings that simply dry. These products contain resins secreted by female lacc bugs. The deposits are collected from twigs, ground up, and often dissolved in alcohol. After you apply shellac and the alcohol evaporates, you have the exact same bug resin particles. They are simply stuck against one another on your wood.

Linseed oil, traditional oil varnishes, and some urethanes are different. These coatings chemically react with air and sometimes moisture in the air to produce chemically different compounds. The resultant film finish is often much more durable than the products that simply dry. The reason is simple. The chemical reaction causes the ingredients in the coating to chemically bond to one another. Water, chemicals, etc. have a much harder time trying to penetrate this type of finish.

To further complicate the issue, clear coatings are formulated for different purposes. The urethane you need for your front door needs to be flexible to withstand the frequent expansion and contraction of the wood. It also needs to have ultraviolet light (UV) blockers. On the other hand, urethanes for a hardwood floor must have tenacious adhesion and hardness properties. The film has to withstand the twisting motion of shoes with minimal scuffing. Some floor urethanes need UV protection as well since sunlight can stream into certain rooms.

In addition to chemical UV blockers, sunlight protection is sometimes achieved in outdoor urethanes by the addition of finely ground silica sand. This is an ingredient that produces the semi-gloss or satin finish. The sand performs three tasks. It flattens the gloss, absorbs and deflects UV radiation, and the sand powder can harden the finish giving it more durability.

Without adequate UV protection, sunlight penetrates clear coatings and blasts apart the lignin in the upper layers of the wood. The lignin is the glue which holds the wood cells together. If the wood falls apart, it takes the coating with it as it falls to the ground. If your painter applies the wrong urethane to an exterior door film failure can happen in as little as two to three years.

Perhaps the most exciting urethanes to hit the market are the water based ones. Many of these dry crystal clear and they do not yellow. They dry so quickly that you often apply 4 coats in one day. This makes them an excellent time saving product. If you open a can of water based urethane you will likely be fooled. They look milky in the liquid state but dry crystal clear within minutes. I used this product on a cork floor I just installed and I am thrilled with the results.


Garage Storage

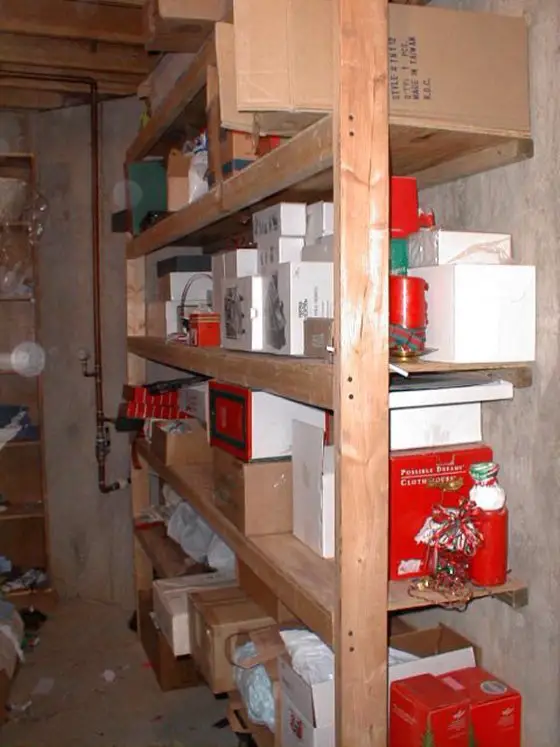
garage storage shelves

DEAR TIM: I need more storage space. As I tripped over some garden tools while taking out the garbage, I noticed how much wasted space is available in my two car garage. Can you offer any suggestions as to utilizing the wall space and floor space in front of my car? I'm looking for simple solutions that I can handle in several days. Is it possible? T. N.

DEAR T. N.: It sounds like you walked through my garage last night. My wife constantly reminds me about my construction leftovers, her garden tools, the kid's bikes, etc. that are scattered about our garage. I believe I can solve your problem and mine at the same time. Here is what we can do.

My guess is that you have certain boxes or objects that are only needed once or twice a year. These objects are going to be placed on shelves that are somewhat out of reach. Things that are used on a weekly or monthly basis will be conveniently located. We will accomplish this by building a series of shelves at different heights and locations within the garage.

The storage space for the seldom used items will be created on the side walls of the garage. Determine the height of the largest object that needs to be stored. Our shelf height will be adjusted to accommodate the largest item. A 16 inch deep shelf usually will be adequate for all but the largest items. This allows us to extract 24 lineal feet of storage for each piece of 5/8 inch plywood we will buy.

The side wall shelves will be secured by using a 2x2 on the sidewall as a cleat. Pieces of 1/4 inch threaded rod, nuts, and washers suspended from the ceiling will hold the front edge level and secure. The threaded rod will pass through a 2x3 that we attach under the front edge of the shelf. The 2x3, when placed on edge, stiffens the shelf so it will not sag. We will put a piece of threaded rod every 6 feet. 2x4 blocks that pass over the ceiling rafters will be drilled to accept the other end of the threaded rod. The nuts on the ends of the rods will allow us to easily level the shelves.

The back wall of the garage is going to be transformed into a solid wall of shelves, bins, and cabinets. Low cost basic cabinets can often be purchased to suit this purpose. If we are patient and/or lucky, we may be able to purchase damaged units at a deeply discounted price. Let's use a piece of 3/4 inch plywood as the top. This thick wood will take much abuse and serve as an excellent work bench.

A series of shelves similar to the sidewall shelves can be built alongside the cabinet layout. We will start our first shelf two feet off the floor. Each successive shelf will be 16 inches above the one below. Instead of using threaded rod to secure the front edge, we can use vertical 2x4's at each corner and at 4 foot intervals. The 2x4's will be simply screwed into the horizontal 2x3's.

I plan to surround the second shelf from the floor with a 1x6 piece of wood. This barrier will restrain all of my kid's baseballs, basketballs, and any other ball or outdoor game piece that would readily fall roll from a conventional shelf. Dividers that run from the front to back of this shelf will help to segregate different sports equipment.

Don't forget to plan for a void space on the back wall to store your lawn mower or wheelbarrow. These items as well as garbage cans can really cause problems as you open and close car doors. I'm quite sure I will put these large items on the back wall in between the two cars. Let me know if you come up with some innovative solutions for your garage!

Scaling Concrete

DEAR TIM: My 9 month old concrete driveway has begun to deteriorate. The surface finish is scaling. My contractor has blamed the defect on my use of deicing salt and that brought onto my driveway by my cars. He refuses to replace/repair the damaged concrete. Is it true that deicing salt is the cause of my problem? Do you think my contractor has no responsibility in this issue? A. R.

DEAR A. R.: Based upon your description of the problem, I am quite certain that your contractor is liable for the damage to your driveway. The deicing salt excuse is often used by concrete contractors who do not install concrete properly or who install it too late in the season. Concrete which is properly formulated, installed, and finished will withstand many years of exposure to freezing temperatures and deicing salts.

Deicing salts melt snow and ice which in turn creates salty meltwater. This meltwater, as well as regular winter rainwater, can and does saturate the upper layers of concrete surfaces. As the temperature drops, the meltwater can freeze within the concrete. Water expands approximately 9 percent in volume when it freezes. This expansion can blast apart concrete which is not formulated and installed to withstand these freezing forces.

Concrete can be ordered from ready mix plants which contains microscopic air bubbles (air entrained). The air within the bubbles acts like mini pressure relief valves. The expanding ice compresses the air within the bubbles. The air absorbs the impact instead of the cement, sand, and gravel Your contractor is also able to purchase concrete with varying amounts of cement and water. Cement is the glue which holds the sand and stone particles together in concrete. Concrete that will experience freezing temperatures requires a minimum of 564 pounds of cement per cubic yard. This is sometimes referred to as a 6 bag mix.


Want perfect concrete work? Find a pro by using my Concrete Work (Sidewalks, Driveways, Patios & Steps) Checklist. I offer a 100% Money Back Guarantee.


The amount of water present during the mixing and finishing processes is critical to the final strength of the concrete. Weak concrete can not adequately resist repeated freeze-thaw cycles. If you add too much water while mixing concrete, it dilutes the fixed amount of cement "glue" that is present in the mix. Sprinkling or spraying water on the surface of concrete or troweling in bleed water during the finishing process dilutes the amount of available cement in the top most layer, that place where it is needed the most!

Concrete formation and strength development continues for many months after the concrete is placed and finished. Ongoing chemical reactions within the slab require water. Thus, it is important for concrete to be cured with a liquid compound, moist cured with water, or tightly covered with plastic to retard or stop moisture loss from the slab for a period of approximately 7 days.

Stop - Purchase Deicing Salt eGuide NowGet a 24-page guide right now that answers all your questions about Deicing Salts. Will it RUIN your concrete? Did you know that salt can SERIOUSLY harm you? What about your expensive landscaping? You can have all these answers and more in less than a minute. Buy it NOW.

Concrete must also be allowed to dry out after the initial curing period. Concrete poured too late in the year still retains water from the mixing process. This water coupled with rain or meltwater can overwhelm the tiny pressure relief air bubbles. Before exposure to deicing salts or extended periods of freezing and thawing, concrete slabs should be allowed to air dry for a minimum of 30 days.

Millions of cubic yards of concrete exist in my city, as well as yours, that have been through years and years of winter weather. These roadways, drives, and sidewalks get repeatedly wet and are frequently exposed to deicing salts. These same concrete surfaces show no signs of scaling. I suggest that you contact your contractor and the ready mix company. They can produce the delivery ticket that will indicate the strength of the concrete, whether or not air was included, and how much water may have been added to the mix once the concrete arrived at the jobsite.

Read my article on  Concrete and Masonry Sealers in the July 2, 2009 Newsletter.

Barrier Free Kitchen Design

DEAR TIM: My husband and I are building a new home. Our plans are to live there for the rest of our lives. What things can we do in the kitchen to make that room barrier free in the event that one or both of us become disabled? Will these modifications add significantly to the cost of the house? R. I.

DEAR R. I.: I commend you for thinking ahead. Currently there are millions of Americans who have some physical disability. It has been predicted that within the next 10 - 15 years nearly half of our population will be 60 years of age or older. Not too long ago I made modifications at my mother's home to deal with her physical handicap. I am sensitive to your thinking.

The challenge is to design a kitchen which will serve you now as you are fully mobile but can be easily adapted at a future date. There are no real design obstacles in the kitchen as I see it.

The overall size of the kitchen is critical. It must contain enough space between cabinets, appliances and islands to allow the free movement of a wheelchair. In most cases this means a minimum of 36 inches between any two points. However, to fully rotate a wheelchair 180 degrees to make a U-turn, you need 5 feet between any two points. If you think backing up a car is bad, just wait till you try a wheelchair!

Your cabinet and countertop layout are equally important. Do not install a standard sink base cabinet. Choose an easily removable sink front instead. In the event that you or your husband become confined to a wheelchair, you will need to access the sink. Be sure that the plumber installs the piping such that an anti-scald valve or motion detector faucet can be easily installed.


Avoid flaws and mistakes when planning your kitchen. Use my Kitchen Remodeling Checklist as your remodel guide. I offer a 100% Money Back Guarantee.


Design your cabinet layout to allow a 60 inch wide food preparation area next to the cooktop. This preparation area as well as the cooktop need to be designed so that they can be lowered approximately 4 inches should it become necessary. Choose a cooktop that has front or side mounted controls. Reaching over a heated burner to adjust the temperature can be dangerous.

Install a wall mounted self-cleaning oven away from the cooktop. Be sure that it is mounted low enough in the oven cabinet to allow for easy access from a person sitting in a wheel chair. You can use gas appliances now, however, the cooktop and oven should be wired for electric usage in the future. It is possible that you or your husband my loose your sense of smell and be unable to detect a gas leak.

All of the base cabinets that you choose should have ample pull out bins, shelves, etc. This allows all of the cabinet contents to be within easy reach of someone sitting in a wheelchair. It is also a handy feature for those who are not disabled. Make sure that you choose D shaped handles for all cabinets and drawers. Avoid knobs as they can be slippery and hard to grasp as time goes on. Magnetic catches on all cabinets doors are handy as well.

The refrigerator choice is important. Select a side by side design. Spend the money for one with a front dispenser for ice and water. This makes it very easy for a disabled person to get ice and water in a jiffy. Besides, it will keep you from yelling at your grandkids to shut the freezer door as they make trip after trip for ice cubes!

Most of the discussed options will cost very little. However, you must discuss these concerns at a very early stage with your builder. If he has an elderly parent or relative, I'll bet he will be very accommodating to your wishes.

CLICK HERE to read about Handicap Showers.

Payment Suggestions

DEAR TIM: My house was severely damaged by a natural disaster. My husband and I hired a contractor who was referred by a friend and whose state license is in good standing. We visited other smaller jobs to review his work. We signed a contract with him to perform $250,000 in repairs. He has taken all of our money and only 1/3 of the work is complete, much of it against code. What should we have done to avoid this nightmare? J.C.

DEAR J. C.: After reviewing all of the details of your story, I can see that this person was a con artist from the start. All of the facts that you have presented indicate that this individual was not capable of performing a job of your scope. Furthermore, it appears that he had every intention of stealing your money. He has no honor and makes life miserable for all honest, stable, and trustworthy contractors.

Some state laws permit contractors to ask for and accept deposit money the day the contract is signed. In many cases, deposit money forwarded by a homeowner to a contractor is nothing more than a loan. You put yourself and your money at great risk if you advance money to a contractor for no good reason. Some contractors use deposit money to pay the bills of other jobs currently in progress. This business practice is often referred to as under-capitalization. In other words, their financial gas tank is running near empty.

Contractors deserve advance money in certain instances. For example, they may have to order custom non-returnable objects such as kitchen cabinets or custom windows or doors. A build/design firm may want the cost of the design work and the building permit covered as these items can only be used on your job. Design and planning costs can be negotiated during the bidding process. Costs for custom materials can be verified by asking for copies of the quotes from suppliers. Honest contractors generally will not hesitate to provide you with these numbers.

I also noticed that you allowed the contractor to begin work without finished, detailed plans that were approved by your local building department. This was a critical error on your part. It is vitally important to have finished plans and specifications BEFORE the contract is signed. The plans should be an integral part of the contract documents. An investment of $250 or so with a attorney to review your contract would have been very prudent. The contract could have contained language telling the contractor that all work must be performed in accordance to the plans and specifications.

Payments of additional monies as the work progresses must be tied to specific progress points. You can agree to pay weekly or monthly for work that is complete and satisfactory. To aid you in determining what is a fair price to pay at each of these times, a detailed cost breakdown of the job costs is required. Had you obtained this breakdown of costs on your job, the money to pay for the yet unfinished work would still be in your possession.

I suggest that you contact your local building department as well. Often these agencies provide written progress reports during construction. These reports tell you whether or not the work is being completed in accordance with the building code laws. Make the contractor submit these reports, if they are available, at each request for payment.

In addition, be sure you receive notarized affidavits from each person who has worked on your property or material supplier who has delivered materials. If your contractor has not yet paid these people, your nightmare is just beginning.