Salvage Ceramic Tile

Salvage Ceramic Tile

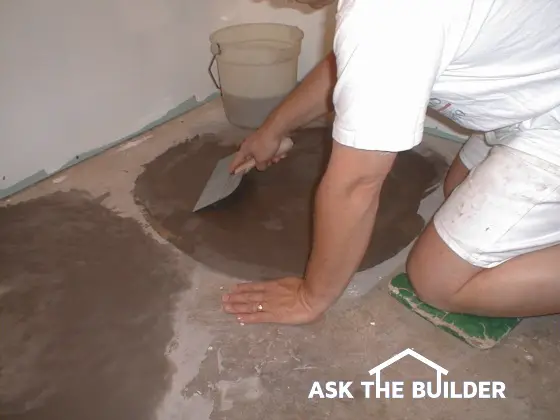
Remove the grout around the tile you are trying to save. Then tap a stiff putty knife at a low angle under the tile.

DEAR TIM: I need your help in a hurry. My mother is going to throw away a ceramic tile countertop. The top has four inch square tiles that are of great sentimental value to me. The tiles are glued to a piece of plywood . I tried to get one tile off but I cracked it. Is there a way to safely remove the tile or am I wasting my time? Ginger B., Sweetwater Oaks, FL

DEAR GINGER: Ouch! This is a job that requires a delicate touch, lots of patience and a large dose of luck. It is possible to remove ceramic tile from some surfaces, but in certain cases you can indeed waste vast amounts of time. The fact that the tile was glued directly to a wood substrate is a good sign. You must be living well!

Ceramic tile is a brittle material. In many respects it resembles concrete. Both have high compressive strength. This means you can squeeze or compress them and they will often will not break. But tile and concrete have low tensile strength, often as little as ten percent of their compressive strength. Bending or twisting a material subjects it to tension. You cracked the first tile because as you were prying it up from the wood, you bent it a little too much.

The first thing that needs to be done to even have the slightest chance of success is to remove the grout between each tile. The grout connects all of the tiles into one large sheet. If you stress one tile with the grout in place, you transfer this stress to adjacent tiles. Once the grout is removed, you can work on each tile independently without fear.

Grout removal can be done by hand with an old flathead screwdriver or with any number of rotary electrical tools. No matter which way you decide to go, you need to proceed slowly. If you select a screwdriver, use a hammer to gently tap the screwdriver into the grout. Once you have created a small void, orient the screwdriver so you are chipping grout towards this void. Take small 1/8 inch bites with the screwdriver. Watch the edges of the tile as they are very susceptible to chipping and scratching.

You have to be cautious with the rotary power tools. The rapidly spinning bit can get out of control and gouge a tile or produce a scratch across the surface. If possible, practice using this tool on some other grouted tile. Once you feel comfortable, proceed to the tiles you wish to save.


Restore the "clean" to your grout. Just go to STAIN SOLVER to see the beautiful, quick results.


With the grout out of the way, you need to remove any wood or ceramic trim that might be hiding the edges of the tile. This is a critical step because you must be able to slide a thin putty knife under a full tile at a flat or very low angle to pop it loose from the wood substrate. If the tile is held in place with an organic mastic, you should have a relatively easy time of popping the tiles from the wood. If cement based thinset was used, expect to spend more time.

Use a hammer to gently tap the handle of the thin putty knife. Orient the knife at an angle so that one corner of the knife starts to slide between the tile and the wood. Start at one corner and move along the entire edge of the tile. Do not try to drive the knife under the tile at just one spot. Keep the knife flat if possible. As you increase the angle you increase the bending forces on the tile.

Continue to tap the knife deeper and deeper under the tile. Once you are halfway, you may be able to apply gentle but firm upward pressure and the tile should pop off the wood. Take your time and go slowly. If the tile has not yet cracked, you will eventually be able to get it off.

Once the tiles are removed you can use semi-paste adhesive removers to soften and eliminate the dried organic mastic. If the adhesive was thinset, you will need to carefully grind this material off. The backs of the tile must be smooth so that they lay flat when you reinstall them.

Column 355

Custom Wine Cellars

wine cellar

A Custom Wine Cellar

DEAR TIM: My new wine collecting hobby is getting a tad out of hand. My hall closet simply will not handle my growing wine collection and my wife has instructed me to build a wine storage room. I am wondering how to calculate the size of the space that is required and what is the best way to build the racks to store the wine. Can you build a storage room in a garage if you don't have a basement? How important is temperature and humidity in the room? Dick D., Sun City West, AZ

DEAR DICK: If you imbibe wine on a somewhat frequent basis and like a variety of wines, I can see why the closet no longer works. Simple closet storage can also be dangerous. It is not uncommon for boxes to shift and a bottle to break. That may be acceptable with inexpensive mass produced wines, but to do so with more expensive wines is considered a sacrilege for those people who respect what is inside many wine bottles.

There are many things you need to consider when designing and building a custom wine cellar. For hundreds of years, wine was stored in wine cellars deep underground. This environment provided by Mother Nature happens to be nearly perfect for wine storage. Wines age perfectly at temperatures that are 55-58 F and relative humidity levels anywhere from 55 - 75 percent. Storing wine outside of these temperature and humidity parameters can rapidly affect the taste and quality of the wine.

Your challenge is to create this artificial environment whether it is in a garage, basement or even a room within a house. You can build regular walls but you absolutely must install a continuous high performance vapor barrier on the warm side of the walls and the ceiling of the storage room. The warm side of these walls is the outside of the room, not inside. Be sure to insulate the walls and the ceiling after the vapor barrier is installed. The door that opens into this room should be an insulated exterior grade door that has an excellent threshold seal and continuous weatherstripping around all of the edges of the door.

Lighting within the room is important but should not be overdone. Light can also affect the quality and taste of wines. You may want to install a timer switch on the storage room lights in case you close the door and leave it on by mistake.

Tile flooring works great in wine storage areas because it is easy to clean in case of an unfortunate accident. Hardwood will work but you must leave a one half inch gap around all edges to account for expansion once the wood swells in response to the elevated humidity.

Wine storage racks can be tough to construct from scratch if you are not an experienced carpenter. An inferior homemade design can put a wine collection at grave risk. The average bottle of wine weighs three pounds. It is not uncommon to have 24 bottles in a vertical stack on an eight foot high wall. Most high quality factory made storage systems will have just under 3 vertical columns per lineal foot of wall space. This means you can have about 200 pounds of wine for every lineal foot of storage. That is a lot of weight!

Redwood is an excellent wood for wine storage systems. It is moisture resistant, strong, colorful and non-aromatic. Do not use woods like cedar that have an aroma. Never stain the wood in a storage room. These odors can penetrate the corks and ruin the flavor of wine.

If it were me, I would build the room myself but purchase the wine storage kits or wall systems. They are affordable and the simple ones can be put together with ease. If you want a deluxe wine storage room that includes hand painted floor tile, wall murals, custom etched glass doors, stained glass, wood ceilings, and high efficiency refrigeration and humidity control you can have that as well. If your hobby leads down this path, you will quickly attain the distinctive title of cellar master!

Column 356

Avoid Annual Deck Cleaning

cleaning wood deck

Cleaning pressure treated lumber is not rocket science. Just use common sense.

DEAR TIM: My husband and I have a problem with our condominium deck. Last summer, I pressure washed the cedar wood because it had turned gray. Although the wood was rough after the washing, it looked superb after we applied a sealer. But this spring the sealer has started to peel. I fully expected the sealer to last at least two years possibly three. What went wrong? Is there a way to avoid the annual deck cleaning/sealing ritual? Marge G. Oaklawn, IL

DEAR MARGE: Welcome to the club! There are tens of thousands, perhaps hundreds of thousands, of people just like you who get very frustrated each spring. Just like you, they worked their fingers to the bone cleaning and sealing wood decks, playsets, boat docks, fishing piers, etc. and achieved spectacular short term results. But Mother Nature, and her good friend Old Man Winter, flexed their muscles and over a period of just a few months wreaked havoc. The good news is that there are deck cleaning and care products that will allow you to take a year or two off.

Your deck sealer is peeling because you unfortunately selected a film forming product. Not all deck sealers or water repellents are created equal. Film forming deck finishes contain clear resins that soak into the wood but they also lay at the surface. A film on any horizontal wood deck or railing is the kiss of death. Penetrating water repellents are a better choice. They soak deeply into wood and stop water penetration.

Intense ultraviolet (UV) rays in sunlight blast away at horizontal deck surfaces during the mid part of the day. These same rays glance off vertical railing pickets. This is why your flat surfaces always look worse than the railings. Add to this the fact that rain and snow puddle and stand on the horizontal decking and hand rail tops. The UV rays and water vigorously attack the film finish. The net result is that the weakened film finish peels off rapidly and readily.

To add insult to injury, you made another mistake using a pressure washer. These devices work great to get paint off of metal, but I have seen hundreds of decks ruined by these devices. The light colored wood bands in any piece of lumber are the growth rings created each spring and early summer. This wood is not as dense as the dark colored grain bands that grow as the tree hardens off for the upcoming winter. Power washers can easily erode the soft spring wood leaving your deck looking like a 30 year old fishing pier.

EB015 Cleaning & Sealing Deck eBoo CoverUnfortunately, you are going to have to strip off the film forming finish you applied last year. The elements will continue to do it for you if you wish to wait, but that is not a good idea. Decks that are neglected suffer continued UV damage and water seeps into unprotected wood. This water causes continued expansion and contraction as the wood swells when it gets wet and then shrinks as the water dries out. This movement creates small cracks or checks. These cracks allow the next rainfall to penetrate even deeper into the wood.

Once the wood finish is stripped off, use oxygen bleach to safely clean the wood. Avoid deck cleaning products that contain sodium hypochlorite. This is the primary ingredient in household chlorine bleach. Chlorine bleach is toxic to nearby vegetation, it removes the color from wood, it destroys the lignin that holds wood fibers together, and it accelerates corrosion of the metal deck nails and hardware. Oxygen bleach does none of these things. It simply forms a froth on the deck and the millions of oxygen bubbles deep clean the wood while you watch.

Once the deck is clean, purchase a penetrating water repellent that is made with synthetic resins. Many of the common deck sealers you see are made with natural oils and waxes. These products are the very food that mildew and algae love to eat. The manufacturers add mildewcides and fungicides to the sealers in an attempt to keep your deck from turning black and green, but these chemicals are often dissolved quickly by rain and snow. Synthetic resin water repellents are not mildew and algae food.

Purchase a synthetic resin water repellent that has colored pigments in it. The pigments help to block damage from UV rays. These rays turn the wood gray. If you apply the water repellent according to instructions, there is a good chance you will get two and possibly three years of protection. These same products work as long as five to seven years on log cabins or any other vertical wood surface.

Message from Tim:

Years ago while researching a column about cleaning decks, I discovered the wonders of Oxygen Bleach. It is perhaps the 'greenest' cleaner I know of as it uses oxygen ions to break apart stains, dirt and odor molecules. There are no harsh chemicals, and it works on just about anything that is water washable.

I decided to create my own special blend using ingredients made in the USA. In fact, the raw materials in the active ingredient are food-grade quality registered with the FDA. I call my product Stain Solver. I urge you to use it to help with your deck cleaning needs. You will be amazed at the results!

Column 357

Wood Wall Covered in Artificial Stone

wood fence artificial stone

Artificial Stone on a Wood Fence | This is my neighbor's wood fence. It has a smooth face to which you could attach artificial stone. The challenge is to make sure the fence sections are securely attached to the posts as the weight of the stone can be significant. Faux stone on wood walls is possible.

DEAR TIM: I want to build an exterior wall around my pool area. My dream wall would be made from stone. But my skills are heavily weighted to carpentry. Therefore, I think a masonry wall might be out of the question. I am not looking forward to wood because I realize it will need periodic maintenance. Is there an easy no-maintenance material I can use? What do you suggest? Gerry M., Malone, NY

DEAR GERRY: This is indeed an ambitious project and one that will look good once completed. A stone wall would be very attractive and I think you should not abandon this idea. You need to think outside the box. What if I told you that you could build a wood wall and cover it with artificial stone that is so realistic it would fool even a geologist?

Should I Check My Zoning Laws?

Before you proceed to the lumber yard and stone center, you need to stop by your local government zoning office. Many cities, towns and villages have strict zoning laws that control yard walls and fences. These laws even control walls and fences surrounding pools. You need to pay particular attention to the minimum and maximum heights of the wall and the appearance. Some zoning laws regulate the materials you must use and the appearance of the surface that faces your neighbors.

CLICK or TAP HERE to get FREE BIDS from local stone masons who can install faux stone.

Is Artificial Stone Affordable?

You can purchase affordable artificial stone that can be applied directly to a wood wall substrate. This stone is made using colorful iron oxide pigments, cement and special small lightweight aggregates that are poured into highly specialized molds. The molds are vibrated so that the face of the concrete stones picks up every detail of the molds. The resulting texture and color of the artificial stones is incredible. They come in all different colors, textures and sizes. The color is solid throughout and they weather just like traditional stone.

Is it Easy to Install Artificial Stone?

It is easy to install the stones. They are simply pushed into a bed of mortar that has been troweled over a layer of galvanized wire lath. The stones are generally easy to fit and you are supplied with special corner stones that allow you to finish off any outside corners.

What are the Important Installation Steps?

There are several important steps you need to consider if you want a wall that will not deteriorate or crack. The combined weight of the lumber and the artificial stone and setting mortar will be considerable. If you build the wood wall like a traditional fence, all of the weight will be concentrated upon the vertical posts. These posts must be placed on eight inch thick by 30 inch diameter footers that extend below the frost line in your area.

What is the Best Lumber to Use?

I would consider using treated lumber for all of the posts, beams, and plywood for the sub-wall that acts as the hidden support system for the artificial stone. The beams need to be securely fastened to the posts with either a mortised recessed joint in each post or by using structural framing connectors that are readily available at most lumber yards or hardware stores. Simply nailing the horizontal beams into the posts is a recipe for disaster. All fasteners must be galvanized.

CLICK or TAP HERE to get FREE BIDS from local stone masons who can install faux stone.

How Long Should the Wood Weather?

After the wood wall is constructed, it should weather for a period of 30 to 60 days. This will allow it to shrink. Treated lumber often contains lots of moisture. If you construct the wood wall and immediately cover it with the artificial stone, you may get random cracks in the joints between stones as the wood member shrink and contract.

Should I Use Tar Paper over the Wood?

It is also a great idea to place tar paper over the entire wood structure just before you nail on the galvanized wire lath. Because water can soak through the mortar that holds the stones onto the wall, this tar paper will keep the wood dry. If the wood were to get wet at a later time, then it might swell. This swelling could also create random cracks.

The shop that sells the artificial stone will very likely give you numerous building tips. This product is used all over the USA for garden walls and privacy walls. You will by no means be the first person to use this artificial stone to create a paradise around a pool!

Column 358

Fixing Toilet Drainage Problems

toilet ring and flange

Fixing Toilet Drainage Problems

DEAR TIM: My toilet leaks at the floor level. I am convinced it has something to do with the fact that it rocks side to side each time it is used. Upon removing the toilet I noticed the metal ring is rusted and the toilet bolts have nothing to grab onto. I would prefer not to cut into the drain lines if possible. What is the best way to fix this? Steve W., Lawton, OK

DEAR STEVE: Toilets are not supposed to act like rocking horses, that's for sure! It is vital that toilets are securely attached to the drainage system and that there is a seal in place between the toilet and the drain system. The seal prevents sewer gas from invading your home and it insures that all toilet waste goes down the drain and not into your home. Toilet seal problems are significant health hazards and require immediate attention.

Plumbing drainage systems have special fittings that make the transition from the pipes to fixtures. Beneath sinks plumbers use a fitting called a "desanko". This fitting has a nut and a washer on it that allows you to connect the P trap pipe to the drainage system. As you tighten the nut, the washer compresses around the P trap pipe and creates a waterproof and airtight seal. Unfortunately, we can't do the same thing with toilets.

Toilets are connected to the drainage system using a toilet flange. The flange fitting should be set so that the top of the flange is about one quarter inch above the finished floor surface. The flange contains several holes that allow you to securely fasten it to the wood or concrete floor beneath the flange. It is very important that the rim of the flange is supported by the floor. The weight of the toilet and anyone using it should never be transferred to the drainage pipes.

This flange fitting has special slots in it that toilet bolts fit into. The toilet bolts extend vertically through the flange and pass through the holes in the base of your toilet bowl. Using nuts and special washers you then tighten the bowl to this flange.

You can purchase a flange extender ring that simply fits over your rusted metal flange. These extenders usually come with a special paste gasket seal. You must use this sealant or silicone caulk between the new flange extender and the old rusted ring. This joint absolutely must be water and gas proof. Visit a traditional plumbing supply house to obtain this flange extender.

Once your new flange is in place, you must make the connection between the toilet and the flange water and gas proof. This is accomplished by installing a wax ring on top of the flange. Wax rings come with or without a horn. A horn is a plastic diverter that directs water into the drain pipe. I prefer wax rings that have this horn. The wax is very sticky and works very well as long as the toilet does not move once the bowl is in place. This is where many rookie plumbers and homeowners make a critical mistake. They move the toilet to some degree after it is in position.

toilet flange thumbnail for videoClick here to watch a toilet flange installation tip video.


Toilet bowls should be installed so that they are level side to side and front to back. The trouble is most bathroom floors are not level. Once your flange extender is in place I want you to set the toilet on top of the flange without the wax ring in place. Use wood shims and a two foot long level to get the toilet so that it is indeed level. Gently lift the toilet off the flange without disturbing the wood shims.

Place the wax ring onto the flange with the horn pointing down into the drain pipe. Be sure the toilet bolts are sticking up through the special slots in the flange. The wax ring often will hold these bolts in place. Slowly and carefully position the toilet onto the wax ring. A helper is handy at this stage and will make sure the bolts make it through the holes in the base of the bowl. Lower the toilet slowly until it contacts the wood shims. Tighten the toilet bolts and grout the space between the floor and the base of the toilet. When the grout sets carefully remove the wood shims and fill these holes with the same grout. You will enjoy years of leak free performance!

Column 359

Watch this video to see how Tim SOLVED a problem in minutes!

CLICK here to learn more on how Tim can help solve your problems.

Creating Brick Patios

brick patio

I feel one of the most important aspects of creating a brick patio is to make sure the patio is sized properly. You can download amazing how-to instructions to build this patio. Go here to get the instructions.

Building a Brick Patio - Use Clay Paving Brick

DEAR TIM: I have a perfect spot in the back of my house for a patio. The look of real brick is very appealing to me. Is it possible for an average person to install a brick patio? What is the easiest method and what is the most permanent method? What do you think the materials would cost? Pamela S., Overland Park, KS

DEAR PAMELA: Patios can be created using all sorts of materials including, but not limited to, concrete, Patterned Concrete®, stone, ceramic tile, traditional clay brick and concrete brick. I have worked with all of these materials but I must admit that the traditional red clay paving brick has always received the most glowing compliments from customers and people who walk on my own brick patios.

Not all brick are created equal. People who live in cold climates need brick that can withstand years of freezing weather. You live in an area that does indeed get cold so be sure that the brick you purchase is graded and rated for severe weather. This brick is made with high quality clay and is fired in the kiln for an extended period. These conditions create a hard brick that is very durable.

The Size of the Patio Must Be Correct

I feel one of the most important aspects of the job is to make sure the patio is sized properly. All too often people make patios and decks too small. I would purchase the patio furniture you intend to use. Place it exactly where it will be used. Use spray paint or string to outline the edges of the patio allowing sufficient room for grills, side tables, flower pots, etc. Using this outline you will be able to estimate the total square footage of the patio.

DIY-Friendly Job

An average person can install a brick patio. If you work alone, it will take many days of work. All too often people think they can do jobs like this on a weekend. I find that rarely to be the case. Be conservative in your time estimate so that you do not rush and cut corners. An average-sized patio that measures 15 by 20 feet may consume 100 to 150 man-hours of labor.

The Two Brick Patio Methods

Clay paving brick can be set in a sand base that is supported by a crushed gravel base. They can also be permanently attached to a poured concrete base. I have tried both methods and I can tell you that the brick over sand method is by no means permanent. Moles can push up bricks, ants love to bring sand to the surface between the joints and this sand is often tracked back into the house. Weed control is a constant problem as well. Installing the brick with cement mortar over concrete eliminates all of these problems.

PC1450 PDF cover page

Download my step-by-step instructions to build a patio using brick. These instructions come with videos, illustrations, links to top tools, and SECRET formulas for both mortar and cement paint. You can get the step-by-step instructions here. It includes a rare secret recipe for the mortar!

How Much Work Does it Require?

The amount of work to do both methods is quite different. In both instances, you will need to excavate and remove soil to create the area for the gravel or concrete base. Transporting the gravel or concrete via wheelbarrow to the patio site is the same amount of work. Installing the base materials is also very similar. Moving brick to the patio and placing each one is the same. The biggest difference is the time spent carefully placing bricks in a cement mortar and then grouting the joints the next day. Comparing the time for both methods I would estimate that you will spend an additional 40-60 hours to get a permanent installation. This is a bargain for a surface that will give you years of beauty and trouble-free service.

How Much Does A Brick Patio Cost?

The cost to install a traditional brick patio is affordable. I prefer to use the one and one half-inch thick solid paving brick. These measure four inches wide by eight inches long and currently cost forty cents each in my city. Each square foot of patio surface requires approximately 3.7 bricks. The concrete required for this job will cost about eighty cents a square foot. Miscellaneous materials like sand, cement, and saw blades needed to cut the brick may add another fifty cents per square foot to your cost. The total cost of materials for your patio should be in the neighborhood of $2.80 per square foot or $840.00 if you do go with a 15 by 20-foot patio (The year 2000 costs!).

Column 360

Wood Flooring

wood flooring

DEAR TIM: I really would like to have a solid hardwood floor but my existing house has a concrete slab. Is it possible to install a hardwood floor on top of concrete? How in the world do you attach the strips of hardwood to the concrete? What needs to be done to insure that the floor looks as good as one installed on a wood sub-floor? Stacey C., Boulder, CO

DEAR STACEY: If your slab surface is level with the outside earth or is an elevated concrete slab you can install traditional hardwood flooring over it. Concrete slabs that are below ground level are not candidates for solid hardwood flooring. If you have such a slab, I would consider installing an engineered hardwood flooring. This material is made by taking different plys or layers of wood and gluing them together to make a wood product that is more stable when subjected to elevated levels of humidity often found in basements or below grade slabs.

Wood is a hygroscopic material. In other words, wood changes its shape in response to changes in relative humidity or the presence of liquid water. As the humidity goes up or if wood gets wet, it swells. As the wood dries it shrinks or contracts. This type of movement can cause all sorts of problems with finished wood floors or even wood furniture. For this reason, it is important that the hardwood stays dry and at or near constant humidity levels before, during and after installation.

To successfully install your hardwood floor over the concrete, you need to make sure the concrete is dry. If the slab is new, it usually takes a minimum of 60 days for it to release sufficient moisture before you can proceed with the hardwood installation. If you are building a new home, be sure the contractor installs a high performance cross laminated vapor barrier under the concrete. These vapor barriers are often used in high end commercial jobs and are very nearly impervious to any vapor transmission. They are also very puncture resistant.

To test any slab for excess moisture, simply vacuum a small area first. Then tape a 15 inch square piece of clear polyethylene film to the slab using two strips of duct tape along each of the four edges. If no condensation or fog develops under the plastic after 48 hours, the slab is sufficiently dry. If the slab is wet, then heat the space and open windows or use a dehumidifier to draw moisture from the slab. Retest the floor for moisture content once you think it has dried.

The hardwood flooring is fastened to plywood or 2x4 strips that are securely attached to the concrete. Keep in mind that the height of your finished floor will end up at least one and one half to two and one quarter inches above the slab height depending upon which wood subfloor you decide to use. This raised floor can be a problem at doorways if you or the builder do not plan for this.


Installing a new hardwood floor? Use my Hardwood Flooring Installation / Refinishing Checklist to avoid costly mistakes. I offer a 100% Money Back Guarantee.


Before the plywood or 2x4 sleeper strips are attached to the floor, an additional vapor barrier must be installed on top of the dry concrete. Use the same high performance plastic that should have been used below the slab. The concrete floor needs to be level or in the same plane. Use a 6 foot long straightedge to check for high and low spots. Standard asphalt shingles make excellent shims to fill in low spots. The vapor barrier can be installed over the shingles and then the wood on top of that.

Fastening the plywood or 2x4 strips to the concrete can be done one of several ways. You can buy special hardened concrete screws that can bite into the sides of a pre-drilled hole in the concrete slab. Driving these screws requires a powerful screw gun to accomplish the task. A simple yet effective method is to drill a 1/4 inch hole through the wood and then directly into the concrete. The depth of the hole should be 3.5 inches. Take two 16 penny sinker nails and drive them side by side at the same time into the hole. Use a 20 ounce or larger hammer to drive the nails and strike them squarely. Believe it or not, the nails will bite into the concrete and hold the wood securely to the slab.

Before you actually install the hardwood flooring, make sure the room has been heated to room temperature for at least five days before the flooring is delivered. Once the wood is delivered, remove any packaging so it can acclimate. The wood needs to be exposed to the room temperature and humidity for at least an additional five days before you actually begin to install it.

Column 361

Leaky Outdoor Faucets

outdoor faucet leak

DEAR TIM: My outdoor frost proof hose faucet is stuck in the off position. It is dripping and I want to repair it. This same valve has always been a source of trouble and I would like to have one that is easy to operate and allows for full water flow. How can this be accomplished? My children have requested an easy way to fill water balloons as well. Any suggestions? John D., Derry, NH

DEAR JOHN: You are not alone my friend. I have had all sorts of problems in the past with outdoor hose faucets. Some of them are knuckle busters that cause scrapes on my fingers when I operate them and others just leak after a few years. Just about every traditional residential outdoor hose faucet uses old technology washers and repairing them can be a hassle. I permanently solved the problem at my own home recently. It was inexpensive and took me less than one hour.

Maximizing water flow can be achieved by using a standard ball valve. These valves are easy to find and commonly used by plumbers as shut off valves when they wish to isolate a water supply line branch. Copper tubing is soldered into each end of the valve to make a leak proof connection. These valves do not have a traditional round handle that you rotate several times to open and close the valve. A ball valve has a simple lever handle that only turns 90 degrees. (See above photo.) The handle is easy to operate, especially for older people who have arthritis.

Inside the rust proof solid brass valve is a stainless steel ball. The ball has a one half inch hole drilled through it. These valves will provide a lifetime of leak free performance. When the valve is open completely there are no obstructions nor any convoluted pathways within the valve. Water flows freely to your garden hose. On the contrary, the inside of a traditional valve often resembles a maze that the water has to twist and turn through before it exits the valve. A simple ball valve often costs less than $5.00.

You will need two valves - one for outdoors and the other one will be used indoors to make the new outdoor valve frost proof next winter. The indoor valve will need to be turned off before cold weather and the outdoor valve should be opened and left open all winter to prevent a burst pipe.

You will not be able to directly connect your garden hose to the ball valve. A special adapter is needed. To save you time and trouble finding this adapter, consider visiting a real plumbing supply house or a traditional hardware store that has a full line of plumbing fittings. This brass adapter has male three quarter inch garden hose threads on one end and male three quarter inch and female one half inch threads on the other end. This multipurpose fitting will work for either one half or three quarter inch water supply lines and costs less than $1.50.

The adapter is soldered to the ball valve with a standard copper tubing fitting that matches your ball valve pipe size. I happened to use a one half inch male adapter. Instead of using Teflon tape or pipe dope to make the connection between the two adapters I soldered them together for a permanent leak-proof connection.

The valve and these parts need to be securely fastened to your home. I happen to prefer copper stand off pipe clamps for this purpose. Match the size of this clamp to the size of your water supply line. Be sure to use stainless steel or solid brass screws to attach these clamps to your home. I use two clamps, one on either side of the valve. The two clamps also hold the valve far enough away from the house so that scraped knuckles will be a thing of the past.

I solved the water balloon filling problem at my house with a special hose nozzle. I found mine at a hardware store that had a great assortment of brass hose nozzles. This simple nozzle looks like a midget old fashioned fire hose nozzle. There is no on/off mechanism and the end of the valve reduces down to the size of a standard pencil. The balloons easily fit onto the end of this midget nozzle and the ball valve allows for rapid filling in the event you are overrun by the enemy.

Column 362

Cracks in Wood Siding

cracks in wood siding

The splits in the siding material concern me. My guess is that the siding was not installed correctly when the houses were built.

DEAR TIM: I live in a landominium development where we all have separate houses. Each house is covered with beveled cedar wood lap siding that splits for no reason. Our maintenance committee insists that all split boards be replaced before the outside of a unit is painted. This seems extreme to me. I thought cedar would be a long lasting material. Do the boards really need to be replaced or can the splits boards be caulked? Jim G., Riverside, CA

DEAR JIM: The maintenance committee is doing the right thing. The boards with splits should be replaced. These splits allow rainwater to penetrate deeply into the wood and in some instances behind the wood. Water is an enemy to painted finishes and wood that has not been treated to prevent rot. A new paint job can blister and peel within six months if enough water gets behind the wood siding. You are correct about the longevity of cedar siding. It is a wonderful renewable forest product that contains natural preservatives. But water that saturates the wood sheathing or framing lumber behind the siding may start to rot in a short amount of time.

The splits in the siding material concern me. My guess is that the siding was not installed correctly when the houses were built. Inexperienced carpenters often nail lap siding so that each piece of siding is unable to move. Lap siding is installed so that each piece overlaps the one below it. This overlap creates an excellent weather barrier so that rain water is shed from the siding. Rookie carpenters often nail along the bottom edge of the siding and this same nail pierces the top portion of the piece of siding just below.

This method of nailing pins each piece of siding and makes it nearly impossible for the siding to expand and contract with changes in the weather. Experienced carpenters know that the nails from one piece of siding must not pass through the siding below. If the overlap of the two pieces of siding is one and one quarter inches, then the nail for a piece of siding should be one and three eighths above the bottom edge. This nail spacing allows each piece of siding to float and move easily. Be sure that the painters nail the siding properly as they replace each split board.

When the split board is being replaced look to see if a water barrier membrane is in place. Years ago tar paper was used by carpenters beneath beveled lap siding. It is still a very effective material to use if you do not want water to contact the framing lumber and wall sheathing. Modern fabric water and air infiltration barriers can also be used. These products come in large rolls and are easy to recognize. If you do not see any water barrier behind the siding, then it is vitally important that new siding be installed. In this case, the siding is the only weather barrier. Felt paper and the modern fabric barriers offer an important second line of defense.

If you want to maximize the life of the houses and the paint jobs be sure that the siding is nailed with hot dipped galvanized nails or better yet, stainless steel nails. These nails have the highest corrosion resistance and are worth the extra cost. Be sure the nails are long enough so that the nail shaft penetrates at least one and one half inch into solid wood once it passes through the siding.

The paint job on the replacement piece of siding will last a very long time if the painter can paint both the back and cut edges of the wood before it is installed. When wood siding is completely covered with paint, water has a difficult time getting into the fibers. If you keep wood completely dry using this method, it becomes dimensionally stable. High quality paint will adhere to this wood for many years.

Column 363

Install Ceramic Tile

installing ceramic tile

Install Ceramic Tile


DEAR TIM: I would like to install 12 inch by 12 inch ceramic tile over my existing sheet vinyl floor. The cushioned vinyl would provide a wonderful flexible membrane that would absorb impact. What kind of glue should I use? What else should I do to make sure my tile floor will look like it was installed by a professional? David R., London, KY

DEAR DAVID: Stop! Installing rigid ceramic tile over something that might move is a huge mistake. The resilient vinyl flooring you now have must be removed before you install your ceramic tile. If you don't I guarantee you that numerous floor tiles will crack over time.

I discovered this the hard way years ago. One of my jobs required ceramic tile floors to be installed in a restaurant kitchen. The tile was installed over a concrete slab. But instead of using cement based thinset that dries hard, I used the trowel-on organic mastic that resembles cake icing. Organic mastic retains a slight amount of flexibility once it dries. When the kitchen equipment was placed on the floor, the tiles beneath the equipment legs cracked in short order.

Ceramic tile is very strong if you try to compress it. But if you bend it, it is very weak and will readily crack. The sheet vinyl floor will allow the tile to bend ever so slightly just as the organic mastic gave way beneath the heavy kitchen equipment. Do whatever it takes to remove the sheet vinyl and any glue that is holding it down. Adhesive removers can commonly be purchased at paint stores. These chemicals work just like traditional paint strippers to soften old glue.


If you're putting ceramic tile in your home, check out my Ceramic Tile Installation Checklist to learn exactly what you should know about the process. Avoid making costly mistakes with the help of this document. I offer a 100% Money Back Guarantee.


The large tiles you are working with are very susceptible to cracking. They are highly sensitive to imperfections in the subfloor beneath the tile. Installation instructions often tell you to make sure the floor is level. What this really means is make sure that the floor is in the same plane - as if the floor was perfectly smooth like a new piece of plate glass. Humps or dips in the floor can create small void spaces under each tile. Walking across these spots or concentrating loads at these points will cause future cracks in the tile.

You can eliminate the humps and dips by using a straightedge and floor leveling compounds. I prefer to use the cement based products that mix with water. Most of them will readily adhere to concrete floors or wood subfloors. If you intend to apply your tile on a cement board product that will be nailed to the wood subfloor, you should remove the humps and dips before you nail the cement board in place.

I use three different straightedges and my drywall finishing tools to apply the floor leveling compound. My six foot and four foot long aluminum levels make a wonderful straight edge. I also use my aluminum framing square. Place the tools at various spots on the floor to determine where the humps and dips are. These same tools can be used as large spreading tools that act like bulldozers to evenly apply the leveling compound.

Mix approximately one half gallon of the floor leveling compound with cold water. Many of them are rapid set and you must spread and tool the material within three to five minutes of mixing it. If it starts to get hard in the bucket do not add more water to try to liquify it. This will make the final product weak. Be sure the floor is dust free and slightly damp to achieve the best bonding.


If your getting ready to install tile in a shower, especially the floor of the shower, you must read my Shower Pan eBook. Failure to do so will result in possible water leaks and mold growth at your home. Who wants that?


Using regular drywall tools and a little bit of water you can achieve a smooth glass like surface as the compound hardens. Gently float the wide drywall tools over the hardening compound and it will get smoother and smoother with each stroke. Sprinkle a few drops of water on the compound to make this task easier. Practice on a small spot first until you feel like a pro. Use the straightedges to check for humps and dips in the flooring as you proceed.


Author's Note: We've received other questions with similar problems or questions. Here's one from Krystina G. of San Sebastian, PR, dealing with floor levelness.

"My husband and I have a home made completely out of cement and we want to put ceramic tiles throughout our home. The floor is not level and we wanted to know the best way to go on with leveling floors."

Column 365