Flag Poles | The good news is that you can create a home built flagpole that will be durable and maintenance free for many years.
DEAR TIM: Prior to the terrorist attack on the World Trade Center I was a ho-hum patriot. The vicious act has galvanized me into action. I want an in-ground flagpole and I want one now. How can I make a sturdy flagpole that will stand 15 to 20 feet tall so I can proudly fly Old Glory each and every day? What do I need to know? Do you think the average homeowner can do this inexpensively? Bill B., Sea Girt, NJ
DEAR BILL: You are a great American my friend! I think it is a splendid idea to build a flagpole. The day after the attack I took out my large 5 foot by 8 foot Old Glory and hung it from the hooks on my front porch. Prior to the attack I just displayed the flag on national holidays. But my wife and I now feel that was a mistake. We should have been flying the flag each and every day. Until such time as you complete your flagpole, figure out a way to respectfully fly your flag.
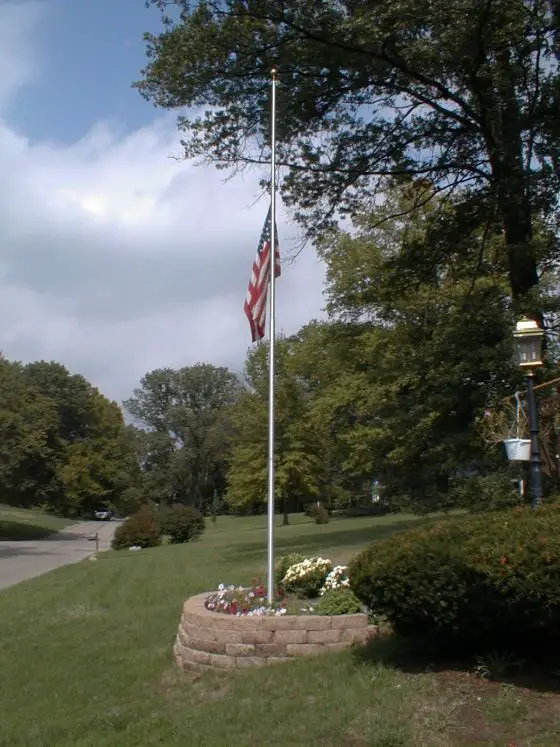
The good news is that you can create a home built flagpole that will be durable and maintenance free for many years. The supplies to build the flagpole cost just a tad over $100.00. This flagpole will work just as well as a factory made one.
Call a local plumbing supply house and see if they stock two inch inner diameter galvanized iron pipe. If so, you are in luck. These normally come in 21 foot lengths. You will need them to deliver it unless you have a truck with ladder racks. The pipe will be a little heavy and very gangly. While you are at the plumbing supply house, purchase two stainless steel band clamps that will fit around this pipe with plenty of slack. You will need these clamps to attach the rope cleat to the pole. The rope cleat is the bent hook device that captures and holds the halyard or flagpole rope.
The most important part to obtain is the truck that sits at the top of the pole. This is the pipe capping device that contains the pulley wheel. You can buy a simple pulley if you wish and creatively attach it to the top of the pole but a truck assembly is made to fit perfectly on top of the pipe. Factory built flagpoles often have sophisticated single and double truck assemblies so that two flags can be flown from the same pole. The deluxe models have trucks that rotate freely so the flag doesn't wrap around the pole as the wind direction changes.
Since your pole will be relatively short, you need not be too concerned about wind problems. High winds create enormous amounts of drag on flags and a flag that is too large on a tall flag pole can actually cause the pole to bend or snap. Your 2 inch galvanized iron pipe will easily support a 5 foot by 8 foot flag in a high wind.
It is very important to install the base of the pipe in a solid foundation. The two inch iron pipe needs to slide into a pipe sleeve that has an inner diameter slightly larger than the outer diameter of the flagpole. You can often find this pipe at a welding shop. I would purchase a 3 foot length of this pipe and have the welder tack a 6 inch by 6 inch flat steel plate on the bottom. Do not weld the plate solidly to the bottom of the sleeve pipe. Water needs to be able to drain out of this pipe as it collects during rain storms.
This top of this sleeve needs to be flush with the ground level and should be surrounded with concrete. Place at least 6 inches of concrete under the sleeve and 12 inches around the sides of the sleeve. It is best to pour the concrete in two separate pours. Pour the 6 inch footer first and let it harden. Then place the sleeve in the ground and use a level to plumb it. Slowly pour stiff concrete mix into the hole around the sleeve. As you pour the concrete take periodic readings to make sure the sleeve is indeed perfectly plumb. Let the concrete cure for at least a week before you insert the galvanized pipe into the sleeve. Be sure you attach the truck to the top of the pole before you do this. Prior to erecting the pipe check for overhead high voltage wires. Electrocution is a real danger if the pipe contacts an energized conductor.
Factory made flagpoles are installed in the same manner. Many of them have fancy hardware and gorgeous metal finishes. The least expensive pole may cost you $275 or more. What's more, the recent surge in patriotism may create a demand that will outstrip the current supply. Old Glory will not be offended in the least if you fly her from a simple yet effective galvanized flagpole.
Column 381