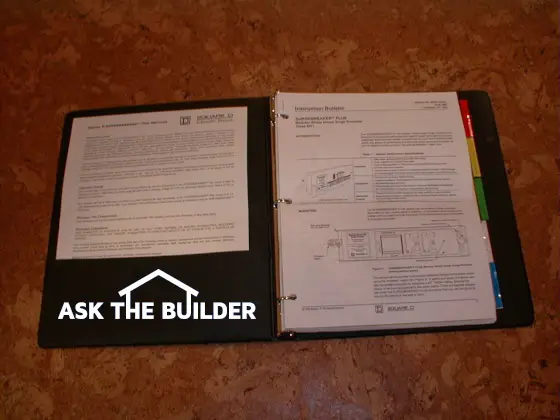
This is a nifty tool that works alongside your blueprints and any written specifications.
Get Organized
DEAR TIM: My husband and I are getting ready to build a new home. I am astonished at all of the details that need to be addressed. Each time we have a meeting with our builder all sorts of decisions need to be made. I am afraid that lots of information is going to fall through the cracks before the final walk through. What is a good way to keep track of all of this information? Julie J., Stillwater, MN
DEAR JULIE: Many people decide not to build a new home for this very reason! They are overwhelmed with the decision and product selection process and simply don't know where to start. Many people are afraid of making the wrong decision. The key is to approach the task in an orderly manner and start making product selections and decisions long before ground is broken.
The building and remodeling playing field is actually a minefield. Making decisions out of order or selecting a product without checking for conflicts with other products can trigger an explosion of extra costs and delays. Once upon a time a client of mine picked two elegant wall light fixtures that hung on each side of a bathroom medicine cabinet. Once they were installed I quickly discovered they prevented the medicine cabinet from opening. Because the homeowner had fallen in love with the fixtures, the problem was solved by relocating the electrical boxes. It was a costly mistake that I paid for.
You can avoid nightmares like mine with a simple job organizational binder. This is a nifty tool that works alongside your blueprints and any written specifications. I have found that the binder works best when it contains a section for each room of the house as well as a separate section for the exterior. Typical things you would find in each section would be photographs or illustrations of fixtures, installation instructions for appliances, fixtures or products, technical information showing supply pipe sizes, wire sizes, and the proper rough-in locations of these utilities.
Each section of the binder should also have a room finish schedule. This is a table that communicates to the builder and his subcontractors exactly what you want on every wall, floor ceiling, trim, door surface in each room. If the data in these schedules is accurate it is entirely possibly for the workers to finish the job with little or no verbal communication.
You will need more than one binder for the job. At the very minimum you need three: one for you, one for the builder and one that is safely stowed in a lock-box at the job site. The subcontractors need the job site binder to refer to as they work each day. Use clear plastic pocket protectors to keep the individual pieces of paper safe from wet job site conditions.
Creating a complete organizational binder means that you need to make product selections before construction begins. This may seem unusual but you might as well resign yourself to it. There are numerous advantages. Pressure decisions are eliminated. Because it is early in the process, you have time to get items that might have to be special ordered. Waiting until the last minute to make selections often eliminates certain items because the job may have to grind to a halt for weeks or months.
Carpenters, plumbers and electricians need to know what they are installing three or four months from now so they get openings, pipes and wires in the correct spots. Every time I have tried to use ESP because I was trying to guess what a customer would want, I guessed wrong. Providing your builder with the correct information simply takes the guesswork out of the process.
If you really want your job to run smoothly you and your builder need to look at all of your selections and insure that there are no conflicts. Imagine your dismay when you discover that the electrical outlet for your night stand is behind your bed. Similar frustration happens when a central vacuum outlet becomes hidden behind a door that is always open. Pesky mistakes like this can be avoided with a little thought and attention to detail.
How would you like me to build your new home? It's probably impossible for me to fit your job into my schedule, but I will gladly share hundreds of my tricks and building secrets with you and your builder. Check out my New House Specifications.
Column 376