Mail Chime Review
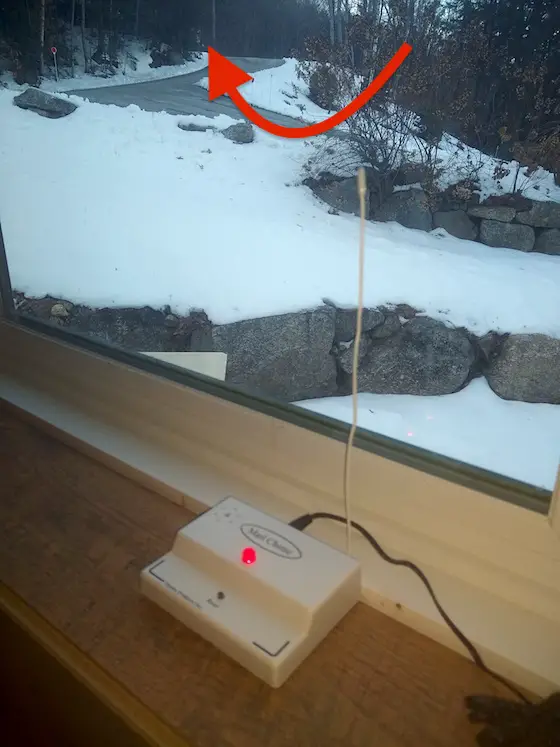
Mail Chime Review | You can see the Mail Chime receiver sitting on the window sill. The bright red light means I've got mail! The red arrow points to my mailbox at the top of the driveway. The receiver also generates four high-pitched BEEPS in addition to turning on the red light. Once you walk back inside with your mail, just quickly press the reset button and the Mail Chime is on guard once again for your friendly mail carrier! PRO TIP: Once in a while leave a tiny nice prize in the mailbox with a note for your carrier. It will pay off in spades in the future - trust me. CLICK or TAP HERE or the photo to have a Mail Chime delivered to your mailbox in days!
Mail Chime Mailbox Alert - Simple, Elegant, and Affordable
I installed a new Mail Chime mailbox alert system yesterday in just minutes.
It was easy, the components are well-made, and the instructions were crystal clear. It's rare you get all of these things with one product. If you want an example of horrible and confusing installation instructions, look at my First Alert smoke and carbon monoxide detector review.
CLICK or TAP HERE to have a Mail Chime delivered to your mailbox in just days!
Look at all the photos of the Mail Chime below.
How Far Away Can my Mailbox Be?
The manufacturer recommends that the receiver in your home be no more than 300 feet away from the mailbox.
Does the Mail Chime Receiver Have a Volume Control?
Yes, there's a rotating volume-control knob to adjust the sound output. You can turn off the sound completely and just rely on the red light.
How Does the Mailbox Sensor Attach to the Mailbox?
The Mail Chime sensor comes with double-sided tape. Be sure you clean the surface of the mailbox lid before you attach it.
Will the Mail Chime Sensor work on Different Mailboxes?
Yes, It will work on wall-mounted mailboxes and mail slots cut into doors. The sensor activates when any lid is moved a certain distance.
Can an Average Person Install the Mail Chime?
Yes, the installation process is simple. You just have to use a small #0 Phillips screwdriver to remove four small screws on the sensor. This allows you to install the tiny battery that powers the radio transmitter. Reassemble the sensor cover, take off the cover to the double-sided tape, and put the sensor on the mailbox lid. All you have to do next is plug in the transformer to a wall outlet and then plug in the tiny DC jack into the back of the Mail Chime receiver. It's so very simple!
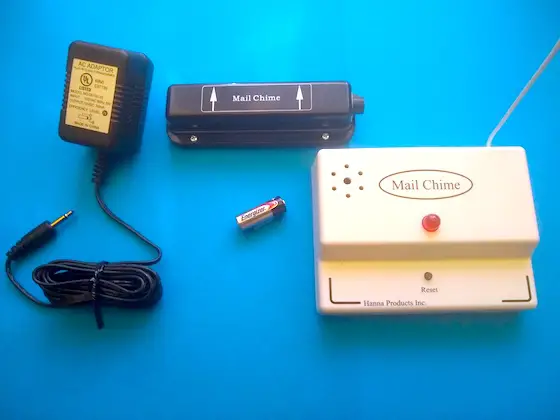
These are the components you have to install. A caveman could do it so I know you can too! CLICK or TAP HERE or the photo to have a Mail Chime in your mailbox in days!
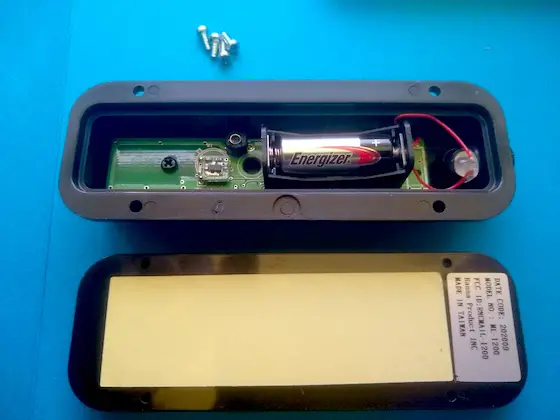
This is the inside of the Mail Chime sensor. You install the tip of the small battery towards the red wires. The beige patch is the double-sided tape. I've not yet removed the silicone paper exposing it. I did that just seconds after cleaning the lid of the mailbox lid of all dirt and dust. CLICK or TAP HERE or the photo to order your Mail Chime.

This is the sensor control. It's pre-set at the factory. READ the instructions before you start messing with this. CLICK or TAP HERE to order the Mail Chime now.
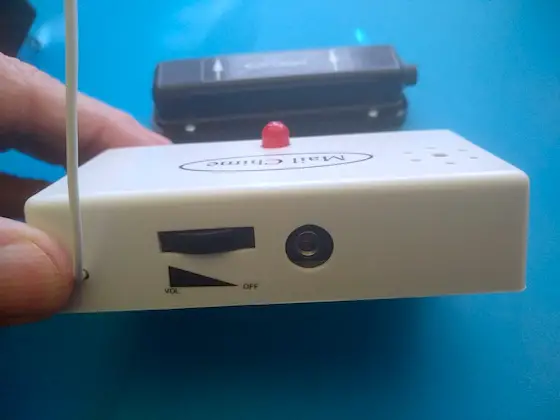
This is the back of the Mail Chime. On the left is the volume control. The small hole is where the DC adapter jack plugs in. CLICK or TAP HERE to order the Mail Chime now.
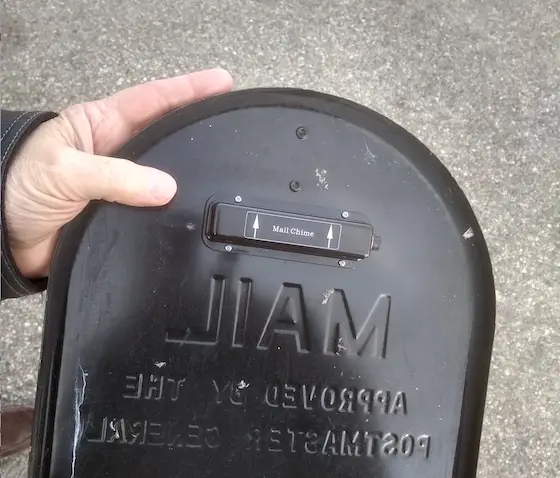
This is the mail chime sensor installed on the inside of my mailbox lid. Pay attention to the directions of the arrows. They must point UP to the sky when the lid is closed. CLICK or TAP HERE to get your own Mail Chime. You can't have mine!
Check out my Cresent Lufkin Chalk Reel review. I did it just before this one.
Tim built custom homes and did ultra-custom remodeling for 20+ years before launching his Ask the Builder media presence. He was selected as one of the Big 50 by Remodeling magazine in 1993. This award gave birth to Ask the Builder in October 1993. Tim also operates https://DrawPlumbingPlans.com. His @askthebuilder YouTube channel was the first home improvement channel on YouTube.
Is that antenna free-standing or does it have to be taped to the window ??
Great idea and worked great...for a little over 5 months and then died. Not exactly great quality, nor reliability
I got one for Christmas 2024. Installed it in January. It worked fine for about 3 weeks then stopped working. I had to pry the adhesive off the mailbox, leaving half of it there. It works intermittently. I have attempted to contact Hanna Products via web site, email and phone and have not had a reply. So much for the quality and their 1 year guarantee! Unhappy customer!!!