Cork Flooring Planks

Cork Flooring Planks

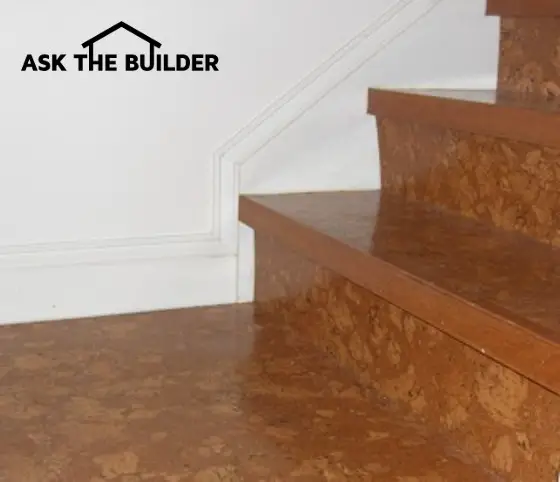
These cork flooring planks were used to cover the steps as well as the entire recreation room that’s at the bottom of the staircase. ©2017 Tim Carter

Cork Flooring Plank TIPS

  • Cork flooring is extremely durable
  • It's used in commercial buildings and strong enough for steps
  • Easy to cut and install - coat with water-based urethane
  • Different grades based on density - beware of cheap cork!
  • CLICK HERE to Get Tim's FREE & FUNNY Newsletter!

DEAR TIM: I’m very interested in cork flooring planks and wonder if it’s really as good as the salesmen tell me. Because money is very tight in these tough economic times, I’m looking for a discount cork floor.

The carpet store that advertises in my town has a cork flooring sale soon, so now’s the time to make a decision. Do you have experience with this material, and if so, would you install it again in a home you’d build?

Is it as durable as they say? How do you protect it and is it easy to clean? Leslie P., Santa Cruz, CA

DEAR LESLIE: I can understand you hesitating about whether cork flooring is really a suitable material to walk on day in and day out.

Cork Is Super Durable

After all, when you hold a cork from a wine bottle in your hand, you often see it’s somewhat friable. Hold a piece of oak in your hands and try to break it apart or chip it and your hands quickly wave a white flag.

CLICK HERE to get FREE & FAST BIDS from local flooring contractors who can install cork.

My First Time

I used to feel the same way about this magical flooring material, but was convinced shortly after seeing the first cork floor of my life. About 35 years ago, my father-in-law took me along for a ride to visit a business partner of his named Carl Hunsicker.

This man lived in a custom-built home that overlooked the Ohio River at the edge of a bluff. When we walked into Mr. Hunsicker’s kitchen, I looked down and saw the strangest floor.

Wide Long Planks

He had cork kitchen flooring. It resembled the deck of a ship as the planks were very long and approximately 8 inches wide. It was drop-dead gorgeous.

When I asked what kept it from disintegrating as you walked on it, Mr. Hunsicker chuckled saying, “Son, you don’t have to ever worry about this floor wearing out.

Public Library Floor

I later discovered that cork flooring was used in many commercial and institutional buildings that receive heavy foot traffic. The main library in Cincinnati, Ohio, had a cork floor for years that millions of people walked on.

This floor is still in the library,  but now if you go there it's covered by giant rolls of commercial carpeting.

cork flooring

This is the exact cork flooring I used in my entire finished basement, including the AsktheBuilder.com world headquarters. CLICK THE IMAGE NOW TO ORDER IT FOR YOUR HOME.

Tough Enough For Steps

You don’t have to worry about durability if you purchase a high-quality cork floor.

To give you another example of it’s extreme toughness, I installed cork plank flooring tiles on the steps that lead to my basement.

Many people don’t realize that steps are the best place to test flooring as your foot typically slides on the tread surface as you climb the steps. There’s much more friction than walking across a normal floor surface.

CLICK HERE to get FREE & FAST BIDS from local flooring contractors who can install cork.

Tons Of Stain Solver

Oxygen Bleach

Stain Solver is MADE in the USA with USA ingredients that are food-grade quality. CLICK THE IMAGE to order some NOW.

My basement steps got extremely heavy traffic because our home office was in several rooms downstairs. We also ran a cottage business shipping a magical cleaning product from the basement.

We made tons and tons of Stain Solver in the basement in a room right at the bottom of the steps. Stain Solver is a certified organic oxygen bleach that cleans anything water washable.

It's a fantastic product you should try. We would carry up tons of boxed Stain Solver up the steps adding even more friction. What's more, we'd have some of the Stain Solver grit on our shoes. The cork on the steps never showed any wear,  but I digress.

Clean & Look Closely

One day I cleaned these steps getting them ready for an open house. They looked like the day I installed them.

I owe much of this to the toughness of the cork, but also to the fact that I had originally coated the cork with five coats of high-quality urethane. I knew the steps would be abused, so I wanted plenty of urethane between the bottom of the shoes and the actual cork.

Oak Stair Nosing

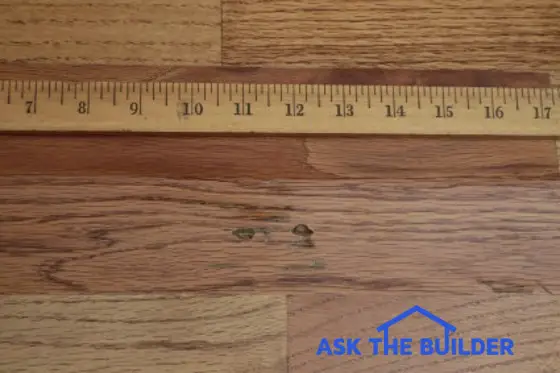
Another thing that helped the cork on my steps was the custom oak nosing I installed.

Because I knew that the shoes would be sliding onto each tread, I had the top piece of oak milled so that it was 1/64th of an inch thicker than the thickness of the cork planks that were glued to the steps. This prevented the shoes from wearing away the front edge of the cork on each tread.

Use Best Urethane

I used clear water-based urethane to protect my cork on the steps and the cork that was on the floor in the entire basement. It was easy to apply, and has allowed the cork to maintain its beauty for the past ten years.

polyurethane

SECRET TIP is to coat the drywall BEFORE finishing with this amazing urethane product. It WILL STOP water from penetrating into the paper of the drywall. CLICK IMAGE TO ORDER IT NOW. Always be sure to order the exact sheen you want. There's a big difference between satin and high-gloss!

Clean With Water & Mild Soap

Cleaning it is easy. I just use regular liquid dish soap and water to clean up spills. For regular moping, I add 8 ounces of white vinegar to two gallons of warm mop water.

It's also safe to use Stain Solver on cork flooring if you get a tough stain on it.

Be Careful Of Discount Cork

Be very careful purchasing discount cork flooring. Not all cork flooring is made the same.

There are different densities of material. The best way to determine what’s good and what’s not is to go discover the most expensive cork flooring you can find.

Cheap Cork REJECTED

Talk to the manufacturer and ask why it’s so expensive while others are not. You’ll quickly discover that the low-cost flooring often contains cork that might be rejected by quality manufacturers.

Consider A Test

If you’re still in doubt about how well cork flooring wears, make up a test panel. Attach pieces of cork to a thin piece of plywood and coat them with three coats of clear urethane. Set this panel in your home someplace that gets heavy traffic. Monitor how it looks after three or four months. You’ll be amazed for sure.

CLICK HERE to get FREE & FAST BIDS from local flooring contractors who can install cork.

Column 821

How to Install Laminate Flooring Video 1 of 3

Tim Carter, founder of AsktheBuilder.com, demonstrates how to install a laminate floor in just a few hours. This was featured as the Secret Link in the July 26, 2015 AsktheBuilder Newsletter.

GET FREE & FAST BIDS

If you're not too handy and feel you can't handle doing this job, click the following link.

CLICK HERE to get FREE & FAST BIDS from local contractors who can do a great job installing your laminate floor.

DIY laminate flooring, How To Laminate Flooring, Laminate Floor Secrets are all discussed in this three-part video series.

My Own Laminate Floor

Here's the exact product in my man cave. I LOVE it!!!

oak laminate flooring

This is the exact product I have in my man cave. You'll trick 9 out of 10 people. They'll think it's reclaimed oak from a barn. CLICK THE IMAGE NOW TO HAVE THIS DELIVERED TO YOUR HOME.

Be SURE to click through to get the Quick Start Guide for laminate flooring  here at the AsktheBuilder.com website.

How to Install Laminate Flooring Video 2 of 3

How to Install Laminate Flooring Video 3 of 3

CLICK HERE to get FREE & FAST BIDS from local contractors to install your new laminate floor.

Slate Flooring Installation and Sealing

Slate Flooring Installation TIPS

  • Slate is extremely durable - it can be used outdoors in cold climates
  • Resists most stains
  • Be careful about wet-look sealers - test before you commit
  • Use thinset to install slate - never use organic mastic
  • CLICK HERE to Get Tim's FREE & FUNNY Newsletter!

When I first got into the construction business, I used to think that slate flooring was only used in expensive houses.

Slate Is Affordable

After all, that was usually where I found it. Then one day, I bid a job that required slate flooring. I was astonished! Slate was very affordable. In fact, it compared in cost to some of the low to mid quality floor tiles.

My First Install

I was awarded the contract for that job. Fortunately, there was not a large area that required slate flooring.

I decided to tackle the installation myself. With the advice of some professional tile setters, my slate job was a success. It installed very much like normal ceramic tile. Both the homeowners and I were satisfied with the final product.

CLICK HERE to get FREE & FAST BIDS from local slate flooring contractors.

Red Slate Sun Room

Since that first job, I have installed thousands of square feet of slate flooring. The last slate I installed was the solid red slate in my wife's sun room. The job came out absolutely amazing.

Walking On Stone

If you're part of the green building movement, you have to love slate flooring. It's not manufactured, it is quarried.

There are vast deposits of this wonderful stone product all over the word. In the USA, numerous quarries can be found in the Appalachian Mountains. There are no factories that produce fumes or harmful by products.

Stain Resistant

Slate is naturally stain resistant. This quality is related directly to the composition of the stone.

Slate begins its life as a sedimentary rock consisting of very fine particles of clay and silt. It's commonly known as shale.

However, this shale is sometimes buried underneath other rocks. This burial process creates heat and pressure. The resulting product is slate, a more compact and dense rock than shale.

Multi-Colored Beauty

Slate is very beautiful. This beauty, I feel, is based on its unusually deep colors of black, red, green, gray, and sometimes purple. The slate also has a texture unique only to itself.

The thin bedding planes of silt and clay create natural cleft faces when the clay is quarried. These cleft faces provide the slate with built in slip resistance.

Multiple Applications

Many people know that high quality pool tables have a thick layer of slate just below the felt. This is why the pool table is so true and smooth. Just drop a billiard ball on the table and listen to that solid sound! This same solid surface can be used as a kitchen countertop, a fireplace hearth, a fireplace surround, stair treads, bar top, even a decorative side table top.

Slate is available in different thicknesses and shapes. I happen to prefer the random ashlar pattern. The pattern is anything but random. However, when you assemble the six different shapes, it sure looks random.

I happen to walk across this flooring everyday in my own entrance hall. It's very durable and attractive.

Slate is commonly available in square pieces or irregular shards that require hand trimming on the job site. Slate installed in this manner resembles traditional flagstone work. If done by a professional, it is extremely attractive.

Slate Care Products

Although slate is very stain resistant, some liquids and foods can stain slate. In the past, homeowners were told to wax slate. I have seen this done time and time again. Waxing slate is a mistake. It detracts from the slate's natural beauty, makes the slate slippery, and can discolor the slate (the slate doesn't turn color, just the wax turns yellow!).

Within the past 15 - 20 years, new synthetic sealers have been developed which seal slate but do little or nothing to alter its appearance. These sealers often contain acrylic plastic compounds which are clear and non-yellowing.

Some of the best products on the market impart a "wet" look to the slate which really brings out the true color of each individual piece. These are the sealers to purchase.

Beware of slate care products that do not penetrate the slate. Some of these sealers form a surface film on the slate which can yellow, scuff, and reduce the natural slip resistance of the slate.

You must do your homework and ask these questions or look for the answers in the sealer literature. Don't necessarily trust a salesperson!

CLICK HERE to get FREE & FAST BIDS from local slate flooring contractors.

Existing Waxed Slate

If you have an existing slate floor that has multiple coats of wax, don't despair! We can bring it back from the edge of oblivion. The first thing to do is remove the old wax with a standard wax remover. Wax removers are very alkaline and simply soften the wax. You normally mop these products on, let them sit for a few minutes, and then remove with another mopping.

Be careful not to get this stripper on any painted woodwork, stained baseboard or trim, adjacent carpeting, hardwood, etc. It is a vicious product! I recommend that you work in small areas and do it by hand. It may take several applications to remove all of the wax from the grout joints.

Be careful not to flood the floor with water or stripper. Water may work its way beneath the slate and swell the wood subfloor (that is, if you have a wood subfloor). Only use enough stripper or rinse water to sufficiently cover the area you are working on.

After you have removed the wax, you should clean the slate and the grout with a neutral pH cleaner. This is very important. Many of the slate sealer companies also sell these special cleaners.

Once the floor is clean, it should dry for several days before sealing. The sealers work best when they can penetrate into the slate.

Read Instructions

Absolutely take the time to read the instructions on all the products you use. I find this to be the biggest reason for poor results on projects. Homeowners and contractors alike seem to resist reading instructions thoroughly.

If you follow the instructions found on a quality product, you will be rewarded with a gorgeous final product. Take the extra 10 minutes and read them. Then, be sure to follow the directions to the letter. Contact me with any questions!

Slate Sealer

You may want to seal your slate, but realize doing this could take away it's gorgeous matt finish. Some people really like the wet-look sealers.

These can make the slate slippery when wet and they require periodic re-coating.

CLICK HERE to get FREE & FAST BIDS from local slate flooring contractors.

wet look slate sealer

Here's a wet-look slate sealer. I'd test it on a scrap piece of slate before committing to doing the entire floor. CLICK THE IMAGE NOW TO BUY THIS SEALER.


slate sealer

Here's a sealer I've used that penetrates into the stone. Realize it's somewhat hard for something to penetrate into slate. Test it to make sure you like the look. Wait 24 hours to see what it looks like. CLICK THE IMAGE TO BUY THIS SEALER NOW.

Slate Installation

Slate installs virtually the same as any ceramic floor or wall tile. It requires a solid floor system beneath it, such as concrete or a very firm wood floor system.

Wood floor systems that are spongy or bounce can lead to cracks in the individual slate pieces or the fracturing of the grout between them.

Cement Board On Wood

When I have installed slate on wood subfloors, I have had the best success when I install the cementitious boards on top of the wood subfloor. These materials are usually 1/2 inch thick and are simply concrete sandwiched between two pieces of fiberglass mesh

Old slate installations were installed on a similar "mud" bed of cement poured between floor joists. You can still do this if you want, but it is very labor intensive.

Set In Thinset

Always be sure to install the cementitious board according to manufacturers recommendations. Most people including builders and remodelers do not install this product correctly. It requires a layer of thinset mortar to be applied wet between it and the wood subfloor. Plus, the nailing pattern is critical.

No Organic Mastic

Once you are ready to install the slate, use thinset mortar. It works much better than organic adhesives, in my opinion. Organic adhesives never really get hard. As such, there is always a little give under them.

If you drop a heavy object or concentrate a load, an individual slate piece may crack. This doesn't happen very often with thinset. It gets very hard within a matter of days.

Use Diamond Saw

Slate cannot be scored and "snapped" like ceramic tile. It requires a wet diamond saw or a regular hacksaw if you're working with thin (3/8 inch or less) pieces.

Plan Your Layout

As with any flooring product, the layout is critical. Work off a center line in the room or a hallway for the ultimate look. Snap a chalk line and work away from the line. Try to plan your work so that you do not have to cross or work over freshly set pieces of slate.

Remove Wet Thinset ASAP

Be sure to wipe up thinset that gets on the surface of the slate. Remember, thinset is really cement. If it gets hard, you will have problems!

If you can afford the luxury, try to have a helper. You will need pieces cut, thinset mixed, slate handed to you, etc. You will get more than twice the amount of work done that you could do individually.

Grouting Slate

Grouting slate is a challenge. Unlike glazed ceramic tile, the grout wants to adhere and stick on the surface of the slate.

Very Hard To Do

The natural cleft face traps the grout very effectively. On average, I would say it takes 4 times longer to grout a slate floor than a similar sized tile floor.

Go Light On The Water

You must be careful when grouting slate not to use too much water in the grout rinse sponges. For one, you can weaken the actual grout if too much water dilutes the cement. Also, most slate floors employ a dark colored grout.

My entrance hall, for example, has a raven black grout. Use too much water and a grout additive, and you end up with light and dark areas in the finished grout. Ask me, I know it for a fact!

Do NOT Use Additives

Milky grout additives can cause blotchy discoloration in the grout. Do NOT USE THEM.

Grout Release Coatings

Some of the companies that make the slate sealers make a special product you coat the slate with prior to grouting. This product makes it easier to remove the grout from the surface of the slate. I've used them and they do work on slate.

grout release

Here's a wonderful grout release product that can save your bacon if you're a rookie DIY tile installer. CLICK THE IMAGE NOW TO BUY THIS GREAT PRODUCT.

Sanded Grout

Be sure to use a sanded grout. Unsanded wall grout should not be used in joints wider than 1/8 inch. Most slate joints are 1/4 to 5/16 inch wide. Don't seal your new slate floor for 30 days. Cover the floor with red rosin paper. Don't tape the rosin paper to the slate!

CLICK HERE to get FREE & FAST BIDS from local slate flooring contractors.

Column B105

Fill Holes in Hardwood Floor

Fill Holes in Hardwood Floor TIPS

  • Color putty can work
  • Perfect match required to avoid polka-dot look
  • Consider using an oak dowel to create pegged-floor look as last resort
  • Get FREE BIDS from local pros to save your knees - See below
  • CLICK HERE to Get Tim's FREE & FUNNY Newsletter!

Jane Belanger, who lives in Louisville, KY - just down the Ohio River from Skyline Chili, had good intentions when she took up some carpeting.

"What is the easiest way to fill in 1,500 screw holes in hardwood flooring?

I removed the wall-to-wall carpeting to  expose a nice hardwood floor except that someone had screwed 1500 screws into the flooring.

I removed all the screws (2" each one) but now need to fill the holes. Any suggestions?"

AsktheBuilder Podcast

CLICK this image and listen to the first call on the podcast. I talked to Jill about how to repair wood kitchen flooring, and possibly installing an inlay border as an option. Copyright 2018 Tim Carter

Colored Wood Putty

Well, Jane, the easy answer is use wood putty, stain it and hope for the best. Here's a kit that I'd try just to see what it looks like:

wood finish repair kit

This is a simple kit that can be used to fill small holes in wood. Blend the color sticks to get the right color. CLICK THE IMAGE RIGHT NOW TO BUY THIS KIT.

But I'm afraid you'll end up with a polka-dot floor that will look not so great.

CLICK HERE to get FREE & FAST BIDS from local hardwood floor repair contractors. Let them ruin their knees, not you.

You'll see the mono-color finish of the putty that will interrupt the natural colored oak grain lines.

Here's a different type of color putty that might also work. You sometimes have to blend two different colors to get a perfect match.

color putty wood kit

This kit has a boatload of different putties. You should be able to get a great match using this kit. CLICK THE IMAGE NOW TO BUY THIS WONDERFUL MAGIC KIT.

Pegged-Floor Look?

The first thought I had was to take the time to plug each hole with a small length of oak dowel rod.

This would be time consuming, but the look would be much better. I assume you'll have to get the floor refinished after all this.

Get FREE & FAST BIDS

CLICK HERE to get FREE & FAST BIDS from local hardwood floor refinishers. Let them suggest what to do.

I would contact two different floor refinishers and see what they say.

I'd also try to plug about five of the holes with the oak dowel and see what it looks like before you make your decision.

The plugs just need to be about 3/8-inch long and you put a little glue around the edge before you tap it in.

Take the time to align the grain lines in the dowel with that you see in the flooring.

CLICK HERE to get FREE & FAST BIDS from local hardwood floor refinishers.

Old Hardwood Floor Finishes

Old Hardwood Floor Finish TIPS

  • Finish could be varnish - varnish can water stain
  • Urethanes not widespread until after 1960
  • Test for lead - lead was used in varnish. Get test kit below
  • Don't sand floor until you know there's no lead
  • CLICK HERE to Get Tim's FREE & FUNNY Newsletter!

DEAR TIM: What type of finish was used on hardwood floors circa 1964? Does it need to removed or screened to apply a new finish such as oil or water-based urethane? Jim Heavey

DEAR JIM: Although highly unlikely, it's possible your finish is urethane. Urethanes were developed in the early 1960's. The widespread adoption of urethanes for floor finishes didn't start to happen until the late 1960s and the early 1970s.

AsktheBuilder Podcast

CLICK this image and listen to the first call on the podcast. I talked to Jill about how to repair wood kitchen flooring, and possibly installing an inlay border as an option. Copyright 2018 Tim Carter

Varnish Is Great, But ...

In all likelihood, the finish on your floor is traditional varnish. It is hard to discern the difference between the two with the naked eye, but you can test in a small out-of-the-way location. A large drop or spot of water will often turn varnish cloudy within 30 minutes or less. Urethane, on the other hand, is usually unaffected by water.

CLICK HERE to get FREE & FAST BIDS from local flooring restoration companies.

Check For Lead

The bigger problem might be the presence of lead in the varnish. Yes, lead was sometimes added to clear finishes years ago. I'd absolutely perform a lead test on the finish before I would create clouds of sanding or screening dust.

lead paint test kit

This is a handy and reliable test kit. Use it on paint or clear varnish to check for the presence of lead. CLICK THE IMAGE NOW TO ORDER THIS KIT.

Remove Wax First

Furthermore, it is also possible a past owner of the home applied wax to the finish. If wax is present, you must remove it before you do any application of a new urethane. The screening process will not remove all of the wax, if it is present.

Screening is the same as a light sanding and is meant to lightly scuff an existing surface to ensure a good bond between an older glossy surface and the fresh coat of floor finish.

DIY Floor Refinish Product

Here's a fantastic liquid refinishing product. NO SANDING required! No lead dust!!

hardwood renewal liquid

This is the wonderful DIY floor refinishing system. It's not hard to do. Just be sure the floor is CLEAN first. Use Stain Solver to clean the floor. CLICK THE IMAGE TO BUY this refinish system.

CLICK HERE to get FREE & FAST BIDS from local flooring restoration companies.

Column EM0004

Hardwood Floor Maintenance Guidelines

Hardwood Floor Maintenance TIPS

Water - Public Enemy #1

Hardwood flooring's biggest enemy is water. Water causes wood to swell. This swelling can cause warping, twisting, cupping, edge crush, etc. to occur. Sometimes the flooring will recover and sometimes it won't. The trick is to avoid introducing water to your hardwood floor.

AsktheBuilder Podcast

CLICK this image and listen to the first call on the podcast. I talked to Jill about how to repair wood kitchen flooring, and possibly installing an inlay border as an option. Copyright 2018 Tim Carter

Vapor Just As Bad

Water can occur either as a solid, a liquid, or a vapor. The liquid and vapor states are the ones that cause the most problems for wood flooring. Water in the liquid state is easy to see and control. It can be from a roof leak, a broken pipe, or a spill.

However, water vapor is an entirely different story. This form of water is invisible and can originate from many sources. The damage it can cause can be widespread and considerable.

CLICK HERE to get FREE & FAST BIDS from local flooring contractors who can restore your hardwood floors.

New Homes = LOTS Of Water

New home construction and major remodeling activities can create vast amounts of water vapor. Water vapor can be created by:

  • curing concrete
  • drying process of water-saturated rough lumber
  • ceramic tile installation
  • drywall or plastering activities
  • painting activities
  • concrete floors that lack vapor barriers
  • crawl spaces that lack vapor barriers
  • high humidifier settings on furnace equipment
  • washing and cleaning activities
  • indoor plants or large aquariums

High humidity levels in the air can not only add additional water vapor, but can also inhibit existing water vapor from dissipating.

The message is really very simple. Don't expose hardwood flooring to excessive levels of water vapor. This is especially true if you are installing unfinished hardwood flooring.

DIY No-Dust Refinish Product

Use this product to refinish your hardwood. No sanding - No dust!

floor repair kit

This is the wonderful DIY floor refinishing system. It's not hard to do. Just be sure the floor is CLEAN first. Use Stain Solver to clean the floor. CLICK THE IMAGE TO BUY this refinish system.

Installation Guidelines

Oak and other wood flooring materials are milled from lumber which has been kiln dried to a specific moisture content. It is recommended that this moisture content be maintained at that level for the best installation results.

That means that you should not allow the wood flooring to gain or loose any additional moisture. As such, you should not transport, load or unload the material on rainy, snowy, or excessively humid days.

The flooring should be stored in a dry, weather proof building. The storage area should be well ventilated. Never stacked or store wood flooring materials directly on concrete flooring.

Dry Flooring

The job site where the flooring is to be installed must be dry. The interior climate conditions (temperature & humidity) should be at or very near those which will be maintained during normal occupancy.

Acclimate The Wood

These conditions should begin at least five days prior to the delivery of the flooring material. The flooring material should be distributed into the rooms where it will be installed and allow to acclimate for four - five days. The interior climate conditions should be maintained at normal occupancy conditions from this time forward.

CLICK HERE to get FREE & FAST BIDS from local flooring contractors who can INSTALL your hardwood floors.

Insulate Large HVAC Pipes

If hardwood flooring is to be installed directly over the home heating plant or main duct or piping trunk lines, these lines or the subflooring should be insulated to prevent low level infra red heat from drying out the wood flooring.

Check Rough Lumber Moisture Content

Rough framing lumber should be checked for moisture content prior to flooring installation. Rough lumber can absorb vast quantities of water because of being exposed to the weather during construction. Moisture readings should not exceed 12 - 14%.

Wood On Concrete

Wood flooring can be installed on concrete floors that are on or above grade level. Installations below grade (in basements) are not recommended!!! The concrete MUST be dry.

There are several ways to test to see if the concrete is dry. The associations listed below will gladly provide you with information which will help you perform these tests.

Concrete floors must have a vapor barrier installed over them prior to the hardwood floor installation. Remember, hardwood flooring is almost never finished on its bottom side. Moisture can enter the wood from below and cause a multitude of problems. A properly installed vapor barrier will almost always stop this water vapor.

Solid Sub-flooring

Hardwood flooring must be installed on solid, approved sub-flooring materials. Non-veneered panel sub-flooring products (OSB, flakeboard, chipboard, etc.) are sometimes not recommended for use below hardwood floor installations.

If in doubt about your sub-flooring, be sure to check with your hardwood floor supplier or installer prior to the construction of your subfloor!

The organizations listed below have excellent, detailed installation manuals available. Contact them for availability. The National Wood Flooring Association, listed below, has several free pamphlets that they will mail to you concerning proper installation techniques.

Care & Maintenance of Hardwood Flooring

Never use lots of water on wood flooring to clean it. Mopping wood floors with soaps, wax removers, 'oil soaps', etc. can easily harm wood flooring. Some cleaners can leave residues which will discolor the flooring or make refinishing extremely difficult.

Oxygen Bleach

Stain Solver is MADE in the USA with USA ingredients that are food-grade quality. CLICK THE IMAGE to order some NOW.

You can clean hardwood floors using oxygen bleach like Stain Solver. The key is to just mix up a solution and use a sponge mop putting a light film of water on the hardwood.

You don't want lots of water to soak into the cracks between the pieces of the hardwood flooring.

Stain Solver is certified organic, it's Made in the USA with USA ingredients and it's a family-owned business.

Avoid Waxes and Easy-To-Use TV Products

Never use 'self-polishing' waxes, unless the product specifically states it is safe for hardwood floors. Many of these waxes contain water.

Be very careful of the miracle products heavily advertised on TV that show how a horrible hardwood floor is renewed by one swipe of a miracle liquid. It's easy to fool people on TV.

Don't over wax floors. Always try to buff floors to revive the shine. If this is unsuccessful, then and only add additional wax. Consider adding wax to the traffic areas only, not the entire floor.

Never apply a surface finish over prefinished factory materials. Prefinished products are often waxed at the factory.

Don't wax floors that have a clear or colored finish (urethane / varnish) on them. The presence of wax may make recoating extremely difficult. Clear finishes can not be applied over wax. Only apply wax to floors that you know have had wax applied from the beginning.

Remove Grit FAST

Vacuum wood floors frequently. Keep dust and grit off of floors. If you walk on grit like fine sand, you're just sanding the floor with your feet. This is a huge mistake.

Clean Spills Fast

Food and beverage residue can be cleaned with a damp (fully squeezed) cloth or sponge.

If hardwood flooring is used in a kitchen, dry mop the floor after meals to pick up any water droplets. Always use an adequate area rug in front of sinks and dishwashers. Aside from protecting the flooring, the area rug will make standing at the sink more comfortable.

Waxes Are Tough To Use And Maintain

Floors that receive waxes should be done in strict accordance with the wax manufacturers guidelines. Apply thin coats of paste wax. Remove old wax periodically with strippers that do not contain water. If these strippers contain flammable solvents, beware of explosion or fire hazards!

Add Maintenance Coat

Consider 'screening' your hardwood floors every year or every other year. This process involves lightly scuffing the old finish and applying a new, single coat of finish. If this is done on a regular basis, the floor may never have to be re-sanded and finished.

Refinishing usually has to occur if the original finish has been abused. The 'screening' process, when done by professionals, can usually be done for a fraction of the cost of refinishing. The result is a brilliant finish which looks new almost all of the time. Please give it serious consideration.

The liquid systems mentioned below yield the same results with no dust!

Old Hardwood Floor Finishes

CLICK HERE to read my column on finishing older hardwood floors.

Wood Flooring Organization

Consider contacting this organization. They offer pamphlets for proper installation, care, and maintenance. Some of the pamphlets are free. This are an extremely helpful organization.

  • National Wood Flooring Association
    111 Chesterfield Industrial Boulevard
    Chesterfield, MO 63005
    800-422-4556
    http://www.woodfloors.org

CLICK HERE to get FREE & FAST BIDS from local flooring contractors who can restore your hardwood floors.

Column B114

Hardwood Floor Inlays

Hardwood floor inlay located in the The Wiedemann Hill Mansion. PHOTO CREDIT: Roger R Henthorn

Hardwood Floor Inlays TIPS

Inlay In Convents

My Aunt Clara is a nun. The convent she lives in is in a huge old mansion in an older part of Cincinnati. I believe the house was built in the 1870's or so. The oak staircase from the first to the second floor has a handrail that is 12 inches wide. It's a slide, not a safety device!

The parlor and dining room floors have an exquisite inlay pattern. I remember as a child visiting my aunt and marveling at the different patterns and the variety of colors in the wood. Ever since then I've been a big fan of hardwood inlays.

AsktheBuilder Podcast

CLICK this image and listen to the first call on the podcast. I talked to Jill about how to repair wood kitchen flooring, and possibly installing an inlay border as an option. Copyright 2018 Tim Carter

Not a Lost Art

Inlays were popular when labor was less expensive. Producing an inlay floor takes time, hand-eye coordination and patience.

To do one by hand today would cost a king's ransom. New computer aided design combined with laser and precision mechanical cutting devices have made a huge difference in bringing the cost of the floors down and making sure that this craft does not die out.

CLICK HERE to get FREE & FAST BIDS from local hardwood flooring craftsmen who can install inlay for you.

Affordable Patterns

You can buy affordable inlay patterns that will easily install with standard hardwood flooring. You can also buy thinner inlays that can be added to an existing hardwood floor. It's a product that will become more popular as more people realize it is available.

Medallions And Other Art

Borders are the inlay items that get lots of attention from people. But you can also buy medallion pieces that work well in an entrance hall or any other open space where you want to make a statement.

They come in all sorts of styles, sizes and looks. One of my favorite medallions is one that actually looks like a staircase going down to the next level. Seriously, things like this are available!

hardwood inlay

Here's a stunning medallion. There are many similar inlay products like this. Not all are circles. CLICK THE IMAGE NOW TO BUY THIS STUNNING PRODUCT.

Care and Installation

You care for inlay products just as you would any hardwood floor. The wood used to create them is similar in nature to standard flooring.

The urethane used on the floor coats the inlay as well. All you need to do is vacuum dust from the floor on a regular basis and wash the floor with a lightly damp sponge or mop that has been moistened with a solution of white vinegar and warm water.

That is an excellent hardwood floor care tip. NEVER use an oil soap product or anything else that leaves a film!

Somewhat DIY Friendly

Inlay products can't be easily installed by a rookie or even a serious do-it-yourselfer, in my opinion. You need precision cutting tools and experience in dealing with inlays.

Some of the products that are intended to be used with existing flooring require high-powered routers and special router bits and templates. Leave this type of work to the pros. Let them make the mistakes, not you!

CLICK HERE to get FREE & FAST BIDS from local hardwood flooring craftsmen who can install inlay for you.

Different Wood Species

Inlay products use amazing wood species. You can often find Brazilian Cherry, Santos Mahogany, Makore, Imbuia and Honduran Mahogany, Pink Ivory, Ebony, Wenge, Curly Maple, Quilted Maple and Bubinga. Strange names to be sure, but breathtaking beauty.

square hardwood inlay

Here's a square hardwood inlay medallion. There are just too many to show you. CLICK THE IMAGE TO SEE MORE AND TO BUY ONE.

Fortunately it takes very little material to make inlay products. The exotic wood used is very rarely more than 5/16 inch thick. This is the amount of wood that is commonly above-the-tongue in most hardwood floors. Once you sand down to the tongue, a floor is toast. The inlay people use less expensive woods beneath the inlays that are glued up to make a full thickness product.

Existing Floors Can Be Retrofitted

Inlay products used in existing flooring is always glued into the pocket created by the precision router. You would never, ever want to face nail an inlay pattern! If your installer says he wants to drive a nail here or there, you better stop him!

Furniture Use

Some of the inlay products are available for use in tables and other pieces of furniture. If you dabble in this craft, then call the manufacturers and see what they have in the furniture inlay line. You can really dress up a table with a medallion or a small border. They make the difference!

Inlaid Borders and Medallions

The following illustrations are courtesy of most, if not all, of the hardwood inlay manufacturers mentioned in this bulletin. Suffice it to say that the illustrations you see here are just a very tiny sampling of what is available.

Prices for the different borders and medallions can range from several hundred dollars to several thousands of dollars. If you are building a mansion, there are some incredible entrance hall medallions that will literally take your breath away when you see them. They are striking.

Affordable Choices

Fortunately, many of the simple borders are within financial reach of many of us. Although my wife and I went for a more expensive border for our family room, we could have picked a great one for an installed and finished price of less than $495.00.

I urge you to visit a hardwood flooring store that sells these goods. Your trip will not be wasted. I guarantee that you will be amazed! At the very least, be sure to call the manufacturers and get as much free literature as possible.

CLICK HERE to get FREE & FAST BIDS from local hardwood flooring craftsmen who can install inlay for you.

Related Articles:  Hardwood Inlays, Hardwood Inlay Manufacturers

Column B247

Hardwood Repair

Hardwood Repair

This hardwood repair is going to take some effort. The interlocking pieces of flooring need to be carefully removed. ©2017 Tim Carter

Hardwood Repair TIPS

  • Toughest repair job in the average house
  • Hire a pro to get it done correctly - very frustrating for a DIYr
  • Cut out center of damaged piece carefully
  • Stain and finish challenges face you after difficult repair!
  • CLICK HERE to Get Tim's FREE & FUNNY Newsletter!

DEAR TIM: I'm faced with a hardwood floor repair. Water seeped under my front door and caused the floor to warp. What's involved in a hardwood-floor-repair job like this?

I'm usually not too timid when it comes to home repair issues, but I'm feeling out of my comfort zone. I realize the hardwood floor is made up of interlocking pieces, and for the life of me I can't figure out how to remove single pieces much less install new ones. Dan B., San Jose, CA

DEAR DAN: I'll tell you what's involved in a hardwood repair like this, lot's of frustration and pain.

Very Tough Job

This is a task that's often best left to a hardwood-flooring professional. You can probably work your way through the job, but a professional will probably be able to complete the task and be on the road to the next job while you are still futzing around with the wood chisel.

AsktheBuilder Podcast

CLICK this image and listen to the first call on the podcast. I talked to Jill about how to repair wood kitchen flooring, and possibly installing an inlay border as an option. Copyright 2018 Tim Carter

Interlocking Pieces of Wood

Hardwood-floor repair is difficult because of the shape of each piece of hardwood flooring. Full-size pieces of hardwood flooring are typically three-quarter-inch thick and they have either a tongue or groove profile on each of the four side edges. The tongue interlocks into the corresponding groove on an adjacent piece of hardwood flooring. This means you can't just pry up a piece of flooring as you might pull up a board on your outdoor deck.

CLICK HERE to get FREE & FAST BIDS from local hardwood floor installers who can do this repair.

Remove Center Carefully

Different hardwood-flooring professionals may have different techniques for removing a single flooring board, but just about every one of the pros will start by carefully removing the center one-third or so of the damaged floor board. By doing this, you can pull the remaining two pieces sideways away from the adjacent flooring towards the center of the space.

If you try to pry up the pieces of flooring, you can crack off the tongue and or groove of the good pieces of flooring you're trying to salvage.

Frustration Guaranteed

You'll become extremely frustrated early in the hardwood-repair process. You'll probably use a circular saw to start the process of removing the center of the damaged piece of hardwood flooring. Carefully set the depth of the blade so it cuts the hardwood flooring only and not into the subfloor beneath the hardwood.

Vibrating Multi-Tool

Because the saw blade is circular, it will not be able to cut full depth to the outer edges of the hardwood strip flooring. You'll have to finish that task carefully with a router or a wood chisel. You may also decide to use a vibrating multi-tool equipped with a wood blade.

This operation will require extreme patience, skill and precision as you can't touch the adjacent pieces of finished hardwood flooring with the tools. If you do, then you'll be replacing multiple pieces of hardwood flooring.

Exact Size Required

Once you've got the old piece of ruined flooring out, it's time to conjure up every ounce of master-finish-carpentry skill you have. You have to produce a piece of new hardwood flooring that is the exact size of the one you removed. Your tolerance for error is perhaps the thickness of a piece of paper.

CLICK HERE to get FREE & FAST BIDS from local hardwood floor installers who can do this repair.

Cut Off Bottom Groove

But note that you have to get the new piece of flooring into a rectangle that has two tongues and two grooves. The only way you can do this is to cut off the tongue on the short edge and cut off the bottoms of the two grooves on your replacement piece of hardwood flooring.

Even with these advantages, it can be a tremendous challenge to insert the new piece of hardwood flooring without damaging the tender edges of the new piece as well as the adjacent pieces you are working against. This stage of the project will require every bit of patience and skill you possess.

Face Nail

Once you have the new piece of hardwood flooring nested into position, it needs to be face nailed. Because you've worked so hard to get to this point, don't ruin the wood by splitting it. I recommend drilling pilot holes that are slightly smaller than the diameter of the special blunt point finish nails you need to use.

Special Blunt Nail

Don't use regular finish nails. There are special finish nails that have a tip that is fairly blunt. You can get these from a real hardware store or from a professional that regularly installs hardwood flooring. While you are picking them up from the pro, be sure to ask him if he has an opening in his schedule to bail you out. My money says you will be calling him to finish what you start.

Hardest Repair Job Ever

Hardwood floor repair ranks as one of the hardest repair jobs I know of in the typical house. It's so technically challenging, you simply can't believe it until you try it. The margin for error is razor thin.

Stain & Finish Challenges

Even if you succeed at getting the new piece of hardwood flooring in, you now have to get the stain and finish to match the adjacent pieces. This is sometimes even harder to do than getting the wood strip into place! It's a true gift the talents a pro finisher has in matching the stain color and level of sheen on the floor finish. If you succeed at doing this yourself, you either have great skills or you should immediately go purchase a lottery ticket.

DIY Refinish Product

If you want to refinish the floor around the repair, here's a NO SANDING method. It's all liquid. Magic in a bottle.

floor refinishing system

This is the wonderful DIY floor refinishing system. It's not hard to do. Just be sure the floor is CLEAN first. Use Stain Solver to clean the floor. CLICK THE IMAGE TO BUY this refinish system.

CLICK HERE to get FREE & FAST BIDS from local hardwood floor installers who can do this repair.

Column 747

Hardwood Flooring Over Radiant Heated Concrete

Hardwood Over Radiant Heating TIPS

  • Wood is hygroscopic - be sure concrete slab is dry
  • Control humidity - allow hardwood to acclimate
  • Use high-performance vapor barrier under concrete - SEE BELOW
  • Narrow wood strips are best over radiant heat
  • CLICK HERE to Get Tim's FREE & FUNNY Newsletter!

DEAR TIM: I am designing a home that will have a monolithic concrete slab foundation. My radiant heating system will be an integral part of this slab.

Is it possible to install hardwood flooring over the concrete, or will I be forced to use ceramic tile? What needs to be done to make sure the wood floor will not develop cracks from the radiant heat?

Am I pushing the envelope by installing wood in this situation? Brian D., Albuquerque, NM

DEAR BRIAN: You are not pushing the envelope hard at all.

Plan Ahead

Hardwood flooring and concrete slabs can get along just fine if you make sure your builder follows some easy, but important, guidelines at various stages as your home is being built. Concrete slabs that contain radiant heating can limit the style of wood floors that you have to choose from, but all in all, I feel you can create a dazzling look in your new home by mixing a few wood species and being creative with the actual layout of the hardwood flooring.

CLICK HERE to get FREE & FAST BIDS from local hardwood floor installers who can put wood over radiant heating.

Many people love the look of hardwood floors but have concrete slabs. You can install hardwood over concrete if you follow certain guidelines. Image by: Hardwood Council

Many people love the look of hardwood floors but have concrete slabs. You can install hardwood over concrete if you follow certain guidelines. Image by: Hardwood Council

Wood Is Hygroscopic

Hardwood flooring and wood in general are hygroscopic materials. Liquid water and water vapor can enter wood which causes it to swell and change its shape and size. If and when the water leaves the wood, the wood can and does shrink, but not always to its original size and condition.

It may warp, develop small check cracks in the surface, twist, bow or even develop cups or dips within each piece of lumber. Cracks in between pieces of wood may open up as the wood dries. In other words, if you want a wood floor to look very good for many years, you need to keep the wood in a state of dynamic equilibrium with respect to the indoor humidity and temperature.

Control Humidity

Controlling indoor humidity and temperature is easier to do in some areas more than others. In my opinion, you happen to live in one of the most user-friendly parts of the nation for hardwood flooring.

The overall year-round humidity of the air in the Southwest is often very dry. Once wood acclimates to the dry air, it retains it shape and size very well. If, on the other hand, your new home was in the humid Midwest, the hardwood flooring might shrink and swell two or more times a year as humid summer air is replaced by dry winter air.

AC Helps

Air conditioning helps stabilize hardwood flooring by keeping the indoor humidity levels close to winter levels.

Concrete Must Be Dry

In your case, you need to make sure the concrete slab is fully cured and has released as much moisture to the atmosphere as possible before the flooring is installed. Ask the builder to keep as much air flowing through the house as possible during construction to aid in this drying process.

Simple Moisture Test

You can check moisture content of slabs by taping a piece of 15-inch square clear plastic to the slab. Tape all four edges with packing tape that is moisture resistant. Wait 24 hours and inspect the plastic. If it is clear with no visible fog or water droplets, the slab is dry enough to proceed.

CLICK HERE to get FREE & FAST BIDS from local hardwood floor installers who can put wood over radiant heating.

High-Quality Vapor Barrier

A high quality vapor retarder must be installed under the concrete slab and preferably over the concrete slab just before the flooring is installed. The vapor retarder should meet the fairly new ASTM standard E 1745. These vapor retarders are the best and offer the highest level of protection.

special vapor barrier

This is the special vapor barrier that meets the ASTM standard. CLICK THE IMAGE TO ORDER IT.

CLICK HERE to order this amazing vapor barrier now and it can be delivered to your home. The addition of the second layer over the top of the slab is an insurance policy against any rogue water vapor that tries to exit the slab at a later date.

Use Narrow Pieces

The radiant heat that emits through the slab can wreak havoc on hardwood flooring pieces that are greater than 2.25 inches wide. Some installers will say it is safe to install widths up to 3 inches, but smaller widths will have less overall movement in response to the radiant heating.

Try to stay with wood widths as close to 2.25 inches if at all possible. The heating system needs to be turned on for several weeks before the wood is installed. The actual hardwood must be stored in the house where it can acclimate for seven to 10 days for the best overall results.

Stable Hardwood Species

Use wood species that offer the greatest stability. White and Red Oak, Teak, American Walnut, Mesquite and American Cherry are excellent choices. Adding an accent border of walnut or cherry in an oak floor is gorgeous. If you are lucky enough to find a creative hardwood installer, he will show you many options.

Coordinate Subcontractors

Be sure your builder coordinates a meeting between the radiant heating contractor and the hardwood flooring installer before the slab is poured. These two sub-contractors need to tell each other what they need to make each of their systems work flawlessly for years. All too often these meetings happen after a hardwood flooring nail is pulled from a leaking radiant heating tube.

Use Seasoned Pros

Installing hardwood flooring over concrete is more difficult than installing it over a wood flooring system. Smart homeowners and builders only work with flooring installers who can demonstrate that they know how to do it.

DIY Floor Refinish Product

Here's a great product to do hardwood refinishing with NO SANDING. All liquid method. Magic!

DIY floor refinishing system

This is the wonderful DIY floor refinishing system. It's not hard to do. Just be sure the floor is CLEAN first. Use Stain Solver to clean the floor. CLICK THE IMAGE TO BUY this refinish system.

CLICK HERE to get FREE & FAST BIDS from local hardwood floor installers who can put wood over radiant heating.

Column 482

Replacing Single Pieces of Warped Hardwood Floor

Replace Warped Hardwood Floor TIPS

  • Hardwood floor board can be replaced
  • Extremely hard job - no room for mistakes
  • Professional is best equipped to do this job
  • Furniture repairman can fix other defects without removal of wood
  • CLICK HERE to Get Tim's FREE & FUNNY Newsletter!

Tom P. who lives down south, who has the patience of Job, emailed me just before Christmas, 2013:

"I have something I need to fix.  We bought our house 2 1/2 yrs ago and it was built in 2005.  Our entry way and dining area have hardwood floors, suspended of course because we live in North Mississippi and the houses are built on slabs.

I have one board, in the middle of the floor by the front door that is, well, warping and raising.  All of the boards all the way around it are fine.  My first thought was moisture, but all the boards around it look fine and there are some surface areas where II can poke my finger into some small holes.  I think it is just a bad board and needs to be changed."

CLICK HERE to get FREE & FAST BIDS from local hardwood floor repair companies.

Here's a photo of the problem:

Replace Warped Hardwood Floor

It's tough to see the warping, so we need to believe it's there. Photo credit: Tom P.

AsktheBuilder Podcast

CLICK this image and listen to the first call on the podcast. I talked to Jill about how to repair wood kitchen flooring, and possibly installing an inlay border as an option. Copyright 2018 Tim Carter

Here's my answer to Tom:

Tom, it's absolutely possible to take out an interlocked piece of tongue and groove hardwood flooring. With respect to making such a repair completely invisible once done, I'd say this job's degree of difficulty is about 9.8 on a scale of 1 to 10.

Professional Required

In other words, you're deep in professional territory, and not just any professional, a true hardwood floor craftsman who has years and years of experience doing such repair work.

Cut Out Center Carefully

Cutting out the bad piece of flooring requires you to cut away the center core of the damaged piece of flooring without harming any of the adjacent pieces of flooring. This is very tough to do and requires great lighting, sharp tools and deft hand-eye coordination.

With the center of the wood out of the way, you can then start to get out the long pieces, one of which will be nailed to the subfloor. In your case I imagine they have wood sleepers on top of your concrete slab.

CLICK HERE to get FREE & FAST BIDS from local hardwood floor repair companies.

Exact Fit - No Room For Error

Once the bad piece is out, then you have to install a new piece that's the exact size of the old one in width, length and height. Remember, your existing floor was sanded and the new piece you install must be the same height. Good luck with that. You can't sand it in place or you'll ruin the adjacent pieces.

Cut Off Bottom Groove

To install the new piece, you need to cut off the bottom of the groove along the two grooved edges. You also need to cut off the small tongue on the narrow edge.

Once installed, you need to secure the piece of wood. You can glue it to the subfloor or glue and face nail it with small finish nails.

Are you discouraged yet?

Stain & Finish Challenges

If you successfully have it installed, now you have to match the stain color and clear finish.

This will really test your skills.

DIY Floor Refinish Kit - No Sanding

Use this kit to refinish the floor around the repair area. No doubt you probably screwed it up. No sanding required!!

DIY floor refinishing system

This is the wonderful DIY floor refinishing system. It's not hard to do. Just be sure the floor is CLEAN first. Use Stain Solver to clean the floor. CLICK THE IMAGE TO BUY this refinish system.

Bottom Line: The warped piece will probably look ten times better than any repair you initiate yourself. My guess is you're the only one who knows the defect is there. Any visitors would probably think the wood appearance is normal.

I'd leave it alone if it were me.

CLICK HERE to get FREE & FAST BIDS from local hardwood floor repair companies.