Resurfacing Concrete

Resurfacing Concrete

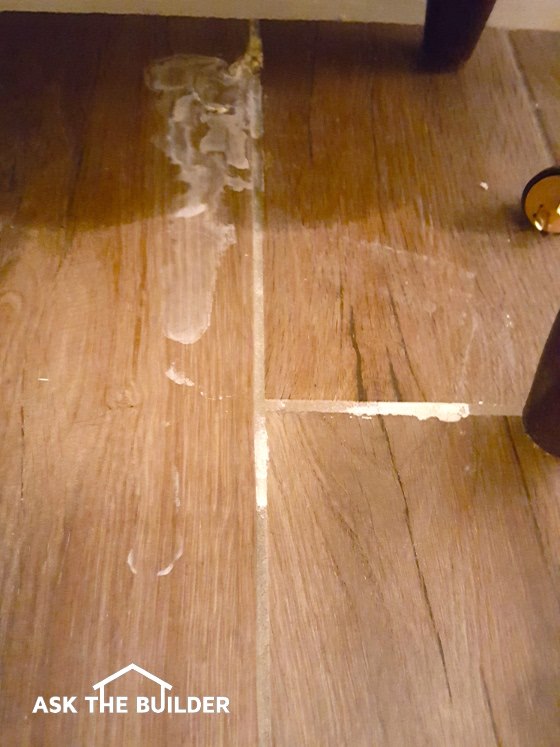
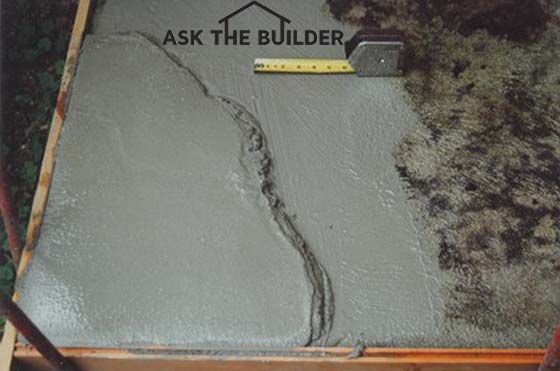
Here's an overlay on a small concrete slab. You can see the form boards that allow you to get the top in the same plane. There's a nice coat of cement paint that bonds the new overlay to the old concrete. (C) Copyright 2017 Tim Carter

Concrete Resurfacing TIPS

DEAR TIM: Is it possible to add an additional layer of thin concrete on top of an existing concrete surface? My concrete patio and front porch are scaling and there are patches where the top surface has deteriorated. The rest of the concrete looks fine. Can the average homeowner successfully complete such a job? Marcia D., Helena, MT

Podcast Concrete Overlay

CLICK this image and listen to the first story - Vic has a gorgeous patio on the back of his house. One part of the patio has sunken down. I've got the fix.

DEAR MARCIA: Resurfacing concrete with an overlay over existing concrete surfaces is a fantastic way to extend the life of a driveway, sidewalk, patio or porch. Believe it or not, this is a great DIY project if you just practice first on a smaller concrete slab.

Super Strong

The new surface will be durable and certainly more long lasting than the original finish if you diligently follow a few simple steps. The best part is that the material cost is minimal and you can do the work on different days to suit your schedule. I believe you can tackle this project if you take your time.

Remove Loose Material

The most important step in the process is to make sure that all loose concrete material is removed. Weak concrete can be removed by hand with a chisel and hammer or you can rent a lightweight demolition chipping hammer that blasts away material.

CLICK HERE to get FREE & FAST BIDS from local concrete contractors that do overlays.

Hammer Drill

This is a great demolition hammer tool to chip out rotten concrete. If you've got a bigger job that's going to last a few days, you should BUY one, keep it in good shape and then SELL it on Craigslist once done. This will be cheaper than renting one. CLICK THE IMAGE NOW TO BUY THIS GREAT POWER TOOL. I own one just like it.

Industrial-strength power washers can also be used. The concentrated stream of water removes weak concrete. The surface that will receive the overlay must be clean, oil and dust free.

Low Angle

Hold the wand close to the concrete at a low angle and use it much like a paint scraper trying to get the water jet spray under the thin layers of peeling concrete.

Thickness Matters

Before you purchase the materials for the job you need to decide how thick the overlay will be. If the thickness will be 3/4 inch or less you will not need any small stone aggregate. The size of stone in concrete mixes is very critical.

1/3 Rule

The maximum diameter of any stone in a concrete mix should never exceed 1/3 the thickness of the pour. Small pea gravel often has stones larger than 1/4 inch in diameter, thus it can only be used in overlays that are greater than 3/4 inch thick.

Ultra-Thin Overlay

Overlays can be as thin as 1/16th inch thick. In these instances you would use fine sand mixed with Portland cement. You can purchase these products already premixed in a bag or pail. You just need to add water.

quikrete-concrete-overlay

This is a resurfacer material that's premixed. You just follow the instructions on the label. Remember, it's just for THIN overlays. CLICK THE IMAGE NOW TO ORDER THIS PRODUCT.

If you decide to mix your own, realize that sand purchased from a traditional gravel pit or building supply yard often is available in three grades: fine, medium and coarse.

Coarse sand has very small stones in it that can be as large as 1/8 inch in diameter. This sand is perfect for one half to 3/4 inch thick overlays.

For a thin overlay, you need to get fine sand.
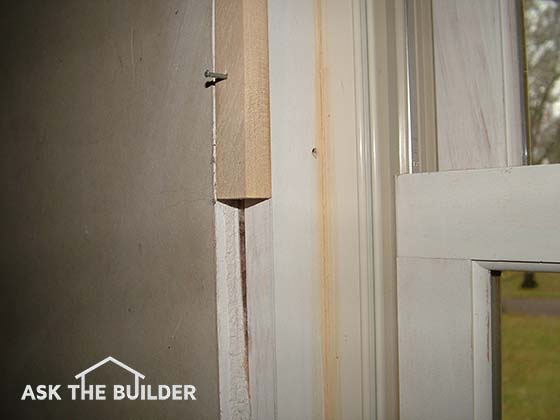
Form Boards

Before you mix any material you need to set up some small form boards. Use furring strips that are braced against the sides of the existing concrete work. The top of these pieces of lumber should be set at the final height of the overlay.

It's not necessary to attach them to the existing slab. Simply drive stakes next to the furring strips to pinch them against the existing concrete work.

CLICK HERE to get FREE & FAST BIDS from local concrete contractors that do overlays.

More Cement = Better Job

If your overlay will just contain sand and cement, make the mixture rich. Simply mix the two parts sand and one part cement together before you add any water. If you decide to do a thick overlay, here's the recipe I'd use:

  • 3 parts rounded gravel
  • 2 parts sand
  • 1.5 parts cement

Feel free to add another half measure of cement for an extra strong overlay. You should add enough water to the mix to make the mixture plastic. It should flow out of a wheelbarrow like pancake batter pours from a bowl.

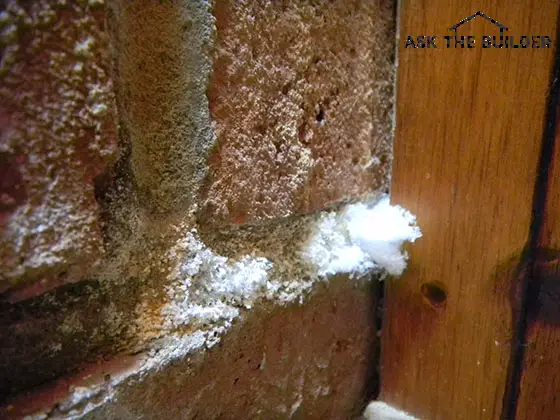
Secret Ingredient - Lime

If you want to really make the overlay mixture sticky, then consider adding hydrated mason's lime to the overlay mixture.  Lime is one of those magic ingredients that's rapidly becoming myth. This happens in construction. Some great methods and materials transform from history, to legend to myth. 

hydrated lime

This is excellent hydrated lime. It's a fine white powder and it's going to look great on your home. CLICK THE IMAGE TO ORDER SOME RIGHT NOW.

This is the recipe you need if you decide to use lime:

  • 3 parts rounded gravel
  • 2 parts sand
  • 1.5 parts cement
  • 0.5 part hydrated lime

Cement Paint

To permanently bond the overlay to the old concrete, apply a cement paint to the old concrete. This paint is made by simply mixing Portland cement and water until it is the consistency of paint. Don't allow the cement paint dry on the existing concrete. It must be covered with the overlay mix within minutes of being applied.

Cement Paint Video

Watch the first three minutes of this video to see how easy it is to mix cement paint. You just need a bag of pure Portland cement.

Best Weather

The best weather to perform this work is when the temperatures are in the 50 - 60F range. Overcast days are ideal. You want the resurfacing to set up slowly. You apply your final finish to the overlay when the material is somewhat firm.

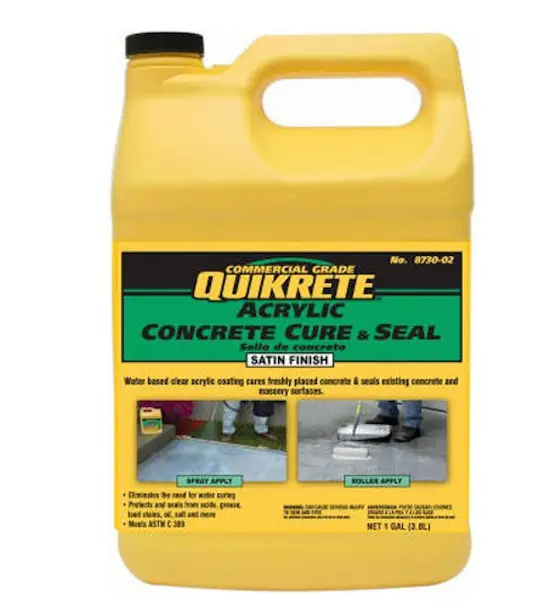
IMPORTANT TIP: Don't sprinkle water on the surface as you finish it. This will weaken the top skin of concrete. Tightly cover the finish slab with plastic to cure it or spray a clear curing compound on it so that the overlay cures very slowly. This will allow the concrete to attain maximum strength.

CLICK HERE to get FREE & FAST BIDS from local concrete contractors that do overlays.

Column 379

February 7, 2017 AsktheBuilder Newsletter

I've been doing this newsletter since 1997 is my best guess. I can't tell you when I sent out my first newsletter.

One of the biggest mistakes I've made in the Ask the Builder journey is not keeping a journal or diary.

That one line from the movie Field of Dreams that old Doc Graham uttered in his office comes to mind.

"At the time you don't think much of it. You know, we don't recognize the most significant moments of our lives while they're happening."

Well, I do recognize this moment right now. And it will forever be kept at my AsktheBuilder.com website so I can go back and reflect on it.

What is it? Read on, please.

True Value Hardware Paint

Two months ago I mentioned that I had been in Chicago for a brief business trip. I can now share where I was.

I had the good fortune to visit the True Value Hardware paint manufacturing plant in Cary, Illinois.

I've been on many a factory tour. They're all eye-opening.

Usually my biggest takeaway as I watch all the products marching rapidly down the assembly and packing lines is, "How is it possible THIS MUCH of this product is needed day after day after day?"

You're wondering, "Tim, big deal. What's in this for ME? Why should I care about your cool factory tour?"

There's quite possibly LOTS in it for you. Keep reading please.

The Test

I got to meet the top team members while there, John, Rich, Mark, and a few others I fail to remember because I didn't get their business cards.

We all agreed I'd tape two videos for them about two paints True Value is very excited about.

The one was their X-O Rust spray paint and the other one was their EasyCare interior paint. Both are made at the Cary, IL plant. It's a massive facility.

EasyCare Washable Paint

Above is a photo of the can of EasyCare paint I bought from one of my local True Value hardware stores. I had it sitting on my deck railing.

The following photo shows two lab test panels where the X-O Rust spray paint was put up against a top national brand you've probably used for years. The True Value X-O Rust paint is the one that's on the right in the photo.

These test panels were subjected to an official scratch test and then subjected to an ASTM 200-hour salt-fog test.

xo paint vs rustoleum salt fog

These two paints are exclusive to True Value Hardware and you can only get them at your local True Value hardware store owned by one of your neighbors.

The True Value team at the paint plant wanted to test to see how well you would react to my feelings about their paint.

They wanted me to try it myself, do an honest review of both and then see if you'd then consider using it yourself.

To encourage you to do just that, I was able to get them to create two EXCLUSIVE rebate offers. They're fantastic offers and they only run for the next three weeks.

These rebates are ONLY AVAILABLE to you as an AsktheBuilder.com follower / subscriber.

Both rebate offers expire on March 1st.

True Value paid me to take the time to test the two paints and create a video about each one. The links to them are just below.

But Wait, There's More

The real payoff for you is not the rebates. Yes, they're great, yes, you'll save money, yes, you'll get some of the best paint you've ever used.

But the big payoff is a little farther down the road.

However, this payoff all depends on you. Only you can make it happen.

If you can prove to True Value that you trust what I say, go buy a little bit of this great paint you're about to see AND then send in for the rebates, then there's a really good chance I'll be taping many more videos for you.

These videos will help show you how to save lots of time and money and demonstrate amazing new products that I love.

Both paints are already an exceptional VALUE before the rebates.

I can pretty much tell you after you get two cans of the spray paint, you'll wish True Value would have allowed you to send in the rebate for ten cans.

Watch the Videos

Please click the two links and watch the videos. Do that first, then keep reading. The links to the rebate offers are just below.

CLICK HERE to watch the EasyCare wall paint video review.

CLICK HERE to watch the XO-Rust spray paint review video.

The Rebate Offers

Now it's your turn. If you feel the paints are worthy of your investment, then please go visit your local True Value Hardware store and buy some.

CLICK HERE to find your closest True Value Hardware store.

Each rebate is good for two cans total per household. Just read the offers and you'll figure it out.

You NEED TO ACT FAST because the rebates are only good if you buy the paints by March 1st and then send in the rebate form. You'll see.

CLICK HERE for the X-O Rust spray paint rebate.

CLICK HERE for the EasyCare interior paint rebate.

Why It's So IMPORTANT

I thought years ago that some company would take an interest in me and help me get the word out to you about great products.

But it never happened. It could have been poor marketing of myself to companies.

However, the time has come.

To get the word out to you about great products, great methods, etc., a person like me needs resources and support.

We both know that video is powerful and it's the future for allowing you to discover new things FAST.

But video done RIGHT is resource intensive.

I've had the pleasure to work with a professional video recording team over the years. John Wall, now a good friend, was my producer / director / mentor.

There were others on the team and some invisible people who did all the post production. A team like this costs money. A real set to tape on costs money. I could go on and on.

The videos you see me do now are done by me with little or no help. Occasionally I can enlist my son to help, but it depends on his schedule.

If you step up and come through buying some of the amazing EasyCare and X-O Rust paint, then there's a CHANCE I'll get to once again work with a professional crew and really crank out lots of videos.

You'll get to watch them for free forever.

Help me get all that information that's in my brain into and out of a video camera.

Help me create more videos.

Help your kids, your grandkids and friends discover at least one more time-tested way to Do It Right and Not Over.

Help me make this a day we'll both never forget.

Tim Carter
Founder - www.AsktheBuilder.com

Do It Right, Not Over!

EasyCare Paint Review

EasyCare Paint Review

Watch the above video review of the EasyCare paint sold exclusively at True Value Hardware stores.

I tested EasyCare out in my own bathroom. Here's my opinion:

  • Nice and thick
  • Above-average hiding power
  • No roll splatter
  • Very low odor
  • Exceptional value

Paint Prices

When you compare indoor wall and ceiling paint, you should always consider the price. Traditionally, cheaper paints didn't perform that well.

Guess what? There are apartment building owners that WANT A CHEAP paint. They just want to freshen up walls before a new tenant moves in only to mess up the walls in a month.

This is one reason there are low-cost paints. Some look good, but don't hold up.

Great Price & Performance

EasyCare is a great paint that doesn't leave you broke. It's not the cheapest by far, but it's not priced out-of-sight like some huge national brands that I've used in my home.

I'm convinced when you go into your local True Value hardware store and see how much it is, you'll do a double take.

You can also order it NOW if you want online. CLICK HERE to check pricing. Just realize what you gain in convenience not visiting a True Value store, you'll pay for in shipping.

Also, when you go to your local store, you can get any color you want. They'll match other brand-name paint color chip names. Bring in a different brand paint chip you love, and they'll mix it in EasyCare.

EasyCare Washable Paint

Here's a washable wall paint. I tried this in my bathroom and it cleans easily. CLICK THE PHOTO NOW to have this delivered to your home.

EasyCare Price

What you'll discover when you compare the price of EasyCare is that it's substantially lower in price than many of the top name-brand paints that perform just as well as EasyCare.

Why are these other paints so expensive? My guess is they spend more on advertising and/or the stores selling the paint have to make up so much of their soft business costs if they're just selling paint.

A True Value hardware store owner has hundreds and hundreds of other products they sell that they can use to spread out the soft business costs. But realize I used to eat lunch sitting on overturned drywall buckets and I don't have a master's degree in business administration!

CLICK HERE NOW to BUY EasyCare paint and have it delivered to your door!

Reminder - February 19, 2017 AsktheBuilder Newsletter

XO Rust vs Rustoleum

xo rust spray paint

XO Rust spray paint is on top. Rustoleum is on the bottom. These are actual lab scratch tests done. The results are SHOCKING. CLICK HERE to have XO Rust paint delivered to your home in DAYS. Copyright 2018 Tim Carter

XO Rust vs Rustoleum TIPS

I'm very lucky. As a syndicated newspaper columnist and Internet publisher, I get to visit places the average person can't go.

December, 2016 was one of those times. I was able to tour the True Value Hardware paint factory in Cary, Illinois.

There I got to see how many of their paints are made including XO Rust spray paint.

Rustoleum Results

But best of all, I got to see how XO Rust Spray Paint performed against the popular heavily advertised Rustoleum paint.

You're going to see test panels in the video just below.  The panels were created using an ASTM B117 test procedure.

After you see them, something tells me you'll probably think long and hard before buying Rustoleum again.

xo rust paint

Do I need to tell you which brand is on top? Yep, XO Rust. Copyright 2018 Tim Carter

Tough Love

It's my job as a journalist to share facts with you. Sometimes it's not easy. This is one of those times.

It's not my job to beat up on a company. I've used Rustoleum for years but now after seeing the XO Rust ASTM B117 test results, I'm switching. 

Competition

The free marketplace is amazing. A company that decides to make a fantastic product deserves to do well. Those that make so-so products reap what they sow sometimes.

The way I see it is, if a company knows their product doesn't perform as well as it could, then they can do better to ensure it does. You and I as consumers end up the winners.

I know I'd never use Rustoleum again until such time as Rustoleum provides me with test panels that show how they've re-formulated their paint to outperform all others, including XO Rust.

When you see the test panels, you'll agree the Rustoleum chemists have lots of work to do.

XO Rust Spray Paint Video

Watch this video to see how I used XO Rust spray paint to restore a rusted piece of wrought-iron patio furniture. The test panels will be just after the music interlude.

Test Panels Tell The Tale

The test panels you saw in the video were real. Nothing fake there at all. The chemists and engineers that work for manufacturers use these standard tests all the time. In fact, they're the ones that sit on the committees that come up with the test procedures.

The ASTM B 117 scratch really shows up on this photo set. Look at all the peeling paint on the lower Rustoleum panel. The XO Rust panel on top looks fantastic. (C) Copyright 2017 Tim Carter

Any paint manufacturer can run the ASTM B 117 test. They often do it to see how their paint stacks up against a competitor's.

But not all manufacturers share the test data for all the obvious reasons.

These tests were run using the industry-accepted ASTM B117 Salt-Fog test. The basic steps in the test are:

  • Paint pieces of bare steel
  • Allow paint to cure
  • Scratch the center of the test panel
  • Put panels in the salt-fog chamber
  • Expose for 200 hours

CLICK HERE to see the actual ASTM B117 test requirements.


CLICK HERE to BUY XO Rust and have it delivered to your home. Remember, you can get it in quarts and gallons for bigger jobs.


Pot Filler Faucet

Pot Filler Faucet

Here's the pot filler faucet from my own kitchen. I installed it. CLICK THE IMAGE NOW TO ORDER ONE. ©2017 Tim Carter

Pot Filler Faucet TIPS

DEAR TIM: A pot filler faucet has been suggested by my kitchen designer. I have never had one before, and wonder if it is really necessary.

Is a pot filler in a kitchen a good idea? Will the contractor have any problems installing a pot filler faucet?

What are the most important things to consider should I decide to include one of these interesting faucets in my new kitchen? Penny R., Manteca, CA

DEAR PENNY: I am willing to wager that within one month of taking possession of your newly-completed kitchen you are going to call the kitchen designer and tell her how smart she is. If she has thought out the need for a pot filler faucet, there is not a doubt in my mind she has also included all sorts of other labor-saving features.

Commercial Product

Over the past few years, many of the things commonly find in commercial and institutional kitchens have found their way into residential kitchens. Look at the monster cooktops, ranges, ovens and refrigerators that now seem to be commonplace in a modern home kitchen.

Even my own kitchen has a six-burner cooktop. Pot filler faucets can be added to the list of things that are starting to become mainstream in kitchen design.

CLICK HERE to get FREE & FAST BIDS from local plumbers that can install a pot filler faucet in your kitchen.

Back Saver

I feel a pot filler faucet is an excellent idea for your kitchen. These gorgeous articulating faucets save your back. A pot filler eliminates 50 percent of the work when it comes to transporting water to and from a cooktop. Once a pot filler faucet is installed above your cooktop, you never have to carry a pot full of water to the cooktop. This saves wear and tear on your hands, wrists, arms and back.

Pot Filler Faucet VIDEO

Watch this video. You'll discover something new.

62.4 Pounds

Water is actually fairly heavy, as just one gallon weighs a little over eight and one-third pounds. A cubic foot of water weighs in at a hefty 62.4 pounds

If you measure the amount of water you might boil to make a large pot of pasta, you might be surprised to discover you carry nearly 20 pounds from the sink to the cooktop.  When you're doing lots of cooking during large holiday celebrations, the last thing you should be doing is wasting energy carrying water around your kitchen.

Easy Install

I doubt any contractor or plumber worth his salt will have any problems installing a pot filler faucet. Most pot fillers require a single one-half inch cold water supply line.

The plumber can usually install this extra pipe in 30 minutes or less in most kitchens. It may require a small amount of extra labor when remodeling an existing kitchen.

Get The Faucet

There are several very important things to consider before the plumber arrives at the job site. The location of the pipe projecting out from the wall that feeds the pot filler faucet is very critical. If this pipe is not in the correct location, the pot filler faucet might end up too low and/or it might not fold back completely to nest against the wall.

I urge you to purchase the pot filler faucet before the plumber arrives, and read the written installation instructions carefully.

CLICK HERE NOW to view many great pot filler faucets and to order one.

If you don't want to get the faucet that early in the job, most manufacturers have all of the technical notes, dimensions and instructions available for free at their websites. Download these documents, and get ready to do some math.

CLICK HERE to get FREE & FAST BIDS from local plumbers that can install a pot filler faucet in your kitchen.

Cabinet Conflict

The pot filler faucets fold back on themselves. Depending on how you want it to look when not in use, it can bang into a low-hanging wall cabinet that may be adjacent to the cooktop.

Keep in mind the height of the faucet is important so it is higher than your tallest pot you intend to fill! Almost always the faucet body will be higher than the bottom of a standard 30-inch-high wall cabinet. If you don't plan this out, you'll have all sorts of anxiety when the faucet is installed.

Critical Dimensions

You will also need several other important dimensions, such as the height of the cooktop burners above the finished height of the countertop, and the height of your tallest pot. When added together, these dimensions tell you the absolute minimum height above the finish countertop the tip of the pot filler faucet must be.

I'd always add another inch to be safe. Be sure you or the plumber takes into account the height of the finish flooring as you do all of this math.

IMPORTANT TIP:  This is a reminder. Don't underestimate the faucet fold-back issue.

Since a pot filler faucet swings out of the way when not in use, you need to make sure it will not hit against wall cabinets that might flank either side of the cooktop.

My wife and I wanted our pot filler to fold towards the wall cabinets so it would not block a decorative tile backsplash in our kitchen. It took some planning to make this happen, but it was well worth it.

Two Valves

When looking at pot filler faucets, consider ones that have two separate on and off valves. You may think this is poor design until such time as you walk away from your pot filler and it has a slow drip. The second valve acts as a safety to minimize damage that might be caused by a dripping faucet.

Keep in mind that a pot filler faucet in a standard kitchen does not have a sink underneath it to catch pesky drips of water.

Emergency Shut-Off Valve

It's also a fantastic idea to have the plumber install a separate ball valve on the supply line that feeds the pot filler faucet. If you ever have to work on the pot filler faucet or it does develop a leak, the ball valve allows you to shut off the water to the pot filler without interrupting the water supply to any other faucet or fixture in your home.

Be sure this valve is in an easy-to-get-to spot in a closet, the basement ceiling, etc. Put a tag on the faucet so everyone knows what it's for.

CLICK HERE to get FREE & FAST BIDS from local plumbers that can install a pot filler faucet in your kitchen.

Column 663

Reinforcing Steel in Concrete

Reinforcing Steel

This is 1/2-inch rebar. The rods are almost always 20-feet long. Hand and pocket knife for scale. © 2017 Tim Carter

Reinforcing Steel in Concrete TIPS

DEAR TIM: I am having a large amount of concrete work done at my house. As you know, it can be expensive. I want the concrete to last and last.

What are the secrets to long lasting concrete that does not crack, scale, or fall apart? The concrete walks and driveway in my childhood home are in very good shape and my guess is that these surfaces are nearly 40 to 50 years old!

Is it still possible to install concrete that will last longer than I will? Beverly D., Schaumburg, IL

DEAR BEVERLY: Concrete is one of the most abused building materials that I am aware of. All too often the people who work with it have absolutely no formal training with respect to how the material needs to be specified, placed, finished, and cured.

Basic Components

The components that make up standard concrete are very basic - gravel, sand, water, cement, and certain additives. But the science surrounding concrete is very, very complex. Scientists invest their entire lives studying it and producing professional papers. Perhaps the top organization that is the center of the vortex with respect to concrete science is the Portland Cement Association.

CLICK HERE to get FREE & FAST BIDS from local concrete flatwork contractors.

Cement Glue

Installing concrete that will last a lifetime is absolutely possible. The process begins by ordering concrete correctly.

Always keep in mind that the cement powder in the mixture is the glue that holds the sand and gravel together.

More Cement = Strength

You can order concrete with different amounts of Portland cement in it. The amount of cement is directly related to the overall tensile, bending or stretching, force of the cured concrete. You might order concrete in these strengths, all in pounds per square inch (PSI):

  • 2500
  • 3000
  • 3500
  • 4000
  • 5000

Some regions of the USA have you order it based on the number of bags of Portland cement there are per cubic yard of finished concrete. A typical bag of Portland cement weighs 94 pounds. A mix that produces 4,000 PSI has six bags, or 564 pounds of cement in each cubic yard of the concrete.

Guidelines

If you have small amounts of glue the concrete will be weak. Concrete suppliers and concrete trade associations have developed tables that tell you and your builder how strong concrete needs to be for different applications.

For example, concrete used in standard residential foundation footings can be lower strength than concrete used for outdoor patios, sidewalks and driveways. The average person might think the opposite is true.

Concrete Videos

Watch these videos. I've got many more at my AsktheBuilder.com YouTube channel.


Ice & Concrete

Concrete exposed to freezing weather must be a minimum of 4,000 PSI strength. Remember, this is a MINIMUM recommendation. You can always order it stronger.

Concrete exposed to the weather can absorb water. This water soaks into the surface of the concrete and then freezes. When water freezes, its volume increases by nine percent.

This crystal growth can tear apart concrete that's not strong enough to resist the forces. Adding air to the concrete helps create spaces where the ice crystals can grow into.


Want perfect concrete work? Find a pro by using my Concrete Work (Sidewalks, Driveways, Patios & Steps) Checklist. I offer a 100% Money Back Guarantee.


It Shrinks

I know you don't want to hear this but concrete is supposed to crack. As concrete hardens it begins to shrink ever so slightly. In fact, concrete shrinks 1/16th of an inch for every ten feet of length that is poured.

Crack Control

Wise concrete finishers know this and install contraction or crack control joints that encourage the concrete to crack at these locations. For the joints to work correctly they need to be a minimum depth. Always make sure that these joints are cut 1/4 or more of the thickness of the slab.

CLICK HERE to get FREE & FAST BIDS from local concrete flatwork contractors.

Steel A Must

Concrete is incredibly strong when you try to squeeze or compress it. But it has only about 10 percent of this strength if you try to stretch or bend it. This bending or stretching happens if the soil is weak under the concrete or say a heavy vehicle drives onto the concrete.

The concrete wants to bend or snap much like you'd snap a toothpick in two. The bending or stretching force is called tension.

You can prevent small hairline cracks from offsetting or widening by installing reinforcing steel.

Wire mesh and one-half inch diameter steel bars are readily available and very inexpensive. This steel needs to be in the middle of the concrete or slightly above the middle of the slab to provide the necessary reinforcement.

Super Strong

Reinforcing steel has enormous tensile strength. The average piece of rebar, or reinforcing steel rod, has a tensile strength of 40,000 pounds.

That means you need to apply 40,000 pounds of pulling or stretching force to rip apart the steel rod.

The average concrete you order from the ready-mix plant only has 4,000 pounds of tensile strength.

Beware Water

Water is needed to mix and cure concrete but if excess water is added to concrete after it leaves the central mix plant or is mixed into the surface of concrete during the pour or finishing activities, it can severely harm the concrete.

IMPORTANT TIP: Water added to already mixed concrete can dilute the amount of cement in the mixture. This added water weakens concrete just as added iced tea to your half empty glass at a restaurant dilutes the sweetness of the remaining tea.

Cure Concrete

Once the concrete is finished, it needs to be cured. The water within the concrete fuels a chemical reaction called hydration that continues to happen within the concrete for weeks and months. If this water evaporates from the concrete too rapidly, then the concrete might never achieve its design strength.

Curing Compounds

Liquid spray curing compounds can be added to the concrete as soon as the concrete finisher completes his/her final trowel stroke. You can also cover concrete with sheets of plastic. Curing is a simple step that is often neglected.

 concrete curing compound

This is a typical concrete curing compound. They're liquid you spray or roll onto stiff concrete. CLICK THE PHOTO TO SEE A VARIETY OF THESE AMAZING LIQUID PLASTIC MATERIALS. THEY DRY CLEAR.

I can assure you that concrete that is specified, mixed, placed, finished, and cured in accordance with industry accepted guidelines will last and last. The biggest problem I feel you are going to have is finding a concrete contractor that is familiar with these guidelines.

Concrete Associations

If you mention Portland Cement Association, American Concrete Institute, or World of Concrete to a contractor and his eyes glaze over, then keep looking!

CLICK HERE to get FREE & FAST BIDS from local concrete flatwork contractors.

Column 322

How To Replace Paneling With Drywall

Drywall Over Paneling TIPS

DEAR TIM: My wife and I bought a 35-year-old home that has thin wood paneling in several rooms. We don't like the dark paneling and want to make the room lighter in appearance. We're thinking about drywalling the rooms, but the paneling is so much thinner than regular drywall.

If I install drywall, it will stick out past the door and window jambs. What can we do to solve this problem?

To add insult to injury, the height from the floor to the ceiling is 8 feet 8 inches. Should we cut 10 foot long pieces to fit and install them vertically? Is there some other option to make the room look great without all the work? Jeremy S., Green Bay, WI

DEAR JEREMY: I'll bet you were perplexed when you pulled off that first piece of paneling to see how thin it was. I remember that happening to me many years ago.

Stop! Options

The great news is that you have several options and I urge you to stop removing paneling immediately until you test at least one of my ideas. Since you've already considered removing the paneling, what I propose is not going to create problems.

In reality, I believe I can save you lots of sweet moola (money) and days and days of time.

CLICK HERE to get FREE & FAST BIDS from local painters that can do the quick painting test on your paneling.

Stain Solver Cleaner

Oxygen Bleach

Stain Solver is MADE in the USA with USA ingredients that are food-grade quality. CLICK THE IMAGE to order some NOW.

As crazy as this sounds I want you to clean one wall of the paneling with Stain Solver oxygen bleach, soap and water and rinse it with clear water.

The Stain Solver oxygen bleach will do an amazing job of removing any wax or polish previous homeowners may have applied to the paneling.

Stain Solver is Made in the USA with USA ingredients. It's certified organic. It's a fantastic de-greaser. You'll need this in case the paneling has an oil-based polish on it.

Paint Is Light

Your goal is to lighten up the room. You can achieve this without removing the paneling.

All you have to do is paint the paneling a nice off-white color.

Be sure the paneling is free of any wax or polish before you paint. If you don't do this, the paint will peel in the future.

Use a primer for bare wood. If you're using a new paint that says it contains the primer read the label to ensure it's made for bare wood.

Finish Paint Immediately

If you use a traditional primer, the label will tell you how soon you can apply the finish coat of paint. Follow those directions.

Assuming the primer is water-based, you can usually apply the finish paint within two hours.

Behold The Beauty

The purpose of painting this one wall as fast as possible is to do a proof of concept.

I think you and your wife are going to be quite surprised how good the painted paneling looks. To really get a good feel, I want you to move some of the furniture up to this wall and hang one or two pictures.

Vertical Lines Add

You may be shocked at how good this one painted paneling wall looks. The vertical lines in the paneling can add character and depth to the otherwise flat surface you'll get when you drywall.

Over the years on several jobs I did this for customers and each one was stunned by how good the painted paneling looked. They were originally going to remove it like you're thinking of doing.

Fill The Grooves

If the vertical lines or grooves in the paneling bother you or your wife, you can also fill them with spackling compound. It may take several attempts to get the cracks filled so they are perfectly even with the paneling, but it is far less time than you will spend installing and finishing the new drywall.

You can use a newer spackling that has paint primer built into it saving you a step I mention below.

spackling with primer

Here's a pretty cool spackling compound. It's got paint primer built into it. This saves you time and money. CLCK THE IMAGE NOW TO ORDER THIS SPACKLING.

Special Bonding Primer

If you use spackling without a built-in primer, you must prime the paneling with a special clear bonding primer/sealer that will take care of both the texture difference between the smooth paneling and coarse spackling and the vast porosity differences between the two materials.

Clear Bonding Primer

This is a great clear bonding primer. CLICK THE IMAGE NOW TO ORDER IT.

You apply this special bonding primer / sealer after you've filled the grooves and sanded them.

If you don't use this special primer/sealer, you may see the vertical lines even after the finish paint is applied.

CLICK HERE to get FREE & FAST BIDS from local painters that can do the quick painting test on your paneling.

Must Do Drywall

If you and your wife are stuck on drywall, then you need to choose the thickness you want and make adjustments to the jambs at each door and window after the drywall is installed.

Drywall Over Paneling

Look at the window jamb and notice how it is recessed from the face of the added drywall. The natural-colored wood strip with the finish nail has been added to extend the window jamb so it is flush with the drywall. The wood strip would normally continue all the way down to the window sill but was left short for this photo to illustrate why it needs to be added in the first place. ©2017 Tim Carter

I'd use drywall that is at least one-half inch thick and would seriously consider using 5/8 inch drywall on walls and ceilings where I want sound transmission to be minimal. Thicker drywall helps soundproof rooms.

9-Foot Ceilings

There's another distinct advantage to using one-half or 5/8 inch drywall. Both of these sizes are commonly available in stretch boards that are 54 inches wide instead of the normal 48 inch width.

These wider sheets will allow you to install the drywall horizontally since your ceiling is higher than 8 feet. Using the wider sized drywall allows you to have one continuous tapered seam all the way around the room.

There will be no need for the small troublesome ripper strip that would have been only 7 or 8 inches wide near the floor or ceiling.


Hang drywall the correct way. Learn the secrets to great drywall installation in this Drywall / Plaster Installation Checklist. I offer a 100% Money Back Guarantee.


Extension Jamb Hassle

Once the drywall is installed, you will need to add small pieces of finish lumber at all window and door jambs. White pine, poplar or other fine-grained lumber can be used with great success to make these small extension jambs.

Drywall Over Paneling

Check out how great this painted paneling looks! The entire room was painted in half a day. It would take days to add drywall and make all of the necessary carpentry changes for the drywall to work. PHOTO BY: Kathleen Connick with Tim Carter's camera

Try to make sure the added lumber sticks about 1/32nd of an inch past the finished surface of the drywall. This very slight offset will help you as you start to reinstall the exiting or new woodwork around each window and door.

Electric Box Code

You also need to be very observant around all electrical boxes. The electrical code is very specific about the distance between the edge of electrical boxes and the finished wall surface. The safest approach is to have the front edge of the electrical box flush with the finished surface of the wall.

But the code understands this can be tough to achieve and typically the maximum distance the box edge can be away from the finished wall is only 1/4 inch. But check with your local code authorities for the exact distance.

Extension Rings

If you plan to exceed this distance, you must either move the boxes so they comply with the code or you must add code-compliant extension rings. This is a very small detail, but an extremely important one.

Door Swing Issues

The extension jambs can cause small headaches around doors that pivot on traditional hinges. When a standard swing door is hung properly, the hinge is set so the door can swing back on itself and open a full 180 degrees.

But if you start to bring the finished wall surface out from the pivot point, the door starts to hit the wall before it opens 180 degrees. Usually you have to have the wall sticking out from the pivot point more than one-half inch for this to be a big problem.

Do The Test

As for painting paneling, you would be shocked how well it can look. A close friend of mine did this in her study and the look was stunning. The paneling in this room actually had a hand-hewn texture in addition to the vertical lines. Once the flat paint was applied to the paneling, the wall surface look much better than adjacent rooms that had smooth plaster. I was amazed at how nice the painted paneling looked.

CLICK HERE to get FREE & FAST BIDS from local painters that can do the quick painting test on your paneling.

Column 542

Septic Tank Garbage Disposal

garbage disposal for septic systems.

This is a special garbage disposal for septic systems. See that container at the bottom? A small amount of that liquid is injected into the disposal each time it turns on. This helps the waste decompose in the septic tank. CLICK THE IMAGE NOW TO BUY ONE OF THESE GREAT DISPOSALS.

Septic Tank Garbage Disposal TIPS

How Many Homes Have Septic Tanks?

How many homes in the United States do you think rely on a septic system for their household sanitation needs? Five million you guess? Go higher. Fifteen million, maybe? Still higher.

Try twenty-seven million homes. If there are an average of 3 people in each house, that's nearly 81 million people!

How Many Septic-Tank Houses Have Disposals?

Past studies indicate that of these twenty-seven-million homes, only twenty-two percent have elected to install a garbage disposal.

The seventy-eight percent who do not have garbage disposals choose not to do it largely because they feel these devices will harm their septic tanks or drain fields.

CLICK HERE to get FREE & FAST BIDS from local plumbers that can install a septic garbage disposal for you.

What are Septic Garbage Disposals?

There are special garbage disposals that are made for homes with septic systems. These come with a small container of enzymes that are injected into the mush to help break them down in the septic tank. CLICK HERE to buy one now.

Do Garbage Disposals Hurt Septic Systems?

The truth of the matter, as stated by the Federal Housing Authority and other key industry groups such as the Small Flows Clearing House, is garbage disposals don't harm a septic system. You just have to make sure the  system has been sized correctly and is maintained on a regular basis.

What Happens When the Disposal Grinds Food?

When you send solid particles into a 1,500-gallon septic tank, they can begin to accumulate. This only happens if they don't break down within the tank.

Some things can't break down. You may wash sand, clay and silt, and/or other solid non-organic things down into the tank. Small army men are also in this group.

This accumulation is called sludge. Some organic waste particles that can be broken down by the bacteria within a septic tank can sometimes become sludge if the bacteria doesn't have a chance to attack it.

CLICK HERE to get FREE & FAST BIDS from local plumbers that can install a septic garbage disposal for you.

Do Food Particles Break Down in a Septic Tank? 

The organic food particles must remain in suspension for a long enough period of time for the bacteria to eat them.

If the particles are too big or don't float, the bacteria that break down waste simply doesn't have enough time to "eat" the waste. As sludge begins to build in a septic tank, it effectively reduces the capacity of the tank and beneficial bacteria.

How Much Sludge Can Be in a Septic Tank?

In our case, let's say that 400 gallons of sludge is in the bottom of the tank. This means we only have 1,100 gallons of bacteria filled water left to attack food and other waste particles. This is one reason septic tanks need to be pumped out at least every three years.

You need to get rid of the sludge.

Is it starting to become clear why regular tank maintenance is important? For the same reason, you should avoid sending solid objects such as cat litter, plastic Star Wars figures, and other objects towards the septic tank.

Are There Good Septic Tank Additives?

You can purchase countless good septic tank and system additives. The Small Flows Clearinghouse in West Virginia did a study on these years ago. At the time, they couldn't determine if the popular additives really did any good. You adding them to your septic tank may be just making you feel better, not necessarily your tank.

septic tank treatment additive green gobbler

Here's one septic tank treatment product. CLICK or TAP HERE to see others.

Should Oxygen Be Added to a Septic System?

Oxygen Bleach

Stain Solver can inject lots of oxygen into your septic tank. It's MADE in the USA with USA ingredients that are food-grade quality. CLICK THE IMAGE to order some NOW.

You can add oxygen bleach to your septic system. Oxygen is what the big municipal sewage-treatment plants use to break down sewage. The second stage of sewage treatment is called aeration.

You can add Stain Solver oxygen bleach to your septic system once a week to give it a boost of oxygen. Just pour in 1/4 cup of Stain Solver into your toilet and flush it twice to get the powder down into the septic tank.

Stain Solver is Made in the USA with USA ingredients. It's certified organic so it's SAFE for your septic system.

When you add it, trillions of oxygen bubbles invigorate the beneficial bacteria in the septic tank.

Can Some Additives Hurt a Septic Tank?

Yes, some additives might be harmful to the biological activity within the septic system. In fact, some additives can rapidly kill the bacteria within the tank. Any product that contains chlorine bleach is bad for your septic tank and septic system.

The chemical name for chlorine bleach is sodium hypochlorite. Look for this fancy name on the labels of products.

If this happens you will quickly ruin your entire system as solid particles of waste will be carried to the drain field. When this happens, it is curtains.

The solid particles clog the gravel and soil that surrounds the perforated drain pipe in the leach field. Clogged gravel and soil means the polluted water has nowhere to go but the surface or it can travel through the soil to contaminate other groundwater resources.


CLICK HERE to get FREE & FAST BIDS from local plumbers that can install a septic garbage disposal for you.

Related Articles:   Septic Tank MaintenanceGarbage Disposal for Septic Tank ManufacturerSafe Septic Tank AdditivesDisposals Harm Septic Systems - Garbage!

Column B225

Efflorescence Removal

Efflorescence Removal TIPS

Removing Efflorescence

Efflorescence removal is not easy. The first step is to simply brush the salt deposits off the surface with a stiff broom. Vacuum salt deposits or brush them away are the the best methods of efflorescence removal.

It's important to realize the next rainfall will allow the salts to re-enter the brick or concrete if you don't get rid of the salt deposits or just allow them to lay on the surface . The problem then starts all over again when the water evaporates bringing the salts back to the surface.

efflorescence

This is efflorescence on new basement floor tile. The water infiltration needs to be stopped first. Copyright 2017 Tim Carter

Do NOT Use Water

Another key point is the use of water is not recommended. The water will dissolve some of the salts and actually drive them back into the masonry. These salts will subsequently re-appear when this secondary water evaporates.

Acid Wash Efflorescence Removal

It's important to realize that dilute solutions of muriatic acid can be used. However, BEWARE of this method.

Muriatic acid

Muriatic acid is powerful and needs to be treated with lots of respect. CLICK THE IMAGE TO ORDER SOME NOW.

Muriatic acid can cause serious eye and skin burns. The vapors are also very toxic. Muriatic acid, improperly applied to a masonry surface, can 'burn' the brick and cause discoloration.

Always dilute the muriatic acid with water. Try a solution of ten parts water to one part acid.

IMPORTANT TIP: This method of cleaning is only recommended for heavy flow deposits of salts that resemble stalagmites and stalactites in a cave.


Sealing Brick

Brick that is still experiencing efflorescence should not be sealed. If you do this, there is a possibility that you can actually damage the surface of the brick.

mortar fungus

Efflorescence growing in the mortar of a brick fireplace. Photo Credit: Michael Hannum

The sealer can actually block the movement of salts to the surface of the brick. Now, you may think that is not such a bad idea. Well, here is what can happen.

Spalling Danger

The salts work their way to the sealer at the surface of the brick and stop. The concentration of the salts increases as the water evaporates. In certain instances, the salts begin to crystallize.

This process of crystallization can create enormous pressure on a microscopic level that can actually cause the face of the brick to pop off or spall.

Over the years, I've seen many different spellings of efflorescence. Here's my growing list: effervesce, effervescence, effervescent, effleresants, effloreflance, efflorescence, efflorressance, effluorescence, eflorescence, eflorescents, ellforesce and ifflorescence.

CLICK HERE to get FREE & FAST BIDS from local masonry experts who can help clean or repair your brick and stonework.

Column B033

Cultured Marble

Cultured Marble TIPS

DEAR TIM: I'm really fed up with the constant care that my ceramic tile bathtub and shower surround requires. I'd love to have a single piece of marble on each wall.

I've not won the lottery, do you think the cultured marble products will suffice?

Will these synthetic products loose their shine over time? Is it possible for the average person to install cultured marble products? Can you repair pieces that are damaged? Mack T., Liberty, IN

DEAR MACK: Let's set the record straight before we go any further. Cultured marble is really not a totally synthetic product.

Real Marble Dust is Used

Real natural marble dust is used to make cultured marble. This ground-up marble dust accounts for over 75 percent of the volume of a typical cultured marble product.

The marble dust and liquid polyester resin form an attractive and durable bathroom and kitchen product.

I can attest to how cultured marble has rock in it because the sink and countertops made from it are quite heavy!


CLICK HERE to get FREE & FAST BIDS from local contractors who can clean and restore synthetic marble.

cultured marble

It's tough to see the veining in these giant solid sheets of synthetic marble. No grout lines make it easy to clean. Copyright 2017 Tim Carter

Marble Issues

It's important to realize, real marble can be a nightmare in a bathroom or kitchen environment. It's naturally porous and as such can stain easily. Hair coloring products, chemically reactive shampoos and conditioners, and many colored liquids can cause staining problems with natural marble.

Stain Resistant

High-quality cultured marble can withstand stains that might otherwise harm natural marble. The resin in the composite marble gives it this quality. This synthetic marble can stain so you don't want to be careless with any personal-care liquid or food item that's acidic.

History Of Cultured Marble

Another key point is the cultured marble industry is now quite mature and very interesting. It got its start in the late 1960's as a "garage" business. Small volume local fabricators sold their products to plumbing and building supply houses.

The industry continues to be quite fragmented and there are hundreds, if not thousands, of small companies who produce cultured marble all over the United States.

Quality Control

For this reason the quality of the finished product can vary widely from one manufacturer to another. Since the marble dust and polyester resin are mixed at the small factories, there can be errors or a fabricator may decide to use less of the most expensive ingredient to lower his costs.

Pro Association

Years ago, many of the leaders in the industry founded the International Cast Polymer Association. This group, at one time, had a certification process so consumers could tell what members made great products.

Certified members of the association are committed to making a high-quality cultured marble, granite, onyx and solid surface product. Cultured marble made by a certified manufacturer, should maintain its brilliance for many, many years as long as you care for it.

Many Products

Cultured marble can be used to create many bathroom and kitchen products. Sinks with integral tops, bathtubs, whirlpool baths, shower basins, back splashes, wall panels, etc. are all possible.

Since it's a molded product, manufacturers can create an infinite amount of designs tinted to any color. The clear finish can be ordered high gloss or satin from many manufacturers.

CLICK HERE to get FREE & FAST BIDS from local contractors who can clean and restore your synthetic marble.

Restoring Gloss

Cultured marble that has lost its shine can be restored by using Gel-Gloss or Counter Top Magic once a year. 

cultured-marble-polish

Here's a great polish for dull cultured marble. CLICK THE IMAGE NOW TO ORDER IT.

Repairing Scratches

It's possible to repair scratches, chips, and minor blemishes. A certified repair person can re-buff the surface with a special mixed gel-coat compound.

You can also use a DIY repair kit that can often make scratches or chips disappear.

cultured-marble-repair

This kit is Made in the USA and it says it's for marble. Any kit that says it will work on marble WILL WORK on cultured marble. If in doubt, contact the Cast Polymer Association for their best recommendation. CLICK THE IMAGE TO BUY THIS KIT NOW.

Cracks and broken pieces are virtually impossible to repair. It's not possible to apply a complete new clear finish to a cultured marble product once it's left the factory.

Install Tips

Installation of cultured marble tub and shower surrounds is really simple. The process goes quickly if the wall surfaces are plumb, square, and flat.

The walls behind the cultured marble should be flat white. Colored drywall or gray cement board can show through some light-colored marble products.

Dry Fit First

With this in mind dry fit each piece to make sure they are sized correctly. Remove dust from the back of each piece with rubbing alcohol before you apply clear 100-percent clear silicone caulk adhesive.

Three-Piece Tub & Showers

I prefer to start my installations with the piece that goes on the wall I face as I enter the tub or shower. If you install the side wall pieces first, your cuts on the final piece have to be perfect.

That can be tough for a beginner. Caulk all seams with a colored 100-percent silicone caulk that will closely match the cultured marble.

No Abrasive Cleaners

Cultured marble is easy to care for once installed. Avoid any cleaning product that contains abrasives. Use a squeegee after each shower to quickly remove water drops from walls.

Hard water deposits can be dissolved easily with white vinegar applied from a spray bottle. Apply the vinegar and wait for 45 minutes to an hour.

Rinse the softened deposits with clear water and a sponge or cleaning rag. Heavy hard-water deposits may require multiple vinegar spray applications.

CLICK HERE to get FREE & FAST BIDS from local contractors who can clean and restore synthetic marble.


Column 218