How to Paint Aluminum Gutters

paint aluminum gutters

Paint aluminum gutters | Here are a typical aluminum gutter and downspout. The front of the gutter is filthy and covered with diesel-fuel soot from tens of thousands of trucks that traverse the interstate highways just a few miles away. Zebra stripping you see on the face of gutters is often from diesel soot that sits on the small flat ledge on top of the gutter and then runs down with each rain. Stain Solver oxygen bleach will CLEAN the zebra stripes. CLICK THIS IMAGE NOW to ORDER Stain Solver magic oxygen bleach. (C) Copyright 2017 Tim Carter

"The key to repainting aluminum gutters and downspouts is making sure they're clean and that you use the right primer if you use a common paint that contains ammonia."

Paint Aluminum Gutters Checklist

DEAR TIM: Many years ago, I had white aluminum gutters and downspouts installed on my home. They're in great shape except for the faded paint finish.

I want to paint aluminum gutters now! Can I paint the aluminum surfaces and if so, what is the best way? I'm thinking of pressure washing the entire exterior surface of my home before painting. Is this a good idea? Leslie M., Linden, NJ

Related Links:

Aluminum Siding Painting Tips

Paint Your Aluminum Siding

Aluminum Siding - Paint and Primer Tips

DEAR LESLIE: I've got good news and bad news. Let's start with the good news first.

You can paint aluminum gutters. It's not hard to do, but if you make a mistake, the next time it rains they'll look like a blistered hot dog sweltering on a grill at a Fourth-of-July picnic.

Does Paint Stick Well to Metal?

Much to the surprise of many people, metal surfaces actually are very compatible with paint. Just look around you at all of the painted automobiles, appliances, and commercial steel buildings and metal roofs.

Aluminum is especially paint-friendly as you've witnessed on your own home. Since it doesn't rust, blistering or peeling of factory-applied paint finishes on aluminum is very rare.

What Is the First Step in Painting Aluminum?

The key to repainting aluminum gutters and downspouts is making sure they're clean and that you use the right primer if you use a common paint that contains ammonia.

Does Pressure Washing Get Rid of All Dirt?

Pressure washing the gutters and downspouts and the rest of your exterior surfaces is simply not the best way to get them ready to paint. This method doesn't get rid of all the dirt.

The proof is available in two forms. When you shower each day, I'd venture to say that you don't just rotate in circles in the shower allowing a vigorous stream of water to do all the work. Even if soapy water came out of the shower head and you let that water hit your skin, you'd not be completely clean.

You most likely rub your skin using your hands with soap and water and then rinse with the water stream. The mechanical movement of your hands on your skin is what gets you clean. The soap helps lift oils and dirt from your skin as well to get you even cleaner.

Do Car Washes Get Cars Really Clean?

Do you want more proof? Take your car to a self-clean car wash equipped with a pressure washing wand. Clean your car allowing the tip of the pressure washer to get as close to your car as you feel comfortable.

After leaving the car wash, pull out into the parking lot and allow your car air dry. Take your fingers and wipe them across the paint. I guarantee you that you'll remove a thin layer of dirt that was left behind by the pressure washer.

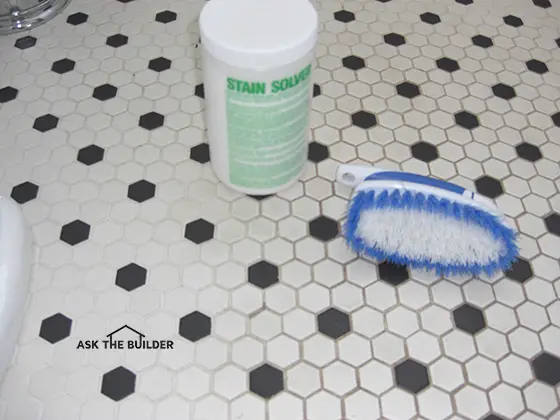
What is Stain Solver?

Oxygen Bleach

Stain Solver is MADE in the USA with USA ingredients that are food-grade quality. CLICK THE IMAGE to order some NOW.

I'd use Stain Solver certified organic oxygen bleach to wash the gutters, downspouts and entire house to get it clean

Stain Solver is a pure powder you mix with warm tap water. Stir until dissolved and put the solution in a garden hand-pump sprayer.

Stain Solver is Made in the USA with USA ingredients.

Spray the surfaces you want to clean and allow the oxygen-bleach solution to bubble and fizz. Work in the shade or early morning if you can. You don't want the solution to evaporate.

You want the Stain Solver solution to soak and work on the surfaces for about 15 minutes before you continue to wash. Don't allow the solution to evaporate.

How Should I Clean the Aluminum Gutters?

Continue to wash your house and the gutters and downspouts as you would your own body.

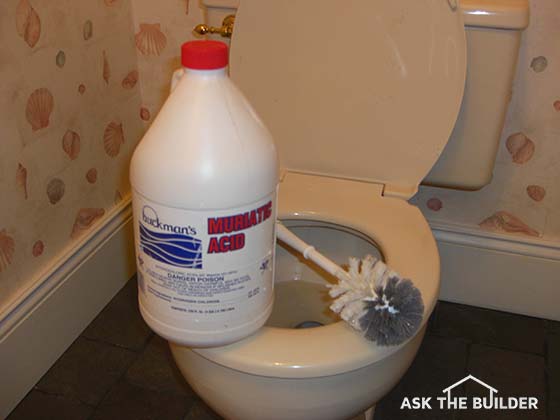
I think the best thing to use is a great brush on a pole like RV owners use.

RV Brush

This is a great RV brush that's got an adjustable handle. It's perfect for cleaning siding. CLICK THE IMAGE NOW TO ORDER ONE.

These brushes are stiff enough to get rid of dirt and algae, but soft enough not to scratch window glass, paint or siding.

Should I Use Liquid Dish Soap?

Mix some liquid dish soap in the garden sprayer along with the Stain Solver solution. I prefer to use liquid dishwashing soaps as they make lots of suds. Spray this solution onto all the surfaces just before using the RV brush. Keep the RV brush wet with the soapy solution.

Rinse the surfaces as soon as you stop scrubbing. Don't allow the dirty solution to dry on the surfaces.

Be sure to scrape any loose paint before you wash. If you have wood on your home, you'll probably need to scrape a second time after washing. Paint adjacent to bare spots of wood always seems to pull away once the rinse water dries.

What About Chalky Paint?

After the gutters and downspouts are dry, they still may be chalky. This is normal. The chalk is simply pigment particles at the surface of the original paint that has been loosened by the harsh ultraviolet (UV) rays of the sun.

Are the Paint & Primer In One a Good Product?

Modern paints often say they're a paint and primer in one. That may be well and good, but you need to look on the label to ensure it doesn't contain ammonia, a common household chemical.

If you want a great spray paint that's SAFE to use on aluminum gutters and downspouts, then consider X-0 Rust. This is a fantastic oil-based spray paint that will bond well with clean aluminum. It comes in different colors, including white.

X-O Rust Paint and Primer spray can

Here's a spray paint that's great for steel beams and columns. It contains a metal primer. This brand also is available in quart or gallon cans if you have LOTS of steel to paint. CLICK THE IMAGE TO ORDER IT NOW.

Is Ammonia in Paint a Problem?

You've now reached the most important part of the job - the primer.

IMPORTANT TIP: Avoid using any latex paint primer that contains ammonia. This ingredient is often listed on the paint can label or a technical sheet that the paint store has on file.

Ammonia can react with oxidized aluminum that is hiding inside small pin holes or bare spots on your gutters and down spouts. When this happens, the chemical reaction creates a gas bubble just beneath the skinned over latex paint.

What Causes Bubbles in the Paint?

The next time the air pressure drops in advance of rain storm or shower, the bubbles actually inflate! When the pressure rises as the weather clears, the bubbles mysteriously disappear. Keep in mind the paint film is a latex film much like a balloon or gloves a forensic scientist wears.

Are Special Primers a Good Idea?

There are two primers that work great for faded aluminum. Get the clear acrylic bonding primer shown below that penetrates the chalky aluminum. This product forms an excellent foundation for a final coat of 100 percent acrylic paint.

Clear Bonding Primer

This is a great clear bonding primer. CLICK THE IMAGE NOW TO ORDER IT.

It'll say on the label that's it's approved for use with aluminum.

If you can't locate this nifty clear primer, then use a regular oil-based metal primer. The trick is to thin the primer with 16 ounces of thinner per gallon of paint.

Feel free to add some pigment to this primer if you feel it will get you close to the final color of your trim.

Try to apply the final coat of paint within 24 hours of applying the primer. The top coat paint will bond much better if you can do this.

Companion Articles:  Aluminum Siding Painting Tips, Paint Your Aluminum Siding, Aluminum Siding Paint Manufacturers, Aluminum Siding - Paint and Primer Tips

Column 274

Ceramic Tile Wall Gap Issue

ceramic tile wall gap

This is a horrible mess. Don't ever accept poor workmanship like this. (C) Copyright 2017 Tim Carter

Ceramic Tile Wall Gap TIPS

DEAR TIM: I’m having a small bathroom remodeled. My wife and I thought we did our due diligence and hired a great contractor. I came home from work to discover the ceramic will tile has a gap issue.

The back of the decorative edge tile is floating above the adjacent wall by almost one-half inch. The remodeling contractor tells me the tile setter is going to fill the gap to make it go away. Is this normal? I’ve never seen the tile sit higher than the adjacent walls.

What could we have done to prevent the issue and should the tile be torn out and redone? Chris C., Washington, DC

DEAR CHRIS: Oh my goodness! The photo you sent made my eyes cringe. That’s got to be the worst ceramic wall tile mistake I’ve ever seen.

Shame on the contractor for trying to cover up for his tile setter’s poor workmanship. The buck stops with the remodeling contractor and he should have known about this issue before it became one.

Before I address what you could have done, let’s talk about what the tile setter should have done and the options available to you now at this point. When I see mistakes like this, I often wonder how many homeowners back down and allow the work to remain in place.

CLICK HERE to get FREE & FAST BIDS from local tile contractors who'll do a great job. Just show them photos.

Keep Eyes Open

You did a magnificent job over the years looking at other ceramic tile installations and filing away in your head what looked good to you, or at the very least, what was the baseline norm.

Flush Finishes

As you said, you’ve never seen tile sit so high off a wall. That’s because professional tile setters know to make sure that the base they put their tile on is flush with the adjacent finished wall surface.

Tile Setter Innocent?

I know this sounds crazy, but the tile setter may not have made the mistake. It’s very unlikely, but perhaps the wrong thickness of finished wall material was installed after the tile backer board was already up. I’d say the odds of this are very small, but it’s a possibility.

Contractor In Charge

In any event, the buck stops with the remodeling contractor. It’s his job to make sure all aspects of the job are progressing and all the correct materials are on the job so the final product is perfect, or nearly so.

Common Thickness

Most builders and remodelers use one-half-inch drywall on the walls in bathrooms. The manufacturers of the tile backer boards, both the cement board and the waterproof gypsum-core backer board, make their products the same thickness so the back side of the tile sits just about one-sixteenth or one-eighth-inch above the surface of the drywall after the tile’s installed.

This smaller gap is created by the compressed thickness of the organic mastic or the cement thinset the tile setter uses to attach the tile to the backer board. The gap is easily filled with the tile wall grout and it looks great once complete.

CLICK HERE to get FREE & FAST BIDS from local tile contractors who'll do a great job. Just show them photos.

Straight Walls

It’s also important for the rough carpenter to get the wall framing perfect so all this works out. The wall studs can’t have horrible crowns or be out of plumb. A crown is a hump in a wall stud that creates a bulge in the wall. If the crown points the other way, t creates a depression in the wall. Both are bad when you’re installing large pieces of ceramic tile.

Steel Studs

Great remodelers and builders consider using galvanized steel studs in locations where there will be tile. The steel studs are perfectly straight. If installed plumb and square, the finished tile work looks amazing.

The other advantage to using steel studs in these areas is they don’t warp or shrink. Modern lumber has been hybridized by the lumber companies so it grows faster in the forest. The downside to this is the light-colored spring wood bands are huge and the lumber is much less stable than lumber from even forty years ago.

Fixing The Problem

Here are a few options you have at this point. You can remove the tile and start over, but this is going to be very painful. I’m not at your home and don’t know if this is possible, but the contractor may be able to install an additional layer of drywall on the existing drywall to correct the error.

Drywall comes in different thicknesses including 1/4-inch, 3/8-inch, 1/2-inch and 5/8-inch. One of these sizes may work perfectly and the drywall might slide under the overhanging edge of the tile.

Tile Tools

What tools do you need to complete a simple tile job? Here's a list:

  • tape measure
  • pencil
  • tile cutter
  • nippers
  • a 1/4 by 1/4 inch v-notched trowel
  • a hammer
  • some 6d finish nails
  • 8 lineal feet of straight 1/4 inch wood lattice strip
  • putty knife
  • 3-inch wide-bladed scraper
  • grout sponge
  • rubber grout float
  • several buckets
  • accurate 4 foot level

Click the image below to BUY all, or some, of the tools in the above list.

ceramic tile tools list

CLICK THIS IMAGE NOW TO ORDER ALL THE TOOLS YOU NEED TO DO CERAMIC TILE.

Preventing the Problem

While this is lots of work, here’s how you might have prevented the error. You could have downloaded from the Internet lots of detailed photos of exactly how you expected everything to look once the job was complete.

Or, you may have taken lots of great photos from model homes you may have visited over the years. I’m talking about close-up photos of great details of tile work, door trim miter joints, baseboard details where it meets flooring, kitchen backsplashes, etc.

Photos In Bids & Contract

These photos should have been part of the bid package plans and specifications so each contractor knows the level of quality they must achieve. They should also have been part of your written contract so you can use them to withhold payments until the work meets your expectations. Few will take the time to do this, but it pays huge dividends to those homeowners that refuse to *hope* everything works out.

CLICK HERE to get FREE & FAST BIDS from local tile contractors who'll do a great job. Just show them photos.

Column 1182

February 5, 2017 AsktheBuilder Newsletter

If you're a new, or newer, subscriber, then you've got no idea about what's going to happen this issue.

Every now and then I share an amazing new product with you in a fun and challenging way.

Today's one of those days.

I'm VERY EXCITED about this new product because it's a game changer.

It's also a product you can use on something you've previously purchased so that means everyone gets to benefit!

Win Win Win indeed just like one team's going to tonight!

Tell Me More Tim!

This is so easy and it's just a few steps.

Step One is to click all the following links and study the photos closely. You can CLICK the photos once there to see a LARGER ONE. Some have multiple views! Each one is different.

Mystical Blue Glow & The Red Diamond

Hidden Art Gallery & Trilobite Vase

The Great White Whale

African Safari and Telephone Pole Indoors

Two Giant Ghost Eyeballs & Hidden Red Face

Step Two is to CLICK HERE and answer my questions.

You can try to guess how much coffee I had creating the multiple-choice answers. BWAHAHAHAHAHAAHA!

LE Johnson NEW Soft-Close Door Hardware

If you took the time above to check out all the eye-popping photos, you're in luck.

Each of the doors, and any others you can DREAM OF, can be equipped with the new LE Johnson Soft-Close kit.

CLICK HERE to see it.

What's so great about this NEW hardware that's hidden up above the doors?

  • Prevents door SLAMMING
  • Reduces NOISE for those sleeping
  • Prevents pinched fingers - Yeeeeeouch!
  • Reduces wear on painted or stained doors & jambs
  • Installs in less than an hour

You can put this great hardware on these LE JOHNSON pocket, sliding or wall-mounted doors kits:

  • 138F
  • 134F
  • 100PD
  • 100SD
  • 2610F
  • 1500
  • 1562
  • 2710

CLICK HERE again to see this very cool soft-close hardware. Oh, and here's the best part:

LE Johnson Soft-Close hardware, as well as all the other stuff they make, is Made in the USA.

Good ole Indiana!

That's quite enough for today!

Please realize you clicking the above links makes it possible for me to continue to provide this FREE newsletter to you.

Without the support of fantastic companies like LE Johnson, I'd not be able to spend the time to create this content each week for you.

Tim Carter
Founder - www.AsktheBuilder.com

Do It Right, Not Over!

The Existing Home Inspection

Home inspection

I don't know about you, but I can clearly see a patched crack in this brickwork. Structural defects are very hard to disguise, but rest assured people try to do it all of the time.

Existing Home Inspection TIPS

DEAR TIM: My husband and I are getting ready to purchase an existing home. We don't want to buy one with lots of defects. Can we inspect the house ourselves or is it necessary to have the house inspected by a professional?

If so, how do you locate a good house inspector? What types of things should we be looking for as we walk through the house? Sally M., Bedford, IN

DEAR SALLY: Many years ago I used to do home inspections for buyers before there were inspectors. The buyers I worked with felt that a seasoned builder knew what to look for in a house, and how to spot small problems before they become big problems.

Ever since the early 1980s, the home inspection industry has become a big business. Just about every home buyer in my town requests an inspection from a full-time home inspector. Not only is it a good idea for existing homes, but home inspections are also a swell idea for new homes too.

Trained Eyes

I doubt that you can do a thorough home inspection. A knowledgeable home inspector takes years to train. The best inspectors have lots of field experience, have passed written examinations, are fully insured and take ongoing continuing education.

CLICK HERE to get FREE & FAST BIDS from local home inspectors.

Bogus Inspectors

There are several national associations out there that home inspectors belong to. Some are legitimate and others just sell worthless certificates.

You want to deal with a home inspector that's been trained and is knowledgeable about both patent and latent house defects.

When you've forged the initial contract with a seller, be sure to use the absolute best inspector you can find. Ask the inspector to provide you with a certificate of insurance that indicates he/she has professional liability or errors and omissions coverage. Be sure that the policy is current and that there is enough coverage to pay for a mistake(s).

Inspections Save $$$

An expert home inspection can save you hundreds if not thousands of dollars. A competent inspector will spot problems that may cause you to rethink your purchasing decision.

Walk, No Run, Away

Sometimes it is better to walk away from a problem house rather than try to spend years of hard earned dollars fixing problems. Buyers are often blinded by dreams that obscure blatant defects and flaws.

Professional inspectors have no emotional ties to the transaction and are there to find flaws. Don't ever purchase a home that's got a visible structural defect. It's almost impossible to hide them and a future buyer will penalize you and try to get you to lower your price.

DIY Initial Inspection

Hiring a professional inspector costs hundreds of dollars. Back in 2008 when I purchased an existing home in New Hampshire I paid an ASHI inspector, they're the best around, $495 to look over the house to make sure I didn't miss anything.

Imagine if the inspection showed up a defect and I backed out of the deal? Yes, I would have saved money, but it cost me $495 to find that out. In today's market that inspection fee has to be much more.

I knew what to look for. Do you? My guess is you'd overlook about ten, or more, things that would be giant flashing red lights.

I developed a very cool checklist. You use it to spot obvious bad flaws in a home BEFORE you call in the expensive inspector. Why spend more than $500 when you can identify flaws for $17?

My checklist helps you locate obvious defects as you walk through a house for the first time. If you discover enough problems, you may choose not to make an initial offer on a particular piece of property.

CLICK HERE NOW to get my DIY Home Inspection checklist. It will allow you to SPOT a lemon before you make an offer!

Structural Problems

I suggest you begin by looking for obvious structural problems. These can be cracked foundations, slanted floors, bowed or bent beams, doors and windows that don't fit uniformly within a frame, cracks in brickwork and stucco, severely cracked concrete floors and slabs, etc.

CLICK HERE to get FREE & FAST BIDS from local home inspectors.

Expensive Repairs

Structural problems tend to be the most expensive problems to repair. Houses with structural problems can also be harder to sell in the future. The repairs often leave scars. (See photo at top of this column.) A future buyer will see a repair attempt and possibly wonder if the problem has really been rectified. You may suffer financially if this happens.

Water Nightmares

Moisture problems are sometimes easy to spot. Look for stained ceilings, walls, interior foundations, basement floors, exterior siding, damp crawlspaces and moisture around plumbing water and drain lines.

Hunt for efflorescence salts.

These fluffy gray-white powdery deposits can be found along cracks in basement floors and walls and in masonry work. They are usually a sure sign of water infiltration or slow seepage.

Flooded Basements & Firemen

Consider a visit to the closest firehouse. If the fire department has made visits to pump water out of the house for any reason, it should show in the public record of their run activity.

Great Drainage

Inspect the exterior for drainage problems. I prefer to see a minimum of four to six inches of foundation projecting above the soil around the entire house.

Soil should slope at least 6 inches within the first ten feet of run away from the foundation. Look for raised planting beds that can trap water against a house.

Beware Realtor Trick

I was a licensed real estate broker in Ohio for nearly twenty years. Believe me when I say there were unethical salespeople and brokers in the marketplace.

The unethical professionals would steer you to a substandard inspector so the deal doesn't go south. Be VERY CAREFUL about using the inspector the realtor recommends. See below.

Best Home Inspectors

When you finally decide to hire an inspector, beware of slick sales pitches and testimonials. Some associations require that an inspector simply send in an application and a small fee to become certified. You want an inspector that belongs to an association that requires experience, written examinations and continuing education. Don't settle for less!

IMPORTANT INSPECTION TIP:

At the time this column was written, the American Society of Home Inspectors (ASHI) had the toughest set of requirements for membership of all of the inspection associations. Many professional engineers who do home inspections are ASHI members.

EXTRA NEWS from Tim Carter:
Purchase my Easy-to-Use Home Inspection Checklist Now. This Simple-To-Use Tool allows you to spot many defects before you have to hire a real inspector. You can then eliminate a house and move on to one with fewer defects.

You have nothing to lose. If my checklist doesn't work for you, I'll give you your money back. Oh, one more thing, it's an Instant Download! You can have the checklist in your hands just minutes from now!

CLICK HERE to get FREE & FAST BIDS from local home inspectors.

Related Articles:  Home Inspectors & Buying New HomesHome Inspection ChecklistHome Inspector Certification Associations

Column 248

Toilet Bowl Cleaner

Toilet Bowl Cleaner

The normal toilet bowl cleaners you get at the grocery often don’t have the power to really clean a toilet. You may need to use muriatic acid. ©2017 Tim Carter

Toilet Bowl Cleaner TIPS

DEAR TIM: I’m at my wits end with toilet bowl cleaners. My toilet has light and dark stains in the bottom of the bowl as well as up under the rim.

I’ve tried all of the national-brand the store-bought toilet bowl cleaners and even the automatic toilet bowl cleaners that fit on the rim of the bowl and stick to the bowl.

None of them do anything to cut the stains. What’s causing the stains and what, if anything, can I do to get my toilet looking respectable. It’s embarrassing and I’m about ready to rip it out and purchase a new toilet. Help me please. Amy H., Lexington, KY

This popular column was shared with all my readers in the April 3, 2015 AsktheBuilder Weekend Warrior.

DEAR AMY: Oh, I’ve been where you’re at. I remember years ago suffering trying to get a cleaner toilet bowl using all the different products at the grocery store as well as every type of brush and scrubbing pad known to man and woman.

I have clear memories of wearing rubber gloves and goggles trying to restore a deeply stained toilet in the basement of a past house I owned. Believe me, it didn't take long to get frustrated like you.

CLICK HERE to get FREE & FAST BIDS from local cleaning companies that will follow the advice below to get your toilet CLEAN.

Tear-Pants Limestone

I got my toilets sparkling clean, but only after I stepped back and thought about some of the things I had discovered in my college chemistry and geology-lab classes.

Decades ago I was a geology student attending a six-week field course camp in the Tobacco Root Mountains of Montana. CLICK HERE to get a fantastic map of this gorgeous mountain region.

tobacco root trail guide

If you want to go hiking instead of cleaning your toilet, I don't blame you. Use this great book to wander across trails I walked while mapping rocks. CLICK THE IMAGE TO ORDER THIS RARE BOOK.

There I was introduced to the infamous tear-pants limestone. We always used a drop or two of acid I carried with me in a tiny bottle to test to see if the rock was, indeed, the sinister limestone.

If the acid reacted with the rock, it would fizz when the acid was dropped on it. When you saw this bubbling and fizzing, you knew the rock contained calcium and magnesium. There was no need to sit on the rock and tear your pants, you knew it was the evil limestone.

Tiny Rocks In Your Toilet

You’re a victim of hard water and lime buildup. It’s very common in many areas of the USA, especially those that have a high concentration of certain dissolved minerals in the water supply.

You have microscopic limestone rocks growing in your toilet and it's all your fault.

A Layer Each Flush

If you have calcium, magnesium and a few other elements in your water, these can create multilayer deposits inside a toilet. Not only can these deposits be unsightly, but they also can significantly impact the performance of the toilet.

If your toilet is like several I’ve had, my guess is that you’ve also noticed that the flushing has become sluggish or not as powerful as it once was.

Trapped Dirt and Stains

The ugly deposits happen when dirt gets trapped in between layers of hard water deposits in the toilet. This is most common under the rim of the toilet bowl and along the sides of the toilet bowl above the water line.

Each time you flush the toilet these areas of the toilet get wet. Once you leave the bathroom, the water evaporates leaving behind an ultra-thin film of minerals. Dirt can easily attach itself to this coarse layer that resembles sandpaper.

Hundreds / Thousands Of Layers

The next flush introduces another sheet of water containing the minerals. The water evaporates and now the fresh mineral buildup locks in the stain. Imagine this happening thousands of times over several years worth of flushes.

Blocked Syphon Jet

You can also get a lime layer buildup in the bottom of the toilet bowl that starts to block the syphon-jet hole. It’s very important that this hole is wide open so that the maximum amount of water can enter the toilet bowl as fast as possible to initiate the flush. Water entering through the rim of the bowl can also be slowed by mineral deposits in the small holes under the rim.

Muriatic Acid

The best toilet bowl cleaner I’ve come across in these situations is muriatic acid. CLICK HERE to have it delivered to your home.

muriatic acid

Muriatic acid is powerful and needs to be treated with lots of respect. CLICK THE IMAGE TO ORDER SOME NOW.

IMPORTANT SAFETY TIP: Muriatic acid is a very powerful chemical that should be used with great care and respect. The fumes are very nasty and the acid can easily cause skin burns and ruin fabrics that it soaks into. Before using it, read the warnings on the label.

Alakazam Acid!

When this acid contacts lime and other hard-water deposits, it rapidly dissolves them. Once the deposits have been removed, the toilet looks brand new.

Muriatic acid will clean the stains from the bowl, the deposits in the syphon-jet hole and the rinse and vortex holes under the rim of the bowl.

CLICK HERE to get FREE & FAST BIDS from local cleaning companies that will use muriatic acid. Just ask them.

Sanitize Bowl

I always start the cleaning project by using the standard toilet bowl cleaners to sanitize the bowl. Just clean the toilet as you normally would with regular cleaners.

Once this is complete, I dump five gallons of water into the bowl as fast as I can.

This rapid influx of water simulates a flush and since no water is coming from the tank it leaves a small amount of water in the bottom of the bowl.

Add the Acid

Then I slowly pour into the bowl about 12 ounces of muriatic acid. You can add more, but it's not necessary.

Safety Gear

Be sure you have the bathroom well ventilated, preferably with a window open to exhaust the acid fumes. Wear tight-fitting goggles, rubber gloves, old clothes with long sleeves, etc. so that you have virtually no skin exposed. Anything that the acid touches, including good towels, great carpeting, a throw rug, the side of the vanity cabinet, etc. will be RUINED by the solution.

Swish The Solution

Carefully use a toilet brush to spread and swish the acid solution under the rim of the bowl and on the sides of the bowl. Do this multiple times over a period of 30 minutes. Continue to apply the solution to the underside of the bowl rim every 15 minutes for up to two hours.

Children and Animals

If you have small curious children and animals, do NOT do this job alone. You need an adult helper to keep kids and animals away from you and the toilet at all times.

If you have to leave the room, always put the toilet lid down to prevent animals from accessing the acid solution. If children are in the house, never leave the toilet alone. Work until the job is finished.

Long Soak - Minimal Scrubbing

The muriatic acid will absolutely remove the hard water deposits that are trapping the stains. The longer it soaks the less you have to scrub. Never use a metal scrapper, screwdriver, etc. to dislodge any deposits. The acid will do the work for you, it just may take awhile.

No Abrasive Cleaners

Avoid using any abrasive toilet bowl cleaners. These can scratch the smooth glazed surface of the china. Take your time and slosh the acid around the bowl and twist the brush in all visible areas. Believe me, the stains and deposits will disappear in time. Depending on the thickness of the deposits, it can take hours for the acid to break them down.

Neutralize The Acid

It's best to completely neutralize the muriatic acid before you get rid of it. Some states may not permit you to flush this chemical into a public sewer system. It's also not a great idea to send acid into a septic system.

IMPORTANT TIP: This is why I instructed you to pour the bucket of water into the toilet bowl to start this process. This allows an ample amount of storage space in the toilet bowl so the acid doesn't enter the drain pipe beneath the toilet.

If you had added the muriatic acid to the normal amount of water that's always in a toiled bowl, for every ounce of liquid you put in the bowl an ounce goes down the drain pipe under the toilet. Since the acid begins to mix immediately with the water in the bowls some acid would go down the drain.

Baking Soda

To neutralize muriatic acid, you just add common baking soda. You'll need just over one-half pound of baking soda since you added just 12 ounces of muriatic acid to your toilet.

baking soda box

This is standard baking soda. Pour it in the bowl SLOWLY so the acid solution doesn't splash out! CLICK THE IMAGE NOW TO ORDER THIS BAKING SODA.

The formula is 5.5 pounds of baking soda for each concentrated gallon of muriatic acid. Keep in mind your solution is diluted because there was water already in the bottom of the toiled bowl before you added the acid.

Allow the baking soda work to neutralize the acid for about thirty minutes. Flush the toilet several times when you think your finished. Repeat the process if there are stubborn stains that didn’t come clean the first time using the industrial-strength toilet bowl cleaner.

CLICK HERE to get FREE & FAST BIDS from local cleaning companies that will use muriatic acid. Just ask them.

Column 843

Foundation Drain Tile Installation

Drain Tile

The builder is doing just about everything right installing this drain tile. The drain tile is the white pipe next to the footer. He should have 2 or 3 inches of gravel under the pipe. If the pipe has two rows of holes, they should point down in the 4 and 8-o'clock position. Finally, he should cover the drain tile with about 2 or 3 feet of gravel, not 3 inches like you see. He did put the pipe alongside the footer instead of on top and he's covered the gravel with tar paper, so it doesn't get clogged with silt from the backfill soil. Copyright 2017 Tim Carter

"The basement, before the house is built on top of it, looks just like the typical in-ground swimming pool. Once the house is built, this swimming pool gets covered."

Foundation Drain Tile Installation TIPS

Foundation drain tile systems are one of the most important aspects of residential construction if your home has a full basement or crawlspace.

Drain tile systems are also one of the most misunderstood parts of the average home - both by most uninformed builders and homeowners.

Related Links

Foundation Waterproofing Systems and Tips

Water Sitting Around Shallow Foundations

Free & Fast Bids

CLICK HERE to get FREE & FAST BIDS from local contractors who can install drainage tile.

Where Is Drain Tile Placed?

Drain tile is placed deep in the ground alongside the foundation footing.

Because these systems are usually deeply buried and cannot be easily modified or corrected, it's vitally important that they are installed correctly. Foundation drainage systems which are installed properly can serve a dual role.

Drain Tile Pipe Video

Watch this video to see the correct white PVC pipe to use and the orientation of the drain holes.

He doesn't show this pipe along a foundation but what you see are the first three steps of doing the job right.

Foundations Are Covered Swimming Pools

Many homes around the nation have full or partial basements. These basements are really reverse swimming pools.

The basement, before the house is built on top of it, looks just like the typical in-ground swimming pool. Once the house is built, this swimming pool gets covered.

But most people don't want water in their basements. Foundation drain tile systems are the means by which groundwater can be transported away from your basement. If you want a dry basement, you must have fantastic drain tile and waterproofing on the outside of the foundation.

CLICK HERE to get FREE & FAST BIDS from local foundation drainage experts.

Is There Water in Soil?

There is water in the soil. Thousands of gallons of water can be in the soil on your lot.

The water content in the soil surrounding your house can fluctuate seasonally. There's always a point at which you can dig and hit water. Geologists often refer to this as the water table.

This water table rises and falls in response to the amount of precipitation in any given time period. The water table in many parts of the country can rise to within a few feet of the surface during wet spells.

How Does Water Move Through Soil?

The water in the soil is moving all the time. In almost all cases, it moves down a few inches then it begins to move sideways. Gravity is pulling it to the oceans around the world.

drain tile

Here's a side view of a typical house. The black clouds release rain. It falls into the soil and starts to go down, but then sideways. The bedrock under the soil generally, but not always, follows the shape of the soil above it. Soil depths can vary from several feet to tens-of-feet thick. ©2017 Tim Carter

Most people think that the water in soil moves straight down but in reality, it moves sideways through the topsoil and upper layers of the B horizon of soil.

Almost all homes are built on some sort of slope, so if you have acres of land above your home, the water in the soil is all marching and flowing towards your house.

Does Water Take The Path Of Least Resistance?

Water will take the path of least resistance. It can choose to go sideways through a crack in your foundation, or it can go down alongside your foundation through clean, washed gravel into a pipe.

I'm sure that you will agree that it is a better idea for the water to go down the pipe.

How Many Parts are There to Drain Tile?

A foundation drain tile system has four main components:

  • Drain tile pipe
  • Gravel
  • Gravel Protection
  • Water outlet

All of these elements must be installed for the system to function properly.

drain tile

Here are three of the four parts of the system. The missing part is what happens with the round drain pipe. It will either extend sideways to daylight if the slope is steep around the house, or it will go under the footing to a sump pit in the basement or crawlspace. (c) 2017 Tim Carter

How Big is Drain Tile Pipe?

The drain tile or pipe is usually 4" in diameter and is perforated or has pre-drilled holes along its length. Depending upon the type, it can be purchased in rolls up to 250' or in 10-foot sections. Fittings are available to allow you to go around corners or interconnect the pipe.

I've never been a fan of the rolls of black corrugated drain tile with the slits in the cracks. I prefer the more rigid white plastic pipe with two rows of drainage holes drilled into the pipe.

CLICK HERE to get FREE & FAST BIDS from local foundation drainage experts.

How Much Gravel is Needed?

Install at least at least 2 or 3-foot thick layer of gravel over the drain tile. More is better.

The filter media or gravel is used to cover the drain tile. Water can flow readily through this gravel and find its way to the pipe.

One customer wanted me to ensure his room addition basement never had water in it. He was willing to pay to have the high-side foundation wall that pointed upslope filled completely with the nice rounded gravel.

There was no way water was going to ever try to force its way into his basement when it had the chance to go straight down to the drain-tile pipe.

Remember, water takes the path of least resistance. Some soils, heavy clays, resist water movement.

What Type and Size Gravel?

The gravel that is used most often is large 1 - 1 1/2" diameter washed rounded gravel. This gravel is about the size of a walnut or large grapes.

Some parts of the USA have crushed gravel this size. It's not rounded, but that really doesn't matter. All that matters is that you just put in this rock and no sandy gravel. Sand slows down the movement of the moving water.

If your soil is like this, the water would rather go sideways into your basement than down through the clay soil to the drain tile.

How Do You Protect the Gravel?

You must protect the gravel with a barrier. It prevents silt and mud from the soil from clogging the gravel or the drain tile pipe.

During excavation, dirt removed from the hole is fluffed. This means that it is disturbed and broken up.

It's volume usually increases about ten percent. It's loosened and disturbed more during backfilling procedures.

Does Gravity Compact the Backfill Dirt?

As the soil gets disturbed, small dirt particles, or silt, are created and separated. These are carried through the gravel by the rainwater or snowmelt which enters this soil.

Very few builders take the time to compact the soil around the outside of a house so Mother Nature does it using water and gravity.

Without a barrier of some type covering the clean gravel, these silt particles immediately clog the gravel and drain tile and render it useless.

IMPORTANT TIP: Most builders often do not install this barrier. It's a HUGE MISTAKE to eliminate it. Do NOT ALLOW them to tell you it's not needed. They're either ill-informed or lying to you.

What Material Covers the Gravel?

The materials commonly used to stop the silt from getting to the gravel are straw or tar paper.

If you use straw, just scatter a 16-inch layer on top of the gravel before you put in any soil on top of the gravel.

Tar paper is easy as you just cut the correct width and lay it on top of the gravel.

Where Does the Drain Tile Pipe End?

The water outlet is simply the place where the collected water flows to. It can be one of two places:

  • Daylight - downslope from your home
  • Sump Pit - inside a basement or crawlspace

If you build on a hillside, your drain tile will simply 'daylight' or come to the surface. This happens naturally because the drain tile pipe is installed nearly level and as the ground falls away from the house at some point the pipe will be visible.

This is the best situation because your system depends entirely on gravity to work.

Are Sump Pumps a Good Idea?

No, sump pumps are a bad idea.

If you build on level ground, you have to install a sump pit. A sump pit is usually installed inside the basement of your home.

The pit is nothing more than a buried plastic container that resembles a garbage can. It's large enough for a sump pump to rest at the bottom.

The drain tile pipe runs beneath the footer to this sump. The collected water is then mechanically pumped from the sump.

Do Sump Pumps Fail?

Yes, sump pumps stop working and the basement or crawlspace floods. They typically fail in big storms when there are extended power outages.

Sump pumps also fail because the float mechanism gets jammed or the pump burns up.

Dry Wells Don't Stay Dry

Some people say to extend the drain tile pipe to an underground dry well. A dry well is a large subterranean pit filled with gravel.

The drain tile pipe runs to this pit and the water fills this pit.

These pits work well only in places that have very open gravel soils. Not many places have this soil. In most places, the soil is dense clay and the dry well fills with water and the water then backs up against your foundation.

Should Drain Tile Be Next To the Footing?

Drain tile pipes work best when placed alongside a foundation footing, instead of on top of the footing.

By placing the pipe alongside the footing, you lower the water table below your basement floor another 6-8 inches.

When Should Drain Tile Be Installed?

In new construction, install the drain tile immediately after the footing forms are removed. Cover the pipe with gravel to a level flush with the top of the footer.

If you choose to wait until the foundation is poured, there will be less room to work in, the side walls of the excavation could cave in, or extra concrete from the foundation pour could fall into the hole and have to be removed. Believe me, it's faster and easier to install the drain tile pipe and the first layer of gravel without the foundation walls in the way.

Install Piping After Waterproofing

After the foundation walls have been waterproofed you begin step two. Backfill over the pipe with at least a three-foot-thick layer of gravel.

If you can afford it, backfill with gravel to within 18" of the finish grade. You must think long term. Remember, it will be virtually impossible to dig up and add gravel in the future when your basement is leaking. The extra money spent now is well worth it.

Once the gravel is in place, cover it with a 16-inch thick layer of straw or a single layer of 15# roofing felt paper. This barrier will prevent the silt from the backfill dirt from clogging the gravel and drain tile.

Extra Protection

To really ensure your basement or crawlspace stays dry, install a Linear French Drain around your home once it's built. I created a fantastic step-by-step Streaming Video showing you how to do this.

Linear French Drain Streaming Video

Do your own DIY install of a Linear French Drain with Tim Carter's time-tested methods and materials! CLICK IMAGE TO ORDER NOW!

CLICK HERE to get FREE & FAST BIDS from local foundation drainage experts.

Column B14

Attic Insulation Batts or Blown In

attic insulation Insulation Map USA

Attic Insulation Batts or Blown In | This is a very good map showing the different insulation zones in the USA. CLICK THE IMAGE to get MORE INFORMATION.

Attic Insulation Batts or Blown In - Both Work Well

DEAR TIM: I'd like to add additional fiberglass attic insulation in my attic. I can install batt insulation myself. Blown-in fiberglass appears to require professional equipment.

Which type offers better performance? Are there advantages in using one type versus another? Are there any installation tips you can suggest? T.H.

DEAR T. H.: Both systems will deliver excellent results. However, if you intend to do the job with batts, you had better be a detail-oriented, patient individual. The thermal performance of fiberglass insulation is directly related to its ability to trap and maintain very small pockets of air.

Attic insulation batts must be cut tightly and you can't have gaps. Sloppy people aren't suited for this job.

Blown-in fiberglass creates a seamless blanket in your attic. You might spend many hours kneeling in your attic to achieve this same result with fiberglass batts.

CLICK HERE NOW to get FREE & FAST BIDS from local insulation contractors.

Is Basement Foam Board Installation Hard to Do?

No, basement foam board installation is not hard to do. You might consider it instead of batts in your basement.

How Much Insulation Do I Need?

The US Department of Energy has published guidelines for years about how much insulation you should have for where you live. It makes a big difference.

Insulation Map USA

This is a very good map showing the different insulation zones in the USA. CLICK THE IMAGE to get MORE INFORMATION.

Insulation Table

This table explains what you need to do depending upon which zone you live in. Look up at the map. (C) Copyright 2021 Me and every other US Taxpayer

Remember, these are minimum guidelines. You can add more, you just have to do the math to see if you'll get a return on investment for as long as you own the home.

The trouble is, it's not easy to do this analysis. But if you've decided to hire a professional company, they can blow an additional 6 or 8 inches in your attic for just a little bit more money.

Is Insulation Cheap to Install?

Insulation might not be cheap to install if you hire a pro. There are lots of costs the pro has to cover to get the truck, materials, and workers to your home.

The primary cost of the job when a pro comes to your home is:

  • Administrative office staff
  • Salesman commission
  • Drive time to & from your house
  • Truck wear & tear
  • Workmen labor

If it takes the crew just 30 minutes more to add 8 more inches, then the cost is going to be not that much more.

CLICK or TAP HERE to get FREE BIDS from local contractors who will install blown or batt fiberglass.

Are Fiberglass Batts Better Than Blown?

The thermal performance or resistance to heat flow (R-factor) is not the same when comparing fiberglass batts to blown-in fiberglass. Batts offer a slight advantage. You can usually obtain an R-factor of 3.1 to 4.2 or slightly higher per inch of material with batts. The R-factor of blown-in fiberglass is usually 2.3 to 2.8 per inch of material.

Once installed and expanded to the uniform, manufactured thickness, batts offer a known R-factor. Blown-in insulation thickness can vary in an attic space. This will lead to non-uniform R-values.

fiberglass attic insulation roll

This is name brand unfaced attic fiberglass insulation. It's great stuff. Wear a mask or you'll be coughing for days. CLICK HERE TO ORDER AND HAVE DELIVERED TO YOUR HOME.

Compressed blown-in fiberglass offers a lower R-factor. It needs to be fluffed up but not so much that it doesn't trap air. It's not an easy thing to describe unfortunately!

Should I Do a Simple Cost Analysis?

Before you make your final decision, do a cost analysis. You may be pleasantly surprised.

I recently priced the cost to upgrade a 1,500 square foot attic from R-19 to the new thermal standard of R-49 in my climate zone. The total cost to have the fiberglass blown-in by professionals was $0.60 per square foot or $900. (2017 prices)

I then called the local retail outlet to price batt insulation. The cost of just the material was $0.62 per square foot! (2017 pricing) Clearly it made better sense for me to have the job done by professionals.

CLICK HERE NOW to get FREE & FAST BIDS from local insulation contractors.

If you can find fiberglass batts deeply discounted, you possibly can tackle the job and save some money. Wear a respirator to minimize throat irritation from airborne glass particles. Gloves, long-sleeved shirts, and goggles are also highly recommended.

Be sure to take your time while installing the batts around roof framing members. Carefully cut the batts so they fit tightly around each piece of wood. Oh yes, don't fall through the ceiling to the rooms below.

Fiberglass Insulation Video

Watch this video to give you an idea of what it's like to work with this itchy material!

Should the Batts Be Installed in 90-Degree Layers?

Install your new batts at a 90-degree angle on top of the existing insulation batts. This will help cover any gaps in the original installation.

Do Dark Spots Indicate Air Leaks?

Dark spots in insulation batts and blown-in fiberglass are indicators of air leaks. The fiberglass fibers capture the dirt particles in the air and create the dark spots.

Check your existing insulation for dark spots. These dirty spots may be locations of large air leaks from your finished living space. The existing fiberglass traps dirt from this air as it passes up into the attic. Locate and close these holes before proceeding.

Should Soffit Ventilation Slots Be Blocked?

Do not block soffit ventilation slots. These are the air passageways between your exterior soffits (eaves) and/or vents and the attic with your new insulation. Flow-through attic ventilation is very important.

You can purchase foam or cardboard baffles that fit in between the roof rafters as they pass over exterior walls. These baffles create an unobstructed pathway for air to enter your attic.

Can you Cover Recessed Lights With Insulation?

Never cover any recessed lights with insulation. Some say they're rated for it, but it can be dangerous if someone puts in an oversized light bulb and the heat sensor in the fixture malfunctions.

Don't cover any recessed light fixtures with fiberglass unless you are absolutely positive it is permitted by your local electrical inspectors.

Modern LED recessed lights that use less energy and burn cooler can be retrofitted into older recessed light fixtures. If you do this, you can then cover the recessed light housing and not create a fire hazard.

recessed light transformer kit

Use this kit to transform your energy-wasting recessed lights. It takes minutes working from inside the room. No repainting, no hassle! CLICK THE IMAGE NOW TO BUY THIS GREAT LIGHT. MULTI-PAKS are available.

Should Insulation Depth Gauges Be Put in the Attic?

Insulation depth gauges should be installed in an attic before blown-in insulation is installed. These work just like flood gauges on a river. You can see easily if the insulation is the correct depth across the entire attic.

If you decide to use blown-in insulation, install scrap lumber depth gauges in the attic. These pieces of wood can be pre-marked with a crayon or spray paint to the desired finished thickness of insulation. Tack them to the ceiling joists in various locations. After the job is completed, you can pop your head up into the attic to see if the pros hit the marks!

CLICK HERE NOW to get FREE & FAST BIDS from local insulation contractors.

Column 165

LE Johnson Soft Close Q1 2017 Fun Quiz

Your job is to CLICK  the five links just below. Once at each page, study the photos you'll see. These links were shown in my February 5, 2017 AsktheBuilder Newsletter.

You can click each of the photos to see a BIGGER one.

This will help you later when you take the funny quiz below.

Some of the questions in the quiz below require you to look at fine details in the photos. It's FUN!

Then complete the FUNNY & EASY quiz below.

Good Luck - you'll need it.

IMPORTANT TIP: After you click SUBMIT, slide back up the page and CLICK THE LINK that allows you to see your answers and CORRECT answers with explanations and other secret links.

Easy Tile Grout Cleaning

Grout Cleaning

The grout to the left and lower left of the bottle of Stain Solver oxygen bleach used to be dark gray and filthy as you see on the right side of the photo. It just took a few minutes of soaking and a little scrubbing to get these dramatic results. CLICK THE IMAGE NOW TO ORDER STAIN SOLVER. (C) Copyright 2017 Tim Carter

Tile Grout Cleaning TIPS

DEAR TIM: I’ve tried tile grout cleaning on the floors of my home with little success. The grout just doesn’t come clean. The tiles themselves don’t look like they used to even though I’m using those newer pad-cleaner contraptions.

Is there a miracle method that you know of for cleaning ceramic tile grout? Have you had this problem in your own home? Judith P., Forest Park, IL

DEAR JUDITH: Tile and grout cleaning was the bane of my existence for years at the last house I built for my family. When I built that home, my lovely wife selected a pure-white tile for our kitchen with a light gray grout.

WARNING: Kitchens and Light Grout

I warned her the grout would turn black, but my pleas for mercy fell on deaf ears. To this day, she says it was my idea.

As it turns out, the grout did turn nearly black, especially around the refrigerator and sink, no matter how hard I tried to clean it.

Dirt Soaks Into Grout

It became crystal clear what the issue was one day when I decided to really scrub the grout. Small particles of dirt on the floor were getting dissolved in water that was spilled on the tile.

This dirty water then soaked into the grout just out of reach of the bristles of the scrub brush. This was compounded by spills of liquids like red wine, cranberry juice, iced tea, deep-purple grape juice, etc.

Colored Liquids Stain Too

Any colored liquid that came into contact with the grout soaked into the sanded grout just like it would a sponge.

Pads are Useless

Regular soaps seemed powerless as well as tile and grout cleaning equipment that I rented. I can see why you’re having trouble with the pad cleaning tools as I’m convinced that these get up some of the dirt, but they leave dirt behind if the pads are not changed with great regularity.

The smooth pads are powerless to remove dirt from the grout because in most cases they never even touch the grout. Look closely at a tile floor and you’ll quickly see the grout is almost always recessed lower than the surface of the tile.

The pads just float over the grout never touching it.

Magic Stain Solver

Oxygen Bleach

Stain Solver is MADE in the USA with USA ingredients that are food-grade quality. CLICK THE IMAGE to order some NOW.

My tile & grout cleaning problems disappeared about years ago while I was researching how to properly seal and clean a deck. I interviewed a chemist who exposed me to a product I had never heard of - oxygen bleach.

This product is a powder mixed with warm tap water. The instant this happens, billions of oxygen ions are released into the solution.

These oxygen ions attack dirt and stain molecules blasting them apart. When this happens, they lose their ability to absorb light and the stains disappear.

Not only do they do this on wood decks, but this magic cleaning action happens on anything that’s water washable.

I discovered it works to remove algae, tough laundry stains, oil stains from car carpets, normal indoor carpet stains, and it de-odorizes too. It was indeed magic!

Sell It

Once I saw what it could do, I decided to start selling it myself. Kathy and I came up with the name Stain Solver because it solved every type of stain.

Mix, Stir & Pour

I tried some of this product and couldn’t believe what I saw. Following the instructions given to me by the chemist, I mixed the powder with hot water and stirred it until it dissolved.

I then poured this solution on the tile floor in my kitchen making sure the grout was completely saturated and covered with the clear solution. Then I walked away for 15 minutes allowing the oxygen ions to work on their own.

Grout & Tile Cleaning Video

Watch this video to see how powerful Stain Solver is. This is the exact process I did all those years ago to clean my kitchen floor.

I guarantee you'll get your floor tile grout as clean as mine. The trick is to mix it right and allow the solution to soak for 15, or more, minutes before you scrub. The longer you let it soak and work the LESS you have to scrub.

Let It Soak Then Scrub

After the wait period, I had to add some additional solution where it had soaked into the tile grout. I then used a stiff scrub brush and ran the brush along the grout lines between the tiles.

With almost no effort, the tile grout looked like new. When the chemist told me this would happen on the phone, I didn’t believe him. It sure pays to have an open mind!

Chlorine = TOXIC

You can get nearly the same results using chlorine bleach, but there are some disadvantages using this harsh toxic chemical. First and foremost, the fumes are powerful and make many feel uneasy.

The chlorine bleach is so strong that it can ruin the pigments in some colored floor grouts. If you splash the chlorine bleach on adjacent surfaces like cabinets or carpeting, it can take the color out of them. It’s a tough cleaner to work with.

Never Scrub Again!

Once my tile and grout were clean, I discovered a way to keep them looking that way. I hated getting on my knees to scrub and didn’t want to do that ever again.

One day, I decided to use the oxygen bleach powder in the mop water. I mopped the floor like normal, but instead of rinsing the floor right away, I let the cleaning solution soak on the floor for about 15 minutes.

I discovered if the grout is just lightly soiled, the dirt has not yet soaked into the grout. It didn't take long for the mop-water solution to attack the dirt on the surface and that which had penetrated into the grout.

My kitchen floor looked like new every week. The best part is the squabbles with my wife stopped and both of us had smiles on our faces. The old saying "happy wife / happy life" is true especially when the kitchen floor sparkles.

Different Oxygen Bleaches

You can buy Stain Solver oxygen bleach online.

Stain Solver is:

  • Certified organic
  • Non-toxic - no foul odor
  • Made in the USA with USA ingredients
  • Has much more active ingredient than other brands
  • Family-owned small business

Some other oxygen bleaches are available at retail stores for less money.

IMPORTANT BUYING TIP: The quality of the different oxygen bleaches varies to a great degree. Some big-name national-brands contain ingredients from offshore. They're not certified organic. They may trick you with language that makes you think they were Made in the USA, when in fact, they were packaged in the USA with offshore ingredients.

Not all of the products have the same amount of active ingredient. You’ll discover products that may have more filler in them than oxygen bleach. It pays to do research to get a product you can trust and really works well.

Stain Solver is that product. CLICK HERE NOW to order Stain Solver.

Column 817

How to Insulate an Older Brick Home

home insulation

Drill a two-inch hole in a closet wall to see how much space you have for insulation. © 2017 Tim Carter

How to Insulate an Old Brick House TIPS

DEAR TIM: My story-and-a-half brick home was built in the 1960's. It has no insulation in the walls as far as I can tell. Each contractor I have talked with wants to drill holes in my interior plaster walls and add insulation from the inside.

I prefer to have it done from the outside by drilling holes in the mortar joints between the brick. I don't want all of the dust and repainting mess inside my home. How would you approach this job? What are my alternatives? Bill B., Versailles, KY

DEAR BILL: The house you describe sounds exactly like that of my in-laws. My wife grew up in a brick home built in the 1950's just before your home was constructed.

The exterior of the home is used brick and the second-story dormers that project through the roof out the back of the house are wood frame. The exterior walls of the first story are solid masonry, not brick veneer which is the way most brick homes are now constructed.

Brick Veneer

Today's modern brick homes have a single-thickness of brick that is placed over a wood-framed structure. The wood walls can be covered with insulated sheathing and the wood-wall cavities can be filled with insulation.

CLICK HERE to get FREE & FAST BIDS from local insulation contractors.

Solid Masonry & Foam

Solid-masonry walls can be insulated with modern foam panels that separate the outer layer of masonry from the inner layer, but this method of construction was not in widespread use when your home was built.

Cheap Fuel

The majority of solid masonry brick homes that were built in the 1950's and 1960's were constructed at a time when energy costs were very low. Builders didn't worry about insulation and furnaces were lucky to be 60-percent efficient.

But the Mideast oil embargo of the 1970's changed all that and energy costs soared like a hawk in the sky.

Basement Wall Foam Insulation Video

Watch this video to see how you can use foam on the inside of basements to slow energy loss.

Brick & Block

The masons who built the structures used a finish brick for the outside facing that was usually about four inches in depth. The inner layer of the masonry wall was often concrete block or cinder block that was also a little under four inches in depth.

These block were laid immediately behind the exterior brick. If you can determine that your masonry walls are about eight-inches thick, you know there is no foam insulation between the brick and the hidden block.

The typical total wall thickness for a home built this way is:

  • 8 +/- inches for the brick and block
  • 3/4-inch for the furring strip nailed to the block
  • 1/2-3/4 inch for the interior drywall

Measure Your Wall

This adds up to about 9 and 1/2 inches. You can measure this fairly accurately at a window using a 4-foot straightedge or level that you place flat on the wall.

Slide it along the wall until the tip extends over a pane of glass. Measure between the tip of the level or straightedge to the glass. 

Do the same on the other side of the wall. Add the two dimensions together plus the thickness of the glass.

After the masonry work was completed, carpenters would follow behind and nail 3/4-inch thick by perhaps two-inches wide furring strips to the masonry walls. These wood strips were usually placed 16-inches on center and fastened to the masonry walls with hardened, cut nails. Large sheets of gypsum-based plaster lath were then nailed to the furring strips and the final plaster was applied over the lath boards.

Narrow Place

If your home is constructed in this manner, you can see the problem you have. The only void space that is available for insulating is the narrow 3/4-inch space between the furring strips.

You can confirm this narrow void space exists by creating a two-inch diameter hole in several of your exterior walls. Do it behind a piece of furniture or inside a closet that is on an exterior wall.

Long ROI

If you discover you only have a 3/4-inch space between the back of the plaster or drywall and the beginning of the block facing, you might never get a payback, or return on investment (ROI), in energy savings in your lifetime for the amount the total job would cost including all cleanup, re-plastering and repainting.

I say this even if you could insulate this space with the best foam insulation currently available. 

Energy Audit

You may want to invest in an energy audit and have an energy audit expert come to tell you where you're losing the most energy in your home. It may not be the walls.

CLICK HERE to get FREE & FAST BIDS from local energy-audit contractors.

Wood Floor Foam Insulation

Watch this video to see how to use foam insulation in a wood-floor system.

Outside is Hard

The contractors you spoke to are correct. Attempting to do the job from the exterior presents a host of problems. For one, the mortar joints are often no wider than one-half inch.

A tiny insulation tool would have to be inserted in eight inches and then somehow have to turn a sharp 90-degree angle to squirt insulation up, down and sideways. A specialized nozzle may indeed exist, but then you have to wonder if the entire cavity is being filled with insulation.

Hitting a Strip

What's more, the furring strips present a challenge. They can't be seen from the outside of your home and a hole drilled into the brick at a furring strip location would be useless. Drilling larger holes inside the home allows the contractors to see if they missed a furring strip and it allows them to more easily install the insulation.

Forget About It

But if it were me, I would not even try to insulate the walls. I feel you can save more energy concentrating your efforts on stopping air infiltration leaks, installing the best energy-efficient windows and exterior doors and improving insulation in your attic space.

Heat Loss Calculation

Calculating energy savings for insulating the narrow 3/4-inch wall space is fairly easy. Heating and cooling contractors have done this for years. They have to perform heat loss and heat gain calculations that allow them to properly size furnaces, boilers and air conditioners.

Businesses that sell this equipment to contractors often have sophisticated computer programs that can quickly tell you how many Btus (British thermal units) of extra energy are required to heat or cool a home that does not have insulation in that narrow void space. I have seen the calculation differences and they are indeed very small.

Windows & Air Leaks

But when you start improving the performance of windows by installing ones that have high-performance Low-E coatings, an overall R-value perhaps 500 percent higher than original windows and a shockingly low air infiltration rate, you start to make serious energy-savings headway. Adding reflective-foil-radiant barriers in attics, in addition to upgraded insulation, can also help save energy dollars.

CLICK HERE to get FREE & FAST BIDS from local insulation contractors.

Column 610