July 1, 2016 AsktheBuilder Newsletter

Happy July 1st!

Holy Cucumber, summer is marching along here, and I'm deep into a massive deck reconstruction and addition project here at my own home.

You're going to be hearing LOTS about this moving forward. I taped a very cool video about a week ago showing amazing heavy-duty timber screws made by Simpson Strong-Tie.

I used these to provide the necessary structural support so the horizontal ledger board at the house would not fall straight down.

The IDIOT builder and carpenters that built my massive deck, it's 64 feet long and projects 10 feet out from the house, use electroplated galvanized nails from a nail gun to fasten the ledger board to the house.

Electroplated galvanizing is pretty much worthless.

For the record, I didn't build the house I'm living in. The builder is still in business here in central New Hampshire and I'll not name him, but I'll share his initials: AG

How Dangerous Are They?

So how dangerous are these electroplated galvanized nails?

VERY.

Two days ago, I almost got seriously injured because a beam those carpenters and builder installed fell to the ground without any warning.

I happened to have a ladder against the beam trying to work on it to make it safer.

One issue is the height of this deck. It's a whopping 13 feet above the ground below. That's pretty high up.

Fortunately, the extension ladder I was using was extended just enough that when the beam fell, my ladder tilted forward and the tips of the ladder caught the next joist by just 1.5 inches.

Had that not happened, I would have most likely done a face plant and the result would have been very ugly.

The beam failed because the nails they used had corroded. The corrosion was happening out of sight where the nails were in contact with the wood deep in the lumber.

High School Chemistry

Here's what you need to know about treated lumber, water and fasteners.

Treated lumber has copper in it. Newer treated lumber has quite a bit of copper in it.

When you mix steel, copper and water, you start a chemical reaction called electrolysis.

The steel sacrifices itself in this reaction and begins to corrode.

Some of the nails that were put in just fifteen years ago had lost fifty percent of their volume.

One has to wonder how many decks out there have these inferior nails in them.

The nails are everywhere on my existing deck and I've been spending over a week adding critical missing structural connectors, new special fasteners and correcting countless other mistakes.

Screws - NOT Nails!

I have the good fortune to know some of the top people in the deck-building industry.

Jim Mailey and Steve Noon are two of them. These are two pros that work for Simpson Strong-Tie.

Let's STOP right here and now.

I'm not getting paid a penny to promote Simpson. I'm doing it to try to make you and your family SAFER.

Last week, Steve visited my home and was stunned to see how poorly the deck was built here at my home.

Both he and Jim talked about the importance of using structural screws, NOT nails, when assembling many, if not all, of the parts of a deck.

The reason is simple. Over time, nails can lose their grip in the wood because of the constant expansion and contraction that deck lumber goes through as it gets wet and then dries.

I put this to the test. I started to remove some of the joist hanger nails used to build my deck. They came out of the wood with little effort.

Be sure you use structural screws that have the PROPER anti-corrosion coating on them when you build your new deck.

Not all screws are RATED FOR STRUCTURAL USE. There are different grades of steel!!!!!!

Just get Simpson Strong-Tie screws and you'll be in good shape.

The Stuck Vanity Top

Dana contacted me two days ago.

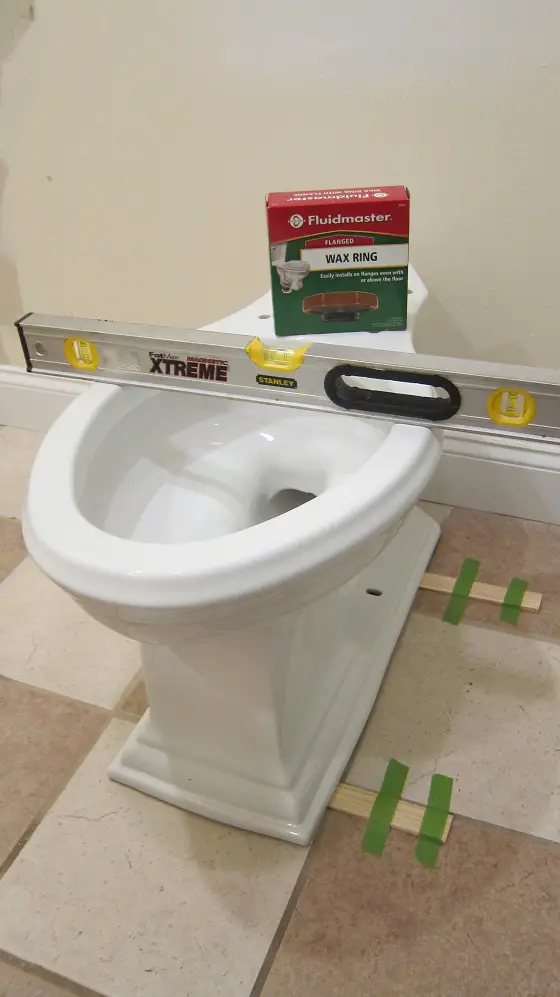
She put in a new vanity and top in her bathroom and thought she was doing the plumber a favor by installing the preformed top to the vanity using silicone caulk.

The plumber complained he couldn't install the new faucet because the space was too tight. They make special basin wrenches for this purpose and maybe he didn't have one, but I digress.

Dana wanted to know how in the world to get the top off the vanity base so the plumber could connect the faucet to the top. Just so you know, this is the best way to do the job in a new install. If you can install the faucet on the sink before the top goes in, do so.

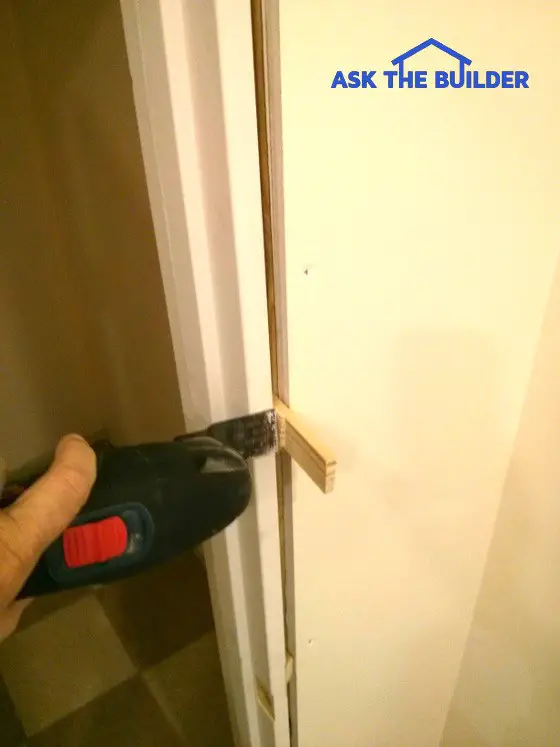
I suggested that she try a thin hacksaw blade to try to cut through the silicone caulk. It's not going to be an easy task and once she gets two of the four sides freed up, she might be able to lift the top up.

Almost LAST CALL for Stain Solver SALE

A week ago, I announced our 4th of July Stain Solver SALE. It ENDS in just three days.

Use this promo code NOW to get 10% off and FREE SHIPPING.

10ATB

This sale is ONLY on our three largest sizes:

  • 9 pounds
  • 18 pounds
  • 50 pounds

CLICK HERE NOW to order the best Certified organic oxygen bleach Made in the USA with USA ingredients.

That's enough for an early Friday morning.

Tim Carter
Founder - www.AsktheBuilder.com

Do It Right, Not Over!

Framing a Door in Existing Wall

This summer cabin in the woods of Maine is going to become a year-round home after the extensive remodel. Photo Credit: Rick Bader

Framing a Door in Existing Wall | This summer cabin in the woods of Maine is going to become a year-round home after the extensive remodel. Photo Credit: Rick Bader

Framing a Door in Existing Wall - It Can Be Done

DEAR TIM: I own a summer cabin that’s been in my family for generations. My wife and I decided to make it our full-time home. It needs lots of work that I intend to do myself. One of the projects is relocating the front door. Is there any magic with respect to framing a door in an existing wall? What are a few of the biggest mistakes you see happen on jobs when a person installs a new front door? I’ll be using a pre-hung door made by a major manufacturer. Rick B., Bridgton, ME

DEAR RICK: I’m your next door neighbor over here in New Hampshire and within a mile of my own home here on Lake Winnisquam there must be fifty or more summer cabins that are vacant eight months out of the year. I’ll bet you and your wife will enjoy the solitude of the new home.

I looked at the excellent photo you sent to me (see above) and it appears that it’s going to be a fairly straightforward modification. The first thing that comes to mind is snow load. I see that you’ve got a fairly flat roof section over that part of the home where the new front door will be so it’s important that you have a great structural header, or beam, over the door that will transfer the roof load to the wall studs on either side of the door.

How many studs to support the head beam?

When framing a new rough opening for a door, many rookie DIYrs wonder about how many studs are required to support the header beam. If the rough opening is 6 feet or less, then you can get by with just one stud on each side of the opening next to the full-sized king studs that go from the bottom wall plate to the top wall plate.

The cut studs that the beam rests on are often called jack studs. If the rough opening is wider than 6 feet, you’ll need two jack studs on each side of the opening. When you use two jack studs on each side, 3 inches of bearing is created on the pair of jack studs for the beam.

Get the opening plumb

It’s very important that the rough opening studs are plumb in both directions and in the same plane. The pre-hung door comes from the factory square and it needs to be installed so the frame is not twisted. If you twist the door frame, the door will not seal tightly against the weatherstripping. If the rough opening is twisted because the wall studs are not plumb in both directions, side to side and front to back, you’ll end up with a twisted opening.

Be sure you create a one-half-inch gap on the two sides and the top of the door for your rough opening. You need this gap to shim the door and you don’t want the roof load touching the top of the door frame.

Be sure the opening is high enough

One of the biggest mistakes you can make is not having the top of the beam across the door not high enough off the rough floor. All too often carpenters forget about the thickness of the finished flooring.

You want the bottom of the pre-hung door threshold to be at the same level as the top of the finished flooring. This gives you plenty of room so the swinging door does not catch on a throw rug you may have on the floor in front of the door. I always cut a piece of 3/4-inch plywood and screwed that to the rough subfloor before setting my exterior doors in place. This raised them up the proper height for 95 percent of the finished floors on my jobs.

Read the installation instructions

Before you start to install the door, take a few minutes to read and fully understand the written installation instructions that come with the door. Pay attention to the types and locations of the fasteners the manufacturer says to use with the door.

Be sure you use a flashing pan under the door or fabricate your own flashing using the membrane tapes made for this purpose. Keep in mind this flashing must be installed so any water that gets under the door flows back to the outside of your home.

What method should be used to insulate the door frame?

You live where it gets quite cold, so air infiltration around and under the door is very important. Once you have the door installed, I’d use the newer expanding foams to seal out air leaks. Be sure to use the foam that’s made for doors and windows. It doesn’t expand so much as to bend and distort the door frame causing the door to bind.

I also prefer to use the newer membrane tapes on the outside of the wall to help to seal water and air leaks. The tape should stick to the exterior wall sheathing or water barrier, cross over the one-half-inch gap between the door and rough framing and then extend onto the door frame. Be sure the tape can’t be seen once the finish trim is installed around the door frame.

If your door has factory-installed brick mold trim, avoid the temptation to just let that lap over the exterior wall sheathing and then nail through the brick mold trim to hold the door in place. Long fasteners need to extend through the door frame into the rough wall framing. This is always covered in great detail in the written instructions.

Don’t do what I see happen on many of the home improvement cable TV shows. Don’t blindly batter the exterior wall with a sledge hammer to relieve your inner frustration demon. You have no idea what’s inside a wall. Remove the inner wall surface and inspect what you’re up against. My guess is you’ll probably encounter some electrical cables that have to be moved.

Lastly, when you go select the lumber you’ll use for the new opening, look for nice straight pieces. It’s best if you can look at the ends of the wall studs and beams trying to find ones where you see the center of the tree and the first rings of growth. These pieces of lumber are usually quite stable and will not warp or twist over time.

June 23, 2016 AsktheBuilder Newsletter

I promised you the promo code for the Stain Solver sale and have been so busy with the deck job I just lost track of time!

It's below. If you're a NEW subscriber welcome and understand that Stain Solver is a Certified organic multi-purpose oxygen bleach cleaner. My wife Kathy and I own the company and have been making it since 1995.

My New Deck

For the past week, I've been working on a new deck at my home and getting ready to completely retrofit my existing two decks.

I'm about to start taping a boatload of informative videos for you about the process.

Kathy asked me if I was going to tape a How-To series and I said, "No."

"Deck building is actually very complex and it would take hours and hours of video to properly explain all the aspects.

For example, you can't believe how hard it is and what you have to know to get the three concrete piers perfectly placed so the posts fall right in the center of them."

What I actually think is better is for me to give you an overview of the process and if you have specific questions then you can invoke my private phone coaching to get the exact answer to your problem.

The past four days I've done over six of these coaching phone calls and solved problems in just minutes, but I digress. Click here and watch the video Laura sent to me two days ago. It's a hoot!

Anyway, I just took a great photo of something I did on the south end of the new deck about two hours ago.

Look at this photo and tell me if you have any idea what's going on. If you don't know exactly what I'm doing and WHY, CLICK the photo or click this link to get the answer.

Stain Solver SALE

Yes, it's time for the USA Birthday Sale!

In less than ten days, it will be the 4th of July!!! Holy Tomato the summer is going by!

I told you that we'd have a sale on Stain Solver. Kathy and I decided since it's such a BIG holiday, we'd have a sale on the three BIG sizes of Stain Solver.

Yes, the sale is ONLY for these sizes:

  • 9 pound
  • 18 pound
  • 50 pound

There is a LIMITED SUPPLY of each. Believe me, it's quite possible we will sell out if you procrastinate.

If that happens, I'll extend the sale price to you when we have them in stock, but that could be five weeks from now. 🙁

CLICK HERE to order NOW.

Use the following promo code to get 10% off and FREE SHIPPING. Remember, the sale is only on the THREE LARGE SIZES.

10ATB

Need inspiration as to what Stain Solver cleans?

Click Here and look at countless Before and After photos sent in by customers like you.

Deck Questions

What questions would you like to see answered in a video or videos about my deck building process?

Send them to me by REPLYING to this newsletter email.

Just click Reply in your email software and type or talk away!

Have a great weekend!

Tim Carter
Founder - www.AsktheBuilder.com

Do It Right, Not Over!

Deck Picture Frame Framing

Deck Picture Frame Framing

Deck Picture Frame Framing - Copyright 2017 Tim Carter

If you want to really add that special touch to your deck, you should consider using two different colored decking boards.

That's what I'm doing with a deck I'm building. I'm using Trex Transcend and my wife has selected the deep Lava Rock color along with the lighter Tiki Torch for the main deck boards.

Many deck designers are incorporating a picture frame look where the outer edge of the deck is one, two or three boards of the one color and the the field area of the deck is the other color.

To ensure that the decking is properly supported where the picture frame boards run parallel to the main deck joists, you need to put in blocking. You also need to add a secondary joist or nailer that catches the ends of the field boards that would otherwise float in the space between the two end joists.

Look at the photo below. It's the right side of my new deck.

This is classic picture-frame blocking for a deck that has the decking going two different directions. Photo credit; Tim Carter

This is classic picture-frame blocking for a deck that has the decking going two different directions.  Read the June 23, 2016 AsktheBuilder Newsletter for more information on the new deck. Photo credit: Tim Carter

Can you see how the blocking between the decks will provide the 16-inch-on-center support for the two 5.5-inch wide Lava Rock boards that will be put on?

The vertical 2x4 that's nailed in the notched blocking will support the ends of the main field Tiki Torch decking boards so they don't droop down should you stand on them.

It's not hard to install this blocking. You just need to think out where the picture frame ends and where the regular decking starts.

Deck Pier Forms

deck pier forms

Deck pier forms like this make the job easy and fast. These come with pre-cut reinforcing steel that snaps into holders! CLICK THIS PHOTO to purchase these amazing deck pier forms. Copyright 2018 Tim Carter

"A few years ago, I stumbled upon a new invention that makes installing deck piers as easy as working with snap-together plastic building blocks children play with."

Deck Pier Forms - Get Ones That Snap Together

DEAR TIM: My wife has instructed me that I no longer can put off the deck project. I got the confidence to do all the work above ground, but I’m worried about the deck foundation.

What do I need to know about deck pier forms so my deck posts don’t sink into the ground and my deck falls to the ground? I see round and square pieces of concrete under the posts at other decks I look at.

It that all you do, just place a precast concrete disc under the post and be done with it? Help me so I don’t disappoint my wife. Eric B., Long Island, NY

Related Links

Deck Pier Basics - SECRET Info Here - Do NOT Share

Deck Pier Footings - A Pad in the Ground = Termites!

DEAR ERIC: It’s an overused statement, but it’s so very true: Happy wife, happy life. Let’s work together to get this deck done so you don’t have to spend time in the doghouse folding laundry forever. Watch this video to see what I mean:

Why Does A Deck Need Piers?

A deck needs piers to transfer the weight of the deck across a wider area of soil than just the bottoms of the wood deck posts.

Think of your deck as you would any structure. Perhaps you’ve seen houses next to the coast where you live that resemble tables. The houses sit up above the ground on large wooden or concrete posts so the storm surge flows under the houses. These support columns are not really any different than your deck posts. They all transfer the load of the structures to the soil below.

Free & Fast Bids

CLICK HERE to get FREE & FAST BIDS from local deck contractors.

Does A Deck Need A Foundation?

Decks need foundations just like a house, detached garage or skyscraper. The concrete deck piers support the concentrated loads that you find at each deck post.

Imagine how much weight is pushing down on the few deck posts you’ll have! By the time the deck is complete and you have lots of people, furniture, snow, etc. on it, the load at each post can exceed several thousand pounds. Properly designed and constructed deck piers ensure the deck doesn’t sink or get uplifted by the wind!

How Far Down Do the Concrete Piers Go?

The concrete you see at the surface under the deck posts you’ve been spying at other homes should continue deep down into the soil. The depth the concrete extends is a factor of the frost line in the area and the bearing capacity of the soil.

What’s more, there’s a good chance that deep in the ground the concrete is wider than what you see at the top to help spread out the load across more square inches of soil.

How Many Deck Piers Have You Installed?

I’ve installed all sorts of deck pier forms in my career as you might imagine. Going back decades it was not unusual to dig a large 2-foot by 2-foot hole and pour about 6 or 8 inches of concrete in the bottom of the hole. This concrete was a small spread footing.

The next day we’d then lay the concrete block on top of the hardened concrete. The hollow cores of the block would be then filled with more concrete. A steel anchor bolt would then be inserted in the wet concrete. This anchor bolt would hold down a metal connector used to fasten the wood deck posts to the new concrete pier.

Are There New Deck Pier Inventions?

Many years ago inventors tried to make all this easier. Round concrete forms that look like giant paper towel roll cores were sold to contractors. You can still buy these thick paper tubes. This was set on a similar concrete footer in the ground and acted as a handy form for wet concrete. You no longer had to lay concrete block.

Are Round Sonotubes Easy to Work With?

No, in my opinion. They require at least two different pours and you need to be an expert at bracing to work with a sonotube.

The issue with using one of these giant tubes is that you had to figure out how to brace it so it wouldn’t move as you poured concrete. It’s not as easy as you might think to do this. Then you had to figure out how to get reinforcing steel into the tube in the right position.

CLICK HERE to get FREE & FAST BIDS from local deck contractors.

Have You Seen Easy DIY Deck Pier Forms?

A few years ago, I stumbled upon a new invention that makes installing deck piers as easy as working with snap-together plastic building blocks children play with. This ingenious deck pier form snaps together in less than a minute with no tools. But wait, it gets better.

The plastic form comes with internal slots and rings that support pieces of pre-cut steel reinforcing bars that come with the form. In years past, you had to get long bars of steel and then struggle to cut them. At least two pieces of the steel need to bent to connect the vertical concrete pier to the wider concrete that forms the footing for the pier. It’s not as easy to bend this reinforcing steel as you might think.

CLICK HERE to order the snap-together deck pier forms that I have at my own home.

There are other types of plastic deck pier forms you can buy, but the ones I prefer are the easiest I’ve ever used in my forty years of building. All you need to do is carefully place the form at the correct depth so you meet the local building codes for frost protection and soil bearing capacity. Once you have the form in place and it’s level, then you carefully backfill the dirt around the form before you pour the concrete.

What Do You Like about The New Deck Pier Forms?

What I love about this product is how much time and effort it saves. Everything you need, except for the concrete, is shipped to your home. You don’t have to drive to different places to get all the steel, forms, bracing, etc. Using the form I use, you just dig the hole to the correct depth, place the form, carefully backfill so as not to move the form and start mixing concrete! It doesn’t get any easier than that.

Be sure the anchor bolt you install in the wet concrete is hot dipped galvanized. You don’t want the bolt that holds the deck post connector to the pier to rust out over time. Take your time and double check all measurements to ensure you have your deck piers in the correct location. The margin for error is usually less than 2 inches in any given direction!

CLICK HERE to get FREE & FAST BIDS from local deck contractors.

Column 1149

June 19, 2016 AsktheBuilder Newsletter

Summer is in full swing here in New Hampshire. Today the temperature is going to kiss up against 90 F. Fortunately, the humidity is not too bad with the dew points in the mid 50's.

I've been crazy busy here as this week I just started to build a deck that should have been put on my home 15 years ago.

What I'm doing is adding a deck that's 24 feet wide and projects out from my existing deck 16 feet.

The picture above shows how far I got in just the past four days. The deck will eventually be as wide as the long beam that's mortised into the top of the wood 6 x 6s.

The three joists you see are there to stabilize the beam so it doesn't fall over in the wind.

On Wednesday, I was getting dirty. Look below at the photo of me down in a hole getting one of the Form Footer pier forms set exactly where it needs to be.

I saw this invention for pouring piers a few years back at one of the shows I attended. It's simply ingenious.

Using this form, which requires NO TOOLS to assemble, you're ready to pour concrete in just minutes after it's set in the hole.

One of the best qualities of this form is it comes with the reinforcing steel already cut to length and bent! But wait, there's more!

The inside of the form has slots and rings that put the steel exactly where it needs to be to provide the most strength. You don't have to try to figure out HOW to suspend the steel so it's surrounded by concrete.

The way I install these forms is to get them exactly where I want them in the hole and then I carefully backfill around them so the dirt supports the form side to side. With the dirt filled all the way to the top of the grade, you can the tip a wheelbarrow right over the top and fill it up with fresh concrete.

CLICK HERE to see a video I taped several years ago when I used the same forms to build my 16 x 24 shed. Boy, I seem to like rectangles that size!

Thursday, I poured the concrete and set the anchor bolts. Friday, I mortised in the ledger board for the new deck into the wood support posts of my existing deck. Yesterday my son helped me put up the three 6 x 6 posts, the beam and the three joists you see in the photo above.

You need to have the new ledger board in place, in my opinion, before you go about calculating the height of the new deck posts and beam.

With the ledger board in place you then simply calculate the distance from the bottom of the ledger board to the top of each pier.

When you add those two dimensions together you get the exact height each 6 x 6 post should be.

The top of the support 6 x 6s is where the top of the new beam will be. If you want the deck level, then the top of the beam needs to be at the same elevation in space as the bottom of the ledger board. Keep in mind the deck joists are supported by the ledger board using metal joist hangers.

I'm using all top-of-the-line Simpson Strong-Tie joist hangers, hot dipped Simpson Strong-Tie nails and structural screws to assemble all the deck components.

This week I'll be retrofitting my deck so it's connected properly to my house. The IDIOT BUILDER - NOT ME - who build my house just nailed my deck ledger board to the house.

Fortunately, Simpson Strong-Tie has come up with ingenious structural screws and a special bracket to connect my existing deck to the house so it doesn't pull away or fail under a massive snow load. I'm strengthening it so it meets the 100 pounds per square foot standard.

I'll be taping a few videos for sure about the ingenious Simpson retrofit screws and brackets. If your deck is lag bolted to your house, you need to do what I'm doing.

Why?

Because you have NO CLUE if the lag bolts were overtightened, if they're the right size and if they even bolt into the RIGHT components of your home!

Stain Solver Sale

We just finished making another TEN TONS of Stain Solver. Watch for a sale announcement on Tuesday.

If you're a new subscriber, Kathy and I own Stain Solver. It's a Certified organic oxygen bleach that cleans just about anything water washable.

CLICK HERE to see a boatload of Before and After photos sent in by customers just like you.

FAIR WARNING: There is a true LIMITED SUPPLY of the bigger sizes. If you want the BEST PRICE per pound, then you want to invest in an 18 or 50-pound size.

Toilet Install SECRET

You may not be aware, but I've been a master plumber for about 35 years. I was licensed in Hamilton County and Cincinnati, OH for years and years.

Since there was no reciprocity between OH and NH, I lost my license when I moved. But they can't take away my knowledge, right?

Here's my question: Do you know the MOST IMPORTANT aspect of installing a toilet so there are no problems in the future?

Lets' see if you do.... CLICK HERE to find out what it is.

That's enough for Fathers Day. BTW, happy belated Mothers Day to all you moms out there!!

I'll be back on Tuesday with your Stain Solver SALE promo code. I'll make it a funny one.

Tim Carter
Founder - www.AsktheBuilder.com

Do It Right, Not Over!

Level Toilet on Tile

It’s very important to level a toilet bowl whether it’s on tile, wood or concrete. Photo Credit: Tim Carter

Level Toilet on Tile | It’s very important to level a toilet bowl whether it’s on tile, wood or concrete. Photo Credit: Tim Carter

Leveling a Toilet on a Tile Floor

DEAR TIM: I’m about to step outside my comfort zone. This weekend I’ve decided to delve into the depths of toilets. My current toilet is horribly stained and nothing I’ve tried seems to help. Besides, I want one of the newer toilets where the seat is higher up off the floor. That will be a blessing for my older parent who I’m caring for. I’ve never installed a toilet and it appears complex and scary. My home is only thirty years old, so it’s not ancient plumbing. There is a second toilet in the house in case I run into problems. What tips can you share so I succeed? Elizabeth W., Vancouver, BC Canada

DEAR ELIZABETH: Yoda, one of the principal characters in the Star Wars movie series, would be proud of you. His “Do or do not. There is no try.” quote resonates with me when it comes to attempting a project around the home. Most jobs are not that hard and often it’s just a matter of having the needed tools to guarantee a victory.

In your case, you often just need a few simple tools to replace a toilet. My guess is you have an adjustable wrench, a putty knife, a 2-foot level, a screwdriver and a hacksaw. This is often all you need to replace a toilet.

Turn Off The Water

The first step is to turn off the water supply to the toilet. You should have a small valve under the toilet that controls the flow of water. If not, you may have to turn off the water supply to the entire house. Check that the water is off by flushing the toilet one final time. If the water is off, no water should be entering the toilet tank.

Pour four gallons of fresh water into the toilet bowl as fast as possible to get as much water out of the toilet bowl as possible. Use the putty knife to remove the decorative caps that hide the bolts that secure the toilet bowl to the hidden toilet flange under the toilet. Disconnect the flexible water supply line from the base of the toilet tank. Remove the nuts from the toilet bolts.

You’re now ready to lift the toilet up off the floor. The odds are you may have to rock the toilet side to side to break the bond between any tile grout or caulk that should be between the toilet and the flooring. Once you have the toilet up and in the air, carry it outside with a helper. Don’t set it down on any good carpet or other finished flooring because nasty wax from the toilet seal could permanently stain whatever it touches.

Clean the Existing Toilet Flange

The next step is to clean up the existing toilet flange. If a wax gasket was used before to seal the toilet to the flange, then you should scrape off any excess wax and otherwise clean it up. Set aside about a tablespoon of the best wax. You’ll need it in a few minutes. I’d wear disposable gloves for this part of the job.

toilet wax rings

Only one change to set the toilet down on the flange!

The next steps are mission critical for a professional installation. You get but one chance to set the toilet down on the flange. You can’t, or shouldn’t move the toilet once you press it down into the fresh wax gasket. If you do monkey with the toilet trying to make adjustments, you risk breaking the all-important seal.

This means you need to dry fit the toilet bowl to the floor without the new wax gasket in place. Put the toilet on the flange and level the bowl both left and right and front to back. Place wood shims as required to get the toilet level. Tape these shims tightly to the finished floor so they don’t move when you lift the toilet back up.

Place the wax gasket on the toilet flange. I prefer to use gaskets that come with a small plastic horn that forces the toilet water and waste down into the piping below the toilet flange. Install new toilet bolts and use some old wax from the previous flange to help hold them vertical in the toilet flange slots.

Straddle the toilet flange and with the assistance of a helper have them guide you so you lower the toilet bowl slowly so the toilet bolts line up with the holes in the base of the toilet bowl. Remember, you only get to set the toilet down one time. Be sure the toilet bowl is square to the wall so you don’t have to twist it excessively. A helper at this stage of the install is invaluable since you’re a rookie.

Be sure the toilet bowl is tight against the wood shims. Install all the new parts for the decorative toilet bowl caps and tighten the nuts. Resist the urge to apply vast amounts of force to tighten the nuts to the bolts. While the china is strong, some people have cracked the bottom of the bowl by using too much force.

Install the tank to the bowl according to the instructions and install a new water supply line. You can now test the toilet to see how well it works. Turn on the water supply valve and the toilet tank should fill with water. Flush it and see how it all works.

Finish with Grout - Not Caulk

If all is well, it’s now time to grout the toilet bowl to the floor. Do not use caulk for this. The connection between the toilet bowl and the floor needs to be a solid material like grout that will not flex when it’s dry. You want the toilet to be rock solid to the floor so it never rocks back and forth. Rocking will eventually break the seal between the toilet and the toilet flange.

Don’t let the grout touch the wood shims. After about 15 minutes, gently remove the wood shims and use the mixed grout to fill in the voids created by the missing shims. Don’t sit on the toilet for at least 8 hours so the grout has a chance to harden.

Column 1148

June 10, 2016 AsktheBuilder Newsletter

This is going to be a fast Weekend Warrior update.

I have to leave the house soon to help the wife of a fellow patriot who's in prison out in Nevada. His name is Jerry DeLemus.

This man should not be imprisoned while awaiting trial right now, but that's a story for a different day. Look Jerry up if you want to know what's going on.

It's an hour's drive both ways to and from her home and she needs me to help put in a window air conditioner and install a few simple bathroom light fixtures.

When I come home, I'll be putting the finishing touches on my downstairs basement bathroom.

It was a total gut job and I put in all new Sterling and Kohler fixtures.

My son and I hung the Kohler shower door two days ago in the Ensemble four-piece acrylic shower stall.

WOW is all I can say. The shower doors are so well designed and have a special nano-technology coating that keeps them clean.

He loved the overhead 8-inch round shower rain head that has the water coming out of the ceiling.

Next week, I'm going to give you links to all the superb products we used in case you have a bathroom remodel or new home in your future.

You want to give these a hard look. The quality of the products is amazing and I love how it's all Made in the USA!

Shari's Boys Black Hands

Shari wrote to me overnight:

"I have a black asphalt driveway and my kids have their basketball hoop out there. Their hands are constantly black and leave prints all over the house. Is there some kind of clear coat to put on to keep their hands from turning black?"

No Shari, there's no magic clear coating and even if there was, the sun's UV light would tear it up.

Without going back and forth with Shari, I'm pretty sure she might be one who coats her blacktop with a sealer every year to make it look great.

No wonder she has BLACK ASPHALT coming off on hands, soles of shoes, etc.

My in-laws kitchen for years had a white linoleum floor. You could see yellow pathways on the floor where people walked.

The yellow paths were caused by asphalt tracked in from their driveway and from oil that was on the soles of their shoes from walking on oil spots in parking lots.

I told her if she wants the black to go away to STOP sealing the driveway.

Blacktop that's been put in on a great base will last for decades without any sealer. The asphalt drive here at my own home is now 16 years old and has never been sealed. It's not falling apart even with harsh New Hampshire winters.

If you have a blacktop drive that you walk across frequently, I urge you to take off your shoes the instant you walk indoors. Put on a set of house shoes to keep your floors, carpets, etc. looking superb.

Stain Solver SALE Next Week

If you've been a subscriber for at least eight weeks, you know we had a Stain Solver Sale at the end of April.

I only announced it ONCE during the week-long event.

Why? Because in just FIVE DAYS we sold about six tons of the TEN TONS we made.

I was afraid of running out had I sent a LAST CALL email at the end of the sale.

Well, get READY to stock up because we will have a sale for just a week.

There's a LIMITED SUPPLY of the larger sizes so if you want an 18 or 50-pound container, you better ACT FAST next week.

Are you a new subscriber? CLICK HERE and scroll down through the photos to see all the things Stain Solver will clean.

CLICK HERE to watch a video about how to use Stain Solver to clean algae and mildew from outdoor surfaces.

If you've not yet used Stain Solver, I BEG you to order a small sample size for $11.97 - FREE SHIPPING - to see how it works. Once you're a believer, you can feel comfortable ordering a larger size.

CLICK HERE to order a sample size.

Secrets for Shimming a Door

Have you ever wondered how a master carpenter like me hangs a pre-hung interior door?

Have you struggled with using wood shims?

Do you know the magic tool to use to safely cut off wood shims?

CLICK HERE and I guarantee you'll discover something new you didn't know.

That's enough for a Friday.

Have a great weekend!

Tim Carter
Founder - www.AsktheBuilder.com

Do It Right, Not Over!

Shimming a Door

wood door shim

Shimming a Door | A vibrating multi-tool is a fast and safe way to trim wood shims that are used to install a door. Photo Credit: Tim Carter

DEAR TIM: While on vacation I plan to install a few new interior doors around my house. I’m using pre-hung doors. I’ve never hung a door before and could use some of your secret tips. Please share how to avoid common rookie mistakes. I’m lost on what to do when shimming a door. My wife told me she will bake you a cake if your advice gets me through this endeavor. Peter K., Philadelphia, PA

DEAR PETER: I’ll see the chocolate cake and raise you a pint of mocha chip ice cream from my favorite parlor in Cincinnati, OH. While I appreciate your wife’s generous offer, it’s not necessary. I’m going to do my best to guide you on this pathway so you can have all the doors installed in one day or less. That way you and your best friend can go do some fun things instead of slaving away on your vacation.

Measure the Rough Opening Accurately

The first thing to do is to carefully remove the door casing trim from around your existing doors. This allows you to confirm the rough openings. This is vital to ensure you get the right doors. Measure accurately and take these measurements with you when you go to order the doors.

Usually the width of the rough opening between the wall studs is one-half inch wider than the outside overall width of the new door frame. This extra space gives you plenty of room to shim the door. The height of the rough opening is often 84 inches from the rough subfloor, but since you have an existing home that’s hard for you to determine.

Have the Right Door Frame Height

You just want to make sure that from the finished floor to the top of the rough opening you have around 83 inches, especially if the rooms have wall-to-wall carpeting. Be sure to check the width of the door jamb. If you live in a home that has 2 x 4 wall studs and 1/2-inch drywall, you’ll discover the jamb width is most likely 4 and 9/16 inches.

I’d take photos of the doors and show them to the person who takes your order. Stand back from the door so you can see the entire door and part of the wall. It’s important that you get the “handing” of the door correct. The photos will tell the person at the lumber yard what you need.

Modern doors are made pretty much perfectly square. The door frame is supposed to be parallel to the door once it’s installed with the same-sized gap between the door and the frame on all three sides. This means the door frame will also be square once installed.

Check the Opening Stud on the Hinge Jamb side - It needs to be plumb.

I always check to see if the rough opening stud on the hinge jamb is plumb. If it’s not, I add shims to the rough stud to make it plumb. If I have to add shims, I do it at the places I intend to put nails through the door frame when installing the door. More on that in a moment.

When you add tapered shims, you need to use two at a time and overlap them so the thin end of one is on top of the thick end of the other. When you then slide one of the shims across the other shim the thickness of the two shims changes equally across the entire length of both shims.

With the rough jamb plumb, it’s easy to get a head start on an easy install. Place the door into the opening and open the door. Place a few shims under the end of the door so there’s no stress on the door frame. Without this support, the weight of the door will pull the top of the frame away from the rough opening.

What size nails to use?

I prefer to use 10-penny finish nails to start the install process. I nail my first one about one inch above the top of the top door hinge on the door frame. This stabilizes the door and allows you to work with no fear of the door falling out of the opening. Carefully hit the nail making sure you do not miss causing an unsightly blemish on the wood door jamb. You’ll need to use a nail set to drive the head of the nail below the surface of the wood frame.

In my opinion, you need a minimum of six nails on each side of the door frame. These nails should be one inch above each hinge locations and level with these spots on the latch side of the door frame. Put a nail on either side of the center door stop.

When shimming the door, the goal is to make sure that once the frame is nailed the gap between the door and the frame is equal all around the door. Most pre-hung doors come with a 1/8-inch gap between the door and the frame on the hinge side and the top. You’ll discover it’s fairly easy to attain this gap around the entire door.

As you shim, the shims will stick out beyond the wall and the door frame. Do not be concerned about this. You’ll cut these off after the install is complete. You can use a sharp razor knife, but the safer tool is a vibrating multi-tool that resembles what a barber uses to cut your hair.

Installation Tip

To prevent the door from rubbing the frame in the future, I always install two hidden screws that penetrate the door frame and go at least 1.5 inches into the rough framing. I place these screws under the top hinge of the door. This step is only done after you’re completely happy with the gap and all the nails are set below the surface of the door frame.

Be sure you support the door with shims under the open door when you go to unscrew the top hinge plate from the door frame. Drill pilot holes and be sure the screws are as far away from the edge of the door frame as possible so they bite into the rough door jamb.

The screws must penetrate through shims so they don’t stress the door frame. Countersink the screw heads a small amount so they don’t interfere with the hinge when you put it back in place.

These tips were shared in the June 10, 2016 AsktheBuilder Newsletter.

Column 1147

June 5, 2016 AsktheBuilder Newsletter

I just spent the last hour awash in emotions. I'm still in a fog.

I was engrossed with the information at the Flight 93 Historic Site website.

I'll be there in about five weeks. I decided to take a different route from NH to OH that will take me through Gettysburg and Shanksville, PA.

Both places are hallowed ground but for different reasons.

Shanksville's scarred ground is yet another reminder of the war that's being waged on us by radical Islamic terrorists.

We've been locked in battle with these vermin since the late 1700's. Don't believe me? Then go research why the US Marines fight song's first sentence has the words, " .... to the shores of Tripoli."

I can hear your angry voice now. "Tim, I don't want to hear your historical drivel. I signed up for home improvement tips!"

Guess what?

I try to open my newsletter each week with something that's important and today it's about something that's very important to me - my country and it's future.

You want home improvement? Here you go.

The Condo Wall

I received an Ask Tim question yesterday that blew me away.

A woman in California lives in a multi-story condominium. She was seriously thinking of tearing out a wall in the condo without consulting the HOA or anyone else but me.

I shouted at her to STOP and call a structural engineer. Who knows how important that wall could be to the people living ABOVE her!

CLICK HERE to watch a video about simple walls in houses and how you might determine if a wall is a bearing wall or not.

Can You Write in Hebrew?

My daughter Kelly needs your help if you can.

Look at the following image just below. Can you translate it accurately for her?

If so, will you please reply to me ASAP with the translation?

Gloria's Pantry Knob Question

Gloria asked me about where is the best place to put a pull knob on a narrow tall pantry.

You can read the column, her question and MY ANSWER by CLICKING HERE. You'll see Gloria's question at the bottom of the stack of comments below the column. Scroll down.

Broken Grace

I often share the books I'm reading. Well, a week ago I finished a very good mystery by E.C. Diskin - Broken Grace.

Here's all I'm going to tell you.

I blurted out loud as I read the last few pages:

"Touche' "

Yep, E. C. got me. She completely fooled me.

You do know what touche' means, don't you?

You're going to LOVE this mystery.

CLICK HERE to purchase Broken Grace.

LAST CALL for TUMI Bag

I told you on Friday that I'm starting to sell RARE Google schwag that I've accumulated over the years.

One prized item is a TUMI laptop case that was given to the 300, or so, attendees of the 2005 Google Zeitgeist.

I was one.

New TUMI bags start about $300 or $400. Some are as high as $600.

The auction for this ENDS tomorrow night.

If you know someone that wants a Google collector's item, this is it.

CLICK HERE to put in a bid.

Bearing Wall Footing

Do you know what a bearing wall footing looks like?

I didn't think so.

CLICK HERE to see a magnificent photo of one.

That's enough for a Sunday.

I'll be spending the day doing the material takeoff for my Trex Transcend decking.

Oh my it's beautiful stuff!!!! CLICK HERE to see it.

Tim Carter
Founder - www.AsktheBuilder.com

Do It Right, Not Over!