Happy New Year!
I feel 2016 is going to be a banner year. I say this because of a major epiphany I had about my Defective Shingles book over the Christmas break.
If things go as I feel they might, this book is going to be the pinnacle of my entire working career.
Why is that?
I discovered something two days after Christmas that will provide complete relief for you, and millions of other homeowners, if you have just installed asphalt shingles that are doomed to fail in just a short amount of time.
What I discovered will allow you to double, maybe triple, the life of your new, or newer, asphalt shingle roof.
I also have news for you if you're going to install a new roof soon. VERY GOOD NEWS!
If all goes well, the book should be ready in about a month. Wait until you see the photographs in the book. Oh my!
Bogus Internet Advice
I want you to be aware that some of the stuff you see on other websites - ones that have to do with home improvement and ones that have a random tip about your home - may be giving you very BAD or SUSPECT advice.
I can't remember now where I saw the link, but I've had a tab open in my browser now for about a week. I saved it for you.
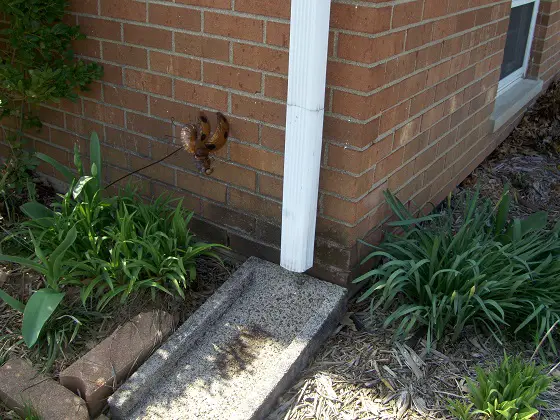
It was a tip that said, "Don't Skip this Winterizing Task".
It talked about making sure you clean your gutters twice a year. Here's one line from the webpage and video:
"Clogged gutter systems overflow with rainwater and can damage the foundation of your home, costing you thousands in repairs."
There was NOTHING in the tip or on the webpage explaining exactly how overflowing gutters can damage a foundation.
Let's apply facts to this statement.
Here in New England and I know it to be the case in the Southeast, many houses do NOT have gutters. The soil is sandy. Snow and ice can rip gutters off houses in heavy snow areas.
Water pours off roofs like it might from a clogged gutter all the time. We don't have damaged foundations here in New England from this.
The same is true in the Southeast and they often have houses with shallow slab foundations!
In the Midwest, the soil is normally a heavy clay. Water just runs off and has a tough time penetrating the dense clay.
What's the water going to do? Is splashing water on the ground going to erode the poured concrete or concrete block? Maybe in a thousand years or so!
Is the water going to erode the soil to the point that the footer under your foundation wall is undermined? Don't you feel you might do something is you started to see a 4-foot-deep hole caused by rainwater cascading from the roof?
Is a clogged gutter one or two times going to cause your foundation to crack? How? Normal rain falling from the sky is going to wet the soil next to the foundation.
Do you see what I'm trying to do?
I'm trying to get you to THINK when you're presented with a statement. Don't assume it's TRUE. Ask for the proof.
Here's an example.
Let's say I state:
"Water leaks around a chimney flashing can cost you thousands in repairs."
But I go on to say this:
"The water will cause the wood framing and the wood roof sheathing to rot. If the rot advances too far, the damaged roof framing can buckle and collapse. The water will cause mold to grow in your attic which costs lots of money to clean up. You might get sick from the mold and have large medical bills. The water, should it make it indoors, can ruin the drywall and any flooring it gets on."
The point is, connect all the dots and make sure they make sense when you see a statement!
| . |
| MYSTERY LINK! You use vinegar to cook with, right? Guess what I use it for! |
| . |
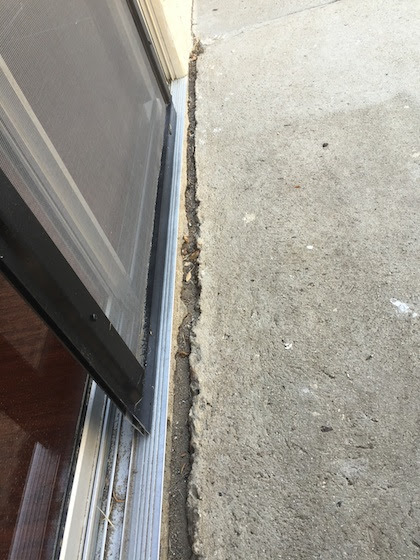
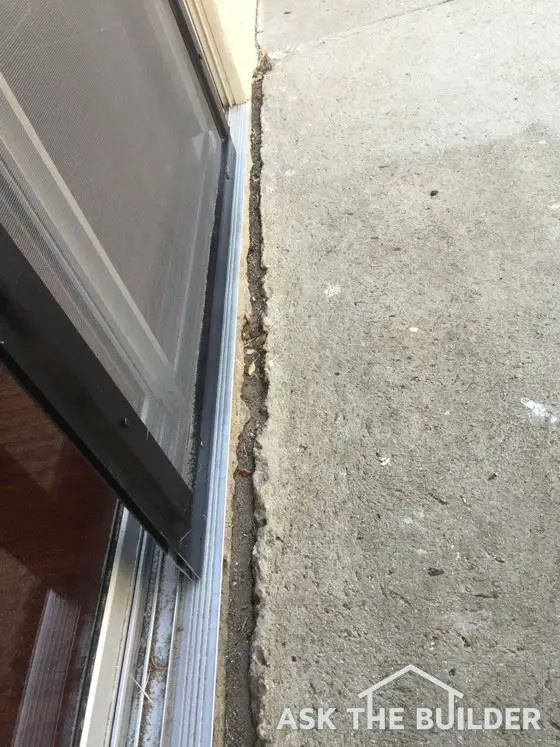
Wood Rot DVD
Speaking of wood rot, did you know there's a MIRACLE product to restore rotten wood?
If the wood's not too far gone you don't have to rip it out. You can STABILIZE and RESTORE the wood!
I created a series of videos showing the product and how to use it!
It's an AMAZING wood-restoration product!
I've decided to put the DVD on sale for just this week.
It's normally $30 - because it truly can save you HUNDREDS of dollars.
But for the next week, it's only $22.50 with FREE SHIPPING to any US Postal Address.
You SAVE $7.50 plus the normal shipping cost.
This is a DVD I burn myself and I've decided to personally autograph each one. Maybe it will become a collectors item after my shingle book comes out!
Who knows, I might become famous!

Remember, this DVD is on sale for only the NEXT week.
I've only got a LIMITED supply of autographed copies on hand.
CLICK HERE NOW to get a copy.
It's a great gift idea, I GUARANTEE you that you'll discover something new and you'll be able to SAVE something made from wood instead of having to replace it.
Little Buddy Space Heater Review
I tested an amazing little heater over the past two weeks. It's the Little Buddy.

I've used it both outdoors while doing ham radio and I've used it indoors in my man cave and while I package small bottles of Stain Solver in my garage.
It's a catalytic heater that runs on propane. It starts up on it's own by pressing a button. If it tips over or falls over, it immediately shuts off.
It has an oxygen-depletion sensor. I didn't notice any odor when using it.
It REALLY puts out the heat and is perfect if you need a TEMPORARY heat source for some task or you need to take the chill off a space.
Let's say you need to work on your car outdoors or in a cold garage and need to warm your hands. The Little Buddy will take care of you.
It attaches to a standard one-pound propane tank.
To save lots of money, you can buy an adapter that allows you to REFILL the one-pound containers from the larger 20-pound container you probably use for your outdoor grill.
CLICK HERE to purchase the Little Buddy!
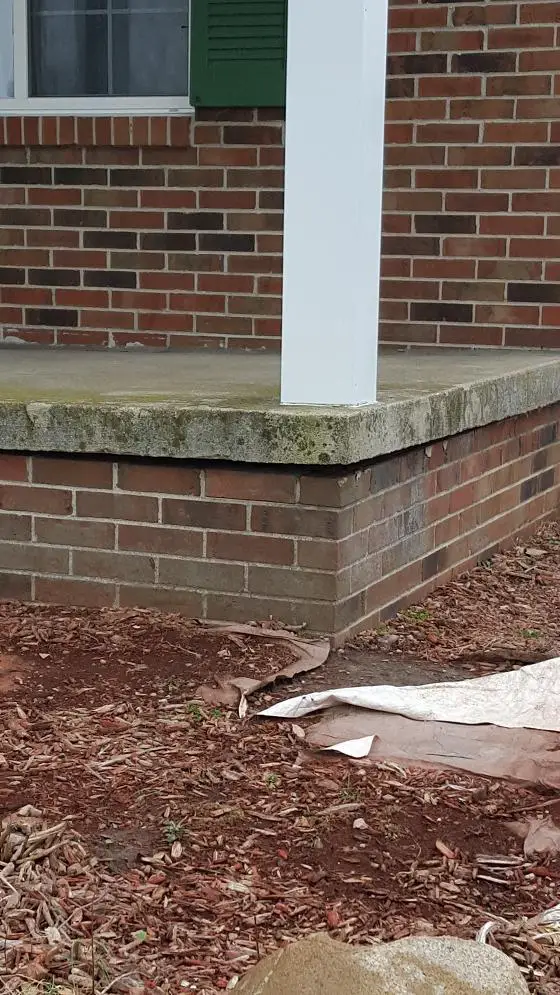
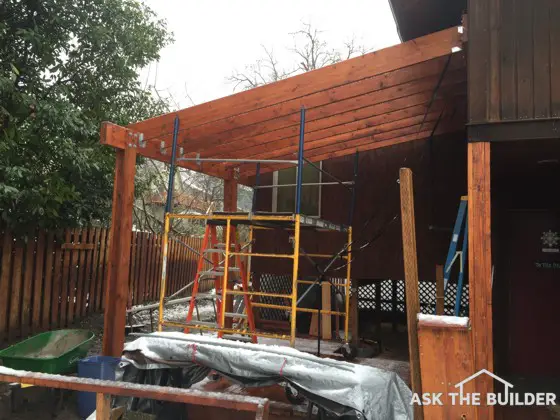
New Column for You
Here's an interesting column about metal roofing over a patio area.
My guess is you'll discover something new for sure.
That's enough for today.
GET that Wood Rot DVD now! Don't put it off.
Remember, I can only sign so many as I've got other stuff to do this week like FINISH the Defective Shingles book!
Tim Carter
Founder - www.AsktheBuilder.com
Do It Right, Not Over!