DEAR TIM: My new house foundation was just poured on a sloping lot. I stopped by just after the forms were stripped from the foundation and I think they poured the foundation too deep. The ground on one side of the house is about 5 feet higher than the top of the foundation. I think water is going to flood against the house. What needs to happen to prevent this? Also, I saw a long narrow concrete pad and a square concrete pad in the basement area. What are those for? It seems like a waste of concrete to me. Mark K., Waltham, MA
DEAR MARK: Building on a sloping lot is somewhat common in certain parts of the nation. My own house sits on a fairly steep lot. As such, the bottom level of my home is open to daylight and each of the rooms there has a wonderful wall of windows or a set of glass doors that allow lots of natural light to stream into the rooms. What’s more, my lot is so steep my basement ceiling height is over 11 feet! That also makes the basement rooms seem far more spacious than they are.
You’re right in thinking that storm water flowing down the hillside towards your house is going to cause problems. I’m hoping your building plans show a new retaining wall on that side of the house to help provide part of the solution to prevent the flooding problem that will happen without the wall.
I had a phone consult last week with a woman who has a wet basement problem at her home. During the call, I told her that she should think of her home as the top of a volcano. All of the ground around the top of the cone of a volcano slopes away and down from the cone. This is what your builder needs to do around your new home.
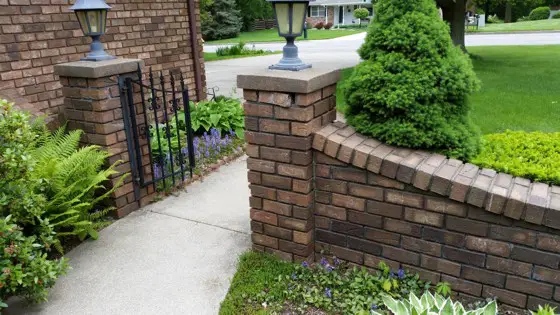
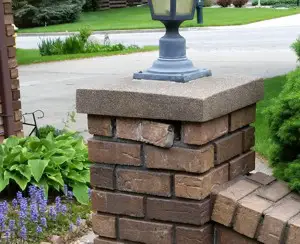
The ground to the left of the foundation must be cut back. A retaining wall will have to be built and the ground between the house and the wall must slope towards the retaining wall. Photo Credit: Tim Carter
Years ago the building code, a set of minimum requirements, said that the ground around a house needs to drop at least 6 inches in the first 10 feet of horizontal distance away from a house. I think it should be a minimum of 9 inches, perhaps one foot.
If I were building your home, I’d have a retaining wall built about 15 feet away from your home on that side where the ground is higher than the top of the foundation. The bottom of the retaining wall where it comes out of the ground would be about 18 inches lower than the top of your foundation wall.
This would allow you to have 6 inches of foundation showing above the ground and give you the 12 inches of fall from the house towards the base of the retaining wall. Your builder needs to slope the ground one way or the other all along this side of the house so the rain water flows away from the house and doesn’t create a lake along the base of the retaining wall.
I would also make sure that you have superb foundation waterproofing installed on the exterior of the foundation. Spraying liquid asphalt is not enough. This is just damp proofing. You need superb perforated foundation drain tile pipe down at the footer covered by lots of washed larger gravel that has no sand in it. This gravel should extend up five or more feet and then be covered by a foot of straw or felt paper so the gravel is not clogged by silt from the fluffed backfill soil that covers the gravel.
The drain tile pipe needs to extend away from the house and it should eventually pop out of the ground because of the sloping ground. In wet weather, water that would normally flow through the soil will drop down the gravel around your home, enter into the drain pipe and then exit the end of the pipe much like a natural spring. This is how you create a bone-dry basement.
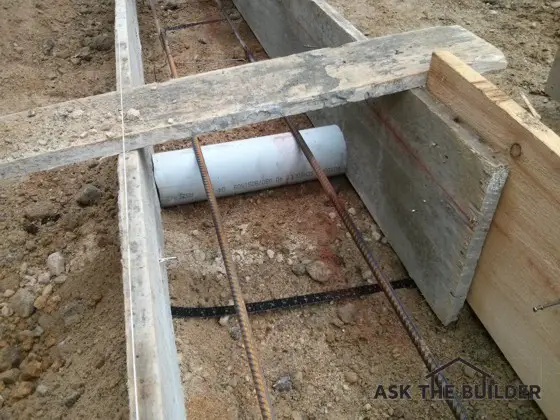
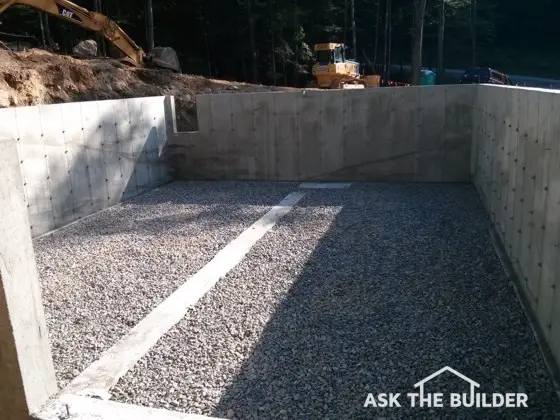
The concrete you see inside the basement area of your house is no doubt interior footers. They are there to spread out the weight of parts of your home that have yet to be built. The long narrow strip of concrete is for an interior load-bearing wall that will no doubt support the floor joists on your first floor.
Instead of building a load-bearing wall in your basement, a steel I-beam could have been installed and it would have been supported at regular intervals by steel columns. Under each of these columns a concrete footer pad would be poured to support and distribute the weight onto the soil below.
The larger pad you saw is probably a footer for a masonry fireplace. You’d be surprised how much these weigh and that weight needs to be supported by more than just a concrete slab in the basement.
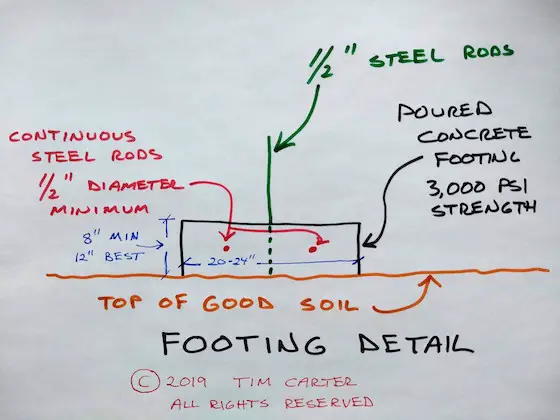
If you obtain a copy of your blueprints they should have a foundation plan as a page. On this page, you should see the concrete building elements you see with your eyes. The plan should tell you how wide they are, how thick and what kind of reinforcing steel is inside the concrete.
Column 1101