Custom-Made Bookcase

David Kirby shares his story of a bookcase for his granddaughter. His project had to be built in one location and transported to the granddaughter's house for installation. Besides fitting into the opening, David had to route a floor vent and electrical outlet through the unit. Here's his story.

"Dear Tim,

My granddaughter wanted a wall-covering bookcase for her new house (similar to the one I had made for her mother years ago) in her living room. The biggest problem was that the wall area was like an alcove, almost 12 feet long, and the unit needed to fit flush to the side walls. Not a big problem if built on site, but that house is 80 miles away. I needed to build it at home where I have the proper tools and transport it there. A single unit 12 feet by 8 feet by whatever depth was deemed undoable - at least - untransportable. So it was built in six sections: a 2x4 base, two lower cabinets, a one-piece top, and two upper shelf units. A floor register needed to be redirected through the base, a wall outlet needed to be relocated above the cabinet top, a security motion detector needed to be relocated, and the carpet and base trim needed to be cut back and reinstalled against the base when it was in place before the cabinets and shelving could be installed.

The cabinets and shelving units were constructed of 11/32" Baltic plywood (seems 3/4" ply isn't very available). All visible plywood edges of the cabinets and horizontal shelves were faced with poplar strips. The shelving uprights were faced with 1x2 poplar strips, dadoed with an 11/32" router bit bought for the occasion. At the center where the two shelving units met, the plywood uprights were 3/8" thick, and only the right-hand unit was attached to the facing strip. The dado was made wide enough to accept the left-hand end upright, and the result looks like continuous construction. The cabinet top was covered with Formica in a pattern that my granddaughter chose.

The cabinet doors are poplar frames, corners mitered and biscuited, all edges mitered 45 degrees, and 1/4" plywood inset in the back. Euro hinges with 3/8 overlay were installed. The cabinets have a middle shelf, and are sized to hold vinyl records in dust jackets. The drawers have full-extension glides and have compartments sized for (lots!) of CDs and DVDs. Everything was finished with sanded primer and two coats of eggshell acrylic latex paint to match the room trim.

Everything made a full 4'x8' utility trailer load, and made the trip well. The installation went better that feared - everything fit snug and tight. The trim board across the top of the shelving is not the final piece: my granddaughter wants crown molding for the room, which of course had to wait until the bookcase was in place. But that's not the last thing for her house, and may not even be the next! My wife says that she is next on a remodel of the master bathroom. (I've taken a before picture.)

I've included a picture of the set-up for painting panels, pretty self-explanatory. One other tip I'd like to pass on: an applicator/container for gluing. Through the years I've bought and tried many different applicators for board edges and biscuit slots and such, but the best I've ever found is the 11-ounce container for dishwashing liquid from a dollar store. The hole size in the cap lays down a perfect line of glue for edges and slots and the snap cover works - doesn't stick and is easy to clean. Best of all - the dishwashing liquid is not wasted - I keep a larger bottle in the set tub with a dilute solution of the liquid for easy clean up, and all for one buck.

Thanks for the web site. Your column in our local paper is one of the main reasons I keep the subscription." - David Kirby
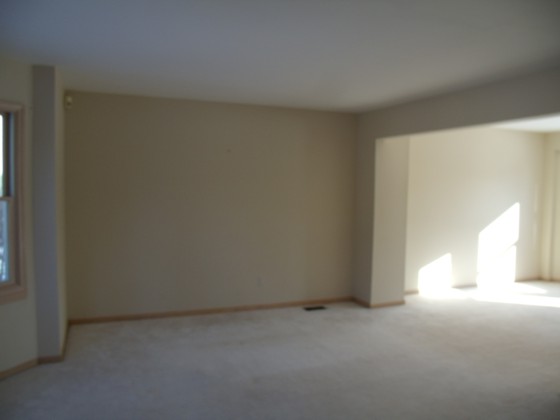
Before  the bookcase

Before the bookcase

Frame for painting

Frame for painting

Finished bookcase

Finished bookcase


If you want to submit pictures and the story behind your project, CLICK HERE to go to the Before & After Submission Page.

Bathroom Shelves

Lewis Allen needed some shelves in his bathroom. He had several small items that required shelf space. Below are Lewis' photos of his bathroom corner before shelves and after installation.


If you want to submit pictures and the story behind your project, CLICK HERE to go to the Before & After Submission Page.

Ladder Safety Tip

After reading last week's tip, I got this sobering email from David Wick who's recovering from injuries in Molalla, OR:

"I was on an old aluminum 6-foot ladder on a flat sidewalk by our front door. The task was to clean out the gutter screen we have. I climbed up and was at the top (usable) step and the ladder buckled. The next thing I know I was on top of the crumpled metal, with one broken rib and a slight puncture of my lung.

I ended up being flown by helicopter to the ER. I am home recovering now, but I would like you to stress to your other newsletter subscribers to really consider throwing out the old ladders and getting a new one.

I should have tossed that one a year or two ago. I also now want a spotter when I use one because my wife was home, but upstairs, and I had to pick myself up and get inside which was hard to do after a fall. When on the ladder, I didn't reach out and change the center of gravity of the ladder. It just buckled. It's amazing how hard you hit when you only fall 5 feet."

David, that's a great tip and by all means get better soon! Thanks for sharing. On a personal note, I inherited a similar 8-foot aluminum ladder from my father-in-law years ago.

The spreader arms had a horrible habit of bending. I never fell, but it was a very dangerous ladder. I ended up taking it to the recycle center cut in pieces so no one else could be hurt by it.

Building Steps Tip

I shared this one on Facebook on Super Bowl Sunday:

"Don't take the easy way out of building steps by making those sawtooth notch cuts. Create rabbets in the sides of the stringers so you maximize the strength of the set of steps."

You've seen steps cut the wrong way. Those are the ones that look like a saw blade. Remember, stair stringers are the beams that support your weight, that of the refrigerator, and the other person helping you. When you cut the sawtooth configuration, you turn a 2x12 into a 2x6!

Want to see how to layout, cut and make rabbets in stair stringers the way I do? Do you want to discover the most comfortable riser/tread combination for a new set of steps? You know, the perfect set of steps that are safe and easy to go up and down?

All of that and more are in this Building Deck Stairs eBook of mine.

Steam And Wood Flooring

Do you have a hardwood floor or a laminate floor? I've got both in my home.

Have you seen those advertisements lately on TV about the wonderful sweepers that also steam your floor at the same time?

Well guess what? Steam and wood go together like oil and water or a square peg in a round hole.

The last thing you want to do is inject water vapor - that condenses into liquid water - into a wood floor or the wood-fiber core of a laminate floor.

Fascinating Folding Door Hardware

Many homes have gorgeous wide openings between rooms. Kathy and I had that at our Queen Anne Victorian home in Cincinnati, OH, where our living room connected to our entrance hall. If you want privacy in one of the rooms, you have all sorts of options. Keep in mind that regular swing doors take up lots of room.

To not waste floor space, you can utilize great hardware from LE Johnson to quickly install folding doors that give you the needed privacy, but not eat up floor space. This is a great alternative if you're on a limited budget and can't afford all the work needed to install pocket doors to achieve the goal. What's more, you may not be able to install a pocket door in that location, much less dual pocket doors that meet in the center of the opening.

This folding door solution will work in any home no matter what the architectural style. You don't have to use flat slab doors as you see in this photo. You can use panel doors, doors with some glass, whatever suites your taste! Click here to discover more about the LE Johnson Folding Door hardware.

I've used LE Johnson door hardware in my homes for years, and when I build my next house for Kathy and me, you'll find it there because it works!

Here are two links to larger photos of the opening above showing the door open and closed.


Cutting The Rug

Last week on Ash Wednesday, I was invited to a first-ever-for-me visit to a United Methodist church service. I was in Richmond, VA, staying with great friends. When I arranged the visit, we both forgot that it was Ash Wednesday. They politely asked me if I would go to church with them after supper. Without flinching, I said yes.

We went to the St. Matthews Church that was close to the home of my friends. The pastor, Rev. Gordon Pruitt, gave an amusing homily where he talked about capturing monkeys with a box and how he replaced the worn-out carpet in the parsonage with a new carpet.

He talked about how he had rolled up the heavy carpet and lugged it to the garage where it sat in the way as it was such a hassle to get it to the dump. The homily was about changing bad habits and his way to ignore the carpet.

It was all I could to contain myself - not knowing the protocol about raising one's hand at a Methodist service. Of course, I would never think of doing such a thing at a Catholic mass.

I wanted to tell Rev. Pruitt that all he had to do when he removed the carpet was to cut it up in place in the living room. He just had to flip over one edge of the carpet about 40 inches onto itself and the backing of the carpet would be right there.

The backing would be elevated off the floor and using a sharp razor knife he could easily have cut the carpet into manageable 3-foot strips that could be rolled up, secured with twine or duct tape and easily put in the trunk of a car to take to the dump or recycling facility.

Don't let this happen to you. Don't break your back trying to carry the entire carpet out of the house. Only take it out in one piece if you know the old rug can be cleaned and reused by someone else.


March 10, 2012 Newsletter & Tips

Accccckkkkkk! Boy oh boy, did my email last night create some bewilderment and discombobulation.

You may have gone to Amazon and saw my How to Grout Ceramic Floor Tile eBook was not free. You possibly got a crabby look on your face and then reported back to me.

Here's what happened. It's a matter of when the Free 48-Hour period begins. Oh boy, were my Australian and Japanese subscribers scratching their heads as Saturday started for them hours and hours ago. As I type this right now, it's just after 10 pm on Saturday in Japan!

Since Amazon is headquartered in California, I'm pretty certain they base everything on Pacific Time. That means if you lived in New York and went to Amazon just after midnight your time, a wave of tetchiness washed over you as the book was not free at that moment of time.

It is NOW!! Woo Hoo! I know because I just checked. So hurry and go get your FREE copy before Amazon starts charging again for the eBook. But wait! Read the next section.


You Need FREE Kindle Software

Before you try to download the eBook, you need either a Kindle, a Kindle Fire (like I have) or the FREE software that can be installed on any number of devices, including your computer. Isn't that cool?

Yes, you can read this eBook of mine on a Mac, a PC, a Blackberry, an iPhone, an Android phone or tablet, an iPad, a Windows 7 phone, etc.

What's more, you can read all FUTURE eBooks of mine using the same free software. Click here to download the free software.


Help Me with a Favorable Review

Once you've read the eBook, could you do me a huge favor? Would you please go back to the page where you saw the book and leave me a very nice review? I'd be very honored if you gave me 5 stars.

Tell your story. Did you like the fact the eBook had cool step-by-step videos? Did you like how concise it was and that it built immediate confidence? Just tell other future Amazon shoppers why you feel the book will help them do the job right, not over!

Your review will really help future Amazon shoppers make the right choice.


Sign Up for the Special Newsletter!

Be sure you sign up for the custom newsletter I'm doing just for you if you want to be part of my new Kindle family. In that special newsletter, I'm going to share with you the new eBooks I'm working on. What's more I'm going to be asking for your input as to what you want to see in the new eBooks.

I'm trying to write all the new books so they fit your exact needs. That's why I need your ideas and suggestions.

Thanks so much for your help and I really hope you enjoyed the free How to Grout Ceramic Floor Tile eBook.

March 9, 2012 Newsletter & Tips

This is NOT a normal newsletter in case you just subscribed in the past few days.

Watch for a real newsletter on Tuesday.

FREE Grouting Ceramic Tile eBook!

If Amazon does it's job, starting Saturday, March 10, 2012, you can get my new Kindle eBook How to Grout Ceramic Floor Tile for FREE.

But just for this weekend. That means the free giveaway ENDS on Sunday night, March 11, 2012 at midnight.

You don't have to own a Kindle eBook reader to see the book. You can download the Kindle Reader for your computer, tablet, smartphone, etc. or stone tablet. Just kidding about the stone tablet.

Here's the link to my eBook on Amazon.

Here's the link to get the FREE Kindle software so you can see the book in case you don't own a Kindle or Kindle Fire tablet.

I hope you like it! Feel free to email all your friends or just FORWARD this email to them. Let's teach many how to grout ceramic floor tile this weekend!