DEAR TIM: Is taping drywall that hard to do? I watched it done on a television show and it seems like it's not too tough. What taping drywall tools should I be looking for? Surely you have some secrets about finishing drywall with all the jobs you've done. What are the biggest mistakes you feel rookies make when mudding and taping drywall? I want my job to look like a professional did it, so please help me out. Wanda P., Haverhill, MA
DEAR WANDA: Let me first say that you could ask these questions to ten different professional drywall finishers and probably get back ten different answers. What's more, entire books have been written about the topic, perhaps the best being The Gypsum Construction Handbook published by the experts on the topic, the USG Corporation.
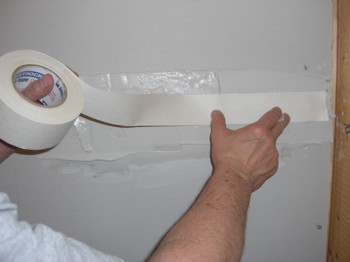
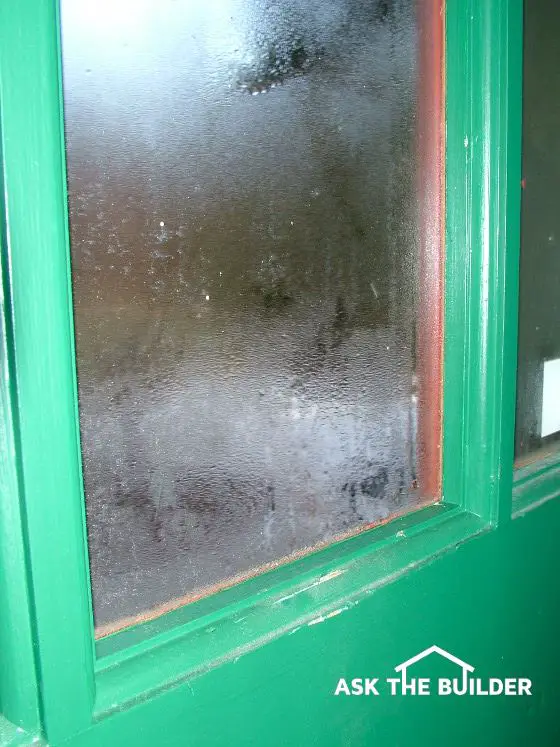
Taping drywall is an art. It requires training and good hand-eye coordination. PHOTO CREDIT: Kathy Carter
It's my honest opinion that taping drywall is much harder than it looks on the shows you watched. I've done video work for years and can tell you that a talented videographer and editor in post production can make the toughest jobs look like a cake walk. What the camera can't communicate is the muscle control you must exhibit to get the drywall tools to produce professional results.
I had an employee who worked for me for years. This individual was never able to master the art and craft of drywall taping. His results were sloppy and he'd either leave too much joint compound under the tape or he'd press out too much allowing blisters to form when subsequent coats of compound were applied. No matter how much training I offered, the results were dismal. I'm convinced the failure was a blend of lack of desire and a severe shortage of hand-eye coordination.
Here are a few of the most common mistakes I see rookie drywall finishers make. The first is using the joint compound straight out of the box or bucket without mixing it with a small amount of water. The joint compound, or mud as it's called by the pros, must be smooth and the consistency of warm cake icing. If you tilt the mud pan it will flow slowly in this plastic state. Avoid adding too much water as it will dilute the adhesive that's in the joint compound.
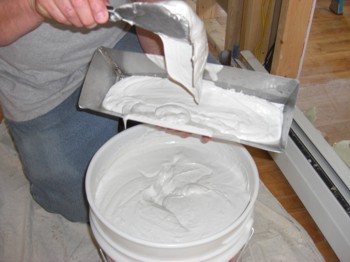
PHOTO CREDIT: Kathy Carter
Remember, joint compound is basically glue and dust. I say this because the compound is designed to stick to the drywall paper and it's made from very finely ground ingredients that turn to dust as you sand them. But make no mistake, top quality joint compounds are made to exacting standards.
Another common mistake is not keeping the precise amount of material between the tape and the drywall. I say this because you might wish to use the traditional paper tape in lieu of the self-adhesive mesh tapes. Many a debate has raged between professional drywall finishers about which tape is better - mesh vs. paper. I happen to use the traditional paper tape, and have never had an issue with it.
To get a feel of how small the margin of error is when taping drywall, take a straightedge or a broad knife and place it across the tapered edges of two pieces of drywall. Note that the gap is no more than 1/8th of an inch. This means you need no more than 1/16th of an inch layer of mud under the tape. This leaves you with a thin coating of mud the same thickness to cover and hide the tape on your second application of joint compound.
It should be obvious that the consistency of the mud must be very plastic so you can achieve this result. One secret trick is to be sure that the mud you apply to the seam is no thicker than 1/8th inch before embedding the tape. Be sure the mud is even, smooth and without lumps or voids. Embed the tape and run your taping knife across it smoothly with even pressure to press out the excess mud making sure you leave the proper amount.
To get professional results you'll have to have great taping drywall tools. I love using my stainless steel mud pan. I use a flexible taping knife
that's just under 6 inches wide. Before I used it the first time, I used a metal file to slightly round the corners of the tool. Straight from the factory these tools have very sharp corners that can cut into the paper tape as you strike inside corners when taping.
Some professional drywall finishers prefer to use trowels to apply mud. I started using broad knives 36 years ago and never gravitated to trowels like you see a plasterer use. I have a 10-Inch and 12-Inch
broad knife both of them stainless steel.
Professional finishers who tape entire houses in one day will use a tool called a banjo.This handy tool applies the exact amount of mud to the tape. The best analogy I can offer is those packaging taping machines that apply clear tape to cardboard boxes. The banjo eliminates the step of you applying the mud to the wall as the tape comes out of the machine with the mud on it.
There are countless other drywall taping tools that you'll discover if you visit a business that sells drywall and specialty tools to drywall professionals.
Please read my Disclosure Policy about products I recommend.
Column 870
 I'd like to talk to the idiot medieval knights who slayed the last dragons. We've had a constant flow of storms here in the Northeast and although I LOVE the beauty of the snow, I'm growing tired of raking it off the roof here and dealing with it near my front door.
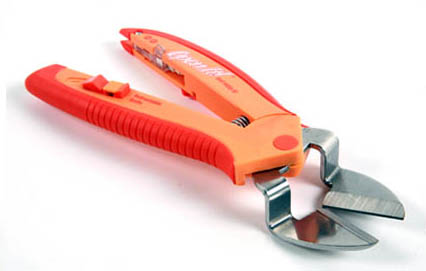
 I was wondering for those who live within driving distance to central New Hampshire if you'd want to have a sleepover meet up? You and your significant other would rent a room for one night - you could stay the entire weekend if you want - at the Atwood Inn. Wait till you see their new website and the videos of all the rooms!! Go watch the video for the White Mountain Room, but be sure to watch the video first on the home page for it to make sense.