What’s in This Issue?
Latest News
Funny-Looking Links
Follow Up on Maytag Dishwasher Recall
Septic Disposer in my Kitchen
Air Flow in Bathroom Exhaust Fans
Upcoming DC Trip
Long-Distance Moving Help
Latest Columns
I do product reviews frequently. Please read my Disclosure Policy to understand the relationship between me and the companies that make the products or offer the services I review.
FOLLOW ME ON TWITTER
Friendly Question Reminder!
If you have a question for me, don't hit the Reply button just yet. Go immediately to my web site and type in the keywords about your problem into my Search engine. The search box is at the top of every page of my web site. You could have your answer in seconds if you do this! Please pay attention to all links you see at my web site. The exact products and services you often need are right in front of you, and you might be ignoring them.
Latest News!
This past weekend I was in Erie, PA for about 36 hours visiting a childhood friend and his family. Saturday was an action-packed day with a morning walk on the beach with Bill and Jill's dog, riding on Bill's Fat Boy Harley, going for a boat ride in the bay between Presque Isle and downtown Erie and a neighborhood flag football game.
I couldn't resist playing in the football game, but am paying dearly for it. My mind is still young, but my feet are screaming at me three days later. I obviously pulled some muscles or slightly damaged some ligaments, as my heels are as tender as a newborn's bum.
I did catch two passes across the middle and provided the key block for our only touchdown. A mom, the only woman on our team, caught the pass after I tangled up my defender and hers as we streaked down the left side.
Damage Assessment Report: It appears the glory days of my football career are long gone. But I did have a good time. Erie's an interesting place. I'll go back to explore more for sure.
Funny-Looking Links
Last week, a subscriber emailed me about the suspicious-looking links he saw in my newsletter. He felt they were malicious and could trigger a virus.
I explained that these are tracking links set by the service I use to send this newsletter and manage the massive list of email addresses.
By using these tracking links, I can *see* in a report what topics of the newsletter most interest you. That way I can do a better job in future issues of the newsletter making sure I deliver relevant information. Believe me, it works, as week in week out I can predict what parts of the newsletter you'll click!
Follow Up on Maytag Dishwasher Recall
Last week, I sent out an emergency broadcast about a dishwasher recall. You may have been one of the hundreds that reached out to me with thanks. I was getting ready to travel and simply couldn't respond.
Quite a few subscribers had the dishwasher in their homes, and a few even commented on smelling burning plastic on occasion.
Elizabeth Hayduk's email to me pretty much sums up why I sent the broadcast and how you may have felt. She wrote:
"Thanks for caring enough to pass onto your readers this type of important info. With people living busy lives, we don't always hear about such recalls. You may be saving not only homes, but lives. Fire hazards can be unpredictable & be triggered when least suspected. How many people set their dishwasher to run when they go to bed? I know I do--not often--but I do.
Again, thank you!"
You may have been one of my subscribers that reminded me of the CPSC email alerts about product recalls. You can tell them exactly what announcements you want when you subscribe.
Septic Disposer in my Kitchen
I'm about to undertake a significant kitchen remodeling job in my NH house before Kathy moves in. Many houses in New Hampshire, as well as all over the USA, have septic tanks instead of public sewers. Every house I've lived in before this one in NH has been connected to a sewer.
I want to really take care of my septic tank and leach field, so I carefully watch what goes in the drains. I've got many past columns on my AsktheBuilder.com website about septic tanks. You just have to type "septic tank" into the search engine to find them. Believe it or not, disposers are not harmful to septic systems if you use them correctly. Read about it at my website in my past columns.
In a box in my garage in NH is the disposer I'm installing. It's a cool machine designed to work with septic systems. It's the InSinkerator Evolution Septic Assist.
This disposer comes with an injection system that squirts in an enzyme as the food is being ground up into a liquid. This enzyme helps hasten the breakdown of food in the septic system. It claims to be quieter than many other models, has a stainless-steel grind chamber and grinders and is more compact. It looks like it's a magnificent machine, as I took a look at it just after it appeared out of the UPS truck.
If you don't want to install one of these machines, you can use the Stain Solver product I manufacture. If you pour one-half cup into your sink and send it to the septic tank, the billions of oxygen ions it releases helps the beneficial bacteria in the tank.
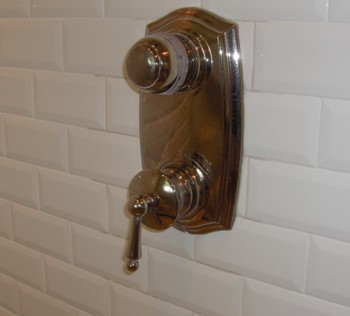
Air Flow in Bathroom Exhaust Fans
Sandra, from St. Petersburg, FL, wrote to me asking:
"Should a bathroom exhaust fan blow air out or draw air in? Mine blows air out. I tested it by holding a tissue up to it. Is there something wrong with it that I can fix, or was it installed wrong?"
You may feel that's a silly question, but it's not. One could easily see why you would want to introduce fresh air into a bathroom. This would require the fan to blow air into the room instead of sucking it out.
Sandra, the good news is that the fan is working properly. Bath exhaust fans are designed to suck air out of the bath replacing it with air from adjacent rooms. The primary use of these fans, in my opinion, is to remove dangerously high levels of humidity from the bathroom after showers or baths. This water vapor rapidly condenses on cooler wall and ceiling surfaces contributing to mildew growth.
The humid air can also easily escape into hidden attic and wall cavities causing severe water issues. I suggest you read all of my past columns in my Ventilation category to see the bath fans I use in my own home. Here's a clue: They look like space ships in my attic.
Upcoming DC Trip
This Sunday morning, I'll be driving to Washington DC to attend a conference about Internet Advertising legislation. Part of the conference is face time with key Congresswomen/men and Senators who are working in this area.
But on Sunday afternoon, an hour after arriving in town, I have an interesting meeting. I have to do a tile floor cleaning demonstration in the lobby of a large condominium complex. One of the residents there used some of my Stain Solver to clean the dirty tile.
The cleaning was so dramatic, the Board of Directors of the condo felt my product ruined the floor. I have to prove to them it didn't. If I do, I've been told I'll save them over $100,000 - the cost they were looking at to replace the tile!
Based on photos sent to me, I already know that the tile that was cleaned looks like the day it was installed. Fortunately, the condo owner that did the test made sure the Stain Solver solution got on the grout lines as well as the tile. It made the grout look like it was just installed - perfectly clean. My Stain Solver can't hurt tile or grout. After all it's just oxygen, water and natural soda ash!
I intend to videotape this demonstration and will share it with you. It should be fun!
Long-Distance Moving Help
I'm meeting this week with long-distance movers to get quotes on moving my Cincinnati possessions to NH. Can you please help me?
Is it possible for you to share pointers and tips that will help me select the right company and how I can AVOID contract hassles, extra hidden fees, and uncomfortable surprises when the moving crew decides there was an eclipse during the drive from Cincinnati to NH that now will cost an extra $1,000 to open the doors of the moving van?
The research I've done so far online makes me shudder as most of the stories are very unpleasant. The last thing I need that week is one or more moving problems.
Latest Columns
Decking Boards - pick the right ones
Firewood Splitter - use what I use
Tim Carter's Fire Pit
I'd like to hear what you have to say about our great nation. Share your feelings at a separate website of mine:
Recently, I talked about the problems in Greece. You may find that interesting!
AsktheBuilder.com