What’s in This Issue?
Latest News
Grouting Ceramic Tile
Warranty Cards and Secret Paint Sale?
Moving Tip
Special Gray Primers
Roofing Masters Degree
My Fire Pit
I do product reviews frequently. Please read my Disclosure Policy to understand the relationship between me and the companies that make the products or offer the services I review.
FOLLOW ME ON TWITTER
Friendly Question Reminder!
If you have a question for me, don't hit the Reply button just yet. Go immediately to my web site and type in the keywords about your problem into my Search engine. The search box is at the top of every page of my web site. You could have your answer in seconds if you do this! Please pay attention to all links you see at my web site. The exact products and services you often need are right in front of you, and you might be ignoring them.
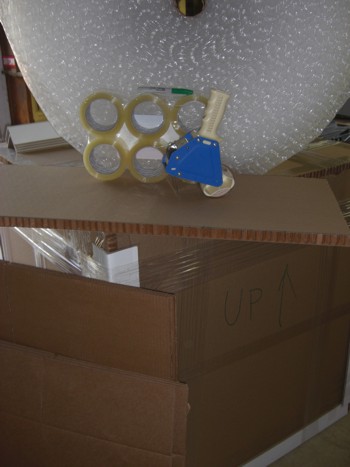
Since the last newsletter, I’ve moved my entire family to New Hampshire. This event, by far, is the most stressful thing I’ve ever done in my life. Well, maybe a few encounters with the one customer from Hell I had comes pretty close. Actually, you have that customer to thank for receiving this newsletter. She drove me out of the day-to-day construction business. AsktheBuilder.com was the offspring of my encounter with Peggy. Thank you Peggy!
The process of using a professional mover and interacting with them was so profound, that I’ve decided to build a website about moving. I want to share what happened to me and what I would do different. I’ll be working on that as soon as the leaves fall from the trees up here in New Hampshire. Fall is my favorite season, and Kathy and I plan to take as many day trips as possible to enjoy our first autumn together up here in God’s country.
As I write this, Hurricane Earl has his eye on the East Coast. Let’s hope he doesn’t cause too much havoc. I hope you aren’t affected adversely by this storm.
I’m slowly digging out from the move. It will take weeks. Did you see the first Indiana Jones movie - Raiders of the Lost Ark? Remember the final scene where the crated Ark of the Covenant was being stored in that unnamed government warehouse? That’s what my garage up here in NH looks like! I have a narrow channel I can walk down from end to end. Hundreds of boxes are stacked floor to ceiling. Accckkkk!
While I was back in Cincinnati closing on the house and doing the final packing with my very good friend Roger, I received a boatload of tools and things to test. That tool testing will be happening soon. One of the most interesting things that came is a very cool tool belt. If all goes well, I’ll be shooting a video of this toolbelt just after Labor Day. That video will be loaded immediately to the website and you’ll be the first to hear about it. Well, not really. If you want to be in the first group to know when my videos go live, you need to subscribe to my YouTube channel. http://www.youtube-nocookie.com/askthebuilder
After I tape the tool belt video, a certain young lady and the woman who sent me the tool belt are going to be very happy people. You’ll not want to miss this video.
Grouting Ceramic Tile
About sixteen months ago, I taped a series of four videos about how to grout a ceramic tile floor using sanded grout. They were fun videos to tape, and I never suspected that they’d get such positive reviews. Each week I get a comment or two about them.
Here’s one that came in overnight from Ryan Merkley who lives in Toronto, Canada:
Hi Tim,
I don't have a question, just wanted to pass on a word of sincere thanks. Your four videos on how to grout were exactly what I needed to renovate our kitchen floor. The job looks great, and I couldn't have done it without your clear, concise guidance.
Thank you,
Ryan
The first video in the series is:
Mixing Grout Video
Video #2 is Grouting Video
Video #3 is Finish Floor Grout Video
Video #4 is How To Grout Video
If you’re getting ready to install floor grout yourself, or you plan to have it done by someone else, you may want to watch these videos. There are many places where you can make a mistake and the tile or the grout will become a huge mess. Water is both your ally and enemy when grouting. Think of it as a possible double agent.
Warranty Cards and Secret Paint Sale?
You may be one of my subscribers that’s become a friend. David from Florida is one. From time to time he sends me great news items and things he feels would help you. Overnight he sent me two items.
First, it appears that Sears may stop selling paint. He reported that he got tremendous buys on WeatherBeater ULTRA paint. That’s the top-line paint that I used on my own home. It’s made by Sherwin Williams and has urethane resins in it. Stop in your local Sears store to get a great deal.
Dave then told me about a new air conditioner he had installed. After reading the fine print on the warranty card, he discovered that if he delayed sending it in, the parts warranty dropped from 10 years to 5 years. Are you kidding me? That’s not right.
The bottom line is that you NEED to read your warranty information on new products and take action immediately to activate all warranties on all products.
Moving Tip
If you intend to purchase a flat-screen TV and are going to move, SAVE the box and all the Styrofoam inserts. Luckily I thought about that over the past few years and saved two boxes. Professional movers will not guarantee the integrity of the TV unless it’s packed in the original box or a carton made to accept these TVs. Throw that box up in your attic as I did and use it when you get ready to move.
Special Gray Primers
The giant family room in the house up here in New Hampshire was painted a garish color of red courtesy of the previous owners. I tolerated it the two years I lived here, but knew Kathy would hate it.
The morning after Kathy, Kelly, Tristan and I got up here, my oldest daughter Meghan and my videographer Brent pitched in to repaint the room a gorgeous vibrant green. The success of the project rested in covering the red with a few coats as possible. I instructed Meghan and Brent to use a special gray primer that was the same intensity of the color of green Kathy selected,
Read my past column on these little-known special gray primers. You’ll do one of those V-8 forehead slaps after you read this column:
Suffice it to say the new color put Kathy in a great mood. The correct primer made it that we only needed one coat of finish paint.
Roofing Masters Degree
Just after Labor Day, I’m kicking off a massive project that will stretch through the winter months. I gathered research on this about a month ago. Perhaps you took the survey. I discovered what checklists you need the most, and I’m getting ready to do a one-hour telephone crash course on *each* of the topics. Yes, you and I can get on the phone together. It’s going to be just like the 12 years I did a two-hour radio show each week. I’m really looking forward to it.
You’ll have the opportunity to partake in a giant conference call where I answer question after question about a topic. The best part is that you get to submit the questions!
The first conference call is going to be about Roofing. If you have to replace your roof soon or are building a new home and want to make sure the roof is installed correctly, then you absolutely want to be part of this opportunity.
I’ll be announcing the first call in the series next issue for sure. I just need one more week to dig out from all the boxes. Oh, the best part is that if you can’t make the call, you’ll be able to download the entire recording and listen to it when it’s convenient for you! Isn’t that cool?
My Fire Pit
Fall is here and it’s time for many a night by my outdoor fire pit down by the lake. I constructed a separate website about what I think about while sitting around the real fires. You may want to visit my Fire Pit website if you want to discover what’s on my mind other than home-improvement topics. Be sure to sign up for that separate newsletter.
http://www.timcartersfirepit.com
Tim Carter
Founder
AsktheBuilder.com
100 Swain Rd.
Meredith, NH 03253, USA